How to Install ProjectSend with Nginx on Ubuntu Linux


ProjectSend with Nginx on Ubuntu Linux sets up a private file-sharing server so you can upload large files and send them to clients without third-party cloud services. ProjectSend is a free, open-source web tool that manages client accounts, while Nginx acts as the web server to handle visitors and secure downloads on Ubuntu versions like 20.04 and 22.04 LTS.
Install Nginx using `sudo apt install nginx`, then install MariaDB with `sudo apt install mariadb-server`. Finally, install PHP 7.4-FPM and necessary modules from a third-party repository.
Install Nginx
Nginx is a web server that handles requests from browsers and serves your ProjectSend files to visitors. You can install Nginx on Ubuntu and set it to start automatically when your server boots by running the apt update and apt install commands in your terminal.
To install Nginx HTTP on the Ubuntu server, run the commands below.
sudo apt update
sudo apt install nginx
After installing Nginx, the commands below can be used to stop, start, and enable the Nginx service to always start up with the server boots.
sudo systemctl stop nginx.service
sudo systemctl start nginx.service
sudo systemctl enable nginx.service
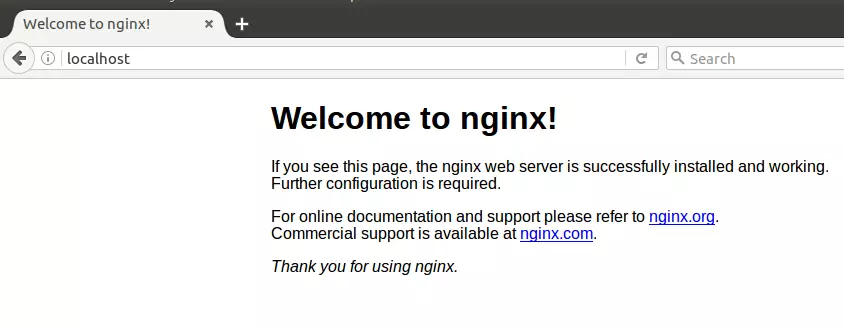
To test the Nginx setup, open your browser and browse to the server hostname or IP address. You should see the Nginx default test page, as shown below.
http://localhost
Install MariaDB
MariaDB is the database system ProjectSend uses to store user accounts, file details, and system settings. You can install MariaDB on Ubuntu by running the server and client package installation command in your terminal to set up the database backend.
To install MariaDB, run the commands below.
sudo apt install mariadb-server mariadb-client
After installing MariaDB, the commands below can stop, start, and enable the service to start when the server boots.
sudo systemctl stop mariadb.service
sudo systemctl start mariadb.service
sudo systemctl enable mariadb.service
sudo mysql_secure_installation
When prompted, answer the questions below by following the guide.
- Enter current password for root (enter for none): Just press the Enter
- Set root password? [Y/n]: Y
- New password: Enter password
- Re-enter new password: Repeat password
- Remove anonymous users? [Y/n]: Y
- Disallow root login remotely? [Y/n]: Y
- Remove test database and access to it? [Y/n]: Y
- Reload privilege tables now? [Y/n]: Y
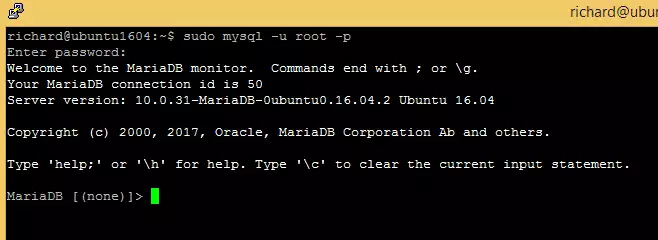
To test if MariaDB is installed, type the commands below to log on to the MariaDB server.
sudo mysql -u root -p
Then, type the password you created above to sign on. If successful, you should see the MariaDB welcome message.
Install PHP 7.4-FPM
PHP 7.4-FPM is the programming language processor required to run ProjectSend code on your web server. You can install PHP 7.4-FPM on Ubuntu by adding a third-party software repository to your system sources and updating your package list before running the installation command.
Run the commands below to add the below third party repository to upgrade to PHP 7.4-FPM
sudo apt-get install software-properties-common
sudo add-apt-repository ppa:ondrej/php
Then update and upgrade to PHP 7.4-FPM
sudo apt update
Next, run the commands below to install PHP 7.2-FPM and related modules.
sudo apt install php7.4-fpm php7.4-common php7.4-curl php7.4-intl php7.4-mbstring php7.4-xmlrpc php7.4-mysql php7.4-gd php7.4-xml php7.4-cli php7.4-zip imagemagick php-imagick php7.4-bz2 php7.4-bcmath php7.4-gmp
After installing PHP 7.4-FPM, run the commands below to open Nginx's PHP default config file.
sudo nano /etc/php/7.4/fpm/php.ini
Then, save the changes on the following lines below in the file. The value below is an ideal setting to apply in your environment.
file_uploads = On
allow_url_fopen = On
short_open_tag = On
memory_limit = 256M
cgi.fix_pathinfo = 0
upload_max_filesize = 100M
max_execution_time = 360
date.timezone = America/Chicago
Create ProjectSend Database
A dedicated database stores all your ProjectSend file records, upload histories, and user credentials. You can create a ProjectSend database by logging into the MariaDB command-line interface as the root user and running SQL commands to set up the database and a new user account with a password.
To log on to the MariaDB database server, run the commands below.
sudo mysql -u root -p
Then, create a database called projectsend
CREATE DATABASE projectsend;
Create a database user called projectsenduser with a new password
CREATE USER 'projectsenduser'@'localhost' IDENTIFIED BY 'new_password_here';
Then, grant the user full access to the database.
GRANT ALL ON projectsend.* TO 'projectsenduser'@'localhost' WITH GRANT OPTION;
Finally, save your changes and exit.
FLUSH PRIVILEGES;
EXIT;
Download and Install ProjectSend
ProjectSend installation files must be downloaded from the official site and placed in your web server directory. You can download and install ProjectSend on Ubuntu by fetching the archive file with wget, creating a new directory in your web root, and extracting the contents there.
cd /tmp
sudo wget -O projectsend.zip https://www.projectsend.org/download/387/
sudo mkdir -p /var/www/projectsend
sudo unzip projectsend.zip -d /var/www/projectsend/
Once you're done above, run the commands below to create a ProjectSend configuration file from the sample.
sudo cp /var/www/projectsend/includes/sys.config.sample.php /var/www/projectsend/sys.config.php
After that, run the commands below to open its configuration file.
sudo nano /var/www/projectsend/sys.config.php
Then make the highlighted changes below:
/**
 Database driver to use with PDO.
 Possible options: mysql, mssql
 */
 define('DB_DRIVER', 'mysql');
 /** Database name */
 define('DB_NAME', 'projectsend');
 /** Database host (in most cases it's localhost) */
 define('DB_HOST', 'localhost');
 /** Database username (must be assigned to the database) */
 define('DB_USER', 'projectsenduser');
 /** Database password */
 define('DB_PASSWORD', 'type_database_user_password');
 /**
 Prefix for the tables. Set to something other than tbl_ for increased
 security onr in case you want more than 1 installations on the same database.
Save and exit.
sudo chown -R www-data:www-data /var/www/projectsend/
sudo chmod -R 755 /var/www/projectsend/
Configure ProjectSend Site
An Nginx configuration file tells your web server how to handle browser requests for your ProjectSend domain name. You can configure Nginx for ProjectSend by creating a new site configuration file in the sites-available directory and adding your server block settings.
sudo nano /etc/nginx/sites-available/projectsend.conf
Then copy and paste the content below into the file and save it. Replace the highlighted line with your domain name and directory root location.
server {
    listen 80;
    listen [::]:80;

    server_name  example.com www.example.com;
    root   /var/www/projectsend;
    index  index.php;

    access_log /var/log/nginx/example.com.access.log;
    error_log /var/log/nginx/example.com.error.log;

    client_max_body_size 100M;

    autoindex off;

    location / {
        try_files $uri $uri/ /index.php;
    }

    location ~ .php$ {
         include snippets/fastcgi-php.conf;
         fastcgi_pass unix:/var/run/php/php7.4-fpm.sock;
         fastcgi_param SCRIPT_FILENAME $document_root$fastcgi_script_name;
         include fastcgi_params;
    }
}
Save the file and exit.
The VirtualHost configuration above must be enabled by running commands, such as `sudo ln -s /etc/nginx/sites-available/your_domain.conf /etc/nginx/sites-enabled/` to create a link, and then restarting Nginx for the changes to take effect.
sudo ln -s /etc/nginx/sites-available/projectsend.conf /etc/nginx/sites-enabled/
sudo systemctl restart nginx.service
Finally, open your browser and go to the URL.
http://example.com
You should see the ProjectSend setup wizard—type in the database name, username, and password. Then, continue with the wizard.
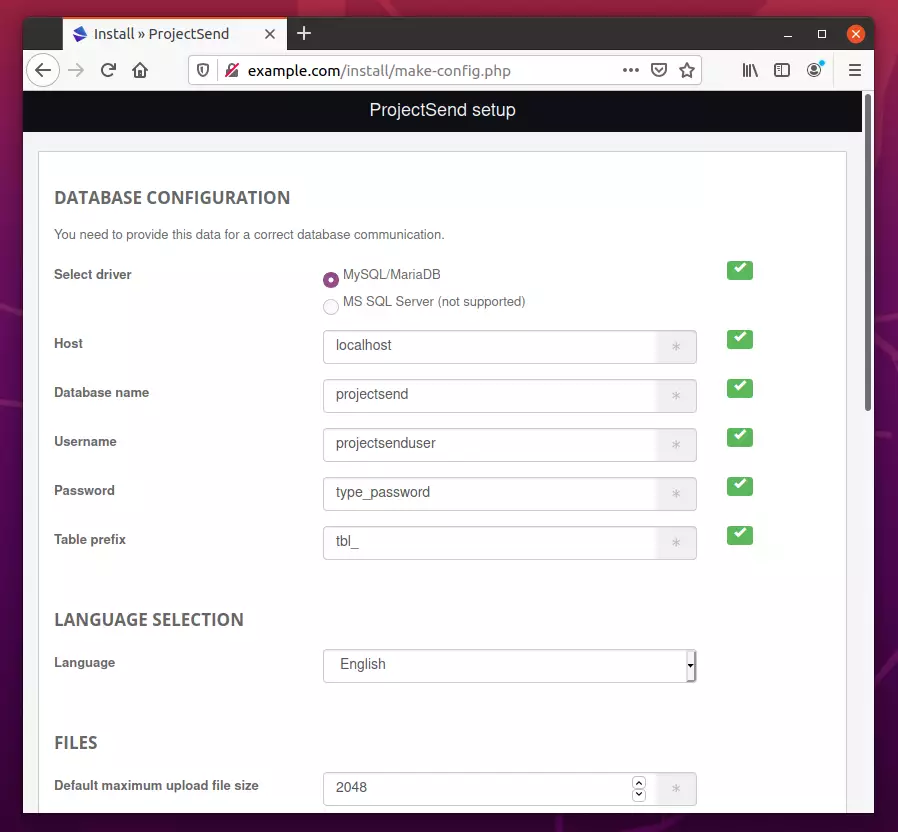
Next, create the site name, administrator account, and password.
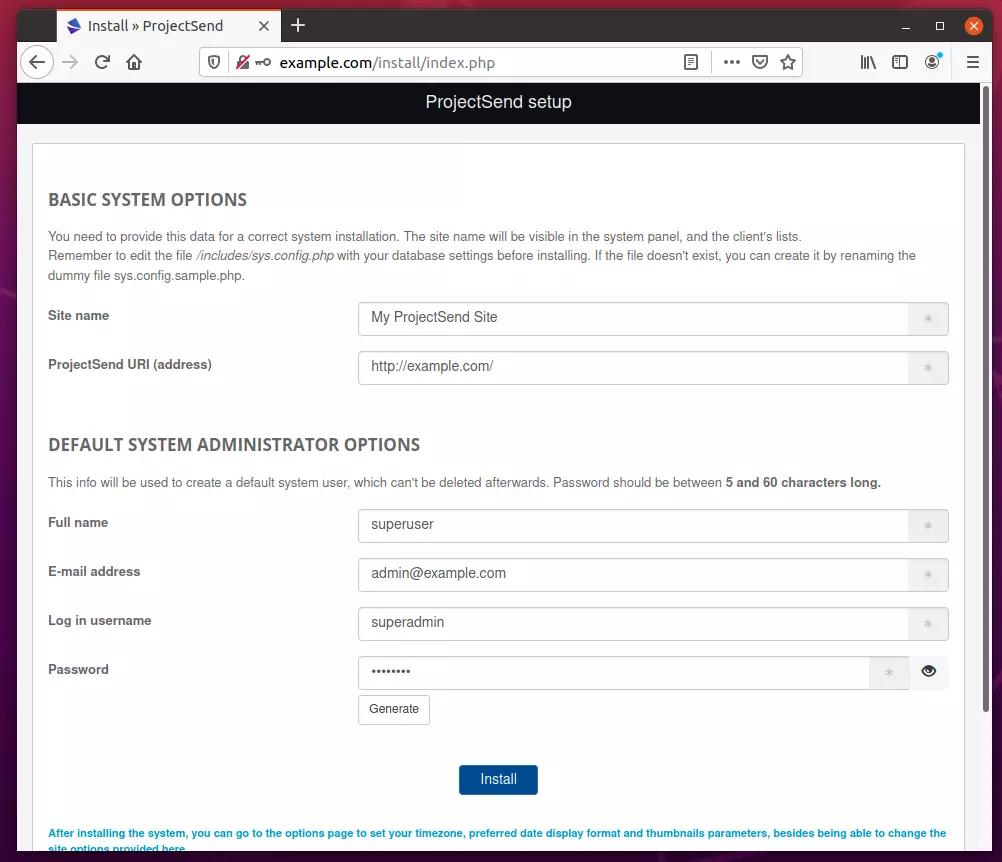
After the installation, log in with the admin account created above.
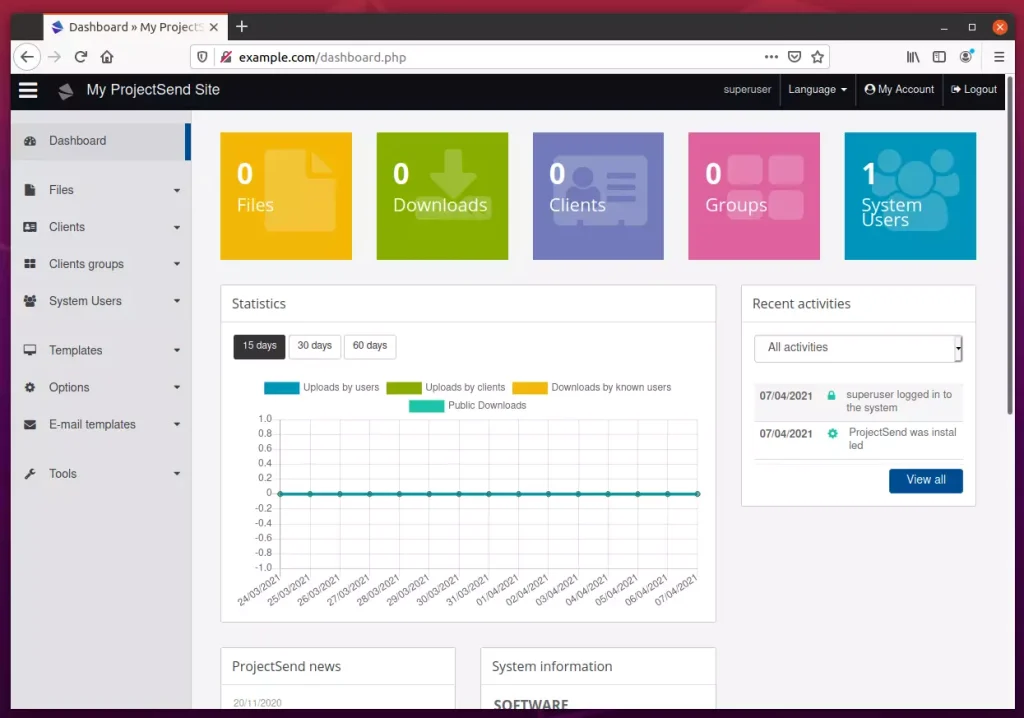
That's it!
Conclusion:
This post showed you how to install ProjectSend on Ubuntu 20.04 | 18.04. If you find any error above, please use the form below to report.
Was this guide helpful?

About the Author
Richard
Tech Writer, IT Professional
Richard, a writer for Geek Rewind, is a tech enthusiast who loves breaking down complex IT topics into simple, easy-to-understand ideas. With years of hands-on experience in system administration and enterprise IT operations, he’s developed a knack for offering practical tips and solutions. Richard aims to make technology more accessible and actionable. He's deeply committed to the Geek Rewind community, always ready to answer questions and engage in discussions.




hi there
I have followed all of the stages in this tutorial and everything wen okay, but in the final stage when I enter the example.com the default page shows up. What should I do?