How to Install FreeScout with Nginx on Ubuntu Linux


- 9 steps
- Needs administrator rights
FreeScout is a free help desk and shared inbox system. You host it yourself on an Ubuntu Linux server. Running it on your own hardware keeps customer emails and data under your control and removes monthly subscription fees.
FreeScout needs three things on the server: the Nginx web server, PHP, and a database to store tickets. This guide covers each one in order, then finishes with the browser-based setup wizard. The PHP version used here is 8.3, the standard version on Ubuntu 24.04. You need a server with Ubuntu installed, a user account that can use sudo, and a domain name for the final steps.
Open a terminal on your Ubuntu server and run sudo apt update, then sudo apt install nginx and sudo apt install mariadb-server.
Install Nginx on Ubuntu Linux
Nginx serves the web pages to anyone who visits your domain. It is in Ubuntu’s default package sources, so installing it takes two steps in the terminal: refresh the package list, then install the package.
- Open a terminal on the server, either directly or over SSH.
- Run the update and install commands from the code blocks below. Use sudo if you are not logged in as root.
- Wait for the install to finish. You should see the terminal prompt return with no error messages.
sudo apt update
sudo apt install nginx
You can control the Nginx service (start it, stop it, or restart it) with the commands below. On Ubuntu, Nginx normally starts by itself right after installation, so you usually only need these when you change its configuration later. A restart briefly drops active connections, so do it at a quiet time on a live server.
sudo systemctl start nginx
sudo systemctl enable nginx
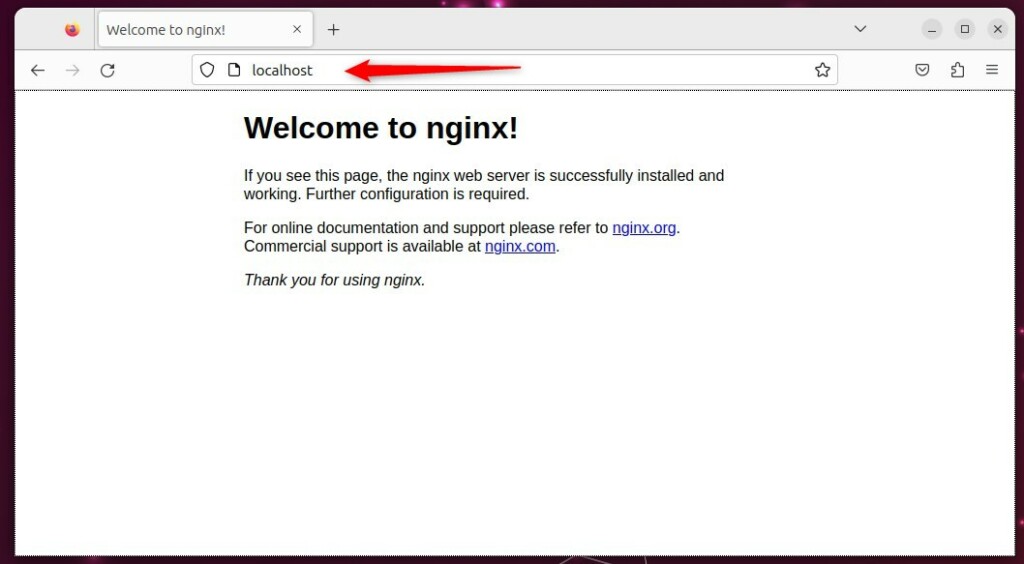
Now check that Nginx works.
- Open a web browser on any computer that can reach the server.
- Type the server’s IP address in the address bar and press Enter.
- Look for the default Nginx landing page. This confirms the installation worked.
If the page does not load, the service may be stopped, or a firewall may be blocking port 80. Check both before you go on.
Additional help on installing Nginx: How to install Nginx on Ubuntu
Install MariaDB on Ubuntu Linux
MariaDB stores all FreeScout ticket histories and user records on your server. As with Nginx, you install it from Ubuntu’s own package sources: refresh the package lists, then install the server package from the command line.
- Run the update command from the first code block below.
- Run the install command from the next code block.
- Wait for the install to finish and the prompt to return.
sudo apt update
sudo apt install mariadb-server
Without this, FreeScout would go offline after every reboot until someone started the database by hand.
sudo systemctl enable mariadb
sudo systemctl start mariadb
Next, test the connection to the database service. Run the command below and check the output.
sudo mariadb
A version greeting appears when the connection succeeds. If you get an error instead, the MariaDB service is probably not running, so start it before you continue. Additional help on installing MariaDB: How to install MariaDB on Ubuntu Linux
Create FreeScout database
FreeScout needs its own database, named freescoutdb, to store all application records. Before you create it and its user account, run the built-in security script. It locks down a fresh MariaDB install.
sudo mysql_secure_installation
Work through the prompts one at a time. The ones that matter most are these:
- Remove the anonymous users.
- Disallow remote root login, so the database can only be managed from the server itself.
- Remove the test database.
Choose a strong password wherever the script asks you to set one, and store it in a password manager.
Now log back into MariaDB so you can create the application database. When the login works, the prompt changes to the MariaDB prompt.
sudo mariadb
Run the queries below inside the MariaDB prompt. They create the freescoutdb database and the user account FreeScout will use. Replace any placeholder password with your own strong one. You will need the database name, user name and password again in the installation wizard, so write them down.
CREATE DATABASE freescoutdb CHARSET utf8mb4 COLLATE utf8mb4_unicode_ci;
CREATE USER freescoutdbuser@localhost IDENTIFIED BY 'your_secure_password';
GRANT ALL ON freescoutdb.* TO freescoutdbuser@localhost WITH GRANT OPTION;
FLUSH PRIVILEGES;
exit
Install PHP and Required Extensions
FreeScout relies on PHP to run its application code. PHP 8.3 is the standard version for Ubuntu 24.04. On that release you can install it from the default package sources. On an older Ubuntu release the default version may differ, so check it before you continue.
FreeScout’s requirements check in the wizard fails if an extension is missing. If that happens, install the missing extension and reload the wizard page.
sudo add-apt-repository ppa:ondrej/php
sudo apt update
sudo apt install php8.3-fpm php8.3-mysql php8.3-curl php8.3-gd php8.3-imap php8.3-mbstring php8.3-xml php8.3-zip php8.3-intl
Download and Configure FreeScout
Now create the target directory and download the FreeScout source files into it. Run the commands in the order shown. When the download finishes, the application files should be sitting in the directory your Nginx configuration will point to in the next section.
sudo mkdir -p /var/www/freescout
cd /var/www/freescout
sudo git clone https://github.com/freescout-helpdesk/freescout .
sudo chown -R www-data:www-data /var/www/freescout
Nginx Server Block and SSL
An Nginx server block is a configuration file that defines how Nginx answers requests for your domain. You create one in a dedicated file inside the Nginx directory, and it points to the FreeScout application files. Keeping each site in its own file makes it easy to disable or change later without touching the others.
Before you start, make sure a DNS A record for your domain points to this server’s IP address. You need it for the Certbot step below.
sudo nano /etc/nginx/sites-available/freescout
Paste the configuration into the new file. Make sure it points to the /var/www/freescout/public directory and that fastcgi_pass points to unix:/run/php/php8.3-fpm.sock. Replace the example domain name with your own. Then save the file and close the editor.
Activate the site configuration with the commands below. Nginx only picks up the new site after it reloads or restarts. If Nginx reports a syntax error, reopen the file and look for a missing semicolon or bracket. A typo is the usual cause.
sudo ln -s /etc/nginx/sites-available/freescout /etc/nginx/sites-enabled/
sudo systemctl restart nginx
Secure with Certbot:
Certbot gets a free SSL certificate and sets up HTTPS for your domain. This works only if your domain already resolves to the server and ports 80 and 443 are reachable from the internet.
sudo apt install certbot python3-certbot-nginx
sudo certbot --nginx
Complete the prompts to encrypt web traffic with the free SSL certificate. Certbot asks for an email address and for you to accept its terms. It may also ask whether to redirect HTTP traffic to HTTPS, which is the better choice for a help desk that handles customer data. When it finishes, open your domain with https:// in front and check that the browser shows a secure connection.
Installation Wizard
The browser-based FreeScout installation wizard handles the final configuration. It checks system requirements and sets up your admin account. To start it, open your domain in a web browser. The wizard then asks for your database credentials and finishes the setup.
- Check requirements
- Enter database details
- Create your admin account
Use the database name freescoutdb and the database user and password you created earlier. Pick a strong admin password, since this account controls every ticket and mailbox.
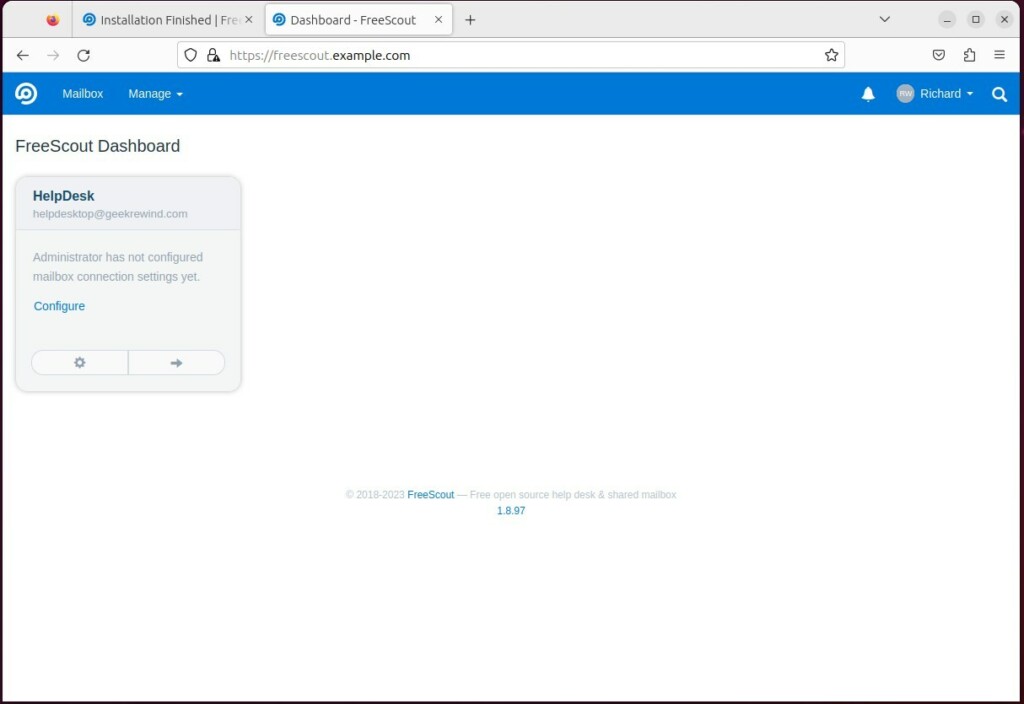
Last, set up the background tasks. FreeScout uses a scheduled job to fetch and send email, so tickets will not update without it. Run sudo crontab -u www-data -e and add the cron schedule line the FreeScout installer gives you. Make sure the job runs as the same user that runs the web server and owns the application files, which is normally www-data on Ubuntu with Nginx. Save the file. When you finish, open the administrative dashboard and sign in with the admin account you created.
Reference: FreeScout
Have a question about this guide?
Answered by AI from this guide. Good questions may be added to this page — please don't include personal details.
Did this guide fix your problem?

About the Author
Richard
Tech Writer, IT Professional
Richard is a writer at Geek Rewind who turns complex IT tasks into clear, step-by-step guides. He draws on years of hands-on experience in system administration and enterprise IT operations, focusing on Windows, Linux and WordPress: the problems people actually run into, and the fixes that work. His server and WordPress guides come from systems he runs himself. Richard builds and maintains the platform behind Geek Rewind, from its Ubuntu servers and Nginx configuration to its custom WordPress plugins. Many new tutorials start with readers' questions, and he's always glad to answer them in the comments.
[…] How to install Nginx on Ubuntu […]