Installing ownCloud on Windows using WSL (Windows Subsystem for Linux) lets you set up your own private file sync and share service.
ownCloud acts like Dropbox or Google Drive, but you keep full control of your files. WSL 2 lets you run a Linux system, specifically Ubuntu in this guide, directly on your Windows PC.
This setup creates your personal cloud storage right on your computer. You’ll use your Windows machine with WSL 2 to host ownCloud, giving you ultimate data ownership.
Enable WSL and Virtual Machine Platform in Windows PowerShell, then install Ubuntu from the Microsoft Store. After setting up your Linux username and password, install Apache and MariaDB using apt commands in the Ubuntu terminal.
Step 1Turn On WSL in Windows
To install ownCloud on Windows, you need to turn on the Windows Subsystem for Linux (WSL). This feature lets your computer run Linux programs. First, open PowerShell as an administrator. Click the Start button, type PowerShell, then right-click and select ‘Run as administrator’. First, open PowerShell as an administrator. This means you’ll have elevated permissions to run system commands. Click the Start button, type “PowerShell,” then right-click on “Windows PowerShell” and select “Run as administrator.”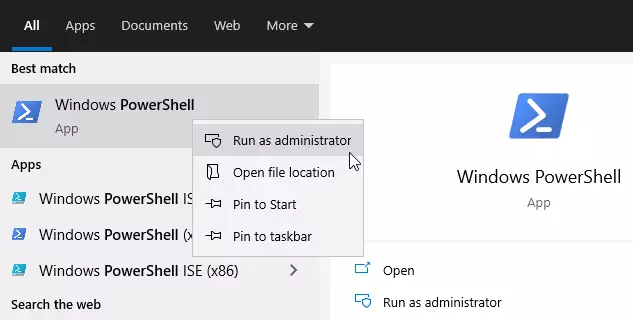
dism.exe /online /enable-feature /featurename:Microsoft-Windows-Subsystem-Linux /all /norestart
What happens: Windows will enable WSL. You should see a message saying “The operation completed successfully.”
Step 2Enable Virtual Machine Platform
To ensure WSL 2 works correctly on your Windows computer, you must enable the Virtual Machine Platform. Keep your PowerShell window open and run the command: dism.exe /online /enable-feature /featurename:VirtualMachinePlatform /all /norestart. This step is crucial for WSL 2 functionality. Keep PowerShell open and run this command:dism.exe /online /enable-feature /featurename:VirtualMachinePlatform /all /norestart
Note: If you’re on an older Windows 10 version (before 2004), use this command instead:
Enable-WindowsOptionalFeature -Online -FeatureName VirtualMachinePlatform -NoRestart
What happens next: After running the command, restart your computer. This is important or the next step won’t work.
After your computer restarts, open PowerShell as administrator again and run this command:
wsl --set-default-version 2
What this does: It sets WSL 2 as your default version.
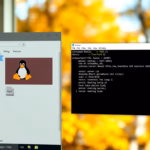
Step 3Install Ubuntu on Windows
Installing Ubuntu on your Windows computer provides the Linux system necessary to install ownCloud using WSL. Ubuntu is a free Linux operating system that offers useful tools. Go to the Microsoft Store, search for ‘Get Ubuntu 20.04 LTS’, and click ‘Get’ to install it. Open this link to download Ubuntu from the Windows Store: Get Ubuntu 20.04 LTS – Microsoft Store What is Ubuntu? It’s a free Linux operating system. Ubuntu 20.04 LTS provides access to the Linux terminal and tools like bash, ssh, and git.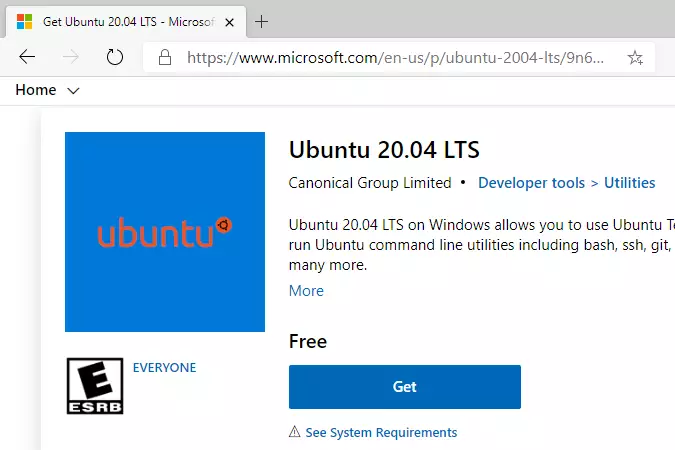
Enter new UNIX username: user
New password: (type your password)
Retype new password: (type it again)
passwd: password updated successfully
If you run into problems: Try these troubleshooting commands:
wsl --set-default-version 1
bcdedit /set hypervisorlaunchtype auto start
Step 4Install Apache Web Server
To get ownCloud working in your WSL setup, you need to install the Apache web server. Open your Ubuntu terminal and run the commands ‘sudo apt update’ followed by ‘sudo apt install apache2’. These commands require administrator rights, which is indicated by ‘sudo’. In your Ubuntu terminal, run these commands:sudo apt update
sudo apt install apache2
Flag: These commands require admin privileges (which means you’ll need to use `sudo` to run them).
Useful Apache commands:
sudo service apache2 stop (stops Apache)
sudo service apache2 start (starts Apache)
sudo service apache2 restart (restarts Apache)
Test if Apache works: Open your web browser and go to:
http://localhost
What you should see: The Apache test page appears. This means Apache is working.

Step 5Install MariaDB Database
MariaDB stores your files and settings for ownCloud, making its installation a key next step for your WSL setup. Run these commands in your Ubuntu terminal: ‘sudo apt-get install mariadb-server mariadb-client’. These commands also need administrator privileges. To install it, run these commands:sudo apt-get install mariadb-server mariadb-client
Flag: These commands require admin privileges.
Useful MariaDB commands:
sudo service mysql stop (stops the database)
sudo service mysql start (starts the database)
sudo service mysql restart (restarts the database)
Secure your database: Now, protect your database by setting a password with this command:
sudo mysql_secure_installation
Flag: These commands require admin privileges.
Answer the questions like this:
Enter current password for root (press Enter): (just press Enter)
Set root password? [Y/n]: Y
New password: (type a strong password)
Re-enter new password: (type it again)
Remove anonymous users? [Y/n]: Y
Disallow root login remotely? [Y/n]: Y
Remove test database and access to it? [Y/n]: Y
Reload privilege tables now? [Y/n]: Y
Test MariaDB: Log in to see if it works:
sudo mysql -u root -p
You’ll be prompted to type your root password. Seeing the MariaDB prompt means everything is working.
Type EXIT; to exit.
Step 6Install PHP
PHP connects all the parts of ownCloud, so installing it on your WSL system is essential. Run this command in your Ubuntu terminal to install PHP and the necessary extra components ownCloud needs: ‘sudo apt install php libapache2-mod-php php-imagick php-imap php-json php-ldap php-common php-pgsql php-ssh2 php-sqlite3 php-xml php-mysql php-gmp php-curl php-intl php7.4-mbstri’. Run this command to install PHP and all the extra parts ownCloud needs:sudo apt install php libapache2-mod-php php-imagick php-imap php-json php-ldap php-common php-pgsql php-ssh2 php-sqlite3 php-xml php-mysql php-gmp php-curl php-intl php7.4-mbstring php-xmlrpc php-gd php-xml php-cli php-zip
Flag: This command requires admin privileges.
Check if PHP installed correctly: Run this command:
php -v
What you should see: The PHP version number and details. If you see this, PHP is working.
Test PHP with a test page: Create a test file:
sudo nano /var/www/html/phpinfo.php
Copy and paste this into the file:
<?php phpinfo( ); ?>
Save the file by pressing Ctrl+X, then Y, then Enter.
Now restart Apache:
sudo service apache2 restart
Open your browser and go to:
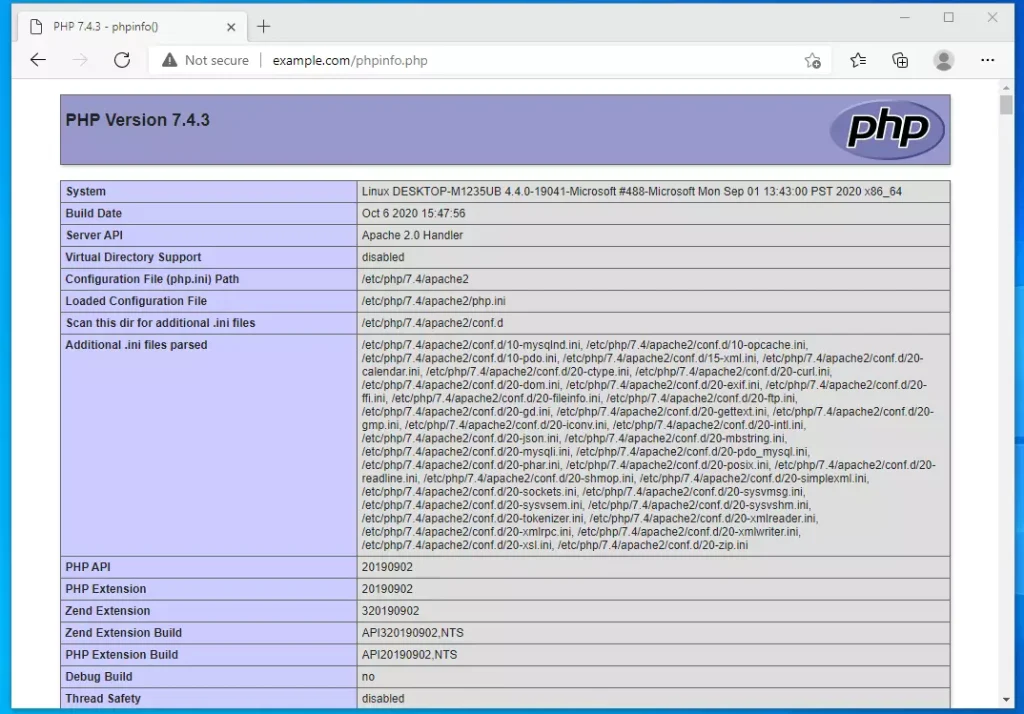
http://localhost/phpinfo.php
What you should see: A page showing all your PHP information and installed modules.
Step 7Create the ownCloud Database
Before installing ownCloud on WSL, create a specific database and user for it within MariaDB. First, log into MariaDB by running ‘sudo mysql -u root -p’ and entering your root password. Then, create the database with ‘CREATE DATABASE owncloud;’ and a user with ‘CREATE USER ‘ownclouduser’@’localhost’ IDENTIFIED BY ‘new_password_here’;’. Log into MariaDB:sudo mysql -u root -p
You’ll be prompted to type your root password.
Create a new database for ownCloud:
CREATE DATABASE owncloud;
Create a user for ownCloud (replace “new_password_here” with a real password):
CREATE USER 'ownclouduser'@'localhost' IDENTIFIED BY 'new_password_here';
Give this user permission to use the ownCloud database:
GRANT ALL ON owncloud.* TO 'ownclouduser'@'localhost' WITH GRANT OPTION;
Save and exit:
FLUSH PRIVILEGES;
EXIT;
Step 8Download ownCloud
Downloading the ownCloud software and placing it in the correct folder on your WSL system is the next task. First, check the ownCloud download page for the latest version. Then, use these commands in your terminal: ‘wget https://download.owncloud.org/community/owncloud-complete-20210326.zip -P /tmp’ and ‘sudo unzip /tmp/owncloud-complete-20210326.zip -d /var/www’. First, check ownCloud download page to see if there’s a newer version than the one used in this guide. Download ownCloud:wget https://download.owncloud.org/community/owncloud-complete-20210326.zip -P /tmp
sudo unzip /tmp/owncloud-complete-20210326.zip -d /var/www
Flag: These commands require admin privileges.
Set the correct permissions so ownCloud can work properly:
sudo chown -R www-data:www-data /var/www/owncloud/
sudo chmod -R 755 /var/www/owncloud/
Flag: These commands require admin privileges.
Step 9Configure Apache for ownCloud
Configuring Apache for ownCloud involves creating a specific file in your WSL setup, telling it how to display your ownCloud files. Use the command ‘sudo nano /etc/apache2/sites-available/owncloud.conf’ to create this file. You will then copy and paste a configuration block into this file. Create a new configuration file:sudo nano /etc/apache2/sites-available/owncloud.conf
Flag: This command requires admin privileges.
Copy and paste this into the file. Replace “example.com” with your actual domain name or IP address:
<VirtualHost *:80>
ServerAdmin admin@example.com
DocumentRoot /var/www/owncloud/
ServerName example.com
ServerAlias www.example.com

Alias /owncloud "/var/www/owncloud/"

<Directory /var/www/owncloud/>
Options +FollowSymlinks
AllowOverride All
Require all granted
<IfModule mod_dav.c>
Dav off
</IfModule>
SetEnv HOME /var/www/owncloud
SetEnv HTTP_HOME /var/www/owncloud
</Directory>

ErrorLog ${APACHE_LOG_DIR}/error.log
CustomLog ${APACHE_LOG_DIR}/access.log combined

</VirtualHost>
Save the file.
Enable ownCloud and required Apache features:
sudo a2ensite owncloud.conf
sudo a2enmod rewrite
sudo a2enmod headers
sudo a2enmod env
sudo a2enmod dir
sudo a2enmod mime
Flag: These commands require admin privileges.
Restart Apache to apply the changes:
sudo service apache2 restart
Step 10Finish Setting Up ownCloud
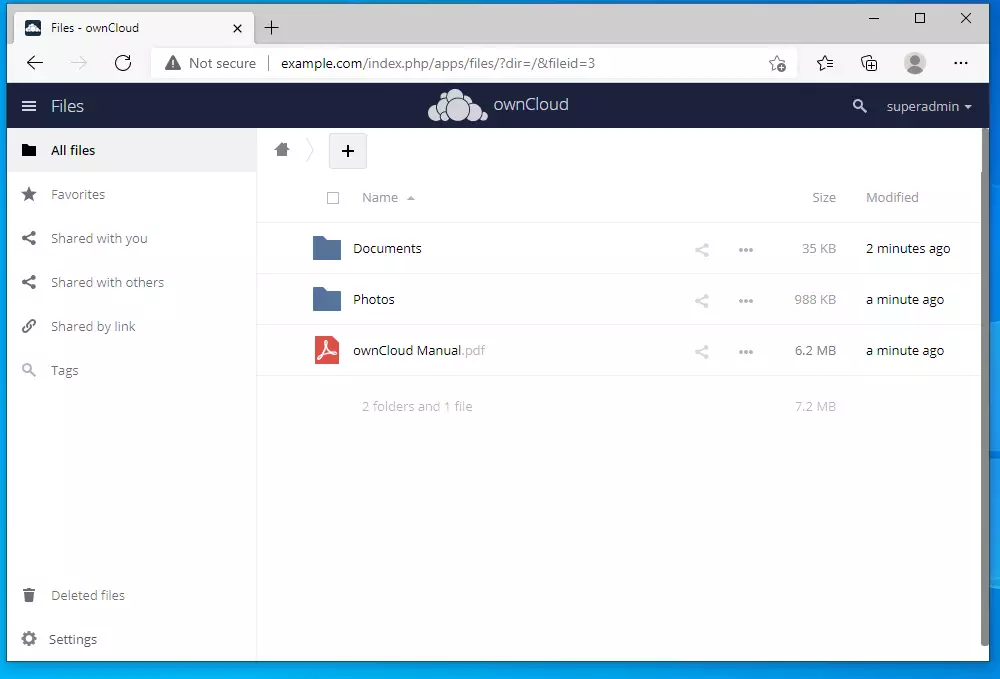
Finish setting up ownCloud through your web browser by connecting it to the database you created in WSL. Open your browser and go to ‘http://example.com’ (replace ‘example.com’ with your IP or domain name). On the ownCloud setup page, create an admin username and password, then enter your database details. Open your web browser and go to (replace with your IP or domain):http://example.com
What you’ll see: The ownCloud setup page.
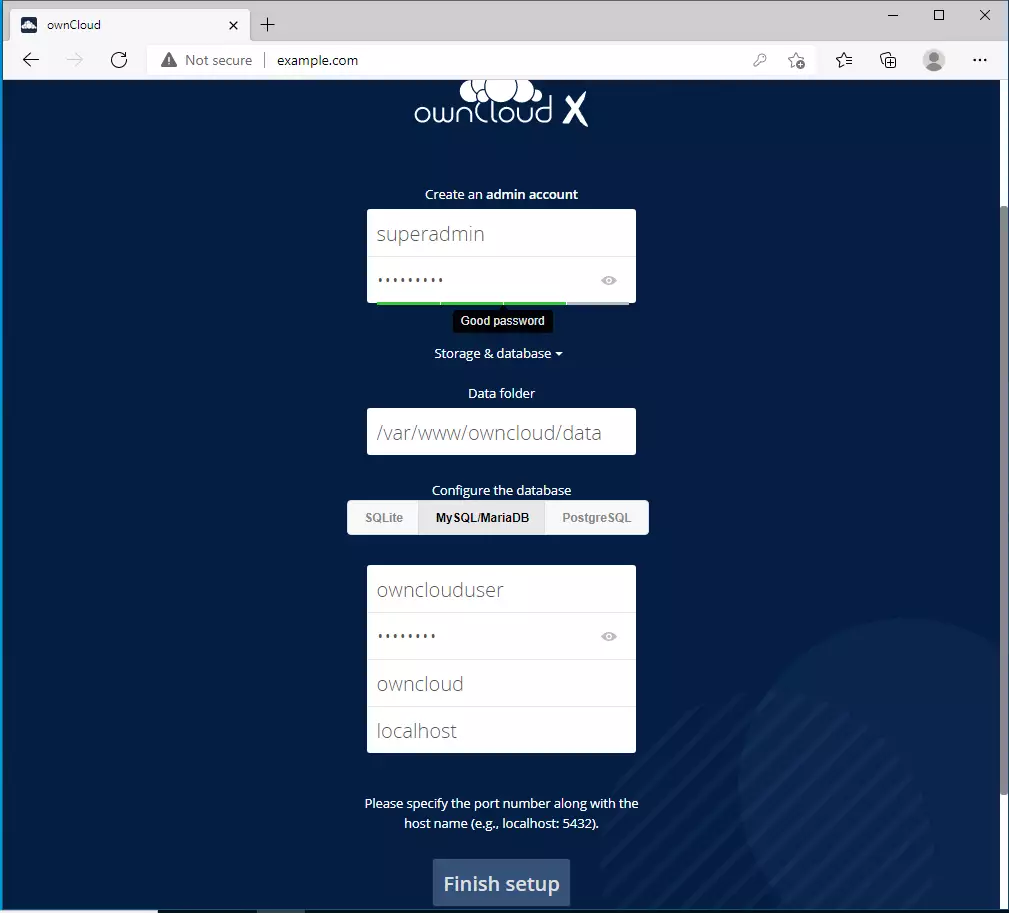
- Create an admin username and password
- Enter the database details (username: ownclouduser, password: the one you created earlier, database name: owncloud)
- Click “Finish Setup”
Summary
You have now successfully learned how to install ownCloud on Windows using WSL, setting up your own personal file storage. If something doesn’t work, double-check that all steps were followed in order and that commands requiring administrator privileges (‘sudo’) were run correctly. Troubleshooting: If something doesn’t work, check that all the steps were completed in order. Make sure you ran all commands with admin privileges (sudo). If you still have problems, use the comment form below.Was this guide helpful?
100% of readers found this helpful (1 votes)

About the Author
Richard
Tech Writer, IT Professional
Richard, a writer for Geek Rewind, is a tech enthusiast who loves breaking down complex IT topics into simple, easy-to-understand ideas. With years of hands-on experience in system administration and enterprise IT operations, he’s developed a knack for offering practical tips and solutions. Richard aims to make technology more accessible and actionable. He's deeply committed to the Geek Rewind community, always ready to answer questions and engage in discussions.


No comments yet — be the first to share your thoughts!