How to Install Jenkins on Ubuntu 24.04

Jenkins on Ubuntu 24.04 installs by adding the official Jenkins project repository and then running a standard package manager command. Jenkins is a free automation server. It builds, tests and deploys your software automatically, so you don’t repeat those jobs by hand.
Setting up version 2.454 takes a few terminal commands. You add the repository’s security key, add the software source, and install the package. Because the package comes from the Jenkins project itself, you get updates through the normal Ubuntu update process. You need a user with sudo rights and a working internet connection on the server.
Install Jenkins on Ubuntu 24.04 by adding the official Jenkins repository, then running sudo apt update && sudo apt install jenkins in a terminal. First, add the repository’s GPG key and source list as shown. The installer starts the jenkins service for you. Open port 8080 in the browser to finish setup.
Install OpenJDK
Current Jenkins releases support Java 17 and Java 21, and both are available as OpenJDK packages on Ubuntu 24.04. If OpenJDK isn’t installed yet, read the post below and install it first.
Once OpenJDK is installed, continue below to get Jenkins on Ubuntu. If you are not sure whether Java is already there, check before you go on. A missing Java runtime is the most common reason the Jenkins service fails to start.
Install Jenkins
Jenkins does not ship with Ubuntu by default. To install it on Ubuntu 24.04, you first add the official repository and its security key from the terminal. The process has three parts: download the signing key, add the package source, and install the package. The sections below take them in that order.
Run all of the commands in a terminal window as a user who can use sudo. Each command should finish without errors before you run the next one.
Step 1: Run the command below to add the Jenkins repository GPG key. The key lets Ubuntu check that the packages really come from the Jenkins project and haven't been altered.
curl -fsSL https://pkg.jenkins.io/debian-stable/jenkins.io-2023.key | sudo tee /usr/share/keyrings/jenkins-keyring.asc
Step 2: Add the repository. This tells Ubuntu where to download Jenkins from, and it points to the key you saved in the previous step.
echo deb [signed-by=/usr/share/keyrings/jenkins-keyring.asc] https://pkg.jenkins.io/debian-stable binary/ | sudo tee /etc/apt/sources.list.d/jenkins.list
Step 3: Once the repository is added, run the command below to install Jenkins. It refreshes the package list and then installs the Jenkins package. Expect it to take a minute or two while the package downloads.
The installer sets up a jenkins service and starts it for you. You don't need to launch it by hand.
sudo apt update && sudo apt install jenkins
After installing Jenkins, its default configuration file is at [/lib/systemd/system/jenkins.service]. Make changes in there as you wish. This is where you adjust settings such as the port Jenkins listens on. If the defaults suit you, leave the file alone, because port 8080 works for most setups.
Open the file with a text editor and use sudo, because a normal user can't write to it.
Save and exit. Then restart Jenkins so it reads the new settings. Jenkins only loads this file when the service starts, so a change does nothing until you restart. If you made no changes, you can skip the restart.
sudo systemctl restart jenkins
Access Jenkins portal
You can reach the Jenkins web portal from any computer on your network. Type your server address followed by :8080 into the address bar of a web browser. When the setup page opens, it asks for the initial administrator password. You find that password in the file /var/lib/jenkins/secrets/initialAdminPassword on your server, and you enter it to unlock the dashboard.
First, make sure the Jenkins service is running. Second, if the Ubuntu firewall (UFW) is turned on, allow TCP port 8080 through it. Without that rule, other computers can't reach the portal.
http://srv1.example.com:8080
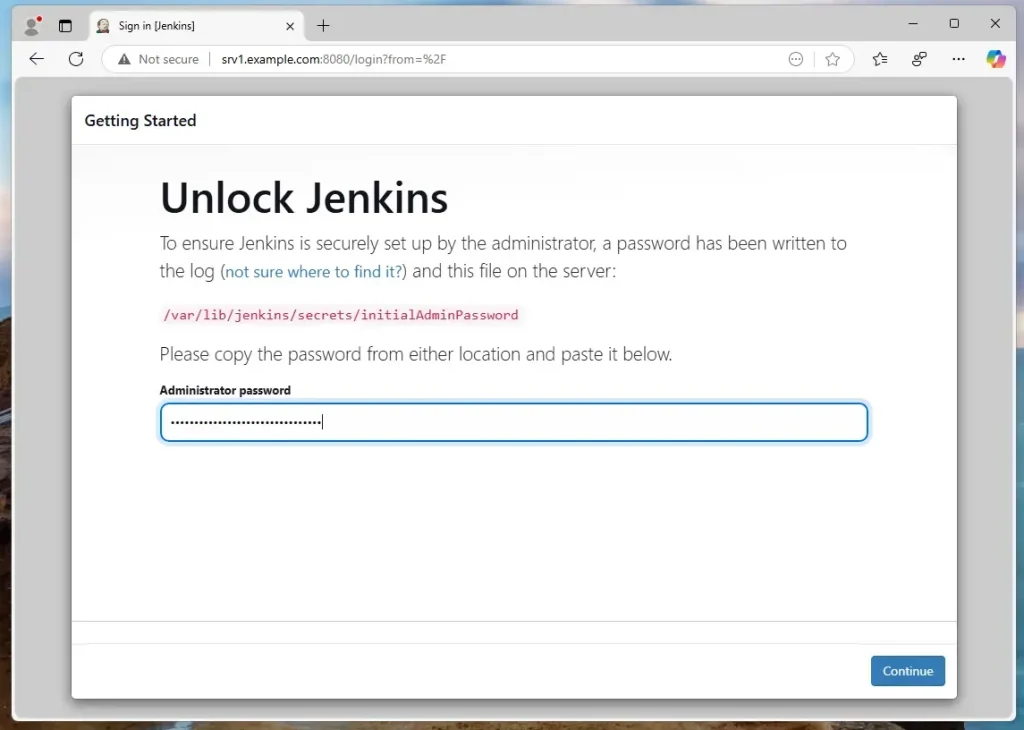
You should now see the Unlock Jenkins page. When it prompts for the Administrator password, find it at [/var/lib/jenkins/secrets/initialAdminPassword]. Only root can read that file, so display it in the terminal with sudo. Copy the password, paste it into the box and continue.
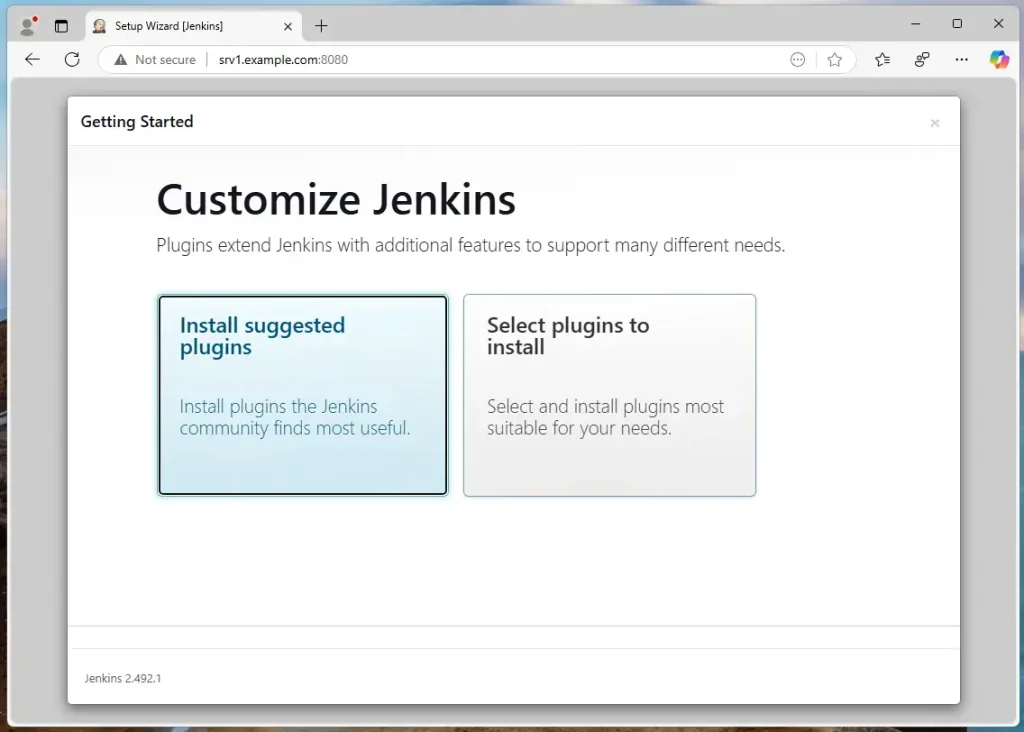
Jenkins now asks how to set up plugins. Choose Install suggested plugins. This is the best option for a first install, because it adds the common tools most people need, including Git support and pipelines. You can add or remove plugins later from the Jenkins dashboard.
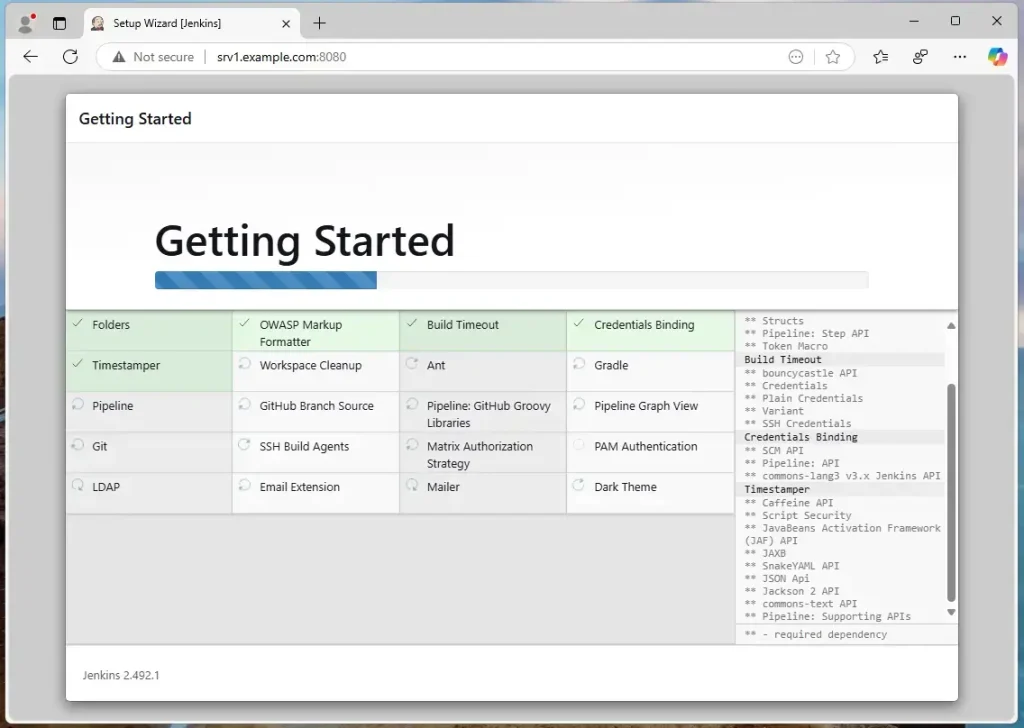
Wait for the suggested plugins to be installed. A list of plugins with progress marks appears on screen. This can take a few minutes, depending on your connection speed. If a plugin fails, the wizard shows a Retry button, so use it. Don't close the browser tab until the page moves on.
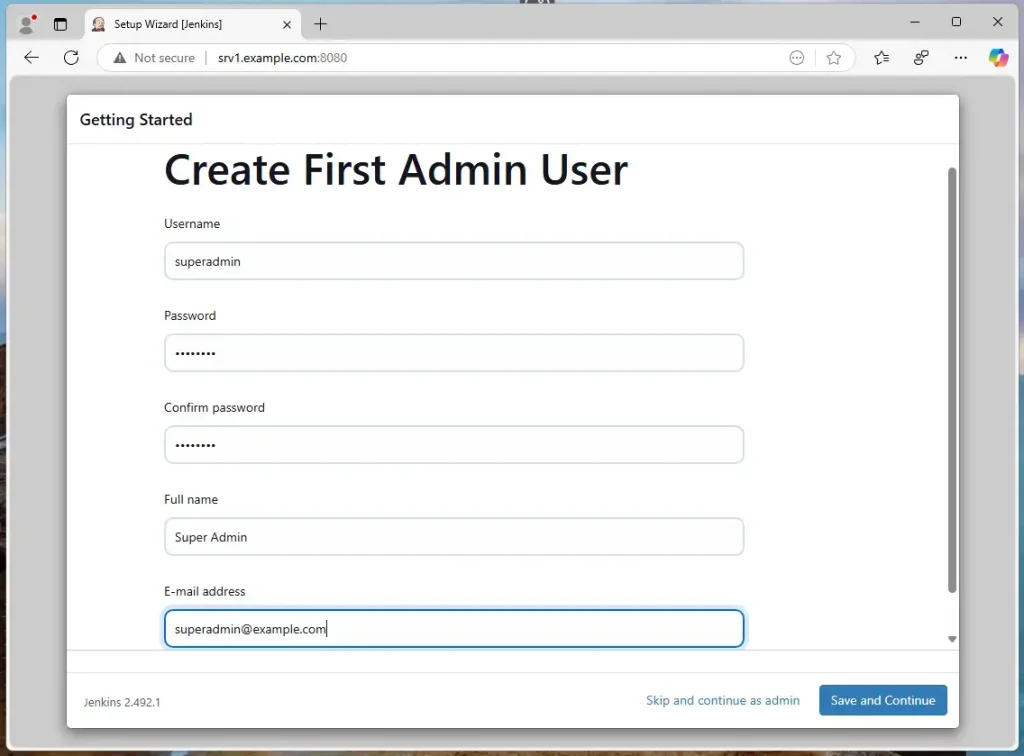
Create an administrator username and password. The wizard also asks for a full name and an email address. Use a strong password, because anyone who reaches this server on port 8080 will see the login page. Write the details down somewhere safe. After this step you no longer need the initial administrator password file.
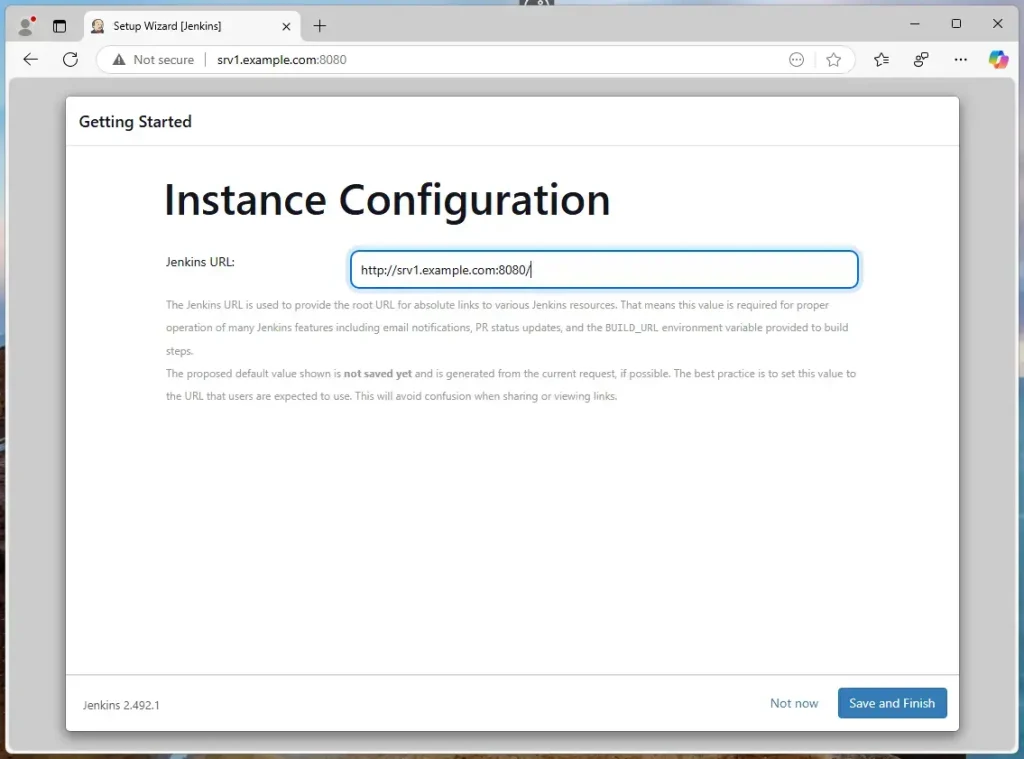
Save and finish the installation wizard. The next page shows the Jenkins URL. Check that it matches the address you use to reach the server, then click Save and Finish. Jenkins confirms that it is ready.
Jenkins should be ready to use. Click Start using Jenkins to open the dashboard. From there you can create your first job or pipeline. To sign in again later, use the administrator account you just created.
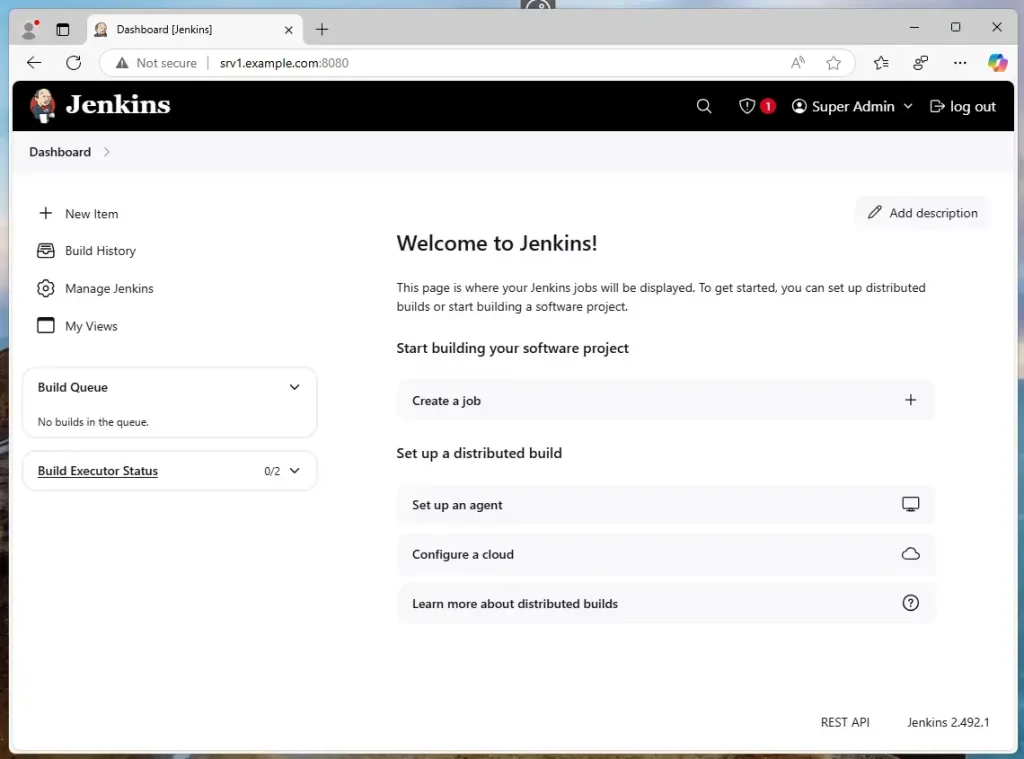
That should do it!
Conclusion:
Installing Jenkins on Ubuntu 24.04 is straightforward, and it speeds up your software development process through automation. Here are the key takeaways:
- Open-source Automation: Jenkins is a powerful tool for continuous integration and continuous delivery (CI/CD).
- Java Dependency: Make sure OpenJDK is installed, as Jenkins requires it to function correctly.
- Adding Repositories: Use the provided commands to add the Jenkins key and repository, then install Jenkins from the terminal.
- Accessing Jenkins: Open Jenkins through the server's address at port 8080, and allow that port in the firewall if one is active.
- Setup: Follow the installation wizard to unlock Jenkins and set up an administrator account.
- Plugin Installation: Use the suggested plugins to get a working base, and add more later as your jobs need them.
With Jenkins up and running, you can improve your development workflow and streamline your processes.
Have a question about this guide?
Answered by AI from this guide. Good questions may be added to this page — please don't include personal details.
Did this guide fix your problem?

About the Author
Richard
Tech Writer, IT Professional
Richard is a writer at Geek Rewind who turns complex IT tasks into clear, step-by-step guides. He draws on years of hands-on experience in system administration and enterprise IT operations, focusing on Windows, Linux and WordPress: the problems people actually run into, and the fixes that work. His server and WordPress guides come from systems he runs himself. Richard builds and maintains the platform behind Geek Rewind, from its Ubuntu servers and Nginx configuration to its custom WordPress plugins. Many new tutorials start with readers' questions, and he's always glad to answer them in the comments.
No comments yet — be the first to share your thoughts!