How to Install Apache on Ubuntu Linux


Apache is a free web server program that hosts millions of websites across the internet. You install Apache on Ubuntu 22.04 LTS using the terminal and a software tool called APT to set up your own website in minutes.
The installation takes only a few basic commands to get the server running on your system. You just need root or sudo access to complete the setup process.
Install Apache by opening a terminal and running sudo apt update followed by sudo apt install apache2. Verify the installation by checking its status with sudo systemctl status apache2.
How to use Apache HTTP server on Ubuntu Linux
You can install Apache on Ubuntu in just a few minutes using the built-in apt package manager. Because Apache is already included in the standard software sources, you only need to run a couple of quick commands in your terminal to download and set up the web server.
Apache is available in Ubuntu repositories, so we can easily install it using the apt package management tool.
To install Apache, run the commands below:
sudo apt update
sudo apt install apache2
The commands above will install the Apache HTTP server.
To find out if Apache is installed and running, use the status check command below.
sudo systemctl status apache2
The command will output similar lines below when Apache is running.
apache2.service - The Apache HTTP Server
     Loaded: loaded (/lib/systemd/system/apache2.service; enabled; vendor preset: enabled)
     Active: active (running) since Wed 2021-09-15 12:29:40 CDT; 10s ago
       Docs: https://httpd.apache.org/docs/2.4/
    Process: 4860 ExecStart=/usr/sbin/apachectl start (code=exited, status=0/SUCCESS)
   Main PID: 4864 (apache2)
      Tasks: 55 (limit: 4651)
     Memory: 4.7M
     CGroup: /system.slice/apache2.service
             ├─4864 /usr/sbin/apache2 -k start
             ├─4865 /usr/sbin/apache2 -k start
             └─4866 /usr/sbin/apache2 -k start

Sep 15 12:29:40 ubuntu2004 systemd[1]: Starting The Apache HTTP Server...
Sep 15 12:29:40 ubuntu2004 apachectl[4863]: AH00558: apache2: Could not reliably determine the >
How to allow Apache through the Ubuntu firewall
You must adjust your firewall settings to allow web traffic before visitors can reach your new server. If you use UFW (Uncomplicated Firewall, a tool to manage network security rules on Ubuntu), a single command opens the correct ports for both standard and secure web traffic.
If you're using UFW to manage the Ubuntu firewall, run the below commands to allow traffic.
sudo ufw allow 'Apache Full'
That will allow full traffic to Apache.
Browse the server hostname or IP address with the firewall opened to see if the Apache default page is up.
http://localhost
You should see the Apache default welcome page.
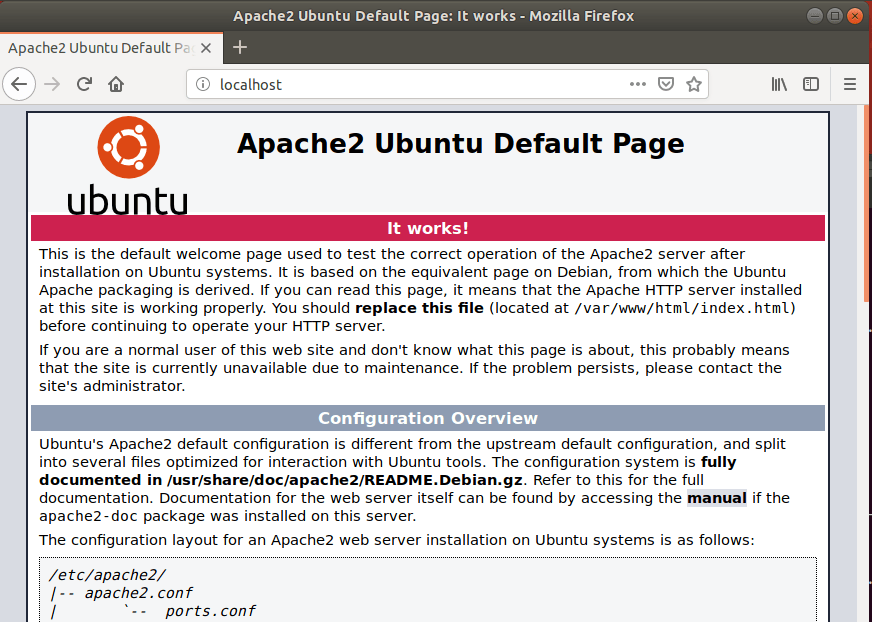
How to configure Apache on Ubuntu Linux
You can change your server settings and manage website files by using the main configuration folder located at /etc/apache2. This directory holds all the important text files that control how the web server behaves, handles domains, and secures connections.
On Ubuntu Linux, these are Apache directory structures and configuration files.
All Apache configuration files are located in the /etc/apache2 directory. This is considered the Apache home directory.
Apache's main configuration file is /etc/apache2/apache2.conf. Global configuration settings are done in the file, but this file is rarely ever touched.
Port configurations, including changing the default listen ports, are specified in this file /etc/apache2/ports.conf. The ports in here are what Apache listens to for traffic.
Apache Virtual Host files use the `/etc/apache2/sites-available` directory for website definitions. Apache only uses these activated definitions. Activated configurations link to the `/etc/apache2/sites-enabled` directory.
These are the commands below to activate websites to link them to the /etc/apache2/sites-enable directory. (replace example.com.conf with your VirtualHost file)
sudo a2ensite example.com.conf
The command above will create a symlink of the website configuration files found in the sites-available directory to the sites-enabled directory.
To deactivate a virtual host, use the command below. (replace example.com.conf with your website VirtualHost file).
sudo a2dissite example.com.conf
Apache uses modules to enhance and add additional functionalities located in the /etc/apache2/mods-available/ directory.
Modules are only available to load with Apache when enabled and symlinked to the /etc/apache2/mods-enable/ directory.
Apache modules activate or deactivate using the `a2enconf` and `a2disconf` commands. After you turn on Apache modules and link them to the `mod-enable` directory, the Apache web server loads these selected modules.
Apache log files, `access.log` and `error.log`, store server activity and issues within the `/var/log/apache/` folder on Ubuntu Linux. These two log files allow you to understand server operations and identify problems.
Apache's Ubuntu configuration files store advanced web server settings. Future guides will explain these extra Apache settings, demonstrating practical uses of the web server's full power.
Conclusion:
This guide explains how to install and use the Apache web server on Ubuntu Linux. Readers can report errors or add information using the comment form provided below this guide.
Was this guide helpful?

About the Author
Richard
Tech Writer, IT Professional
Richard, a writer for Geek Rewind, is a tech enthusiast who loves breaking down complex IT topics into simple, easy-to-understand ideas. With years of hands-on experience in system administration and enterprise IT operations, he’s developed a knack for offering practical tips and solutions. Richard aims to make technology more accessible and actionable. He's deeply committed to the Geek Rewind community, always ready to answer questions and engage in discussions.




useless a2enconf and a2disconf commands missing like how to load php etc
The Apache default site doesn’t load.
[…] How to install Apache on Ubuntu […]
[…] Apache installed, you can enable the Userdir feature by running the command […]
[…] use and run CGI script on Apache, you must first enable its module. With Apache installed, run the command below to enable the Apache CGI […]
[…] Install Apache on Ubuntu Linux. […]
[…] Apache is already installed, run the command below to install PHP. At the time of this writing, PHP 8.3 is the current version […]
[…] all the necessary components are installed, like PHP, a web server (like Apache or Nginx), and Composer, you can create a new CakePHP project using Composer, which is […]
[…] you already have a web server like Nginx or Apache installed and running a website, you can use this method to generate a free […]
[…] Install Apache on Ubuntu […]