

This article describes steps to hide or show the Windows Security app Family options section in Windows 11.
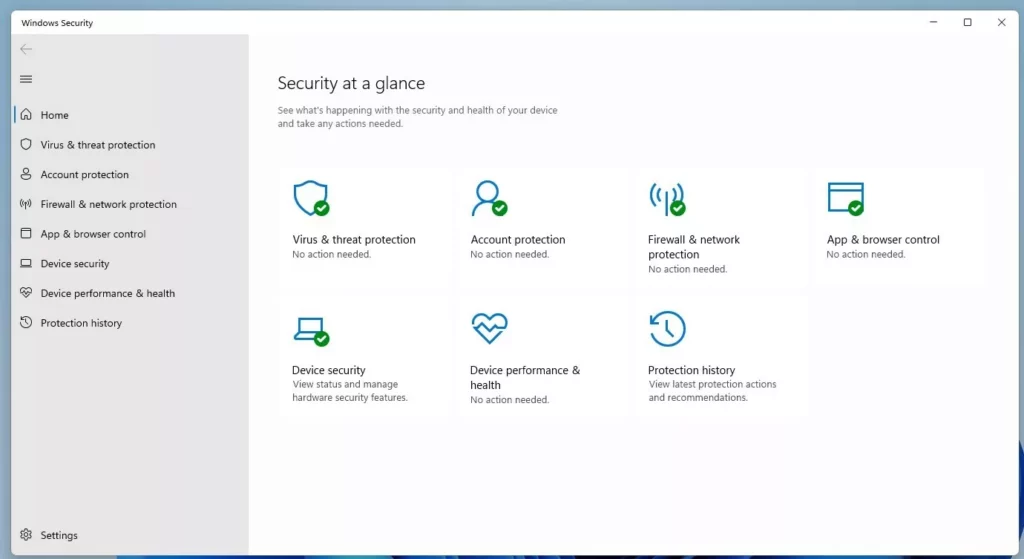
The Windows Security app is a built-in application that comes with Windows 11. It provides a centralized dashboard to see what’s happening with your device’s security and health and take any necessary actions.
The app has many sections that allow you to quickly see the status of your virus and threat protection, firewall and network security, Account protection, App and Browser Control, Device Security, and more.
The Family options section provides the settings to help simplify your family’s digital life, protect your kids online, set device screen time, and choose what your kids see and purchase online.
If you have configured your device’s security settings to suit your environment and don’t want others to change or mess with these settings, you can hide these sections from users.
On the other hand, if these sections are hidden, and you want to show them again, you can use the guide below.
How to hide or show the Family options section with Windows Security app in Windows 11
As described above, the Family options section provides the settings to help simplify your family’s digital life, protect your kids online, set device screen time, and choose what your kids see and purchase online.
Here’s how to show or hide the Family options section in the Windows Security apps.
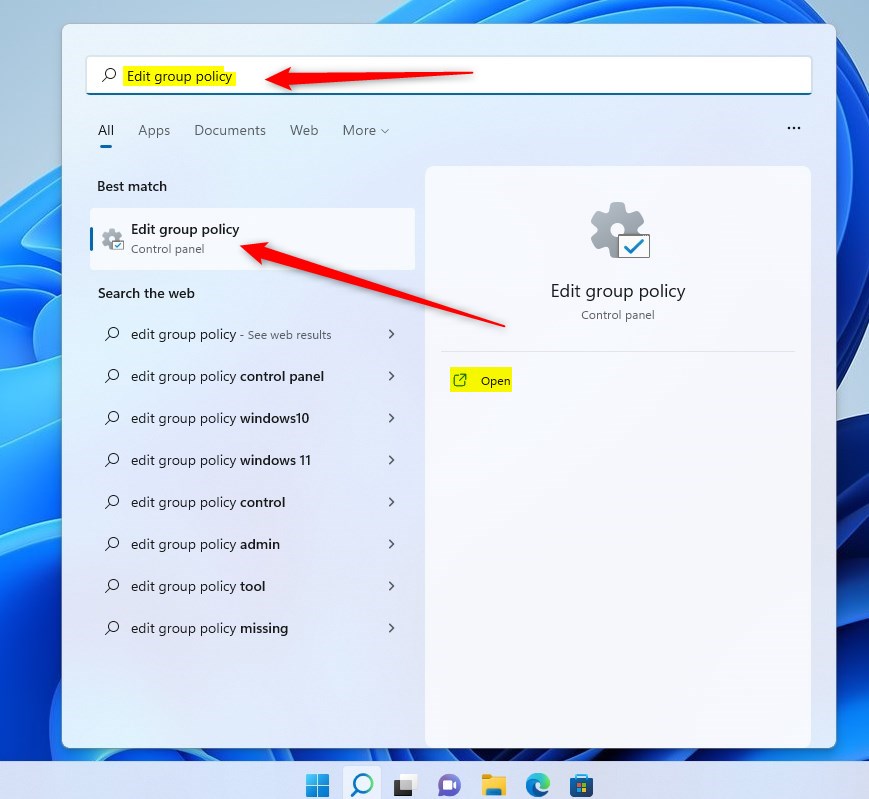
First, open Local Group Policy Editor by clicking on the Start Menu and searching for Edit group policy, as highlighted below.
Under Best match, select Edit group policy to launch Local Group Policy Editor.
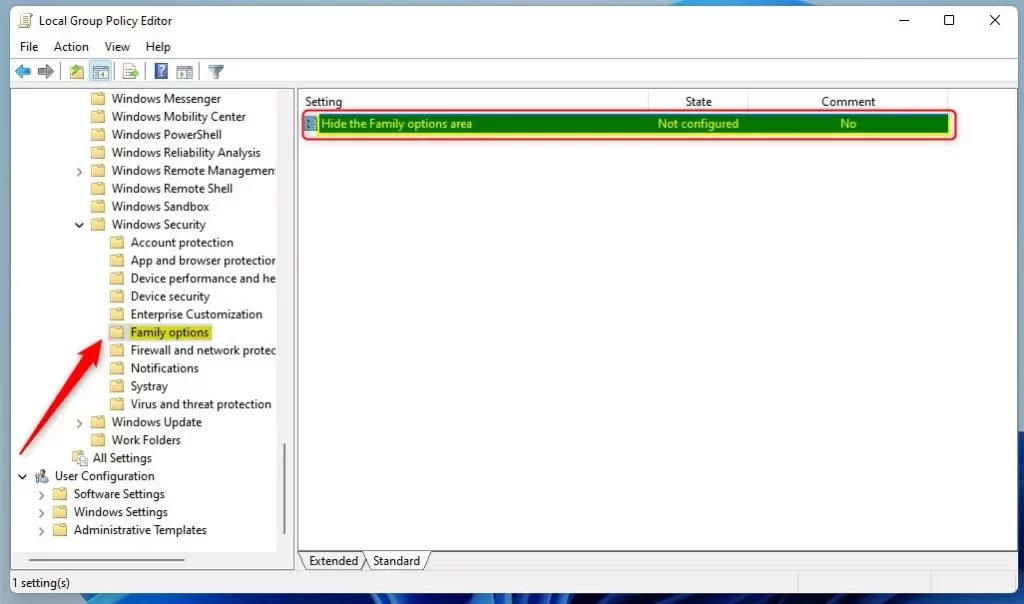
In the left pane of Local Group Policy Editor, expand the tree:
Computer Configuration > Administrative Templates > Windows Components > Windows Security > Family options
In the Device security details pane on the right, locate and double-click the setting that says “Hide the Family options area.”
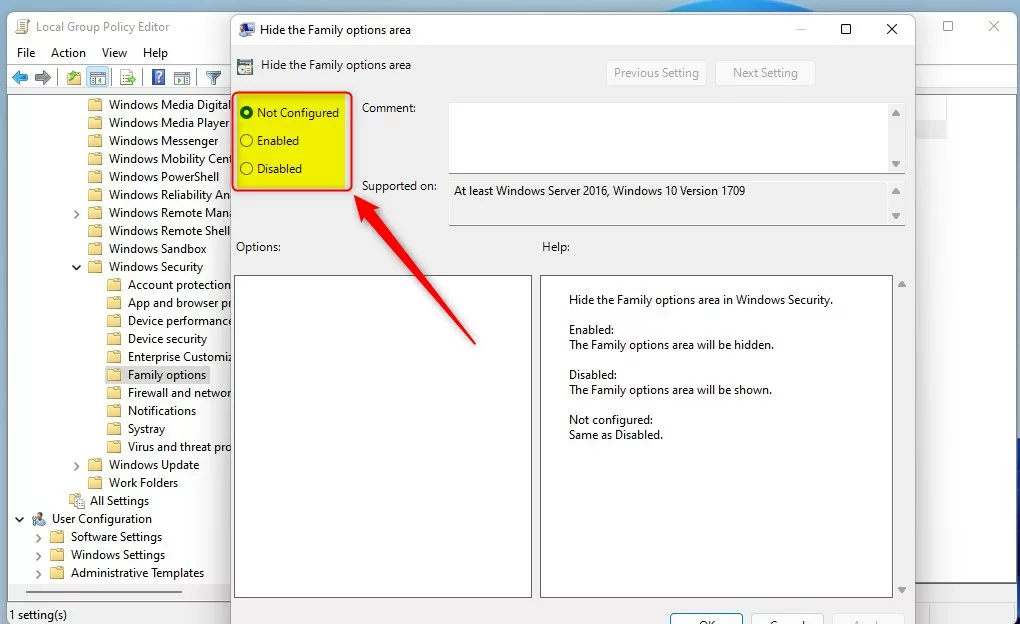
On the Hide the Family options area window set the option to Not Configure, Enabled, or Disabled.
- Not Configured (default)
- Enabled – The Family options area will be hidden.
- Disabled – The Family options area will be shown.
Display or hide the Family options section in Windows Security via Windows Registry
If you can’t open the Local Group Policy Editor, you can use the Windows Registry instead.
Open the Windows Registry, and navigate to the folder key path as listed below.
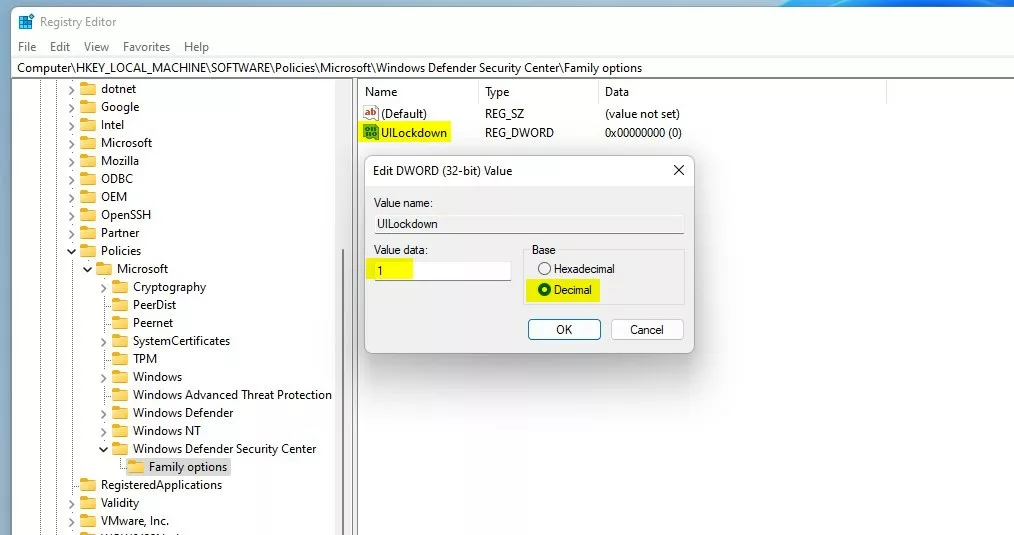
HKEY_LOCAL_MACHINE\SOFTWARE\Policies\Microsoft\Windows Defender Security Center\Family options
If you don’t see the Windows Defender Security Center -> Family options folder key, right-click on the Windows key, then create both key folders.
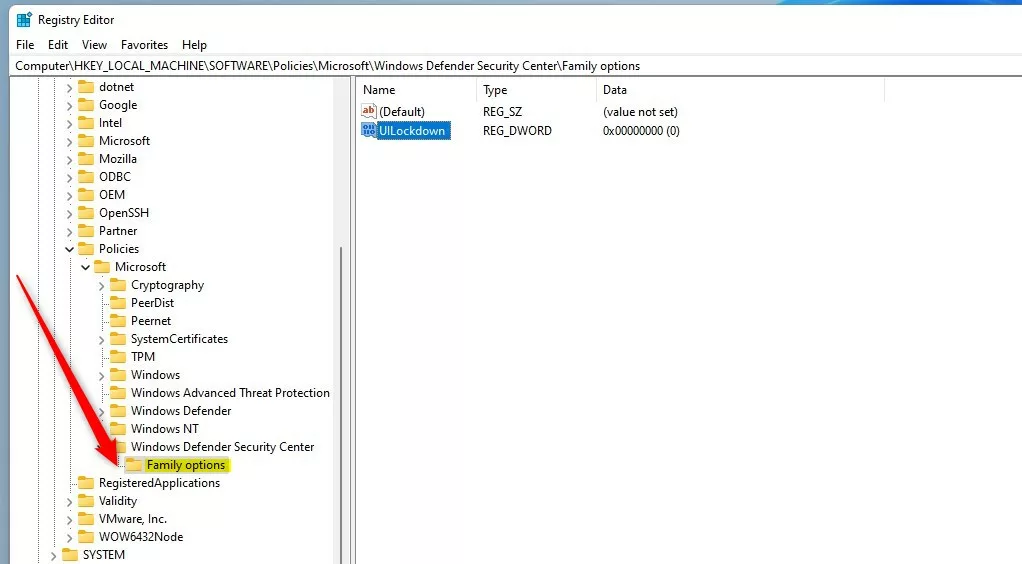
On the right pane of the Family options folder key, right-click and select New -> DWORD (32-bit) Value. Next, type a new key named UILockdown.
Double-click the new key and enter the Value data as 0 to show the Family options section in Windows Security app.
A Value data of 1 will hide the Family options section in the Windows Security app.
Restart your computer, and the Family options section will be hidden or will be displayed.
That should do it!
Reference:
Conclusion:
- The article provides a detailed guide on how to show or hide the Family options section in the Windows Security app in Windows 11.
- Users can utilize the Local Group Policy Editor to configure the visibility of the Family options section, with the flexibility to hide or display it according to their preferences.
- Alternatively, the Windows Registry can achieve the same outcome if accessing the Local Group Policy Editor is not feasible.
- Following the provided steps will enable users to customize the display of the Family options section, tailoring it to their specific security and family needs.
- Readers are encouraged to refer to the Microsoft support page for further information and assistance.


Leave a Reply