
Windows Sandbox is a helpful security feature. It creates a safe, isolated space on your computer. You can test unknown or untrusted applications in this space without risking your main system.
Why use Windows Sandbox? When you run an app in Sandbox, it cannot access your files, settings, or other important Windows data. If the app is harmful, your main system stays protected.
What happens when you enable it? You get a temporary virtual desktop. Apps run inside this temporary space. When you close Sandbox, everything disappears. Your computer is clean.
Method 1: Enable Sandbox from Apps and Features
This is the easiest method for most users.
- Press the Windows key + R on your keyboard. A small box will open.
- Type this command into the box:
optionalfeatures.exe - Press Enter.
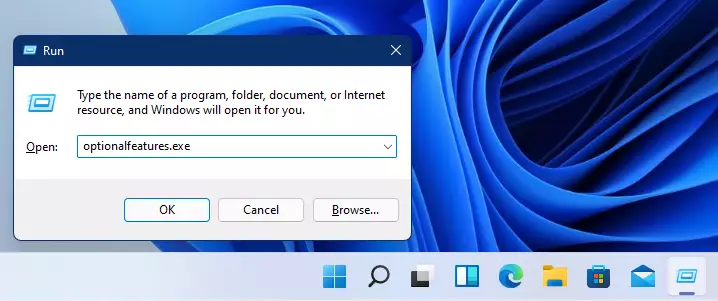
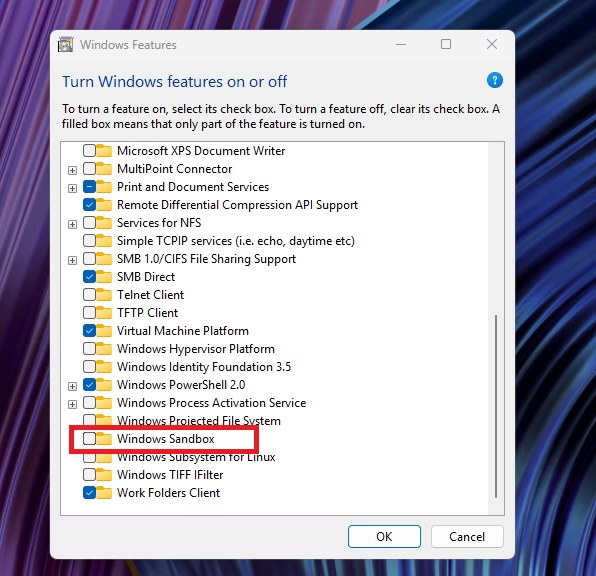
The Windows optional features window will open.
- Look for Sandbox in the list.
- Click the checkbox next to it.
- Click OK.
- Wait for the installation to finish.
- Restart your computer when asked.
Method 2: Use Command Prompt
⚠️ Admin privileges required – You must be logged in as an administrator for this method.
- Open Windows Search by pressing the Windows key.
- Type Command Prompt.
- Right-click on Command Prompt.
- Click Run as administrator.

The Command Prompt window will open with admin access.
- Copy and paste this command:
dism /online /Enable-Feature /FeatureName:"Containers-DisposableClientVM" -All - Press Enter.
- Wait for the process to finish.
- Restart your computer to apply the changes.
To turn off Sandbox later, use this command instead:
dism /online /Disable-Feature /FeatureName:"Containers-DisposableClientVM"
Method 3: Use PowerShell
⚠️ Admin privileges required – You must be logged in as an administrator for this method.
- Open Windows Search by pressing the Windows key.
- Type PowerShell.
- Right-click on Windows PowerShell.
- Click Run as administrator.
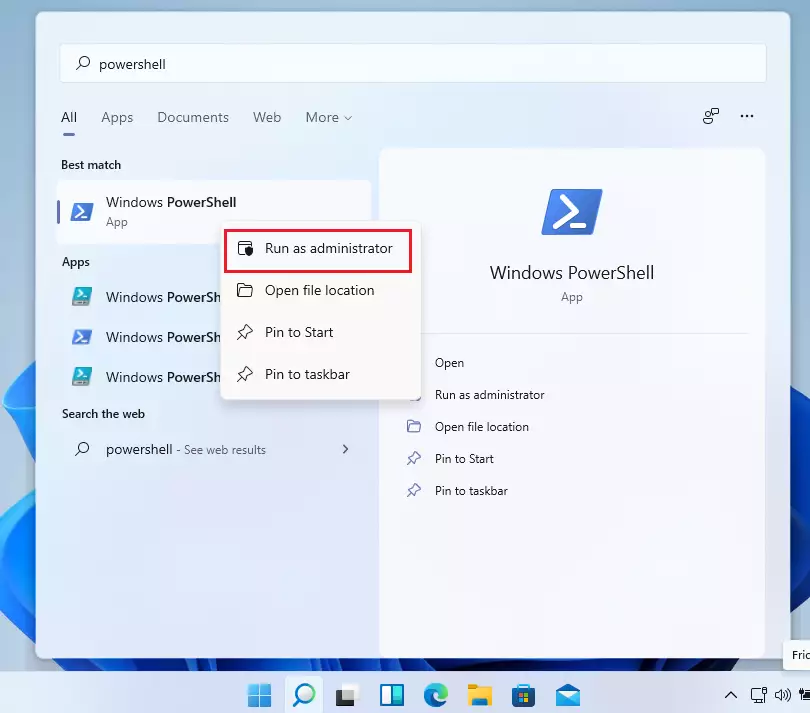
PowerShell will open with admin access.
- Copy and paste this command:
Enable-WindowsOptionalFeature -Online -FeatureName "Containers-DisposableClientVM" -All - Press Enter.
- Wait for the process to finish.
- Restart your computer to apply the changes.
To turn off Sandbox later, use this command instead:
Disable-WindowsOptionalFeature -Online -FeatureName "Containers-DisposableClientVM"
Using Windows Sandbox
Now that Sandbox is enabled, you can start using it.
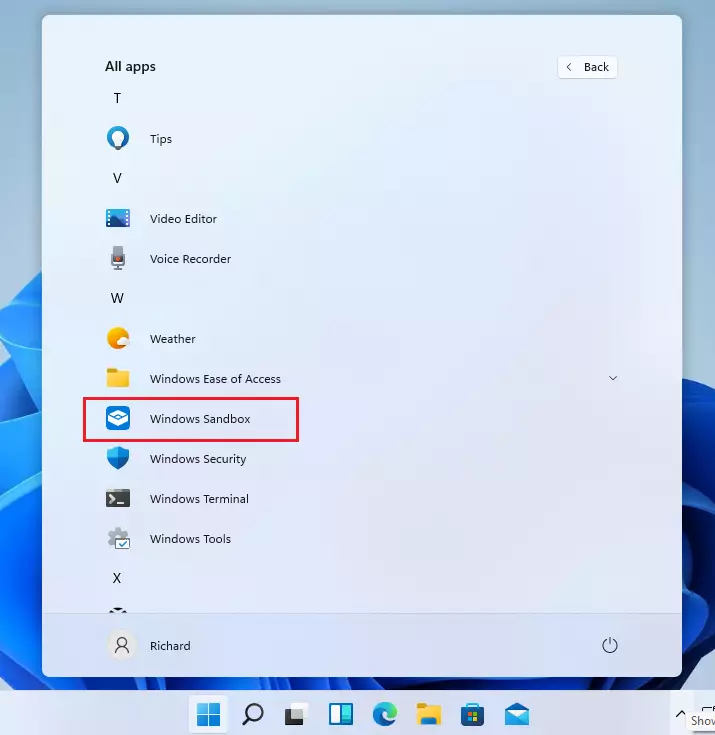
- Press the Windows key and search for Sandbox.
- Click Windows Sandbox to open it.
- A new temporary desktop will appear.
- Download or run the untrusted app you want to test.
- Close Sandbox when you are done testing.
Summary
Windows Sandbox is a safe way to test unknown applications. You have three easy methods to enable it:
- Apps and Features – The simplest option for beginners.
- Command Prompt – Works if you have admin access.
- PowerShell – Another way to enable it with admin access.
After enabling Sandbox, restart your computer for the changes to take effect. Then you can open Sandbox anytime you want to safely test an app. Your main system stays protected because the app runs in an isolated, temporary space. When you close Sandbox, everything is deleted.


Leave a Reply