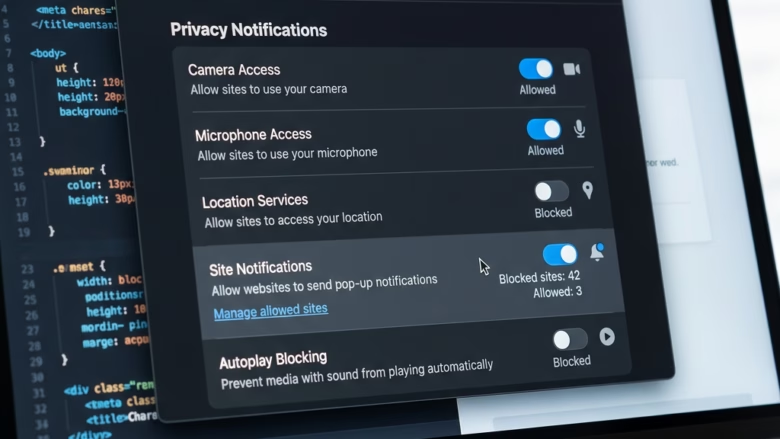
Microsoft Edge website notifications let you control which sites can send you pop-up alerts and how those alerts appear on your PC.
These notifications are messages from websites you’ve allowed to send updates directly to your computer screen. You can still receive them even when Microsoft Edge is closed.
Microsoft Edge, especially version 119, gives you fine-grained control over these alerts. You can block them all, allow specific sites, or get asked each time a site wants to send one.
Managing these alerts helps reduce digital clutter. It lets you focus on important updates and avoid distracting pop-ups from sites like social media.
Access Edge Settings, navigate to Privacy, search, and services, then Site permissions, and finally All sites to manage notification permissions for each website individually. You can also manage notifications directly from a website’s address bar by clicking the site information icon.
Notifications vs. Pop-ups
Edge notifications are different from pop-ups. Pop-ups are usually ads that open in a new window. Website notifications, on the other hand, are simple alerts from a website you’ve already visited. Blocking pop-ups is a separate thing you do to stop ads. This section is only about managing website notifications, not stopping ads.
Blocking pop-ups is a separate step for managing website ads. This paragraph focuses only on website notifications. Website notifications are distinct from pop-up ads.
How to Block Notifications in Edge Settings
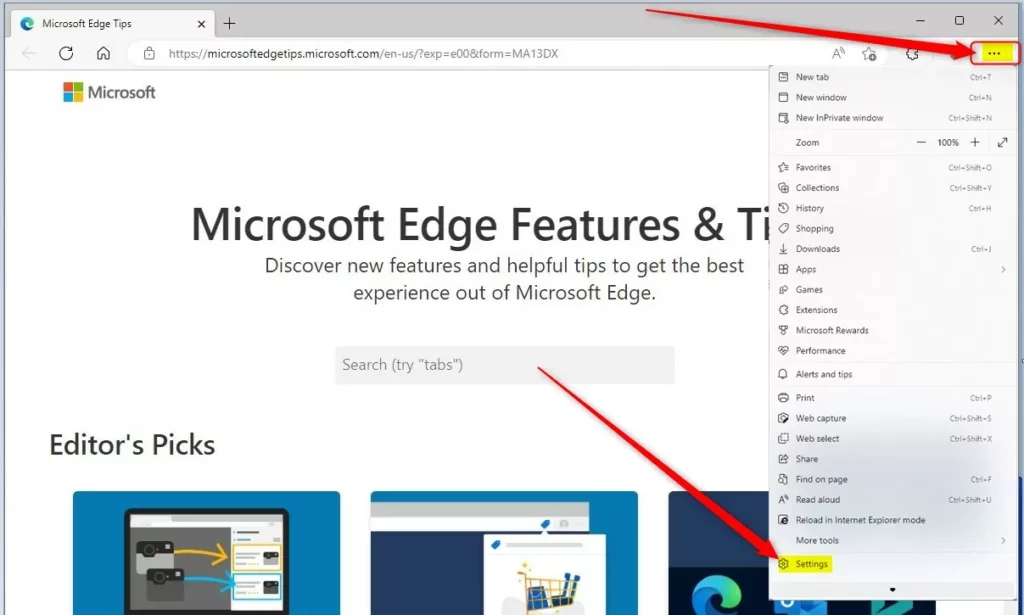
Open Edge Settings
First, open Microsoft Edge's settings. Click the three dots (Settings and more) in the top-right corner. From the menu, choose Settings.Go to Site Permissions
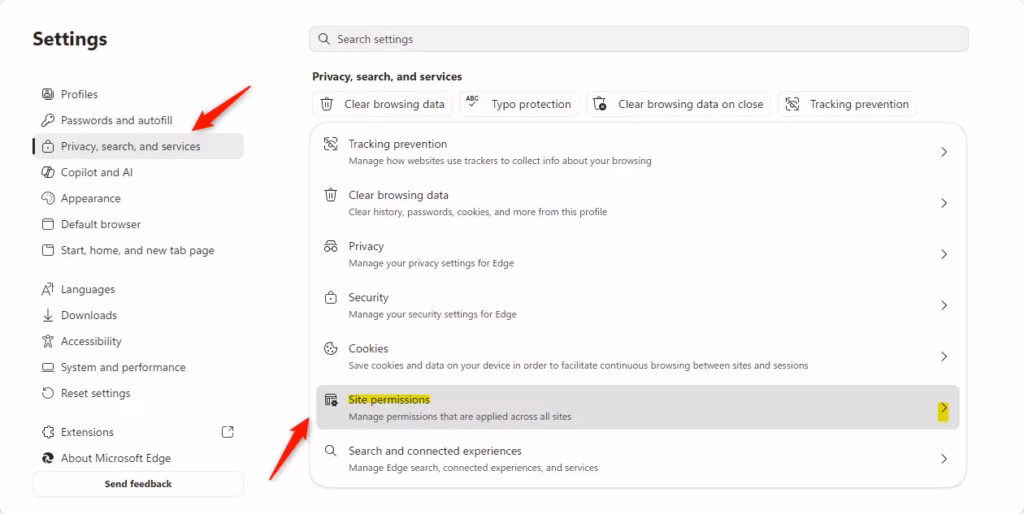
In the Settings menu, look at the left sidebar. Click on Privacy, search, and services. Scroll down and click on Site permissions. This page lets you manage permissions for different website features.See All Sites
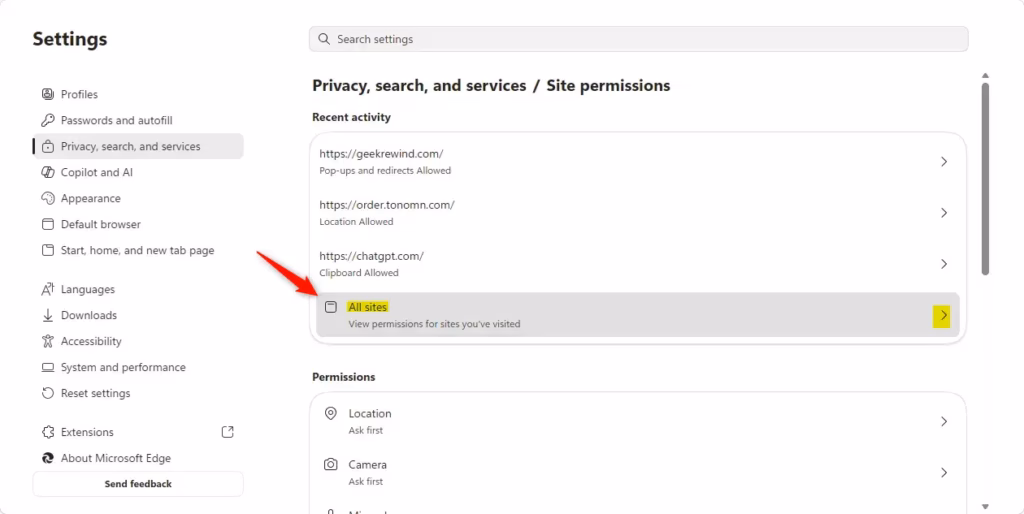
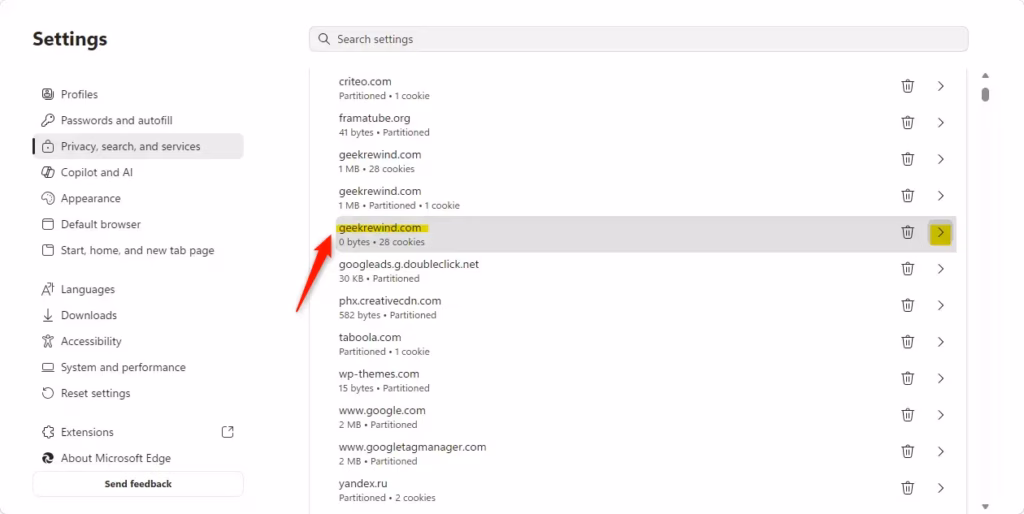
On the Site permissions page, find and click on All sites. This shows a list of every website that has asked for or been given permissions on your computer.Find the Website
You'll see a long list of websites you can scroll through. If you know the site you're looking for, type its name in the search bar at the top of the 'All sites' list to find it faster.Block Notifications for That Site
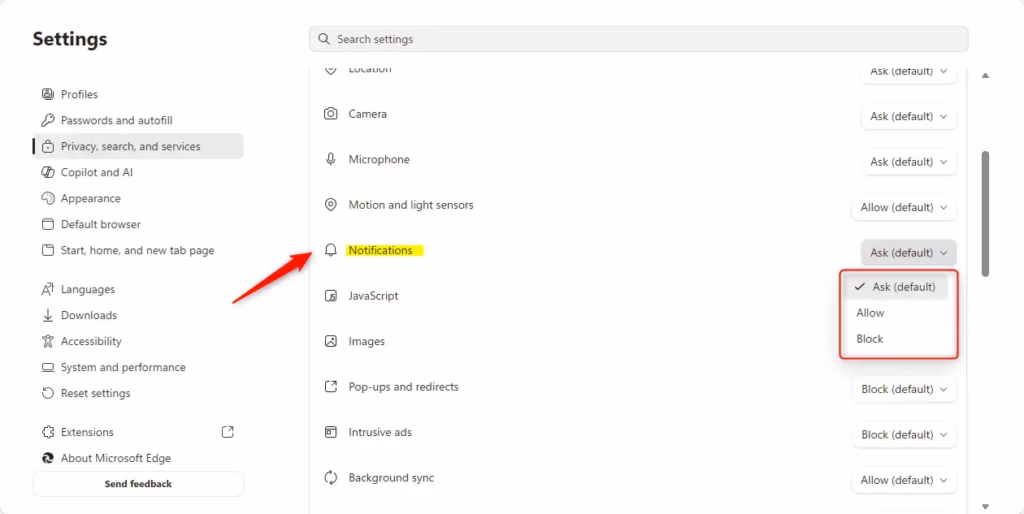
Find the website in the list and click on its name. This will show the specific permissions you gave it. Look for the Notifications setting. Click the dropdown menu next to it and choose Block.You can block Edge notifications for a specific website right from Microsoft Edge's settings. First, find the website in the list of sites that can send you notifications. Click on its name to see its permissions. Then, find the 'Notifications' setting. Click the dropdown menu next to it and choose 'Block' to stop that site from sending you alerts.
How to Manage Notifications from the Address Bar
Visit the Website
Open Microsoft Edge and go to the website you want to manage notifications for. This works best when you are on the site.Click the Site Information Icon
Look to the left side of your browser's address bar. You will see a small icon. It might be a padlock if the site is secure, or a globe. Click this icon. This is the View site information button.Find the Notifications Permission
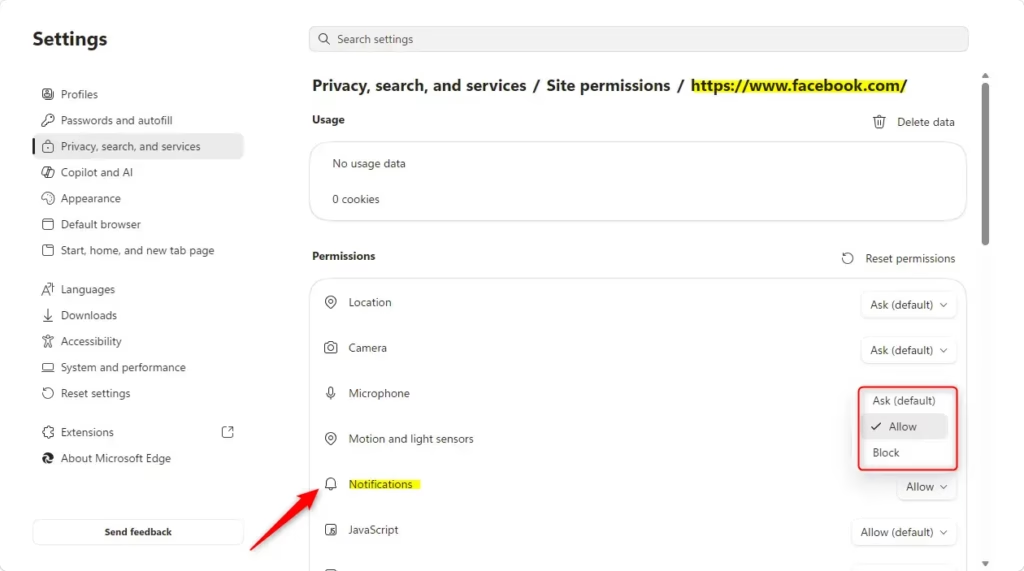
A small panel will appear with website details and permissions. Look for 'Permissions for this site,' and you should see Notifications listed there.Choose to Block
Next to Notifications, there is a dropdown menu. Click it. You will see options like Allow or Block. Choose Block to stop this site from sending notifications.
Reference:
https://support.microsoft.com/en-us/edge/manage-website-notifications-in-microsoft-edge
Summary
Managing website notifications in Microsoft Edge helps you regain focus by letting you control which sites can send you alerts.
How do I get rid of website notifications on Edge?
To get rid of website notifications on Edge, open Edge Settings, navigate to 'Cookies and site permissions,' then 'Notifications.' Here, you can block all notifications, remove specific sites from the allowed list, or toggle off the 'Ask before sending' option to prevent future requests.
How do I stop a website from giving me notifications?
To stop a specific website from sending notifications in Edge, go to Settings > Cookies and site permissions > Notifications. Find the website under the 'Allow' list and click the three dots next to it, then select 'Remove' or 'Block' to disable its notifications.
How do I change the notification settings on Microsoft Edge?
To change notification settings in Microsoft Edge, open Edge, click the three dots for Settings, then go to 'Cookies and site permissions' and select 'Notifications.' You can then toggle off notifications entirely, manage individual site permissions, or choose to be asked before sites send notifications.
How do I get rid of pop up notifications on Edge?
To eliminate pop-up notifications in Edge, navigate to Settings > Cookies and site permissions > Pop-ups and redirects. Toggle the switch to 'Block' to prevent all pop-ups. You can also manage exceptions for specific sites if needed, ensuring a cleaner browsing experience.
Was this guide helpful?

About the Author
Richard
Tech Writer, IT Professional
Richard, a writer for Geek Rewind, is a tech enthusiast who loves breaking down complex IT topics into simple, easy-to-understand ideas. With years of hands-on experience in system administration and enterprise IT operations, he’s developed a knack for offering practical tips and solutions. Richard aims to make technology more accessible and actionable. He's deeply committed to the Geek Rewind community, always ready to answer questions and engage in discussions.


No comments yet — be the first to share your thoughts!