How to Enable a Microsoft Copilot Connector for the First Time

Microsoft Copilot connectors link the AI assistant to outside apps such as Outlook and OneDrive. Once linked, Copilot can pull in data from your personal files and calendar. Setting up a connector for the first time takes a few clicks in Windows 11. Afterward, the assistant can use that information to speed up daily tasks.
A connector is permission-based. Copilot only sees what you allow on the sign-in and consent screen, and you can take that access back later. This guide walks through the first-time setup and what you should see at each step.
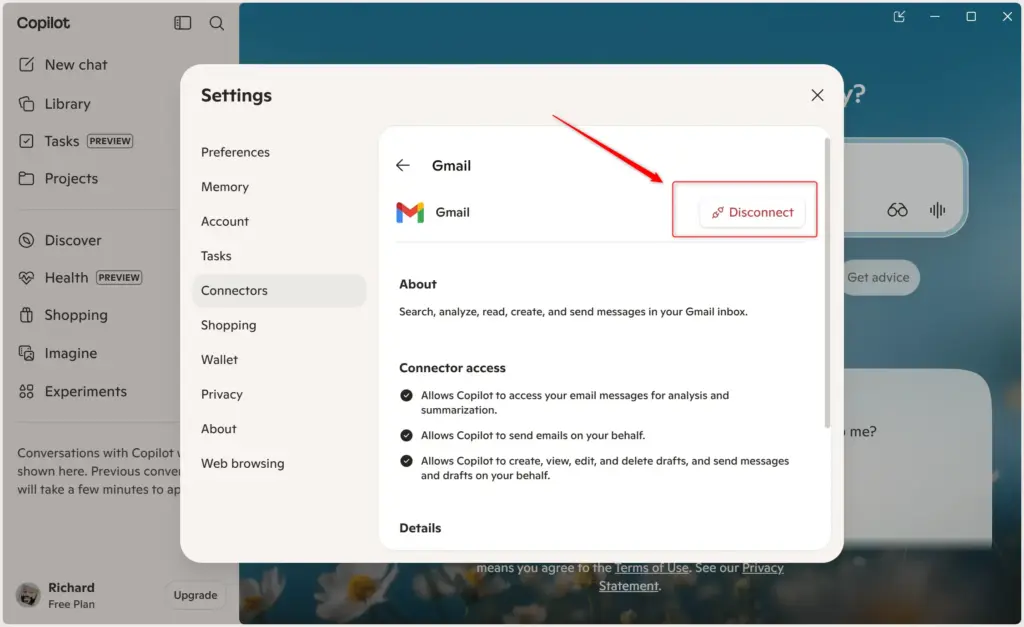
To enable a Microsoft Copilot connector, click your profile icon in Copilot, select “Connectors,” choose the desired service, click “Connect,” sign in to that service, and grant permissions. The connector will then appear as enabled.
Manage Your Emails and Contacts
Once a connector is active, Copilot can help with email and contact management. It can find a specific message or a contact’s details within moments. This saves time when you are hunting for something in a crowded inbox, and it cuts down the frustration of scrolling and searching by hand.
Copilot can only search the accounts you have connected. If it cannot find something, check that the right account is linked and that you gave it the permissions it needs.
How to Set Up a Connector for the First Time
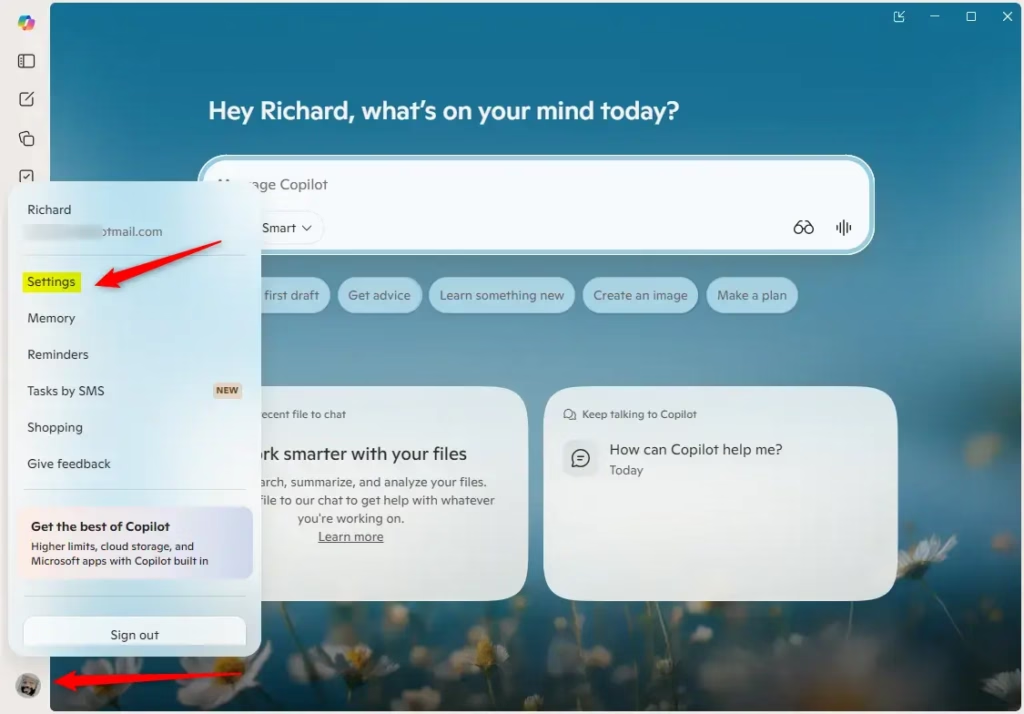
A first-time connector setup starts with signing in to your Microsoft account and opening your profile menu. Click your profile icon in the corner of the screen to reach the page where Copilot manages its service connections. From there you can link external apps and tools to your workspace so they work together.
Before you start, have the sign-in details ready for the account you want to link (a Microsoft account for OneDrive or Outlook.com, or a Google account for Gmail or Google Drive). Which connectors you see can vary with your account type and region, and Microsoft changes the Copilot interface fairly often. If a label differs slightly from what is written here, look for the closest match.
- Open Copilot and find your profile. Make sure you are signed in to Copilot. Look for your profile picture or icon, usually in a corner of the screen, and click or tap it. A menu of options should open.
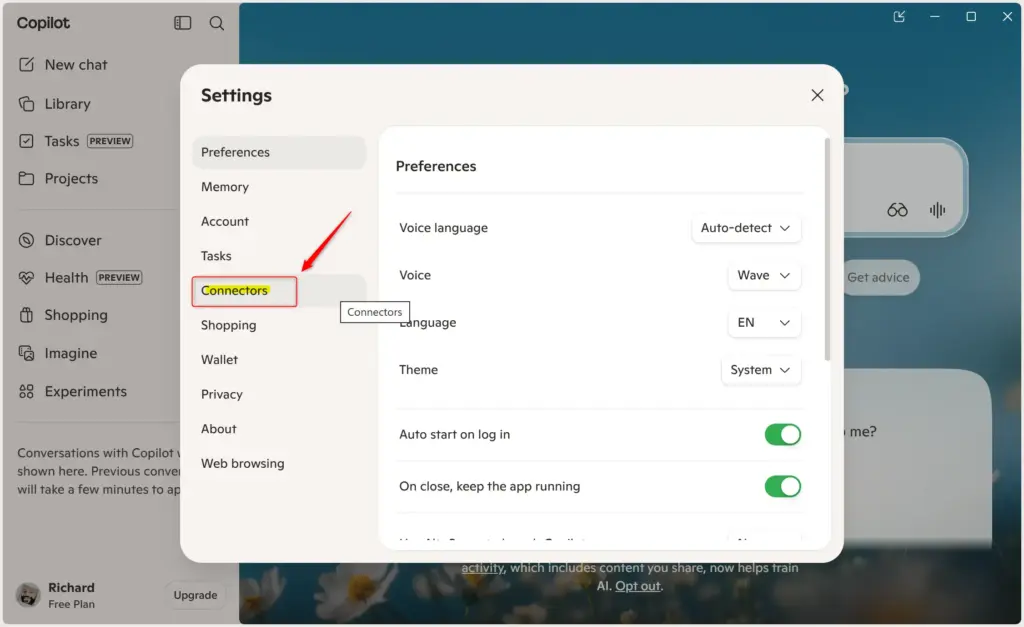
- Go to Connectors. In the menu that opens, select Connectors. You should now see the list of services Copilot can connect to, grouped into several kinds of integration. If you cannot find Connectors, check that you are signed in with a personal Microsoft account. Some work or school accounts may not show the option, and an administrator may control it.
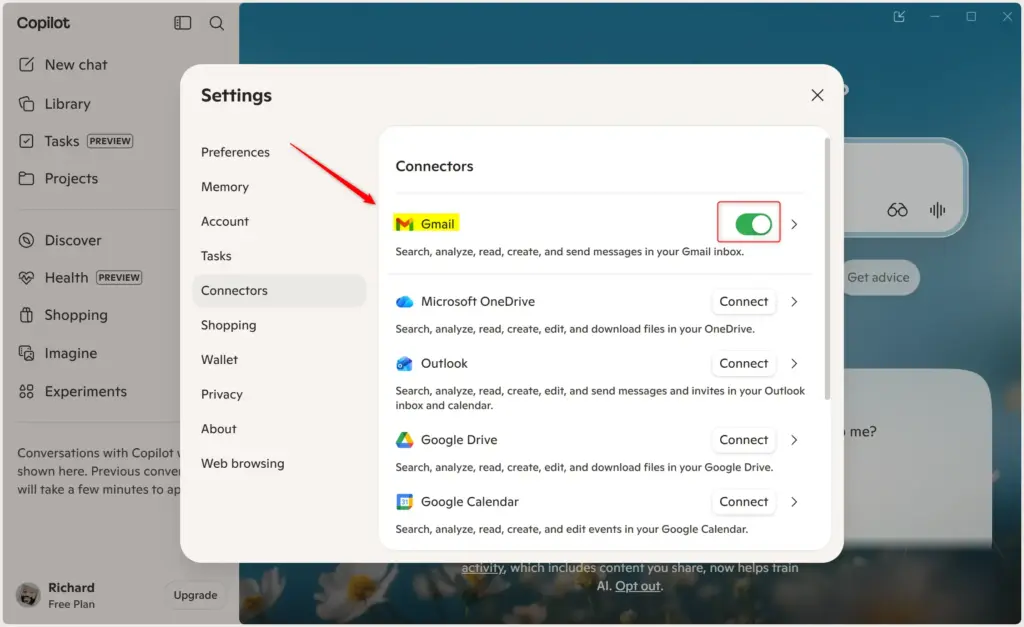
- Choose the service to connect. Copilot connectors support services such as OneDrive, Outlook.com, Google Drive and Gmail. Each service in the list shows its connection status. Find the service you want and click the Connect button next to it. Start with one service. You can add others later.
- Allow the connection. After you click Connect, Copilot shows a Ready message for linking the service. You still have to grant permission on the service's own side. Click the button shown, such as Continue to OneDrive or Continue to Gmail. Your browser should then take you to that service's sign-in page.
- Sign in and give permission. You will land on the sign-in page for the service you chose. For OneDrive or Outlook, that is your Microsoft account page. For Gmail or Drive, it is Google's page. Sign in with the account you want Copilot to use. If you have more than one account, check that you picked the right one. You will then be asked to let Copilot connect. This is where you decide what information Copilot can see and use, so read the permissions carefully before you accept.
- Confirm and go back. Once you give permission, you should be sent back to Microsoft Copilot. The connector you just set up should now say Enabled or Connected in your list. If it still shows Connect, refresh the page or reopen the Connectors list. If the status does not change, repeat the steps and make sure you accepted the permission prompt. Copilot is now linked to the other service.
To undo this later, go back to the Connectors list in Copilot and remove the connector there. You can also review or revoke Copilot's access from the security or permissions settings of the connected account (your Microsoft account or your Google account).
Reference:
https://support.microsoft.com/en-us/microsoft-copilot/connecting-microsoft-copilot-to-other-services
Summary
Connectors give Copilot permission to read information from outside apps like email and cloud storage. Linking one takes less than a minute, and you stay in control of what Copilot can see. You can turn off access whenever you want.
Have a question about this guide?
Answered by AI from this guide. Good questions may be added to this page — please don't include personal details.
Did this guide fix your problem?

About the Author
Richard
Tech Writer, IT Professional
Richard is a writer at Geek Rewind who turns complex IT tasks into clear, step-by-step guides. He draws on years of hands-on experience in system administration and enterprise IT operations, focusing on Windows, Linux and WordPress: the problems people actually run into, and the fixes that work. His server and WordPress guides come from systems he runs himself. Richard builds and maintains the platform behind Geek Rewind, from its Ubuntu servers and Nginx configuration to its custom WordPress plugins. Many new tutorials start with readers' questions, and he's always glad to answer them in the comments.
No comments yet — be the first to share your thoughts!