Create Windows 11 ISO Using Rufus for Older Systems
This article explains creating a Windows 11 ISO file for unsupported hardware.
Use Rufus to create a bootable USB drive that bypasses Windows 11 hardware checks. Download the Windows 11 ISO, then open Rufus, select your USB drive, choose the ISO, and select the “Extended Windows 11 Installation” option before clicking START.
The official Windows 11 will not be installed on PCs that do not meet its minimum requirements. However, with the help of Rufus, a utility that helps format and create bootable USB flash drives, you can now create ISO files that bypass TPM and Secure Boot checks to install Windows 11.
You can create an ISO file to install on hardware that does not meet Windows requirements. However, you must still own a product or the activation key to use it. If you don’t have a valid product key, you cannot use Windows 11.
There are no free versions of Windows 11.
You’ll need Windows 11 ISO and use Rufus to create a modified ISO that works on unsupported hardware.
To download the Windows 11 ISO file, go to Download Windows 11 ISO, and scroll down until you see the ‘Download Windows 11 Disk Image (ISO)‘ section.
There, click on the Select Download drop-down and choose Windows 11.
How to use 🪟 Windows 11 on older PCs
As mentioned above, Windows 11 has strict hardware requirements. However, if your PC does not meet these requirements, you can use Rufus to create a Windows 11 ISO file to skip these requirements and install it on unsupported hardware.
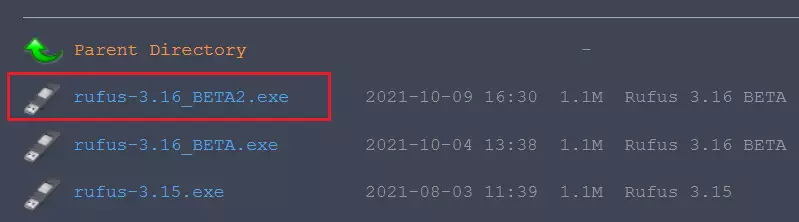
Once you’ve downloaded the official Windows 11 ISO, go to the link below and download the Rufus (beta) version.
Index of /downloads (Rufus.ie)
Future versions might be different.
After downloading, open Rufus, then insert the USB drive you want to use to create the ISO image. Next, browse for the official Windows 11 ISO file and select it.
Then, use the highlighted options in the image below to match yours.
- Image option: Extended Windows 11 Installation (no TPM/no Secure Boot/8GB – RAM)
- Partition scheme: GPT
- Target system: UEFI (non-CSM)
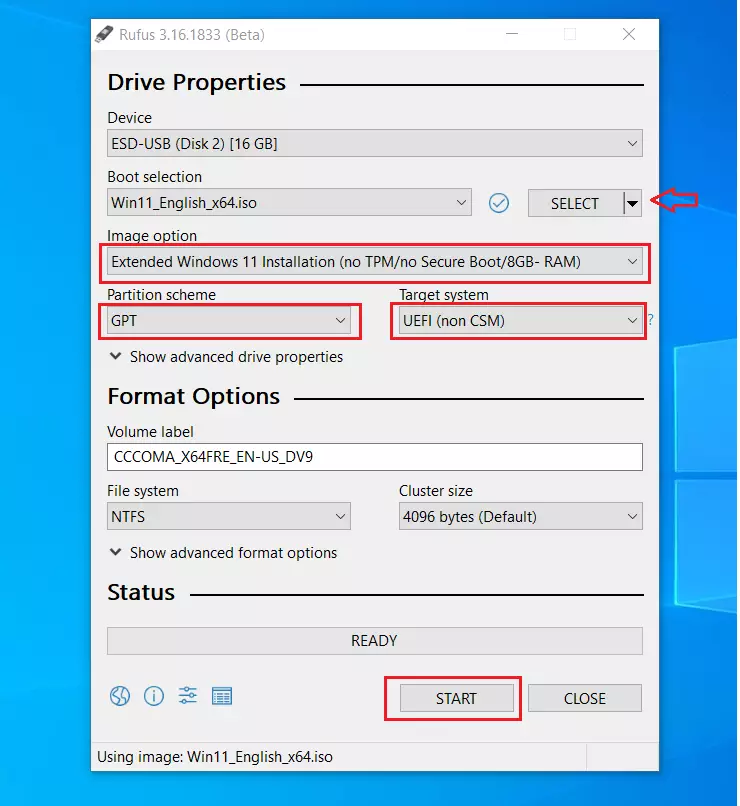
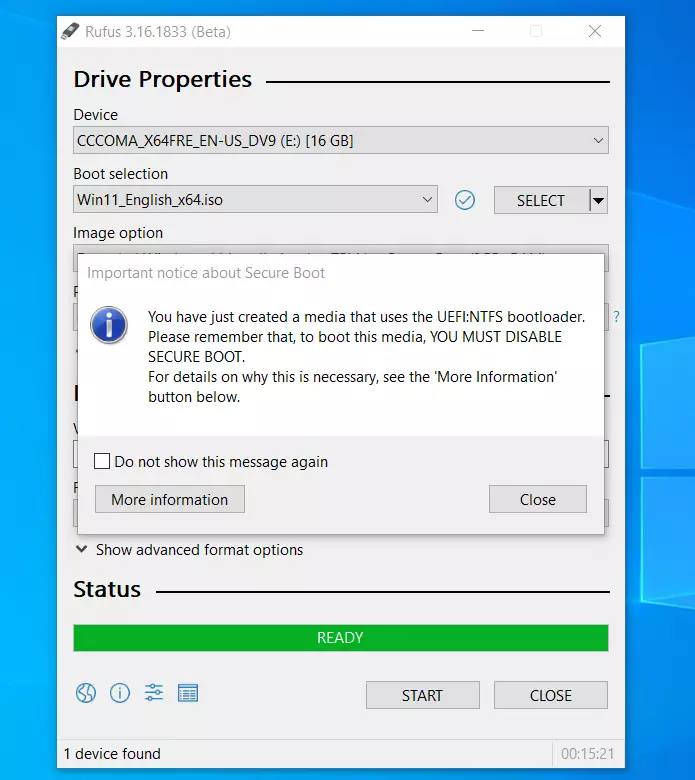
Once the settings are correct, click START to create the ISO image for unsupported PCs.
Please wait for the process to complete, then eject the USB drive and use it to install Windows 11.
That should do it!
Conclusion:
- Creating a Windows 11 ISO for unsupported hardware allows you to bypass standard installation requirements.
- Ensure you have a valid product key or activation for Windows 11 to comply with usage terms.
- Use Rufus to modify the ISO file effectively for installation on older PCs.
- Always download the latest version of Rufus and the Windows 11 ISO for the best compatibility and performance.
- Follow the specified settings in Rufus carefully to avoid installation issues.
Following these steps, you can install Windows 11 on your unsupported hardware.
Was this guide helpful?

About the Author
Richard
Tech Writer, IT Professional
Richard, a writer for Geek Rewind, is a tech enthusiast who loves breaking down complex IT topics into simple, easy-to-understand ideas. With years of hands-on experience in system administration and enterprise IT operations, he’s developed a knack for offering practical tips and solutions. Richard aims to make technology more accessible and actionable. He's deeply committed to the Geek Rewind community, always ready to answer questions and engage in discussions.


Was reading somewhere that if you don’t have the UEFI and Legacy only then on the Partition Scheme use the MBR instead, I tried it with the GPT and it didn’t work for me, so now I’m redoing it and using the MBR scheme and hopefully it will work this time, and it takes a long time for Rufus to complete the image on the USB, on my system anyhow, Dell workstation T3500 with an Intel Xeon 6580 I recently installed.