How to Clear Your Clipboard History in Windows 11

Clipboard history in Windows 11 stores your last 25 copied items, including text, HTML, and images under 4 MB. Pressing the Win+V opens this panel so you can paste older items instead of only your most recent copy.
Clearing this history removes saved passwords, private notes, and sensitive files from the list so nobody else can see them. This matters most on shared or work PCs, and after you copy something like a password or a bank number. Nothing else on the PC is touched, and you don’t need to restart.
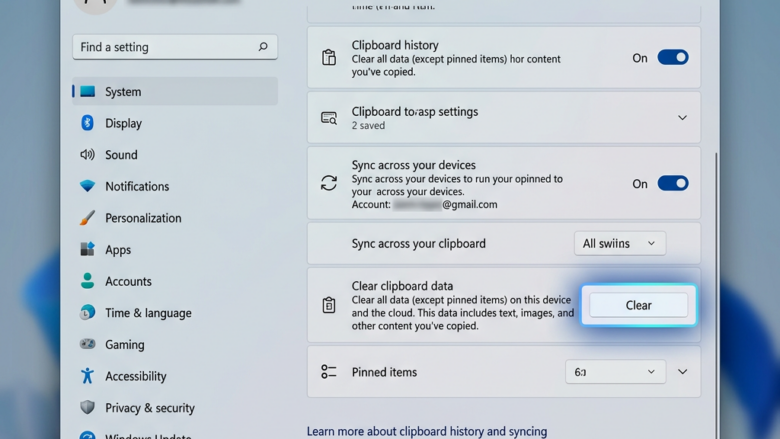
Open Settings , go to System Clipboard, and click the Clear button under “Clear clipboard data”. Your clipboard history empties immediately, though any pinned items remain. Pinned items stay because this only clears unpinned entries.
How to Clear Your Clipboard History
Two methods clear out this stored data when sensitive information lingers. You can wipe the whole list in one go, either from Settings or from the Win+V panel. Or you can delete a single entry and keep the rest. All of these work the same on Windows 11 Home and Pro.
Method 1Using the Settings App
The Settings app lets you clear clipboard history Windows 11 quickly by wiping all stored text and images at once. If you use a Microsoft account and have clipboard sync turned on, this also removes the copied items so they don’t carry over to your other computers. Open Settings by pressing the Win+I, go to System, and choose Clipboard to find the clear button.
If you want a pinned item gone, unpin or delete it by hand (see the last method below).
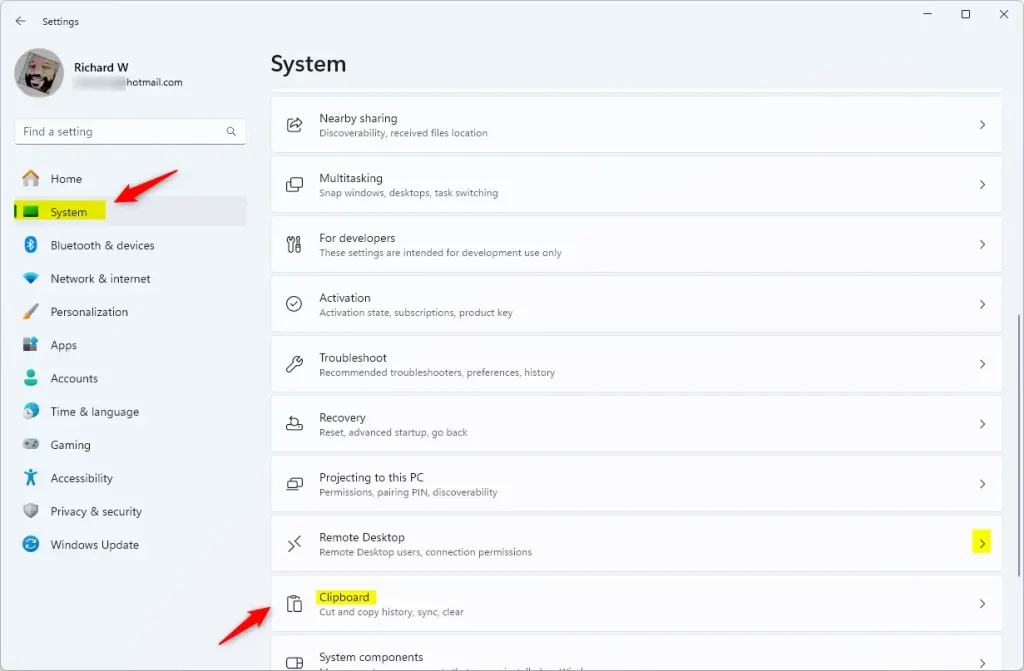
- Open Settings : Click the Start button (the Windows icon, usually in the bottom-left corner). Then click the Settings cog icon. You can also press the Win+I on your keyboard. The Settings window should open with a list of categories on the left.
- Go to System: In the Settings window, click on System. The System page lists items such as Display, Sound, and Notifications.
- Find Clipboard: On the left side, scroll down and click on Clipboard. Depending on your Windows 11 version, Clipboard may appear in the main System list instead of the left side. Either way, click it. You should see the clipboard history switch and sync options.
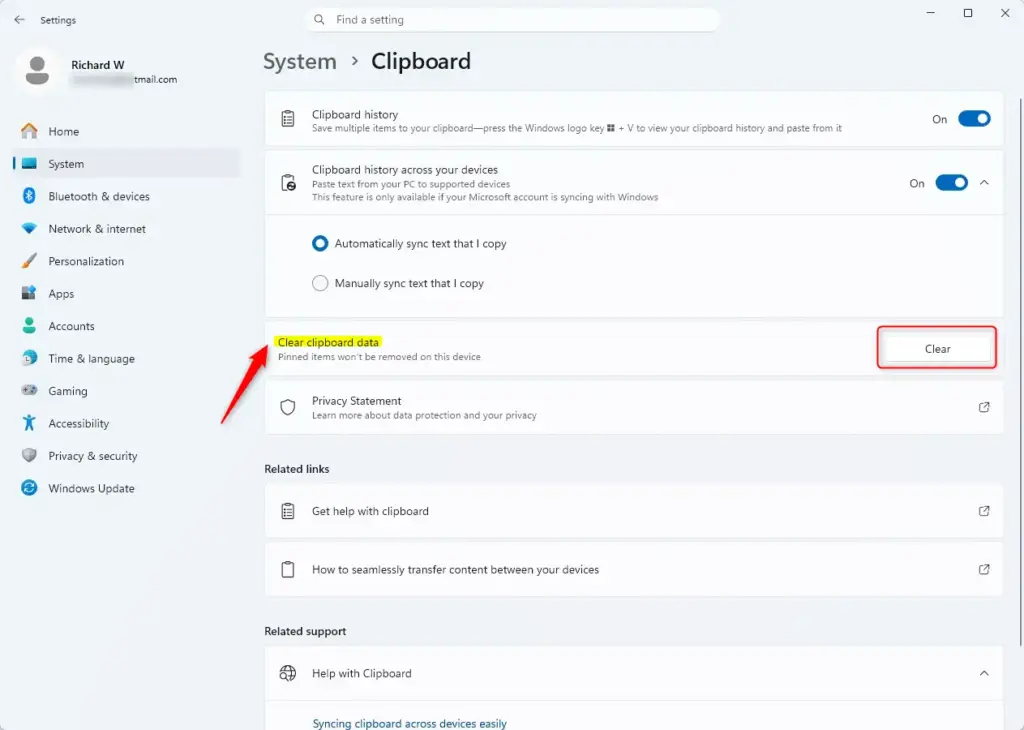
- Clear Your Data: Look for a section that says “Clear clipboard data”. Click the Clear button. There is usually no confirmation message. The history is wiped straight away, and when you press Win+V again the list will be empty apart from any pinned items.
If you never want Windows to keep a history, turn off the Clipboard history switch on the same page.
Method 2Clearing Directly from Clipboard History
You can clear clipboard history Windows 11 right from your desktop without opening the main Settings menu by using a simple keyboard shortcut. Pressing the Windows key + V opens your recent items panel, where a single click wipes everything you have copied during your current session. As with Settings, pinned items stay put.
- Open Clipboard History: Press the Windows key + V on your keyboard. This shows a list of what you've copied. If Windows instead offers to turn on clipboard history, history is switched off and there is nothing stored to clear.
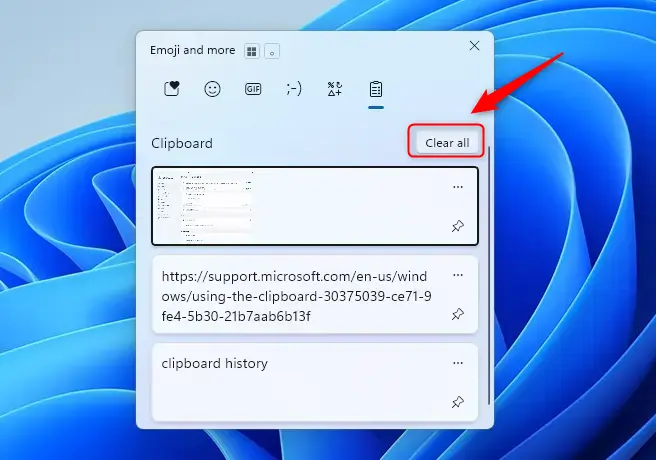
- Find 'Clear all': At the top of the clipboard history list, you should see an option that says Clear all. Click it. On some builds the option sits near the top-right corner of the panel. Every unpinned item should disappear from the list.
- Confirm (if asked): Windows might ask if you're sure. If it does, click Confirm or Yes. Most versions clear the list without asking, so don't worry if no prompt appears.
Press Windows key + V once more to check. The panel should show no items other than anything you pinned.
Clearing Individual Items
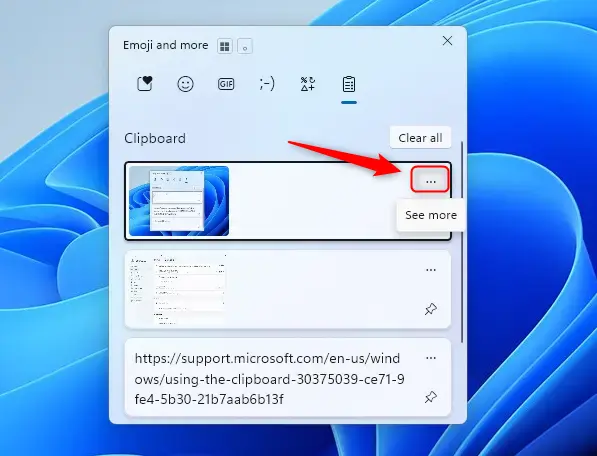
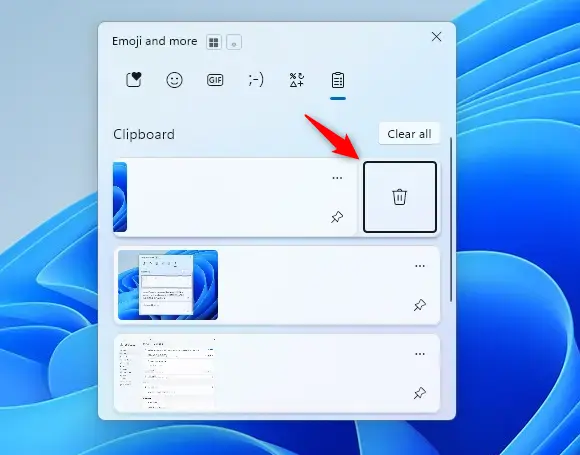
Clearing individual items from your clipboard history Windows 11 lets you remove sensitive passwords or private text without losing the rest of your copied data. Pressing the Windows key + V opens your history panel, where you can click the three dots next to any specific entry and delete just that item. This is also the way to remove a pinned item.
- Open Clipboard History: Press Windows key + V. The clipboard panel should appear near your cursor or text box, with the newest item at the top.
- Find the Item: Scroll through the list to find the item you want to remove. Text shows as a preview, and images show as thumbnails.
- Select 'See more' or '...': Next to the item, click the three dots (...) or the 'See more' option. The three dots may only appear when you hover over the item.
- Choose 'Delete': A small menu will appear. Click Delete. The item vanishes from the list and the others stay as they were. Repeat for any other entries you want gone.
Deleting an item removes it from the history only. If it is still the item you copied most recently, it may still be on the active clipboard until you copy something else. Copy a harmless word to replace it.
Reference:
https://support.microsoft.com/en-us/windows/using-the-clipboard-30375039-ce71-9fe4-5b30-21b7aab6b13f
Summary
Clearing clipboard history in Windows 11 protects privacy and maintains system organization through Settings, the Windows key + V shortcut, or manual item deletion. Use Settings or Clear all when you want a clean slate, and delete single items when you only need to remove one sensitive entry. Remember that pinned items survive a full clear, and none of these steps needs a restart.
Have a question about this guide?
Answered by AI from this guide. Good questions may be added to this page — please don't include personal details.
Did this guide fix your problem?

About the Author
Richard
Tech Writer, IT Professional
Richard is a writer at Geek Rewind who turns complex IT tasks into clear, step-by-step guides. He draws on years of hands-on experience in system administration and enterprise IT operations, focusing on Windows, Linux and WordPress: the problems people actually run into, and the fixes that work. His server and WordPress guides come from systems he runs himself. Richard builds and maintains the platform behind Geek Rewind, from its Ubuntu servers and Nginx configuration to its custom WordPress plugins. Many new tutorials start with readers' questions, and he's always glad to answer them in the comments.
No comments yet — be the first to share your thoughts!