How to Change Hard Disk Idle Timeout in Windows 11
Windows 11 can automatically turn off your hard disk when it hasn’t been used for a little while. This helps save power and makes your laptop battery last longer.
But, when the hard disk is turned off, it might take a few seconds for your apps to start working again because the disk needs to “wake up.”
If a short wait isn’t a problem for you, you can change this setting to save energy. Here’s an easy guide to help you change the hard disk idle timeout in Windows 11.
You change the hard disk idle timeout in Windows 11 through the Control Panel’s Power Options. Navigate to Hardware and Sound, then Power Options, select your active power plan, and adjust the “Turn off hard disk after” setting under advanced power options. This controls when your hard drive spins down to save energy.
What is Hard Disk Idle Timeout?
This is the time Windows waits before turning off the hard disk when it’s not being used. It only works with traditional hard drives (HDDs) and does not affect SSDs or faster drives like NVMe.
Steps to Change Hard Disk Idle Timeout in 🪟 Windows 11
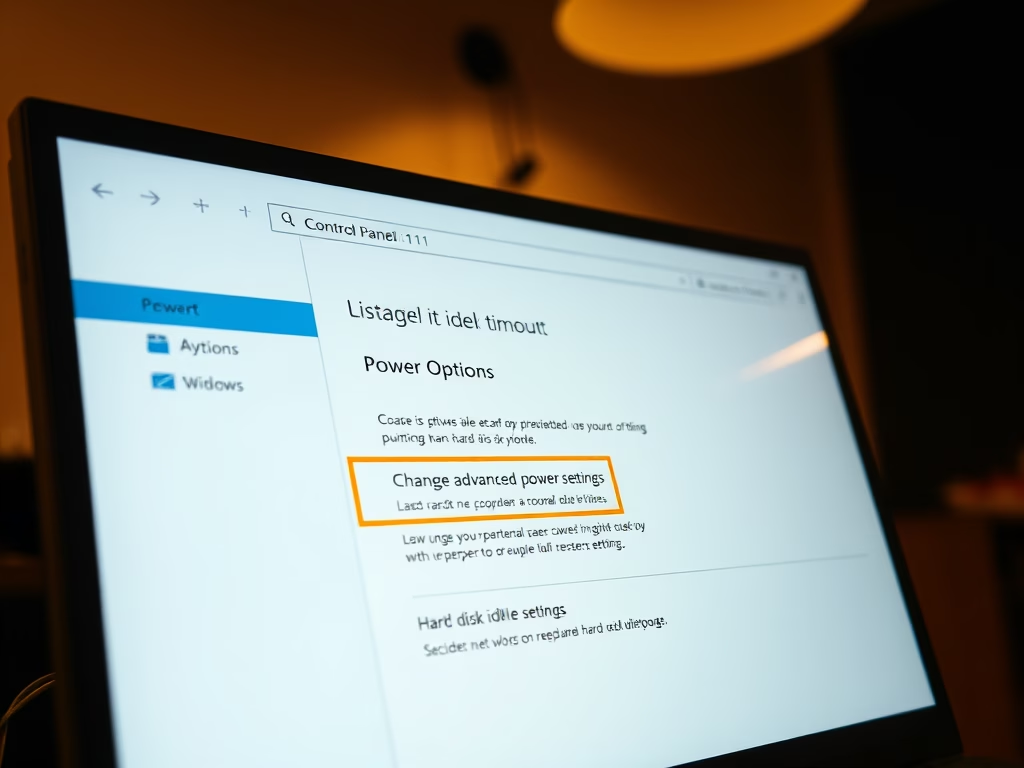
- Open Control Panel:
Click the Start button and type Control Panel, then press Enter.
Or you can follow this guide: How to Open Control Panel in Windows 11 - Go to Power Options:
In Control Panel, click on Hardware and Sound, then select Power Options.
CodeControl Panel → Hardware and Sound → Power Options
- Choose your current power plan:
Find the power plan that is marked as Active. Click the Change plan settings link next to it.
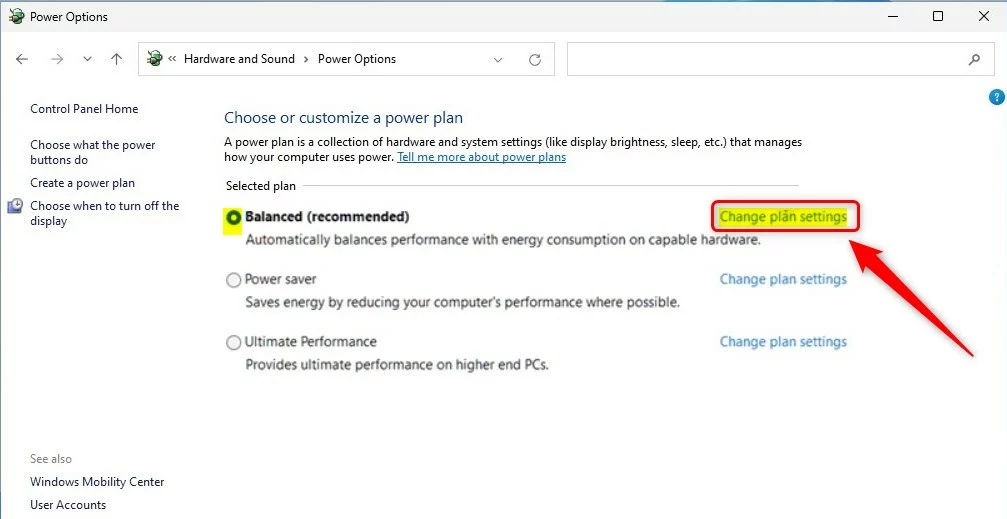 Click “Change plan settings” next to your active power plan
windows 11 change power plan settings link - Open advanced power settings:
Click on Change advanced power settings.
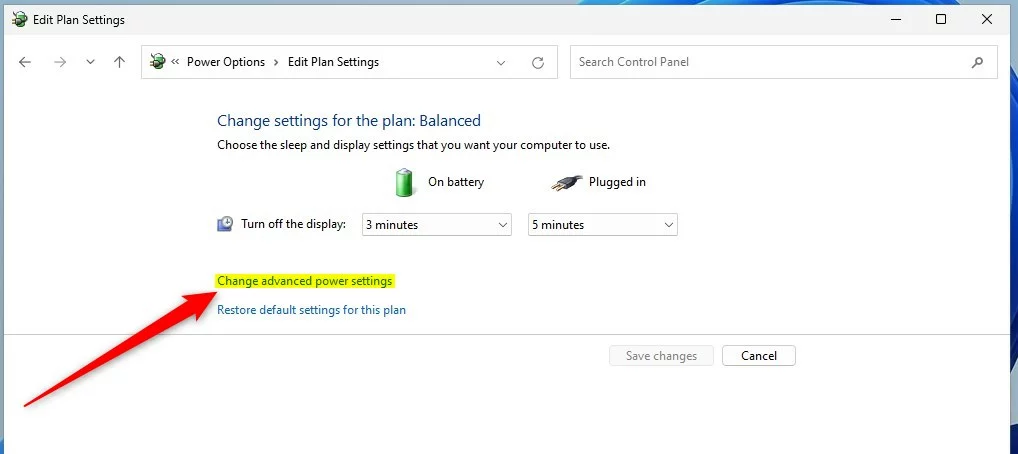
windows 11 change advanced power settings control panel Click “Change advanced power settings” - Adjust the hard disk settings:
- In the pop-up window, scroll down and click the plus sign (+) next to Hard disk.
- Click the plus sign (+) next to Turn off hard disk after.
- Set the time (in minutes) for On battery and Plugged in. For example, you can change it to 10 minutes on battery and 20 minutes plugged in.
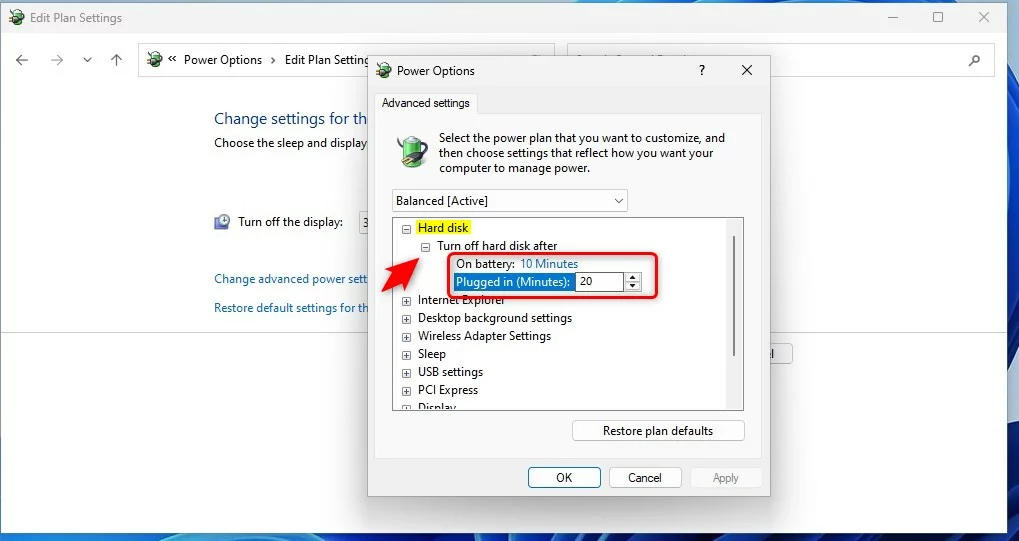
windows 11 hard drive turn off hard disk after Set how many minutes before Windows turns off the hard disk - Save your changes:
Click OK to save and close the window.
You can now close the Control Panel or Settings app.
Important Notes
- This setting only works for traditional hard drives (HDD). It does not affect SSDs or NVMe drives.
- If you set the timeout too short, your hard disk might turn off too often, causing small delays when accessing files.
Summary
- Windows 11 can turn off your hard disk after a set time to save power.
- You can change this timeout using the Control Panel’s Power Options.
- This helps save battery life but may cause slight delays when the disk wakes up.
For more info, you can visit the official Microsoft page:
Microsoft Disk Idle Timeout Settings
Was this guide helpful?

About the Author
Richard
Tech Writer, IT Professional
Richard, a writer for Geek Rewind, is a tech enthusiast who loves breaking down complex IT topics into simple, easy-to-understand ideas. With years of hands-on experience in system administration and enterprise IT operations, he’s developed a knack for offering practical tips and solutions. Richard aims to make technology more accessible and actionable. He's deeply committed to the Geek Rewind community, always ready to answer questions and engage in discussions.


No comments yet — be the first to share your thoughts!