How to Backup and Restore Microsoft Defender Firewall in Windows 11
Backing up and restoring Microsoft Defender Firewall rules in Windows 11 lets you save and reapply your custom security settings.
Microsoft Defender Firewall is Windows’ own tool that watches and manages your computer’s network traffic to keep it safe from online dangers.
This feature is great for people who have set up specific rules, like blocking unwanted websites or letting certain games connect online, saving you lots of time later.
You can export your current firewall setup to a file. This makes it simple to put your security settings back on a new computer or after you reset Windows 11.
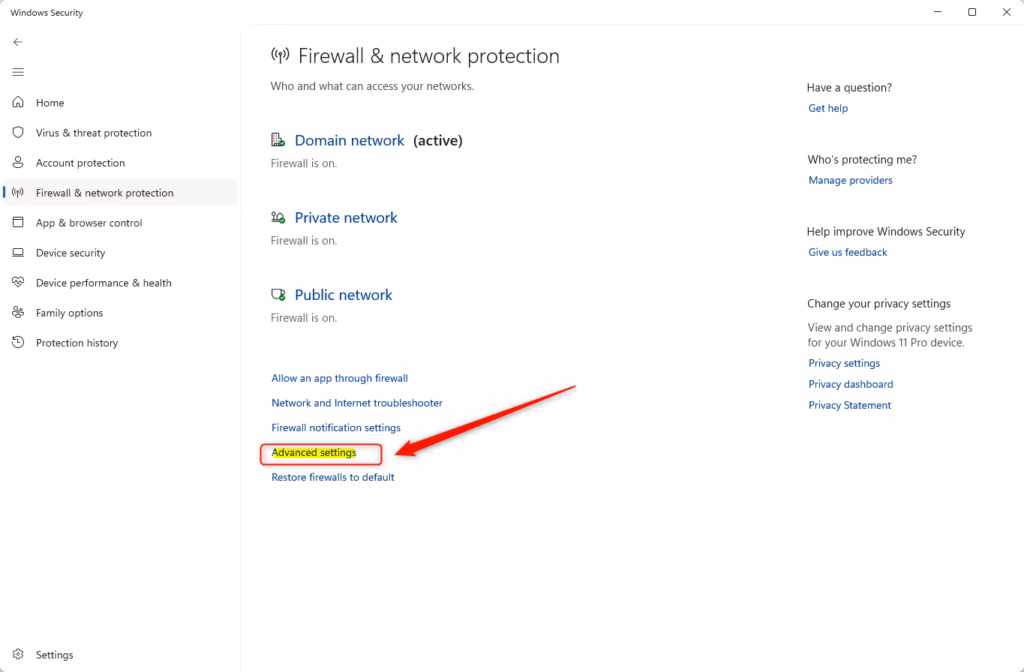
Export your firewall policy from Windows Defender Firewall with Advanced Security. Navigate to Firewall & network protection, then Advanced settings, and click Export Policy to save your configuration. To restore, return to Advanced settings and select Import Policy, choosing your saved backup file.
Why Back Up Your Firewall Settings?
Backing up your firewall keeps your security settings safe. If something goes wrong, you can restore them quickly. You won’t have to set up everything again from scratch.
Method 1Using Windows Security App
You can backup your Microsoft Defender Firewall settings using the Windows Security app on your Windows 11 computer. This lets you save a copy of your current firewall rules so you can easily restore them later if needed. It’s a straightforward way to keep your network protection settings safe.
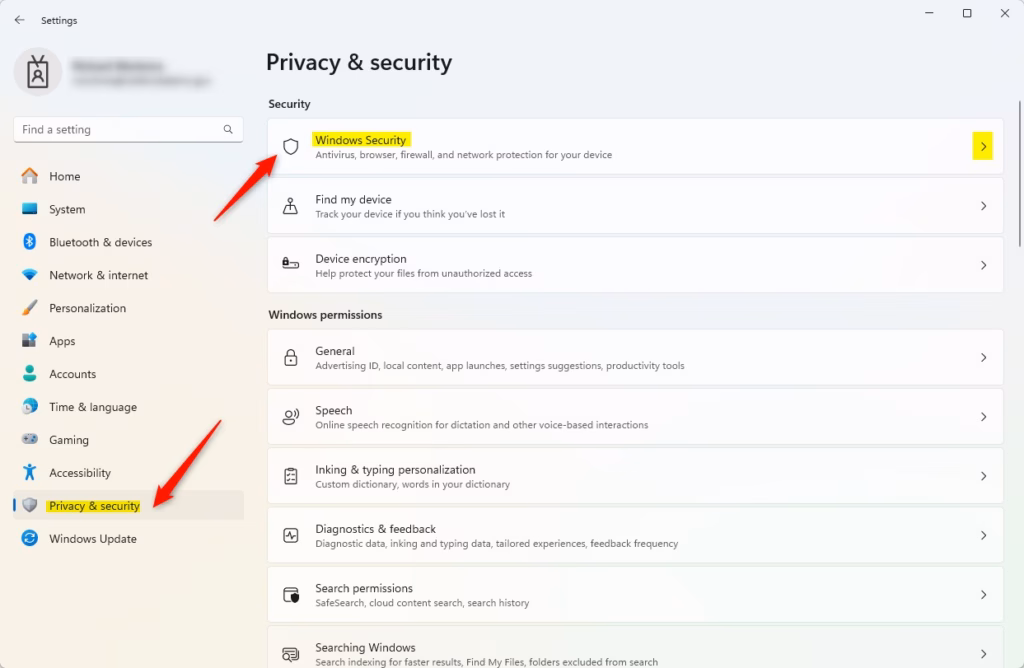
- Click the Start button (Windows icon), then click Settings.

- Click Privacy & security on the left side, then click Windows Security.
- Click the Open Windows Security button.
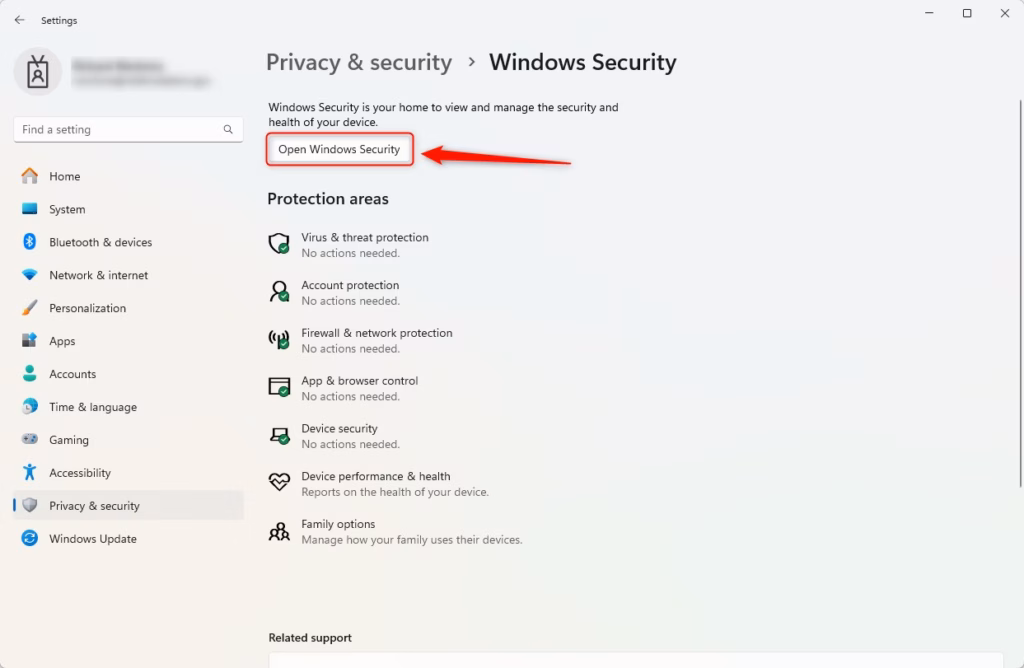
- In the Windows Security app, click Firewall & network protection. You can also open it with this link: Firewall & network protection.
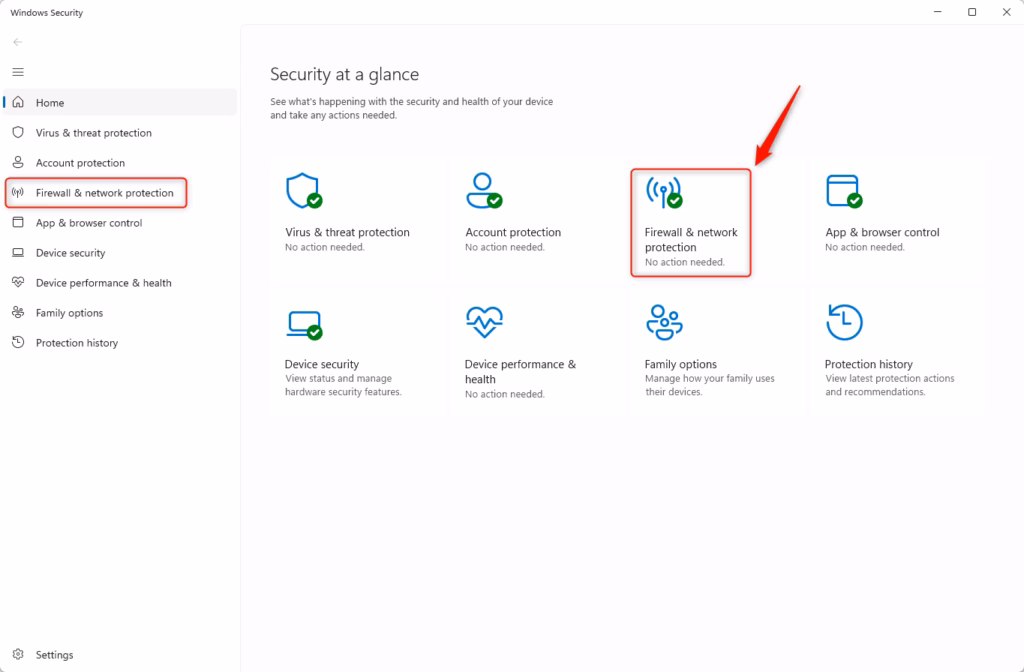
- Scroll down and click Advanced settings.
- A new window called Windows Defender Firewall with Advanced Security will open. On the right side, click Export Policy to save your settings.
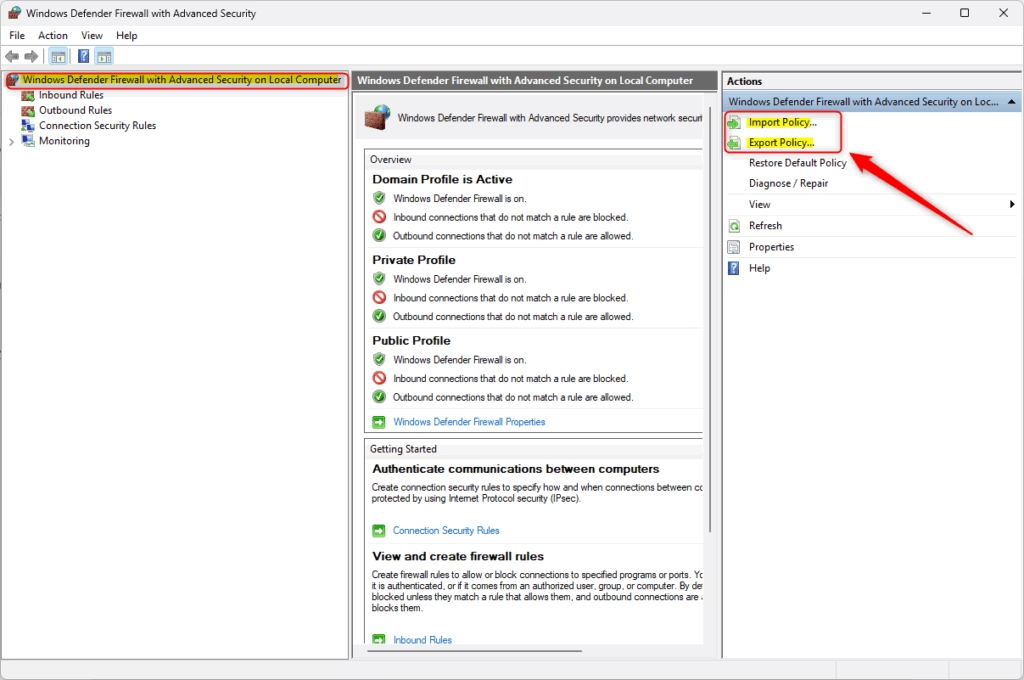
- Choose where you want to save the file (like your Desktop). Type a name like
FirewallBackup.wfw. Click Save.
What Happens After You Export?
Your firewall settings are now saved in a file. You can keep this file safe and use it later if you need to.
How to Restore Your Settings
Method 2Using Command Prompt
If you like typing commands, you can use this method instead.
- [ADMIN REQUIRED] Open Windows Terminal as administrator. Click Start, type
Windows Terminal, right-click it, and choose Run as administrator. - Make sure you are in the Command Prompt or PowerShell tab.
To Backup Your Firewall Settings
Type this command and press Enter:
netsh advfirewall export "%userprofile%\Desktop\FirewallBackup.wfw"This saves your backup file on your Desktop.
To Restore Your Firewall Settings
Type this command and press Enter (change the path if your file is somewhere else):
netsh advfirewall import "%userprofile%\Desktop\FirewallBackup.wfw"Your firewall settings are now restored.
Summary
Backing up your firewall settings is a smart move that protects your computer and saves you time if you ever need to fix issues or set up a new PC.What is 3 2 1 backup configuration?
The 3-2-1 backup rule is a simple way to protect your important files by keeping three copies of your data, storing them on two different types of devices, and making sure one copy is kept somewhere else, like online or at another location.
How to save firewall settings?
Log in to the firewall with an administrative account that has the role privileges required to save the desired changes. Select ConfigSave Changes at the top of the web interface. Select Save Changes Made By. To filter the Save Scope by administrator, click , select the administrators, and click OK.
Was this guide helpful?

About the Author
Richard
Tech Writer, IT Professional
Richard, a writer for Geek Rewind, is a tech enthusiast who loves breaking down complex IT topics into simple, easy-to-understand ideas. With years of hands-on experience in system administration and enterprise IT operations, he’s developed a knack for offering practical tips and solutions. Richard aims to make technology more accessible and actionable. He's deeply committed to the Geek Rewind community, always ready to answer questions and engage in discussions.


No comments yet — be the first to share your thoughts!