How to Change Sleep Button Function in Windows 11

The sleep button function in Windows 11 controls what happens when you press the physical power button on your computer case or laptop. By default, pressing this button puts your system into sleep mode, but Windows lets you change it to shut down, hibernate, turn off the screen, or do nothing.
You can adjust this power setting in less than one minute through the classic Control Panel . Setting the button to shut down your PC completely gives you a quick physical way to turn off your system without opening the Start menu .
Change the sleep button function in Windows 11 by opening Settings (Win+I), navigating to System Power & battery, then Power button and lid. Select your preferred action from the dropdown menu for “Pressing the sleep button will make my PC.
What Is the Sleep Button?
The sleep button Windows 11 feature is a dedicated hardware or keyboard shortcut that pauses your computer’s activity and switches it to a low-power state instead of shutting it down completely. This standby mode saves electricity while keeping your open apps and files exactly where you left them, letting you resume work instantly when you press any key to wake the machine.
The computer's sleep button pauses device operation without a full shutdown, saving power. This action reduces energy use by lowering system activity.
How to Change What the Sleep Button Does
Windows 11 makes this easy. You can change the sleep button settings right in the Settings app . No need to dig through old menus.
Follow These Simple Steps:
- Open Settings
To change the sleep button Windows 11 action, you need to open the classic Control Panel power options via the main settings menu. While the modern Settings app handles basic tasks, assigning a custom action like shutting down or turning off the display requires navigating through the older hardware power plans, which gives you full control over what happens when you press the physical power or sleep key.
- Find System Settings
In the Settings window, click System on the left side.
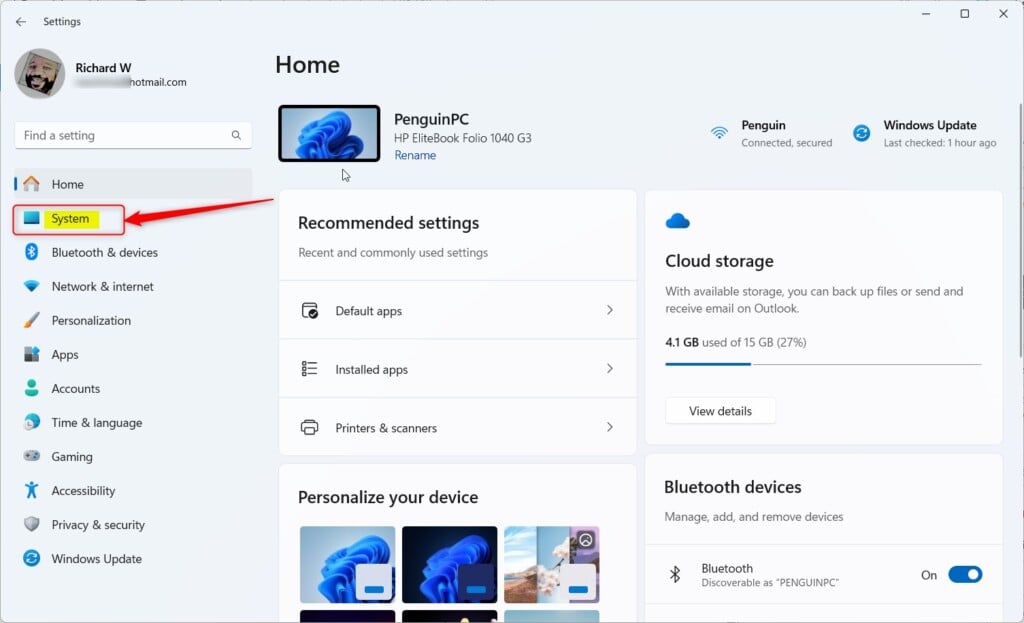
Windows 11 System button in Settings - Go to Power Settings
Click on Power & battery or just Power on the right side.
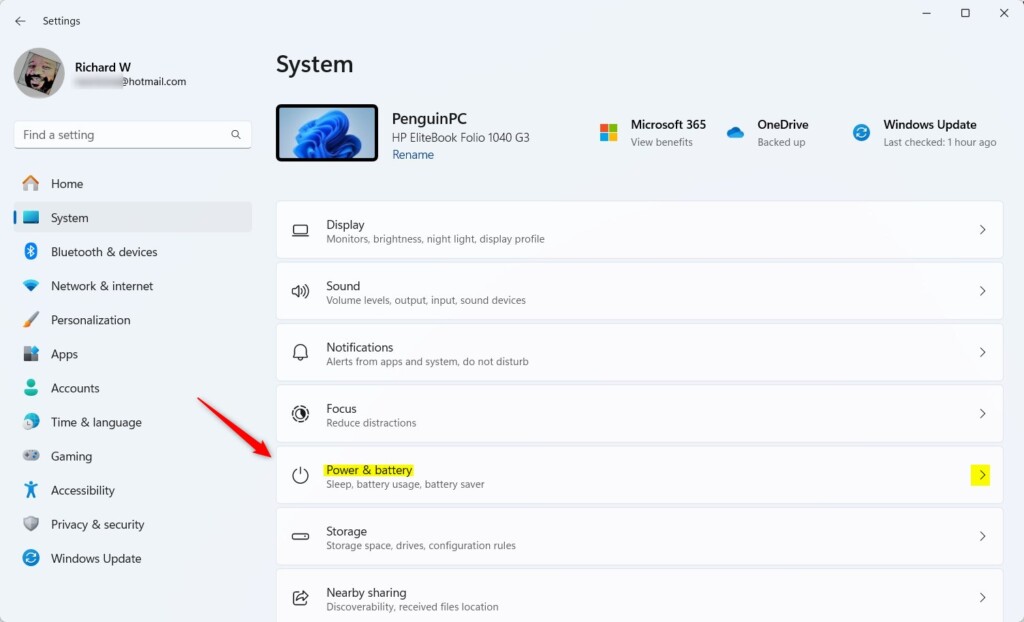
Windows 11 Power and Battery settings - Find the Sleep Button Controls
Scroll down to find the section called "Lid, power & sleep button controls". Click it to expand the options.
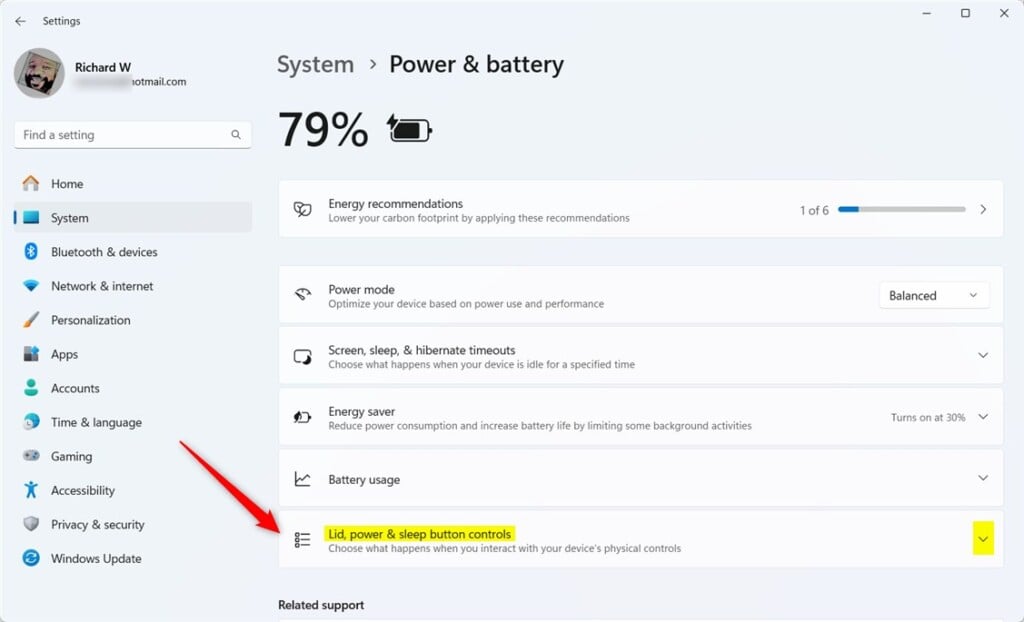
Lid, power & sleep button settings - Select Your Preference⚠️WarningLook for the option that says "Pressing the sleep button will make my PC".
You'll see this for both "Plugged in" and "On battery" modes. Click the dropdown to see your choices.
- Pick What You Want
Choose one of these options:
- Do Nothing — pressing the button won't do anything
- Sleep — puts your PC to sleep (this is the default)
- Hibernate — saves your work and turns off the PC
- Shutdown — turns off your PC completely
- Display Off — turns off the screen only
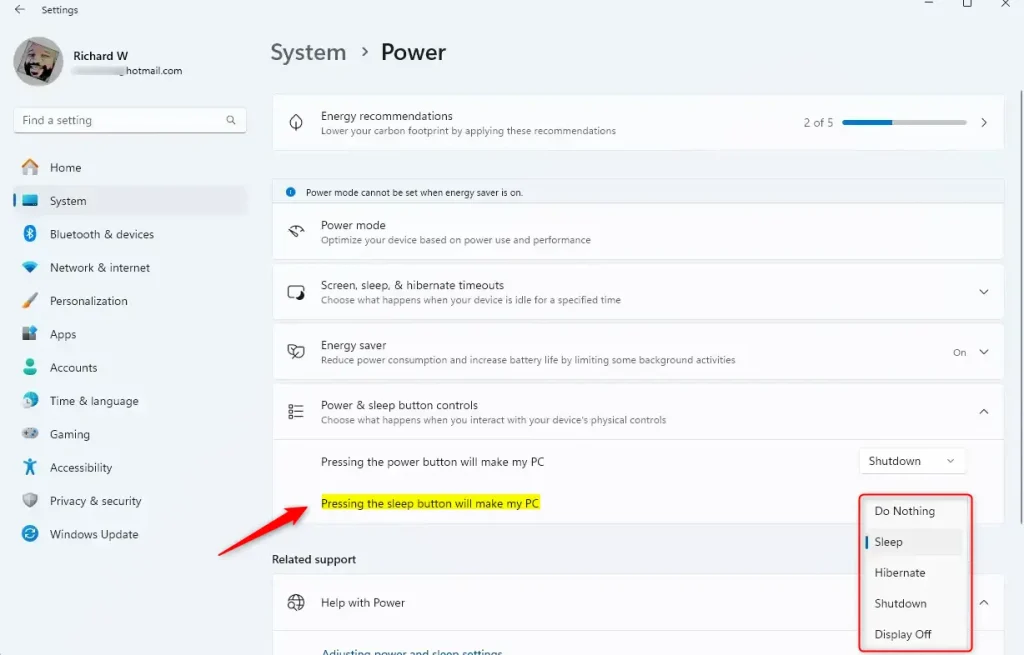
Sleep button behavior options in Windows 11 - Close Settings⚠️WarningClose the Settings app when you're done.
Your changes save automatically.
Why Change the Sleep Button?
Changing the sleep button Windows 11 behavior is helpful if your desktop computer or laptop frequently freezes or fails to wake up properly from standby mode. Customizing this physical button lets you avoid bugs related to modern standby, switch to a safer hibernate state, or turn off the screen without putting the core hardware to sleep, making your daily computer use much more reliable.
What happens when you customize it? Your sleep button now works exactly how you want. You get a computer that behaves the way you prefer.
Summary
Changing your sleep button function in Windows 11 is simple: open Settings, go to Power & battery, find the Power button and lid options, and choose from actions like Sleep, Hibernate, Shutdown, Display Off, or Do Nothing.
Have questions or tips to share? Leave a comment below!
Was this guide helpful?

About the Author
Richard
Tech Writer, IT Professional
Richard is a writer at Geek Rewind who turns complex IT tasks into clear, step-by-step guides. He draws on years of hands-on experience in system administration and enterprise IT operations, focusing on Windows, Linux and WordPress: the problems people actually run into, and the fixes that work. His server and WordPress guides come from systems he runs himself. Richard builds and maintains the platform behind Geek Rewind, from its Ubuntu servers and Nginx configuration to its custom WordPress plugins. Many new tutorials start with readers' questions, and he's always glad to answer them in the comments.




No comments yet — be the first to share your thoughts!