How to Share Wi-Fi Password using QR Code on Windows 11

You can share your Wi-Fi password with a QR code directly from Windows 11.
This new feature, available on Windows 11 starting with version 24H2, lets you generate a scannable QR code that contains your network’s name (SSID) and password.
Instead of manually typing a long, complex password, your guests can simply scan this code with their smartphone or tablet. Their device will automatically read the information and connect them to your Wi-Fi network instantly.
This method is incredibly convenient for quickly granting access to friends, family, or visitors without any fuss or potential for typos.
How to Share Your Wi-Fi Password with a QR Code
Here’s how to do it in just a few simple steps.
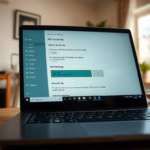
- Open the Settings app. You can do this by clicking the Start menu and selecting Settings. Or press Windows key + I on your keyboard. Windows Settings Settings app
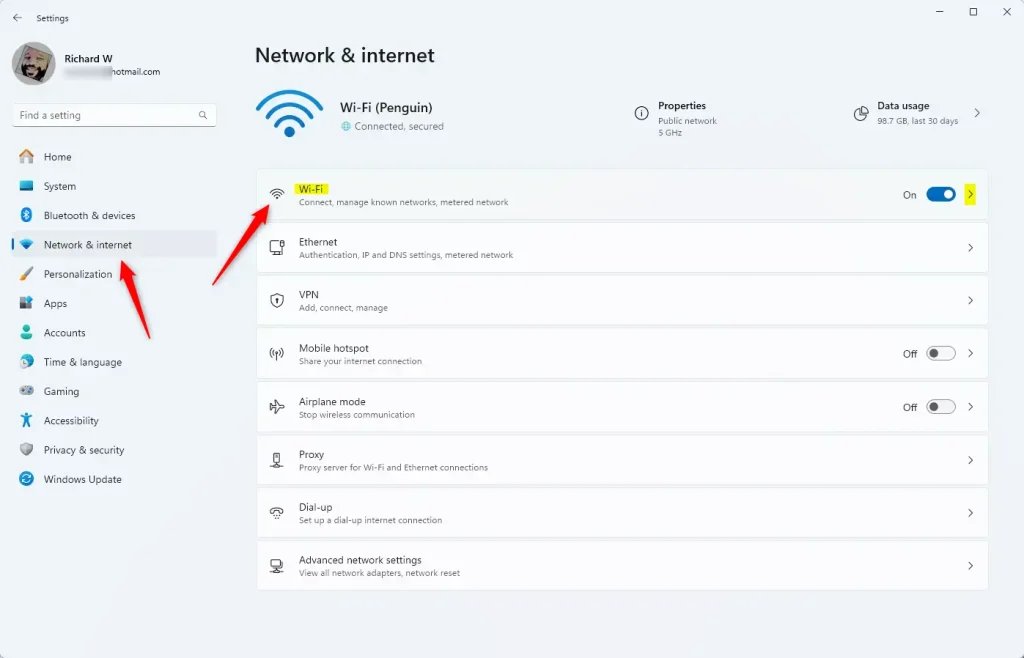
- Click on Network & internet on the left side.
- Click on the Wi-Fi section on the right to expand it.
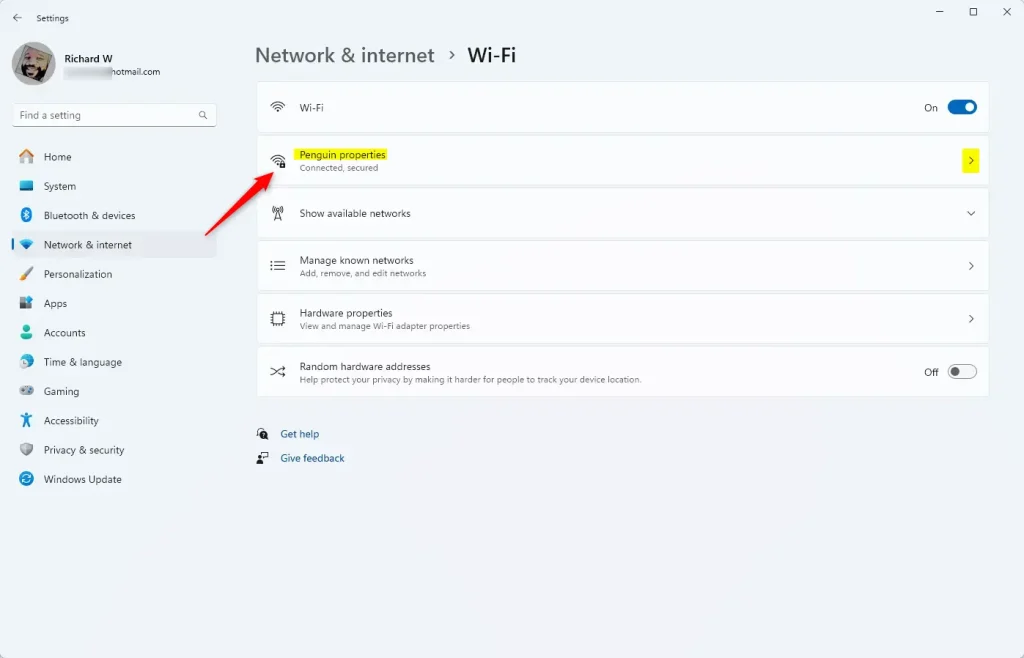
- Find the Wi-Fi network you’re connected to. Click on it to see its properties.
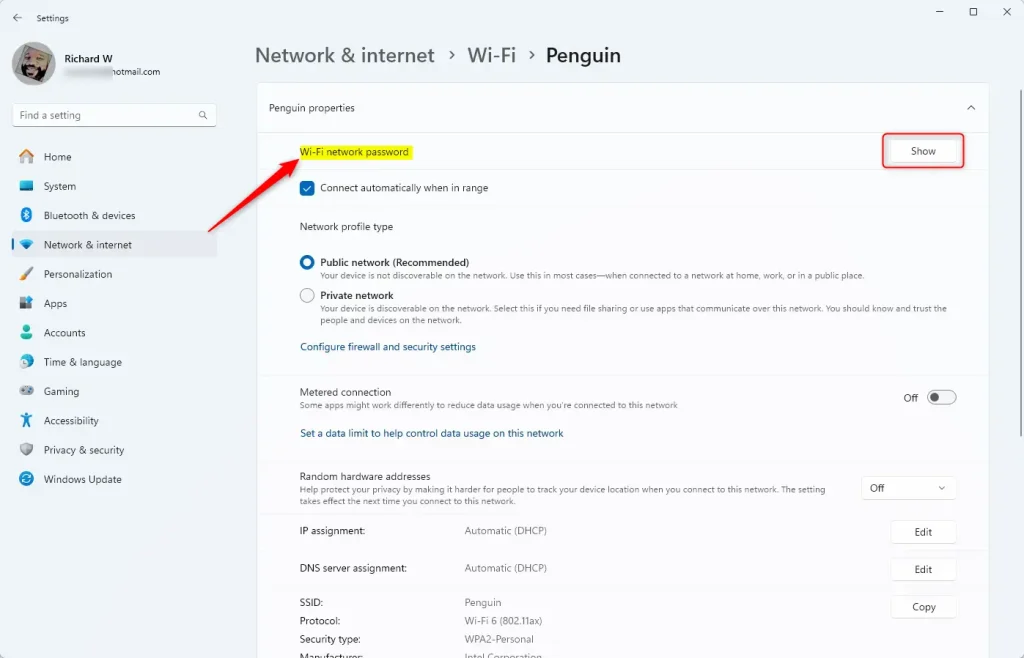
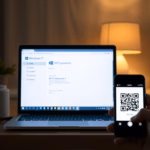
- Look for the Wi-Fi network password section. Click the Show button.
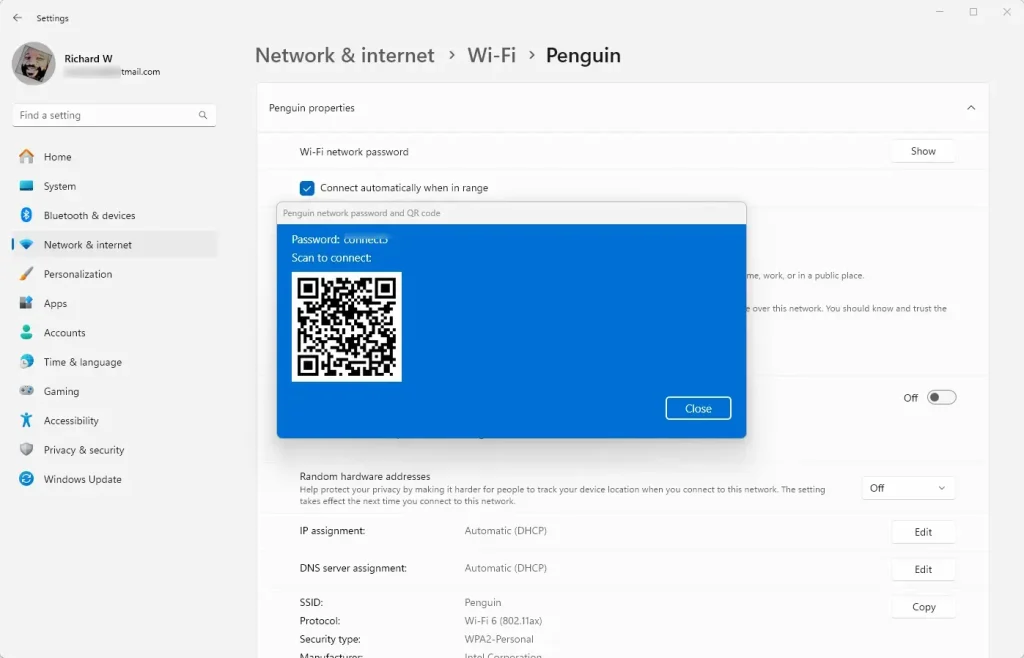
- A QR code will appear on your screen. Ask your guests to scan this code with their phone camera or QR code scanner app.
- Close the Settings app when you’re finished.
Summary
Sharing Wi-Fi passwords with QR codes in Windows 11 is simple and convenient. The feature came with Windows 11 version 24H2. You open Settings, go to your Wi-Fi network, and click Show next to the password. A QR code appears. Your guests scan it with their phones and connect automatically. No complicated passwords to type. This makes sharing Wi-Fi with guests and other devices much easier.
Frequently Asked Questions
How do I share my Wi-Fi password using a QR code on Windows 11?
What is the benefit of using a QR code to share Wi-Fi passwords?
Is the QR code feature available in all versions of Windows 11?
Can I generate a QR code for any Wi-Fi network on Windows 11?
What should I do if the QR code does not work?
Was this guide helpful?

About the Author
Richard
Tech Writer, IT Professional
Richard, a writer for Geek Rewind, is a tech enthusiast who loves breaking down complex IT topics into simple, easy-to-understand ideas. With years of hands-on experience in system administration and enterprise IT operations, he’s developed a knack for offering practical tips and solutions. Richard aims to make technology more accessible and actionable. He's deeply committed to the Geek Rewind community, always ready to answer questions and engage in discussions.


No comments yet — be the first to share your thoughts!