How to View and Stop Sharing OneDrive Files
You can view and stop sharing OneDrive files directly through the OneDrive web interface.
OneDrive is Microsoft’s cloud storage service that synchronizes files across your devices, with deep integration in Windows 11 via File Explorer.
Sharing files and folders is a powerful collaboration tool, but it’s crucial to manage who has access to your data. Regularly reviewing shared links and permissions prevents unintended access to sensitive information.
This process ensures your privacy and security by letting you revoke access for anyone you no longer want to share with, even after you’ve initially granted it.
Access the OneDrive web portal, click “Shared” in the left menu, and then select “Shared by you” to view files. To stop sharing, select the file, click “Manage Access,” and then remove specific people or delete sharing links.
How to See Your Shared Files
You can see everything you have shared by using the web version of OneDrive.
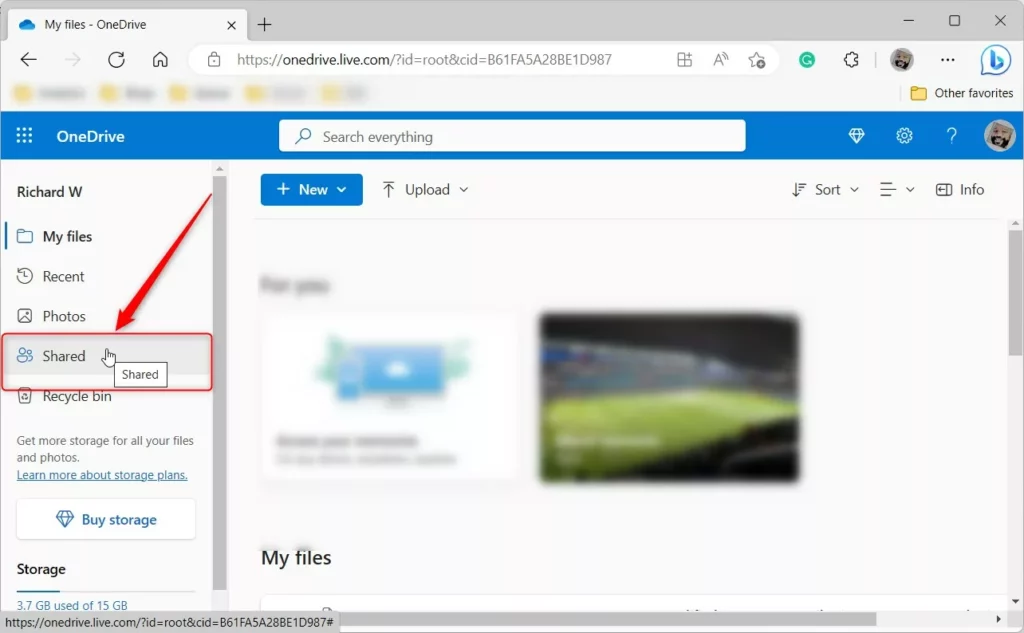
- Go to your Microsoft OneDrive portal online and sign in.
- Click the Shared link in the menu on the left side of your screen.
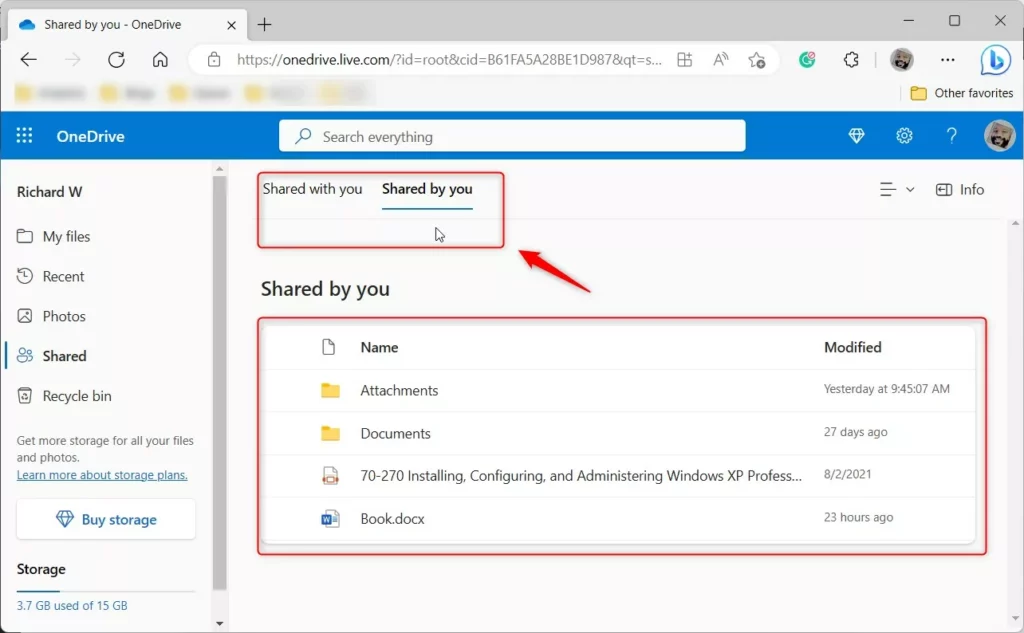
- Click the Shared by you link at the top of the page. This shows only the files you have given others permission to see.
How to Stop Sharing Files
If you find a file you no longer want to share, you can stop access in a few clicks. You do not need admin privileges for these web-based steps.
- Navigate to your Microsoft OneDrive portal and select Shared, then Shared by you.
- Find the file or folder you want to stop sharing.
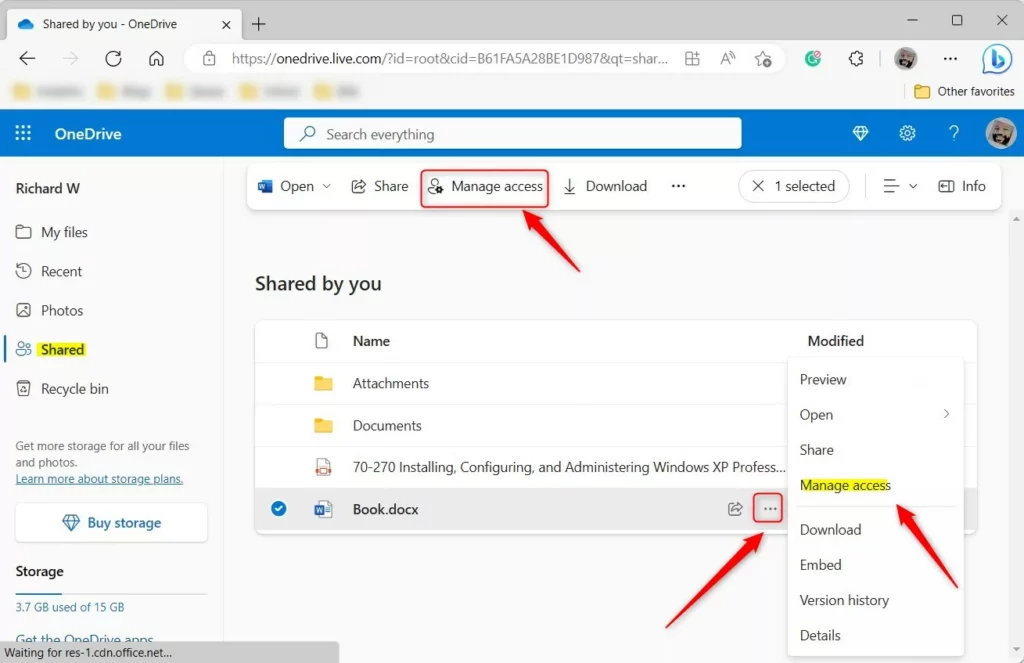
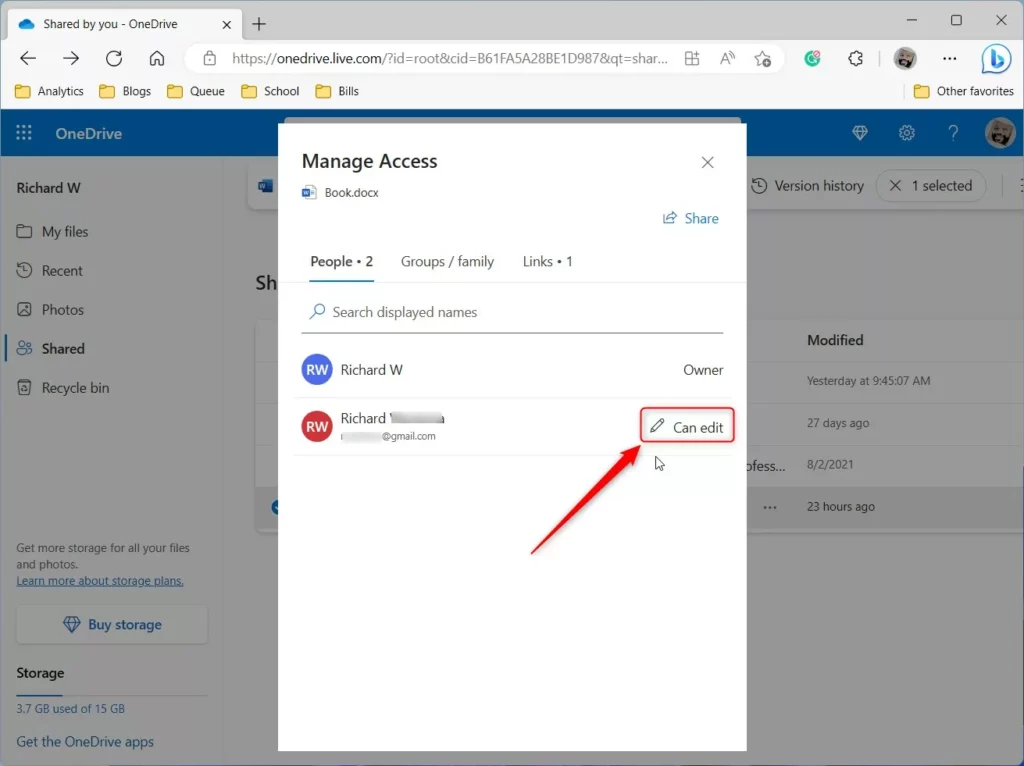
- Select the item and click Manage Access in the top menu, or click the three dots and choose Manage access.
- In the window that pops up, click the People link. Click the Pencil icon to see who has access.
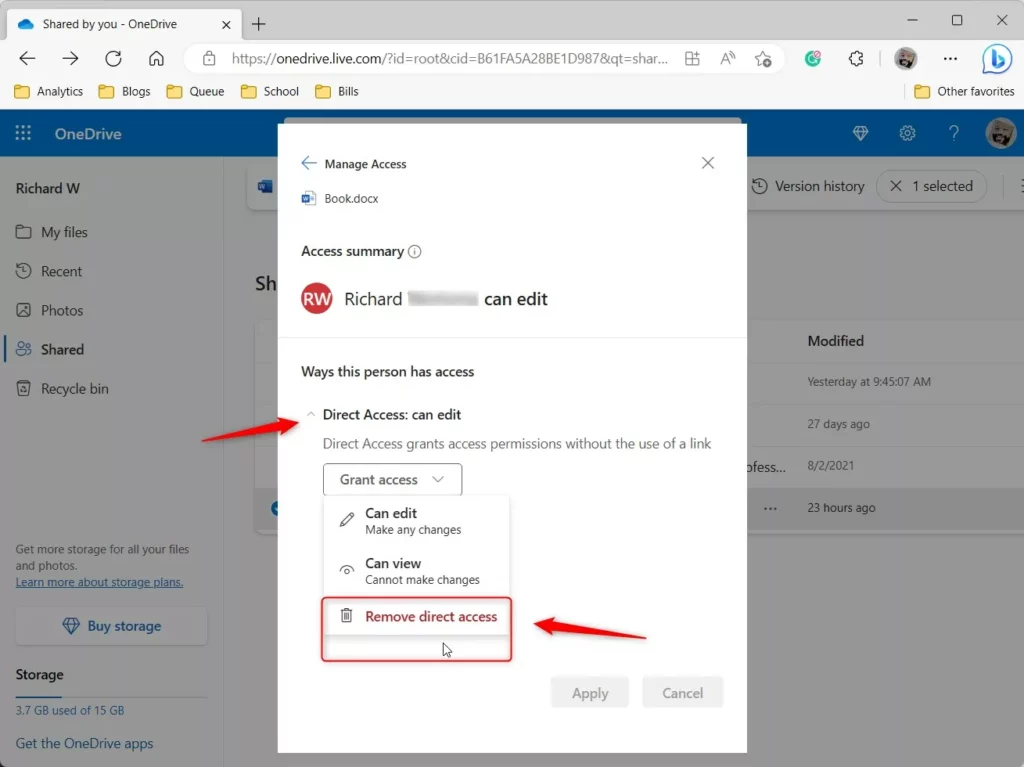
- Click Direct Access to see the list of people. Select Remove direct access for anyone you want to block.
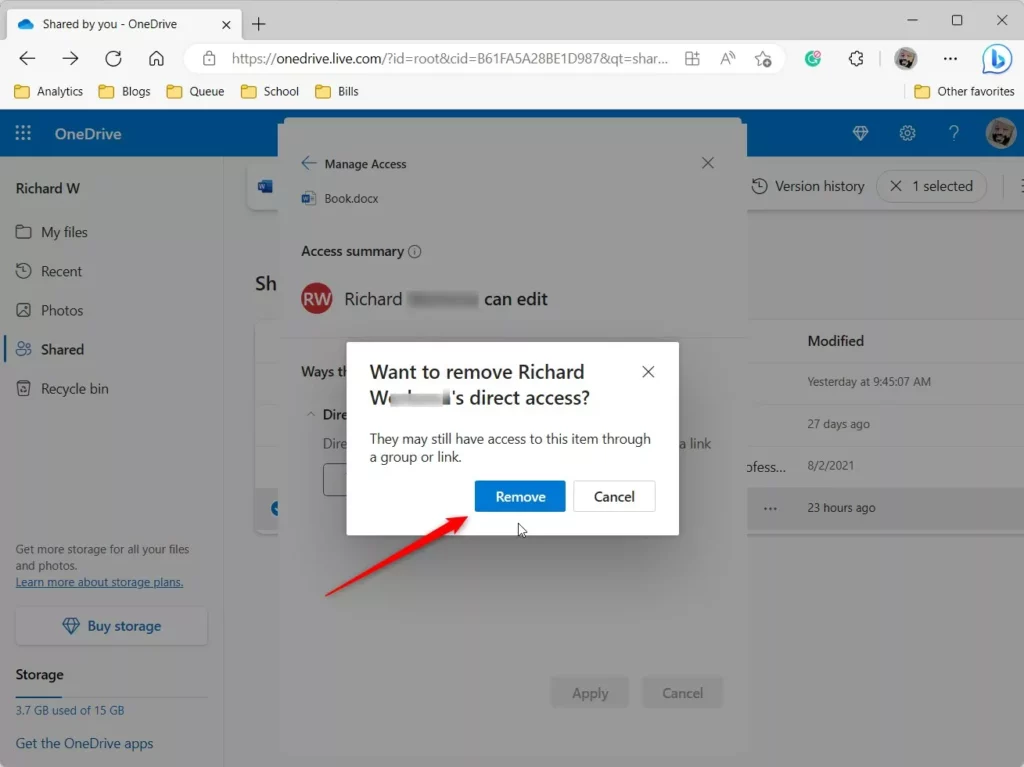
- Click Remove to confirm your choice.
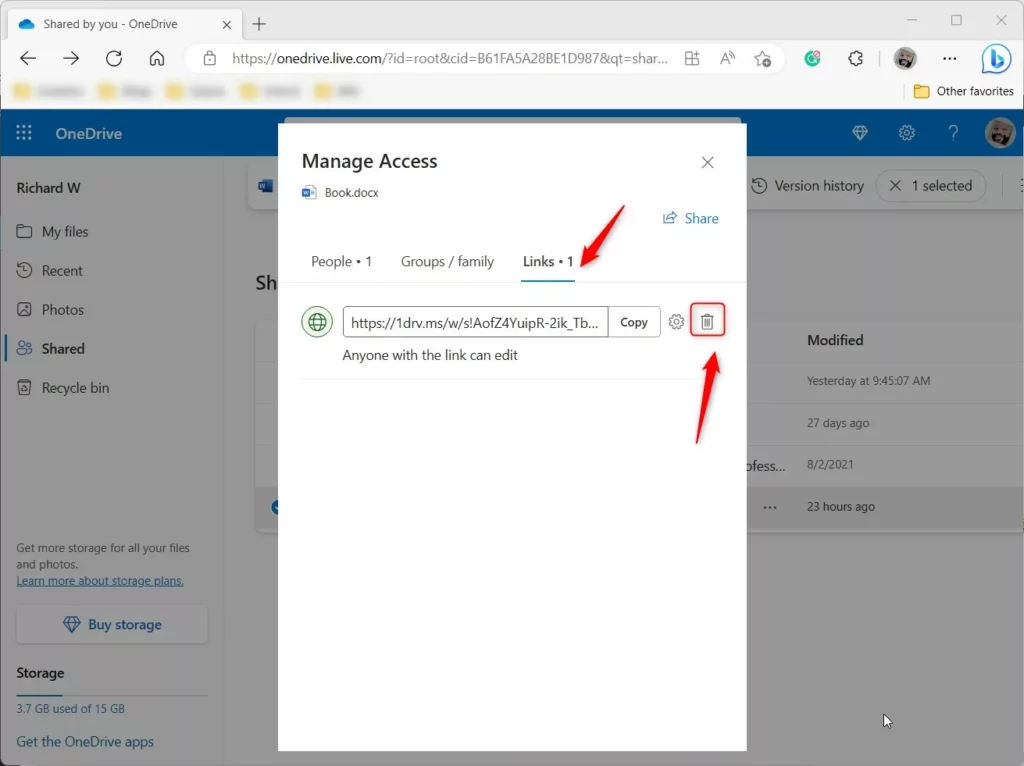
- Finally, click the Links tab in that same window and click the Delete button to kill the sharing link entirely.
Understanding Permission Inheritance and Subfolders
When you share a folder, everything inside it is shared by default. This is known as permission inheritance, meaning permissions flow down. If you add a new file to a shared folder, others can see it right away. To stop sharing a specific sub-item, you must go into that file’s individual Manage Access settings to break the inheritance.
Managing Access on Mobile Devices
You can also stop sharing files using the OneDrive mobile app. Open the app, tap the Shared tab, find the file, tap the three dots, and select Manage Access. From there, you can remove links or specific people just like you do on a computer.
Summary
Keeping your data private is important. By checking your “Shared by you” list in the OneDrive portal, you can see exactly what you have made public. If you no longer need to share a file, use the “Manage Access” menu to remove specific people or delete the sharing link to revoke access completely. Always remember that sharing a folder grants access to all sub-items unless you change those settings individually.
Related Topics
Can I stop sharing all files at once?
OneDrive does not currently offer a single button to stop sharing every file at once. You must review and revoke access on a per-file or per-folder basis to ensure you do not accidentally remove access to files you still need to collaborate on with your team.
What happens to the recipient when I stop sharing?
When you stop sharing, the recipient will no longer see the file in their “Shared” view. If they try to open a direct link to the file, they will receive an error message stating that the item no longer exists or they no longer have permission to view it.
Was this guide helpful?

About the Author
Richard
Tech Writer, IT Professional
Richard, a writer for Geek Rewind, is a tech enthusiast who loves breaking down complex IT topics into simple, easy-to-understand ideas. With years of hands-on experience in system administration and enterprise IT operations, he’s developed a knack for offering practical tips and solutions. Richard aims to make technology more accessible and actionable. He's deeply committed to the Geek Rewind community, always ready to answer questions and engage in discussions.

[…] files, and folders with people using Windows File Explorer. Once a resource is shared, you can manage access and remove or stop files and folder sharing, even […]