How to Change Startup App Notification Priority in Windows 11
You can change startup app notification priority in Windows 11 to control how prominently these alerts appear.
Windows 11 displays notifications for new apps that automatically launch on startup. Adjusting their priority means you decide if they’re a gentle hint or a more insistent pop-up.
This ensures you see important startup app alerts without being overwhelmed. You can set their importance level within the system settings.
Change startup app notification priority in Windows 11 by going to Settings > System > Notifications. Turn on “Startup App Notification” and select your desired priority level: Top, High, or Normal. This controls how prominently these alerts appear in the Notification Center.
What is Startup App Notification?
Startup app notifications in Windows 11 let you know when an app decides to launch itself as soon as your computer turns on.
Why would you want this? It helps you stay aware of which apps are loading at startup. This can help you manage your computer’s performance and security.
You can choose how important these notifications are. There are three priority levels:
- Normal: Shows below high priority notifications.
- High: Shows above normal priority notifications.
- Top: Always shows at the very top in the Notification Center.
Steps to Change Startup App Notification Priority in 🪟 Windows 11
- Open Settings by pressing Windows key + I on your keyboard.

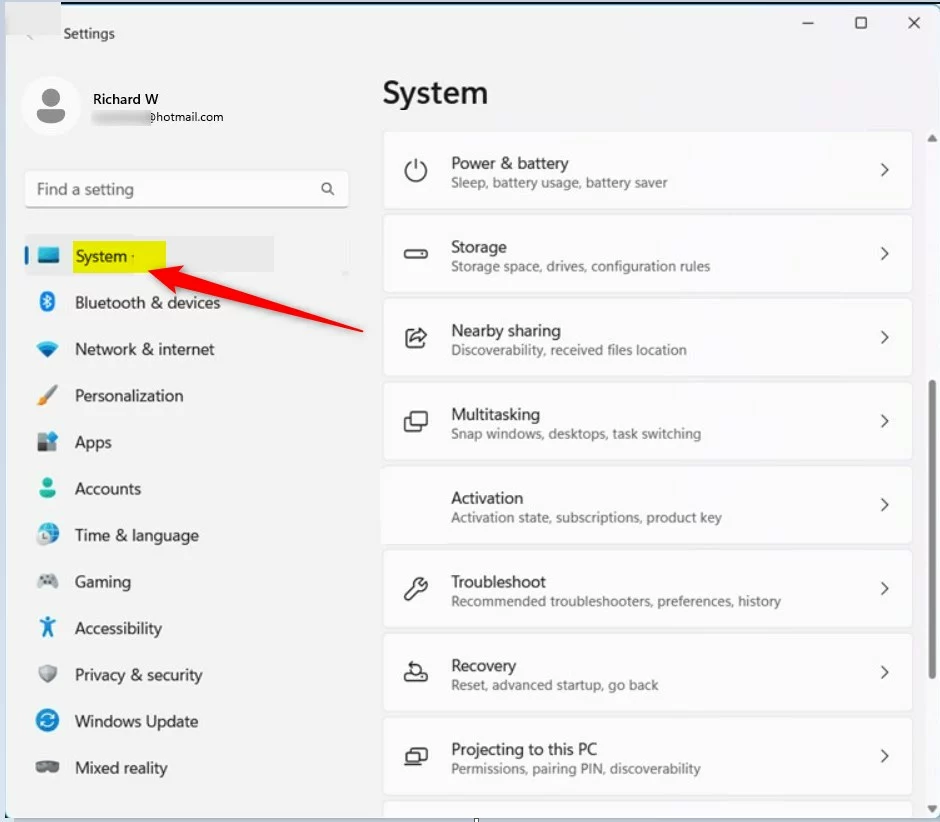
windows 11 new settings button - In the Settings window, click on System from the left menu.
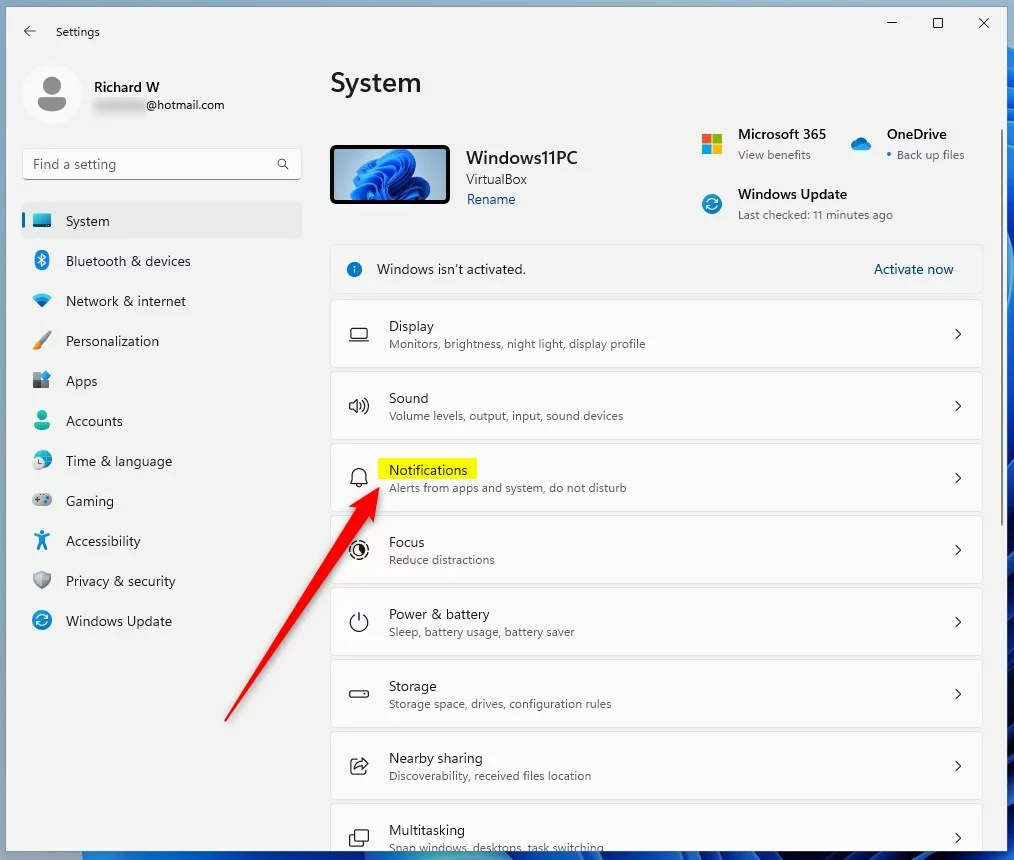
windows 11 system in settings app - On the right side, find and click on Notifications.
windows 11 system notifications tile - Scroll down to Notifications from apps and other senders and click on Startup App Notification to open its settings.
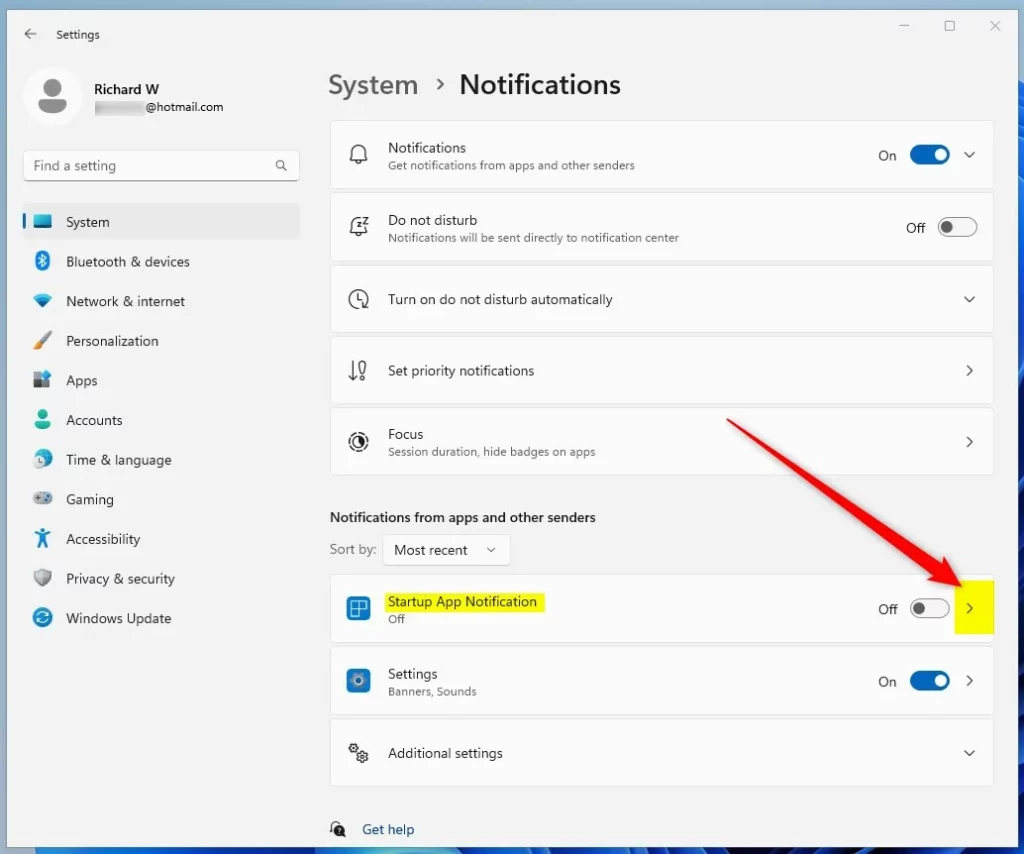
windows 11 startup app notification tile expand - Turn on the notification by clicking the switch at the top.
- Choose the priority level you want:
- Top: Notifications appear at the very top.
- High: Notifications appear above normal priority.
- Normal: Notifications appear below high priority.
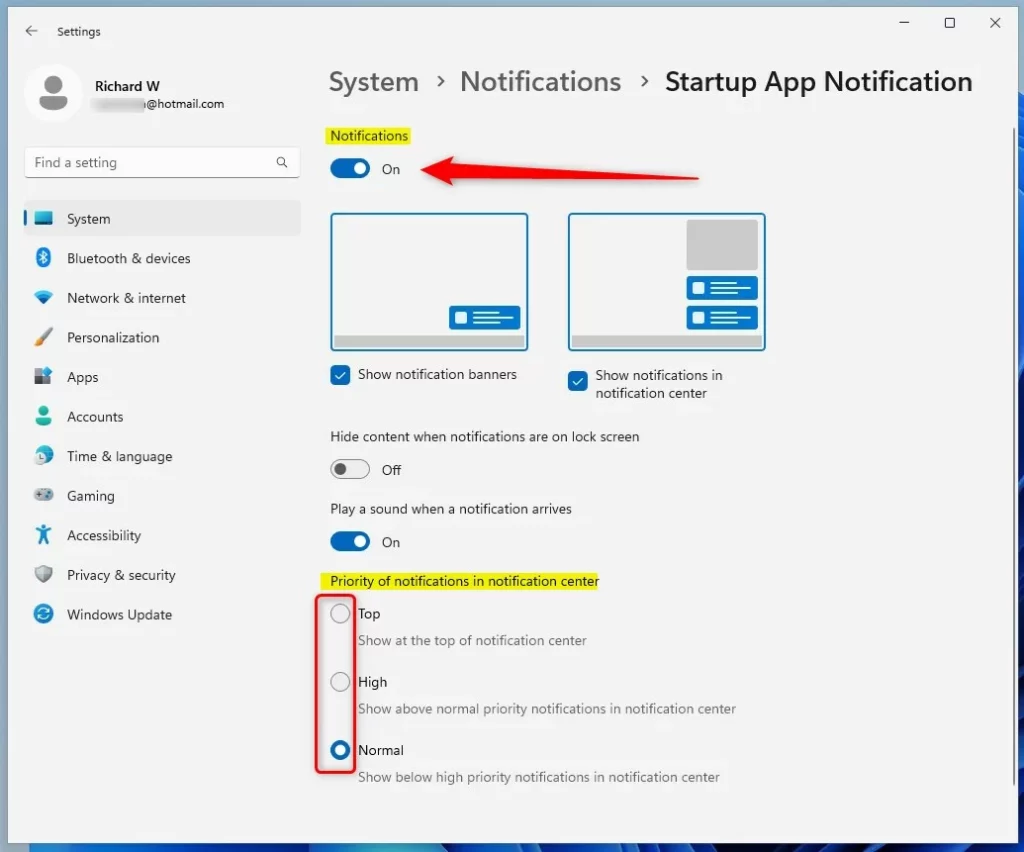
windows 11 startup app notification priority options Changing the Windows 11 notification priority for startup apps is simple and can be done right in your Settings.
- When done, close the Settings window. Your changes will be saved automatically.
What happens when you change this? Windows will show Startup App Notifications at your chosen priority level. Higher priority notifications appear first and are harder to miss.
Want to learn more? Check out how to enable or disable Startup App Notification in Windows 11.
Summary
- Windows 11 can notify you when apps set themselves to start automatically.
- You can set the notification priority to Top, High, or Normal to decide where they appear.
- Changing this is easy and done through the System Settings.
- Use the steps above to make notifications work best for you.
Windows 11 lets you control how important startup app notifications are, choosing from Top, High, or Normal priority.
How do you change the priority in win11?
You can change the priority of a running process in Windows 11 by going to its details.
Was this guide helpful?

About the Author
Richard
Tech Writer, IT Professional
Richard, a writer for Geek Rewind, is a tech enthusiast who loves breaking down complex IT topics into simple, easy-to-understand ideas. With years of hands-on experience in system administration and enterprise IT operations, he’s developed a knack for offering practical tips and solutions. Richard aims to make technology more accessible and actionable. He's deeply committed to the Geek Rewind community, always ready to answer questions and engage in discussions.
No comments yet — be the first to share your thoughts!