How to Change PowerShell Execution Policies in Windows 11
Do you want to control how PowerShell runs scripts on your Windows 11 computer? This guide explains what execution policies are and shows you easy steps to change them.
What Are PowerShell Execution Policies?
PowerShell execution policies are rules that tell your computer when it’s safe to run scripts (small programs) in PowerShell. Why do these rules exist? They help prevent harmful scripts from running by accident.
You can set these rules for:
- Your whole computer (all users)
- Just your user account
- Only the current PowerShell window you’re using
Note: Execution policies are not full security locks. Someone can still run commands by typing them manually. But these policies help stop accidental or unsafe scripts from running.
Types of Execution Policies
Here are the common policies you can choose from:
- AllSigned — Only runs scripts signed by a trusted publisher. You’ll get asked if a script from a new source is allowed. This helps avoid running unsigned or unknown scripts.
- Bypass — No restrictions or warnings. Used when PowerShell runs inside another app that handles security.
- Default — No restrictions or warnings. Similar to Bypass for normal use.
- RemoteSigned — Default for Windows Server computers. Scripts you download from the internet must be signed by a trusted publisher. Scripts you write on your PC don’t need to be signed.
- Restricted — Default for Windows client computers (like your PC). Does not allow any scripts to run. Only individual commands are allowed.
- Undefined — No policy is set. This usually means Restricted for clients.
- Unrestricted — Runs all scripts, including unsigned ones. Warns you before running scripts downloaded from outside your local network. Risky if you run scripts from unknown sources.
Where Can You Set These Policies?
You can set policies in these places:
- MachinePolicy: Set by system administrators for all users on your PC.
- UserPolicy: Set for your user account by system administrators.
- Process: Only affects the current PowerShell window (temporary).
- CurrentUser: Affects only your user account.
- LocalMachine: Affects all users on your PC.
Check Your Current Execution Policies
Before changing anything, you can see what your current settings are. Here’s how:
Get-ExecutionPolicy -ListTo run the above command, open PowerShell as an administrator. Here’s a quick guide:
Change Execution Policy Using Windows Settings (Easy Way)
You can turn on or off certain PowerShell policies using the Windows Settings app. This is especially good for your user account.
Why use this method? It’s simple and doesn’t require typing commands.
What happens when done? Your PowerShell policies will update immediately.
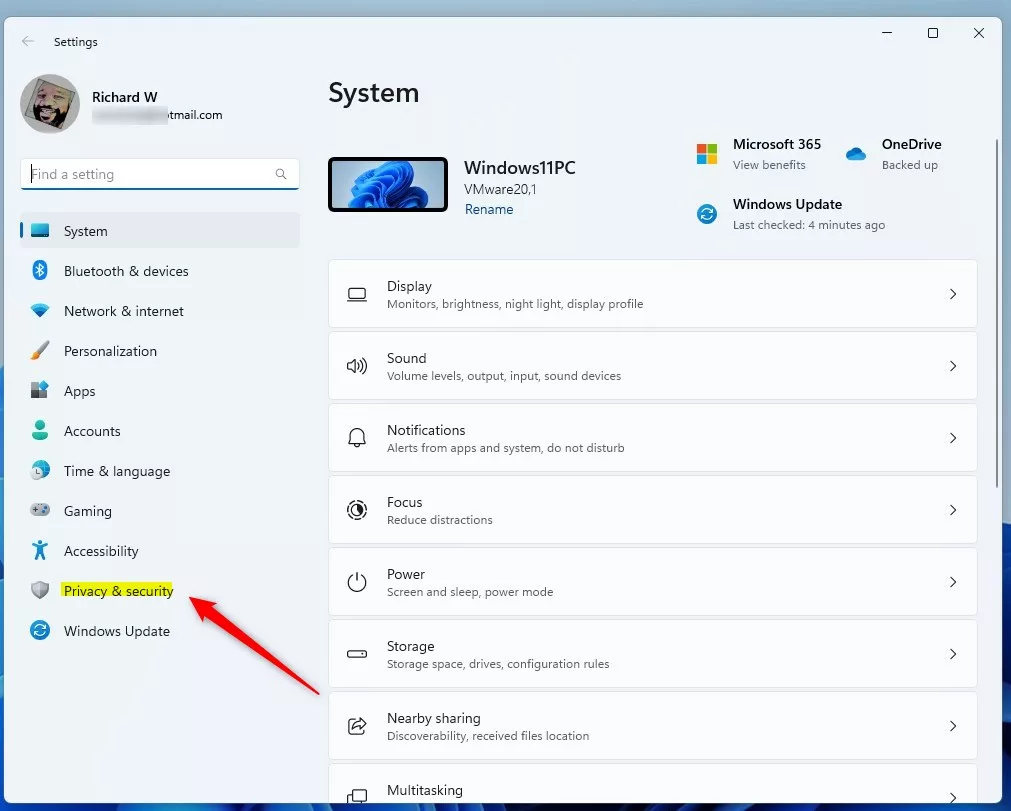
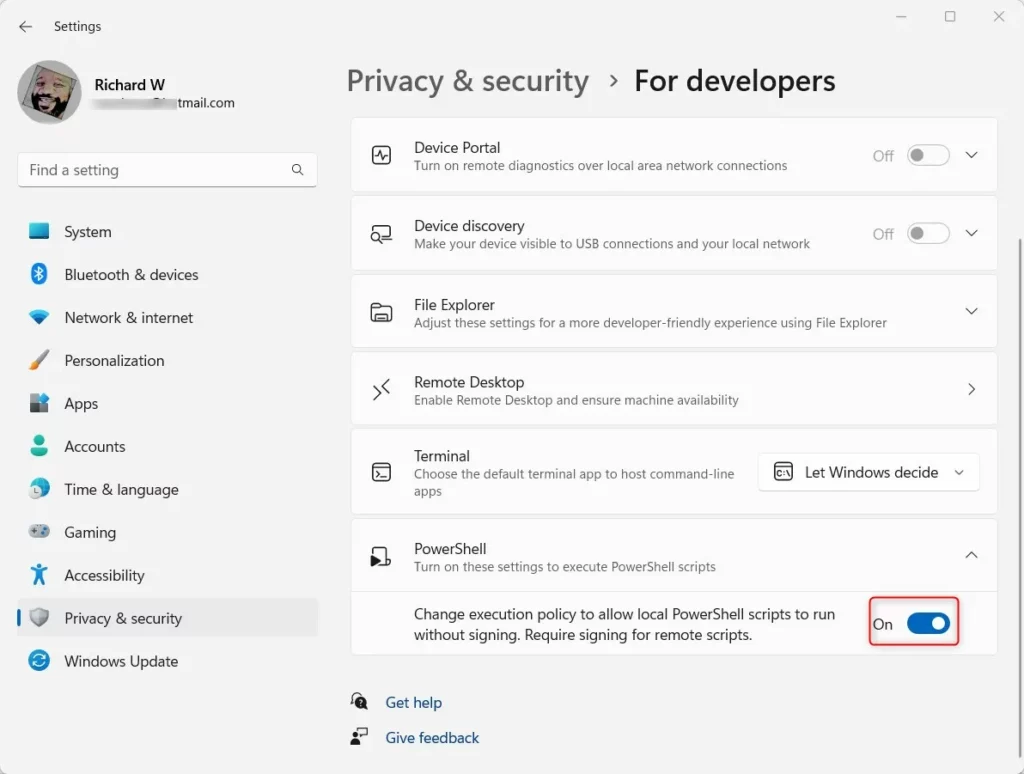
- Open Settings by clicking the Start menu and selecting Settings. Or press Windows key + I.
- Click Privacy & security on the left menu.
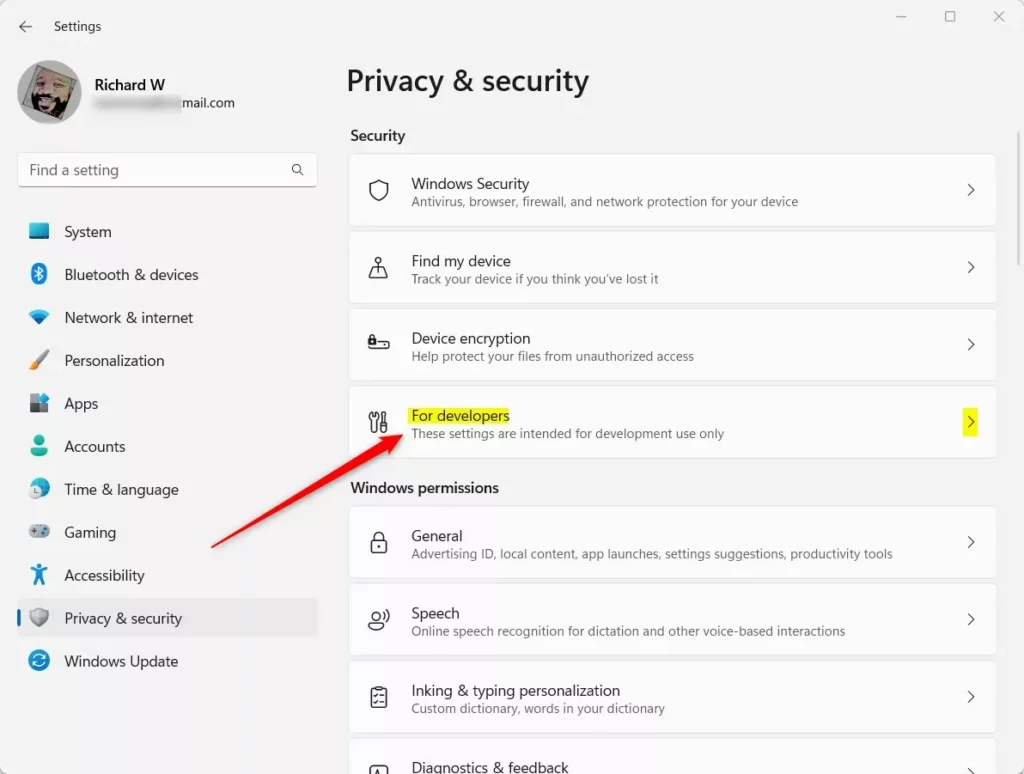
- On the right, find and click For developers.
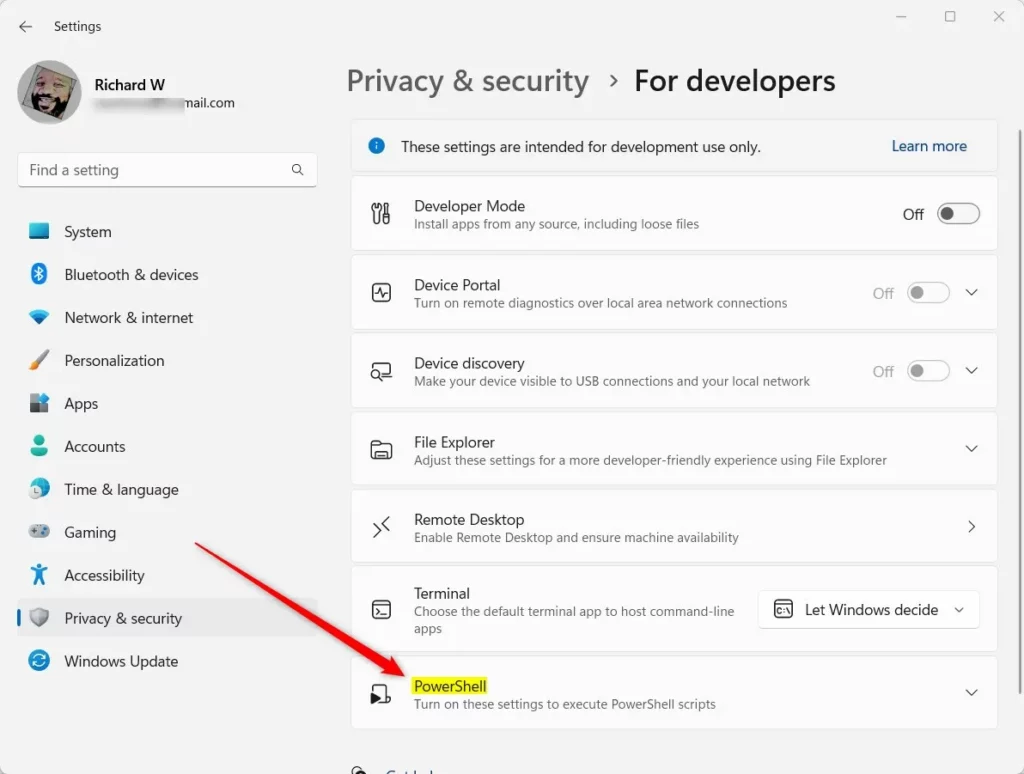
- Scroll down and find the PowerShell section. Click it to expand.
- Toggle the switch to On to enable RemoteSigned and Restricted policies for your user.
- Toggle it back to Off to disable these policies.
- Close the Settings app.
Change Execution Policy Using PowerShell (Advanced)
If you want more control or need to set policies for all users, you can use PowerShell itself to change the settings.
Why use this method? It gives you more options and lets you set policies for all users.
What happens when done? Your chosen policy takes effect right away.
First, open PowerShell as administrator:
How to Open PowerShell as Administrator
Then type one of the following commands and press Enter to set the policy. Replace PolicyName with one of these: AllSigned, Bypass, Default, RemoteSigned, Restricted, Undefined, or Unrestricted.
Set-ExecutionPolicy PolicyName -Scope CurrentUser -ForceOr:
Set-ExecutionPolicy PolicyName -Scope LocalMachine -Force⚠️ Admin Required: Using LocalMachine scope requires administrator privileges.
For example, to set RemoteSigned for your user only:
Set-ExecutionPolicy RemoteSigned -Scope CurrentUser -Force
Change Execution Policy Using the Registry Editor (For Experts)
You can also change the policy by editing the Windows Registry. This method should be used carefully.
Why use this method? It’s another way to change policies if PowerShell commands don’t work for you.
What happens when done? Changes take effect after you restart your computer.
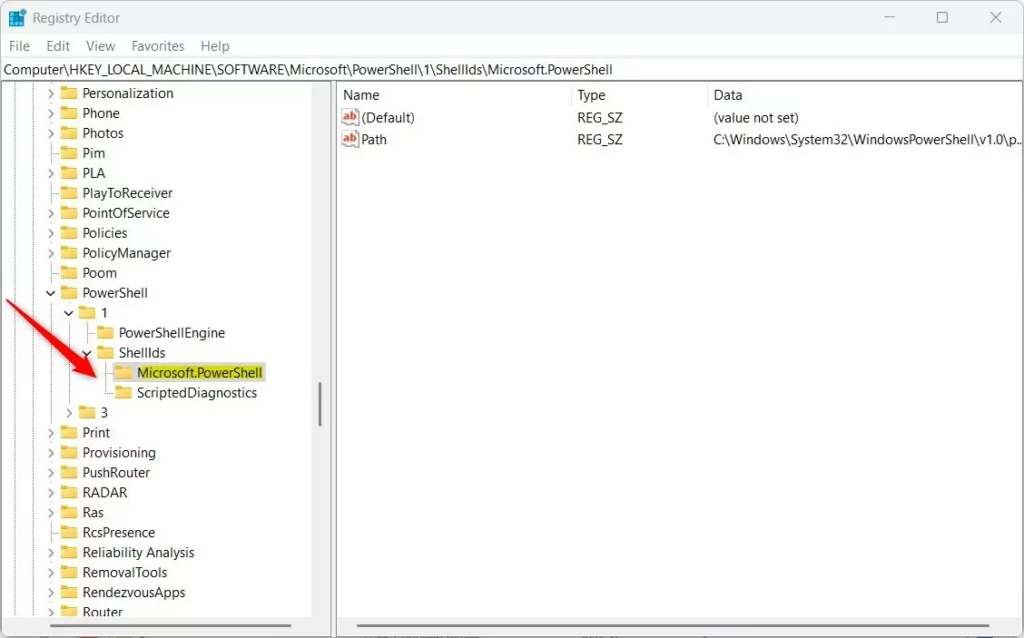
- Open the Registry Editor by typing
regeditin the Start menu and pressing Enter. - Navigate to this path:
HKEY_LOCAL_MACHINE\SOFTWARE\Microsoft\PowerShell\1\ShellIds\Microsoft.PowerShell - If you don’t see the Microsoft.PowerShell folder, right-click on ShellIds. Choose New > Key. Name it Microsoft.PowerShell.
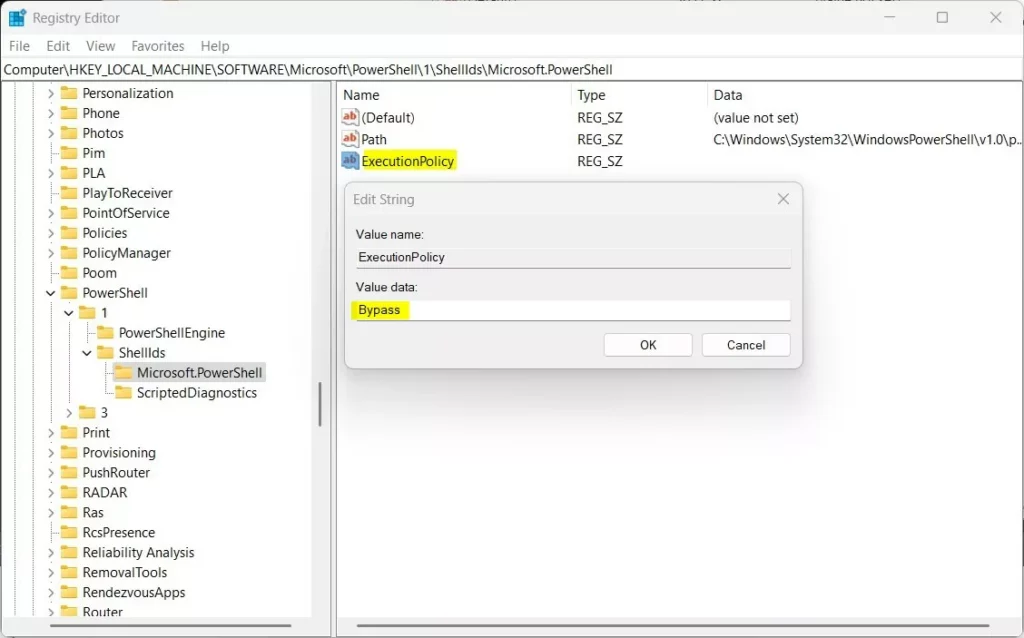
- Click on the Microsoft.PowerShell folder. Right-click on the right side and choose New > String Value.
- Name the new value
ExecutionPolicy. - Double-click ExecutionPolicy and enter one of the policy names as the value:
- Restricted
- AllSigned
- RemoteSigned
- Unrestricted
- Bypass
- Click OK and close the Registry Editor.
- Restart your computer for the changes to take effect.
⚠️ Admin Required: Editing the registry requires administrator privileges.
Summary
- PowerShell execution policies help control when scripts can run on your computer.
- There are several policy options. You can choose from very strict (Restricted) to very open (Bypass).
- You can change policies using the Windows Settings app, PowerShell commands, or the Registry Editor.
- Always be careful when running scripts from unknown sources. This keeps your PC safe.
- For more detailed info, visit the official Microsoft page: Microsoft PowerShell Execution Policies
Was this guide helpful?

About the Author
Richard
Tech Writer, IT Professional
Richard, a writer for Geek Rewind, is a tech enthusiast who loves breaking down complex IT topics into simple, easy-to-understand ideas. With years of hands-on experience in system administration and enterprise IT operations, he’s developed a knack for offering practical tips and solutions. Richard aims to make technology more accessible and actionable. He's deeply committed to the Geek Rewind community, always ready to answer questions and engage in discussions.
No comments yet — be the first to share your thoughts!