How to Install or Uninstall Built-in Sysmon on Windows 11
What is Sysmon?
Sysmon (System Monitor) is a tool in Windows that helps track what’s happening on your computer. It watches for things like new programs starting, network connections, and changes to files. This information is saved in the Event Log, which can help you spot problems or security issues.
Why use Sysmon? It gives you a detailed view of your system’s activity. This helps you find security threats and troubleshoot problems.
What happens when you install it? Sysmon starts logging system events automatically. You can then view these logs to understand what’s happening on your computer.
Starting with certain Windows 11 versions (like build 26220 and newer), Sysmon is already included in Windows. You don’t need to download anything extra!
Important: You need to be signed in as an Administrator to install or uninstall Sysmon. ⚙️
Option 1Install or Uninstall Sysmon Using Windows Settings
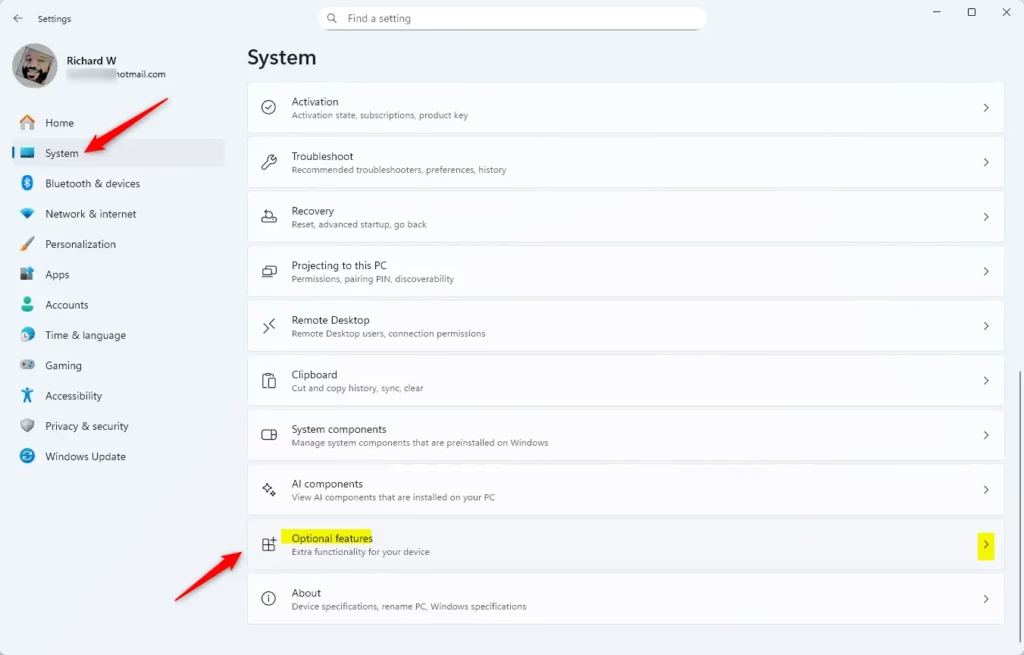
- Open Settings by pressing ⊞ Win+I.
- Click System from the left menu, then select Optional features on the right.
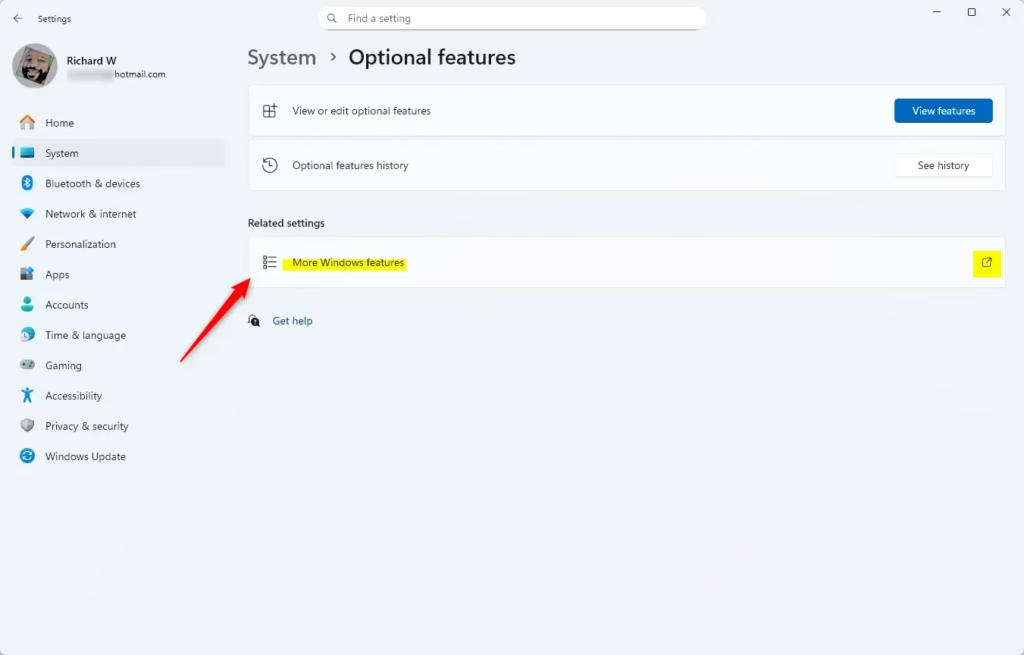
- Click More Windows Features near the top.
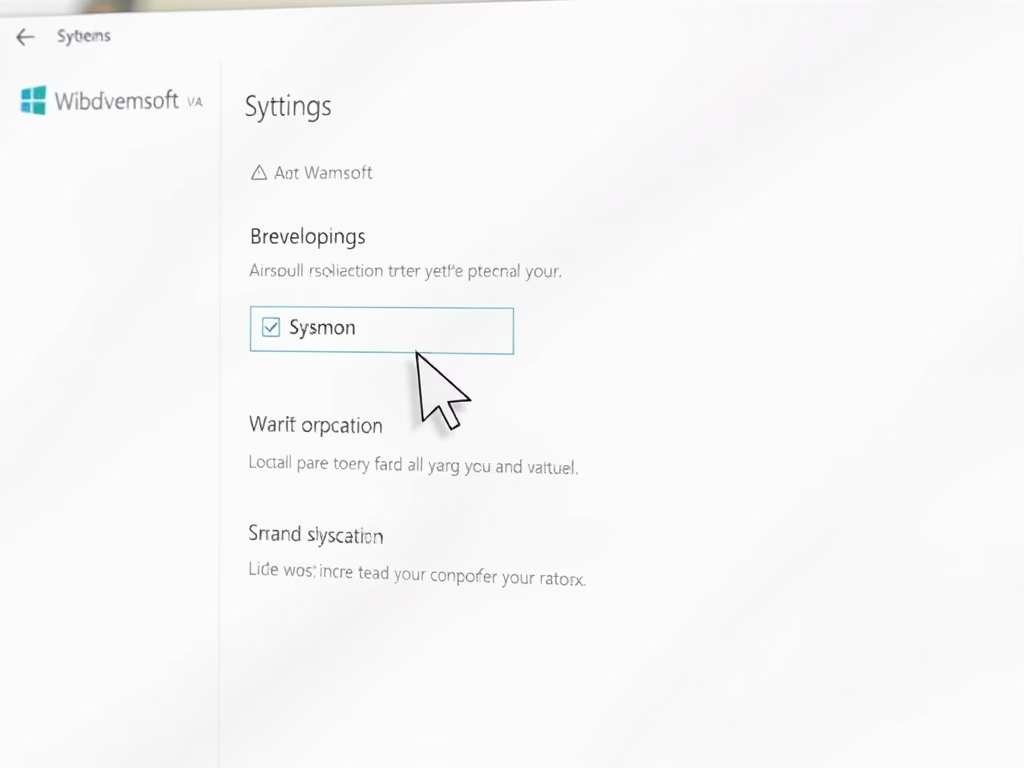
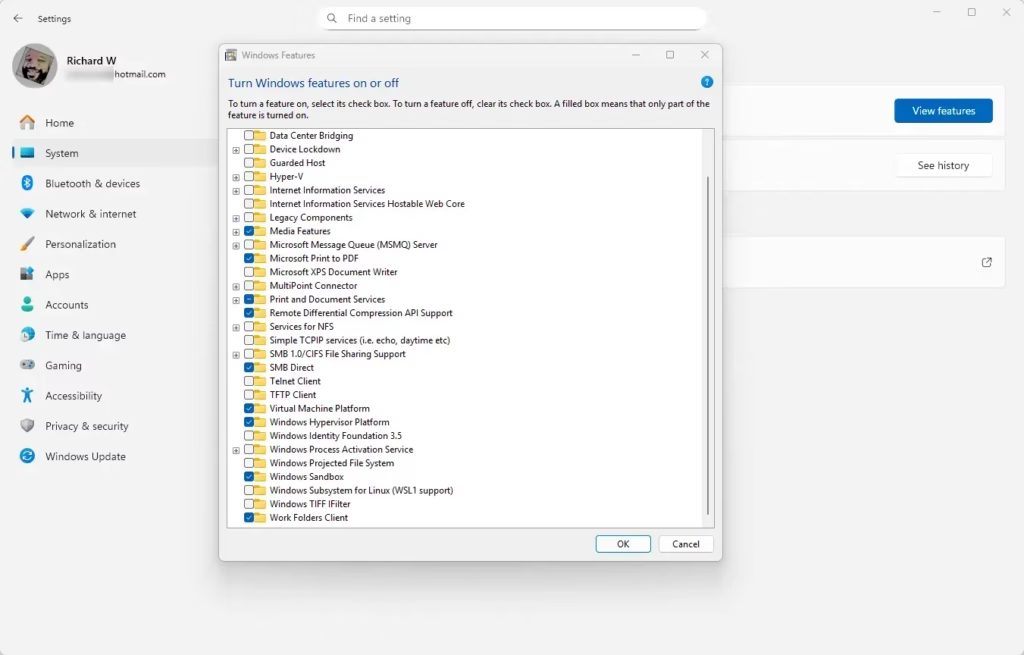
- In the new window, find Sysmon in the list.
- To install, check the box next to Sysmon. To uninstall, uncheck the box .
- Click OK.
- Depending on your choice:
- If installing, click Close.
- If uninstalling, click Restart now to finish the removal.
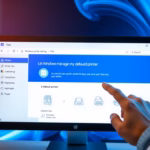
Visual guide:
Finish Installing Sysmon via Command Line
- Open Windows Terminal (Admin) (Admin). ⚙️ Choose either PowerShell or Command Prompt.
- Type or paste the command below, then press Enter:
Sysmon -i - After it finishes, you can close the Terminal and Settings.
Option 2Install Sysmon Using Command Line Only
- Open Windows Terminal (Admin) ⚙️ and pick PowerShell or Command Prompt.
- Run one of these commands to turn on the Sysmon feature:
- PowerShell:
Enable-WindowsOptionalFeature -Online -FeatureName Sysmon
- PowerShell:
- Command Prompt:
DISM /Online /Enable-Feature /FeatureName:"Sysmon" - Next, run this command to install Sysmon itself:
Sysmon -i - Close the Terminal when done.
Option 3Uninstall Sysmon Using Command Line
- Open Windows Terminal (Admin) ⚙️ and pick PowerShell or Command Prompt.
- Run one of these commands to turn off (uninstall) Sysmon:
- PowerShell:
Disable-WindowsOptionalFeature -Online -FeatureName Sysmon
- PowerShell:
- Command Prompt:
DISM /Online /Disable-Feature /FeatureName:"Sysmon" - When asked, type Y and press Enter to restart your PC and finish uninstalling.
Summary
- What Sysmon Does: Tracks and logs important system activities to help spot security problems.
- Admin Rights Needed: You must be signed in as an administrator to add or remove Sysmon. ⚙️
- Easy Installation Options: Use Settings or Command Line tools like Windows Terminal.
- Restart May Be Required: Removing Sysmon usually needs a reboot to complete.
- Built into Windows 11: No need to download anything extra on newer Windows 11 versions.
With these simple steps, you can manage Sysmon on your Windows 11 PC to help keep your system secure and monitored.
Was this guide helpful?

About the Author
Richard
Tech Writer, IT Professional
Richard, a writer for Geek Rewind, is a tech enthusiast who loves breaking down complex IT topics into simple, easy-to-understand ideas. With years of hands-on experience in system administration and enterprise IT operations, he’s developed a knack for offering practical tips and solutions. Richard aims to make technology more accessible and actionable. He's deeply committed to the Geek Rewind community, always ready to answer questions and engage in discussions.


No comments yet — be the first to share your thoughts!