Set Up Nginx Basic Authentication in Ubuntu 24.04


Nginx basic authentication in Ubuntu 24.04 stops random visitors from opening specific website folders. Nginx asks for a username and password before it serves anything from the protected location. This adds a login prompt to private directories like /var/www/html/private, so only people you approve can see the content.
The setup has two parts. First you create the login details with a password tool. Then you update your Nginx configuration so it checks those details. Basic authentication only encodes the credentials, it does not encrypt them. Anyone watching the network can read them over plain HTTP, so run this setup over HTTPS.
Set up Nginx basic authentication in Ubuntu 24.04 by installing the apache2-utils package with sudo apt install apache2-utils, then adding auth_basic and auth_basic_user_file directives to a location block in /etc/nginx/sites-available/default. Create the login with sudo htpasswd -Bc /etc/nginx/.htpasswd username, then reload Nginx. Run this over HTTPS, because basic authentication does not encrypt credentials.
Protect directories with Nginx basic authentication
To protect a directory with Nginx basic authentication in Ubuntu 24.04, you first install the password-hashing tools that ship with Apache. Nginx has no tool of its own for creating password files, so it uses the Apache one. Once the setup is done, any folder you choose shows a login screen, and visitors can’t view private files without the correct username and password.
- Open a terminal on your Ubuntu 24.04 server. Use an account with sudo rights.
- Run the command shown below to install the utilities.
- Enter your password if asked, and approve the install if prompted. You are back at the shell prompt when it finishes.
sudo apt install apache2-utils
The utilities are now installed. You don’t need to restart anything. Continue below to protect a directory with a username and password.
In this post we protect /var/www/html/sensitive-doc with a password. Anyone who wants to open this directory must type a username and password. Every other part of the site stays public, because the rule only applies to this one location.
You can create a new server block file instead. We use the default file here to keep the post short. If your site already has its own server block, edit that one, because the protection has to go in the block that serves your site.
- Run the command shown below to open the file in a text editor, using sudo so you can save your changes.
- Look for the server {} section. You will add your new block inside it.
sudo nano /etc/nginx/sites-available/default
Next, add the highlighted block to the server {} section in the file. The block does two things. It sets the text of the login prompt, and it points Nginx at the password file that holds the approved users. Make sure the new block sits inside the closing brace of the server {} section and not outside it. Keep the semicolons at the end of each line, or Nginx won’t load the file.
# Default server configuration
#
server {
        listen 80 default_server;
        listen [::]:80 default_server;
        root /var/www/html;
        index index.html index.htm index.nginx-debian.html;

        server_name example.com;

        location /sensitive-doc {
              auth_basic            "Basic Auth";
              auth_basic_user_file  "/etc/nginx/.htpasswd";
        }

        location / {
                # First attempt to serve request as file, then
                # as directory, then fall back to displaying a 404.
                try_files $uri $uri/ =404;
        }

        # pass PHP scripts to FastCGI server
        #
..........
..........
Save the file and exit the editor when you’re done. Nginx does not read the change until you reload it, which we do later in this post.
Create accounts
With the configuration in place, create an account to log on to the directory. The command below stores the username and a hashed copy of the password in the password file. The plain-text password is never saved.
- Run the command shown below.
sudo htpasswd -Bc /etc/nginx/.htpasswd username
Replace username with the actual username you want to use. Pick a name that means something to you, such as one per person, so you can remove individual users later.
- When prompted, type a new password for the account. Nothing shows on screen as you type, and that is normal.
- Type the same password again to confirm it. You should see a message saying the password was added for the user.
To add more users later, run the same command again with a different username, and leave out the option that creates a new file. If you use that option again, it overwrites the file and deletes every existing user.
Create the protected directory
Next, create the directory you want to protect. This gives Nginx basic authentication in Ubuntu 24.04 a specific folder to lock down. The folder has to exist on your server before the login prompt has anything to guard. If it is missing, Nginx returns a “not found” error for that address instead of asking for a password.
- Run the command shown below to create the directory.
sudo mkdir /var/www/html/sensitive-doc
Once the directory exists, enable the Nginx server block and reload the service by running the commands below. If you edited the default file as we did here, it is usually already enabled. A reload applies the new settings without dropping active connections.
If the reload reports an error, go back to the server block file. The usual causes are a missing semicolon or a brace in the wrong place. Fix it and reload again.
sudo systemctl reload nginx
Next, run the command below to create a basic HTML index.html file in the protected directory. The file gives you something to see once you log in. The command opens an empty file in a text editor.
sudo nano /var/www/html/sensitive-doc/index.html
Copy and paste the lines below into the file. The page can be as simple as a heading and a line of text. Any short message works, as long as you recognize it when it loads.
<html>
<title>My basic authentication HTML page</title>
<body>
<p style="width: 100%; font-weight: bold; font-size: 60px; text-align: center;">
Basic authentication is enabled!
</p>
</body>
</html>
Save the file and exit the editor.
Test Nginx basic authentication
Now test the setup. This confirms the password prompt appears before anyone can view your files. Use a private or incognito window if you can. Browsers remember basic authentication logins until you close them, and a private window gives you a clean test.
- Open your web browser.
- Type the address of the protected folder, using your own domain or server IP address in place of the example, as shown below.
http://example.com/sensitive-doc/
- Press Enter. You will see a prompt asking for a username and password, like the one below.
If the page loads with no prompt, the browser may have cached a login, or Nginx is not using your new configuration. Check that you reloaded Nginx and that the new block sits in the server block that serves your site.
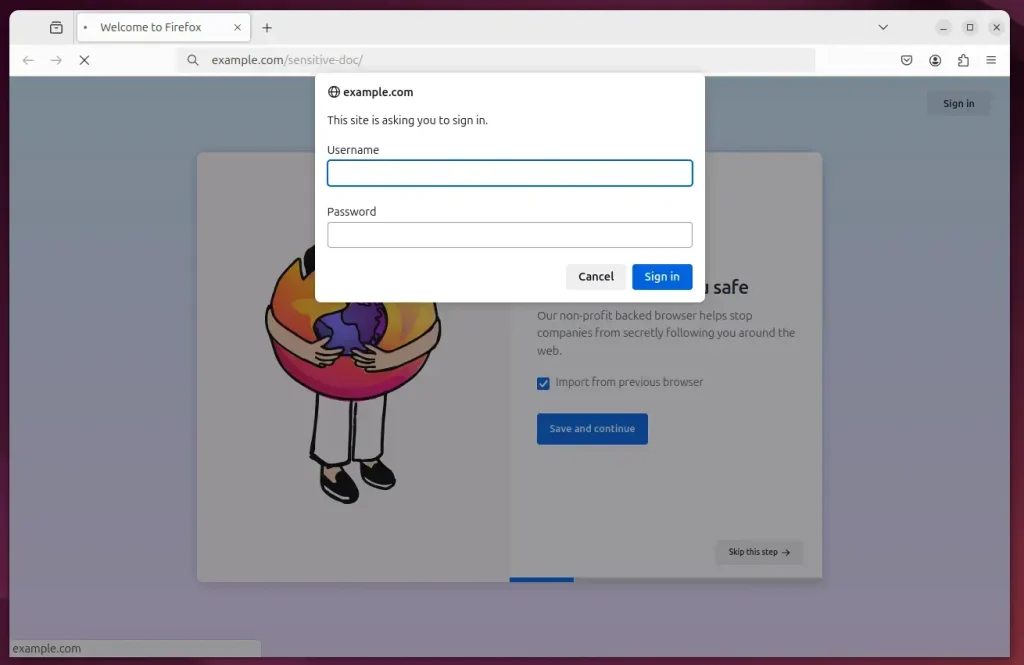
- Enter the username and password you created earlier, then sign in.
If the details are correct, your index.html page loads. If they are wrong, the browser asks again, or shows a “401 Authorization Required” page when you cancel. That error means the protection is working.
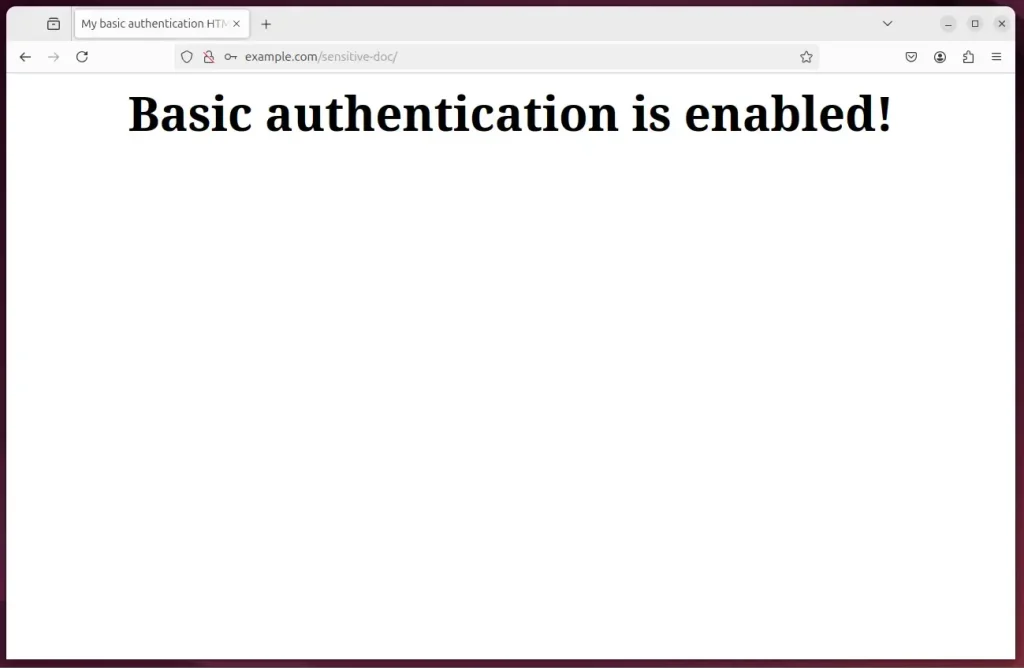
That should do it! To undo the change, remove the block you added from the server block file and reload Nginx. The folder is then public again. To take away a single person's access, remove only that user from the password file.
Conclusion:
Nginx basic authentication is a simple, effective way to secure specific directories on your Ubuntu server. By following the steps in this article, you can keep sensitive information away from casual visitors. Here are the key takeaways:
- Increased Security: Implement basic authentication to control access to sensitive directories.
- Use of SSL/TLS: Set up SSL/TLS first, because basic authentication does not encrypt credentials. HTTPS protects them in transit.
- Nginx Configuration: Modify your Nginx server block to enable authentication for designated locations, then reload Nginx to apply it.
- User Management: Create and manage user accounts with the
htpasswdcommand. Add one account per person so you can remove access individually. - Testing: Verify that authentication works as expected by opening the protected directory in a web browser, ideally in a private window.
- Simple Implementation: Secure your directories quickly with a handful of command-line steps.
Nginx basic authentication makes sure only authorized users can reach protected resources such as sensitive configuration files. It stops unauthorized access and protects your data from casual snooping. For anything that holds real secrets, pair it with HTTPS.
Have a question about this guide?
Answered by AI from this guide. Good questions may be added to this page — please don't include personal details.
Did this guide fix your problem?

About the Author
Richard
Tech Writer, IT Professional
Richard is a writer at Geek Rewind who turns complex IT tasks into clear, step-by-step guides. He draws on years of hands-on experience in system administration and enterprise IT operations, focusing on Windows, Linux and WordPress: the problems people actually run into, and the fixes that work. His server and WordPress guides come from systems he runs himself. Richard builds and maintains the platform behind Geek Rewind, from its Ubuntu servers and Nginx configuration to its custom WordPress plugins. Many new tutorials start with readers' questions, and he's always glad to answer them in the comments.
No comments yet — be the first to share your thoughts!