How to View Startup App Impact in Windows 11

Startup app impact in Windows 11 measures how much each background program slows down your computer when it boots up. Windows groups these boot delays into three clear impact levels (High, Medium, and Low), so you can spot heavy resource hogs right away.
Slow boot times often happen when programs like cloud storage or chat tools launch automatically when you turn on your PC. Spotting these delay culprits helps you turn off the apps you do not need, making your computer start much faster.
The impact rating is an estimate, not a stopwatch. Windows measures how much CPU time and disk activity an app uses during sign-in, and it only rates apps it has seen start. This guide shows two places to read the ratings, what each level means, and how to turn an app off and back on again.
Open Task Manager by pressing Ctrl+Shift+Esc, then click the Startup apps tab. Review the “Startup impact” column to see if apps are rated High, Medium, or Low. You can also find this information in Settings under Apps Startup
View startup app impact using Task Manager
Task Manager helps you measure Windows 11 startup apps impact by showing how much each background program slows down your computer during boot time. Press Ctrl+Shift+Esc to open the tool, then click the speedometer icon on the left menu to see every app configured to run when Windows starts.
The steps below match the current Task Manager in Windows 11 (version 22H2 and later), which has a navigation bar down the left side. On the original Windows 11 release (21H2), the same list sits on a tab named Startup along the top. The columns and ratings are the same. Task Manager works the same way in Home and Pro.
- Open the Start menu and type Task Manager , or press Ctrl+Shift+Esc. The Task Manager window opens. If you see a small window with only a list of apps, click More details at the bottom to expand it.
- Click the Startup apps tab (the speedometer icon). If the left bar shows only icons, click the three-line menu at the top to show the names. You should now see a table of every app that can start with Windows, with columns for name, publisher, status, and impact.
- Review the Startup impact column for each app. Each row should show High, Medium, Low, or Not measured. If you cannot see the column, make the window wider. To bring the heaviest apps to the top, click the column heading to sort the list.
The Status column shows whether an app is Enabled or Disabled. To turn one off, right-click it and choose Disable. The Status column then changes to Disabled. To undo it, right-click the same app and choose Enable. You do not need to restart for the change to be saved. It takes effect the next time you start the PC or sign in.
You can also right-click any column heading and add extra columns, such as the CPU and disk figures measured at startup. They show the numbers behind each rating.
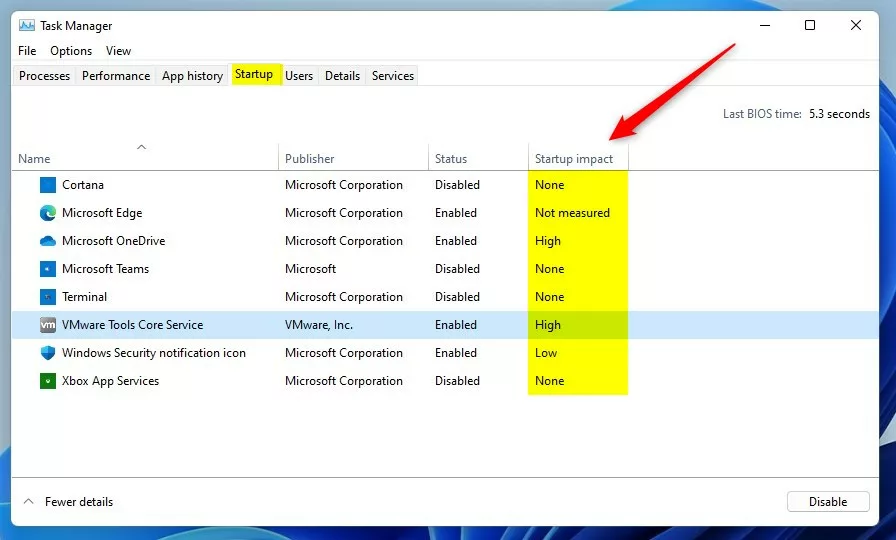
The impact levels are defined as follows:
- High impact: Uses significant CPU or disk power; these are the main causes of slow boot times. Roughly, this means more than about one second of CPU time or a few megabytes of disk activity during startup.
- Medium impact: Uses a moderate amount of resources. These are worth a look if you have several of them, because they add up.
- Low impact: Uses very little power and has a negligible effect on speed. You can usually leave these alone.
- Not measured: Windows has not yet calculated the impact, often because the app was recently installed or has not run during a startup cycle. Restart the PC once or twice and check again. A rating usually appears after Windows has seen the app start.
Keep in mind that the rating covers only the load at sign-in. An app marked Low can still use a lot of resources later, and an app marked High may be one you need. Use the rating to decide what to look at first, not as a verdict.
View startup app impact using Settings
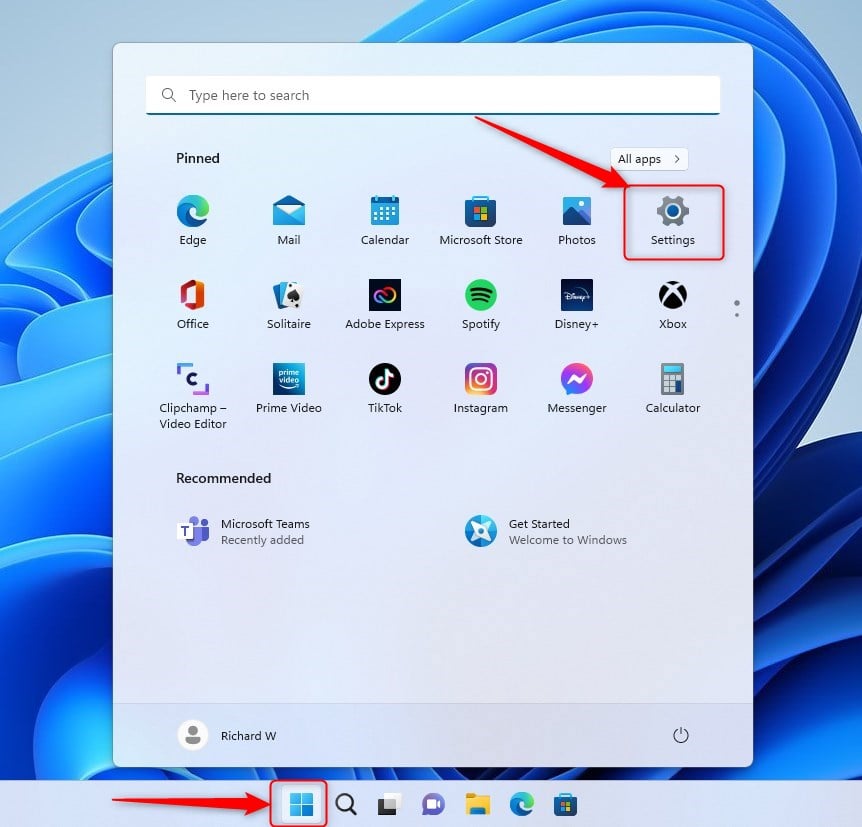
The Settings app offers another way to manage these programs, and it shows the same impact ratings. This page is available in Windows 11 Home and Pro. Press Windows key + I to open Settings.
- Press Windows key + I to open Settings. The Settings window opens.
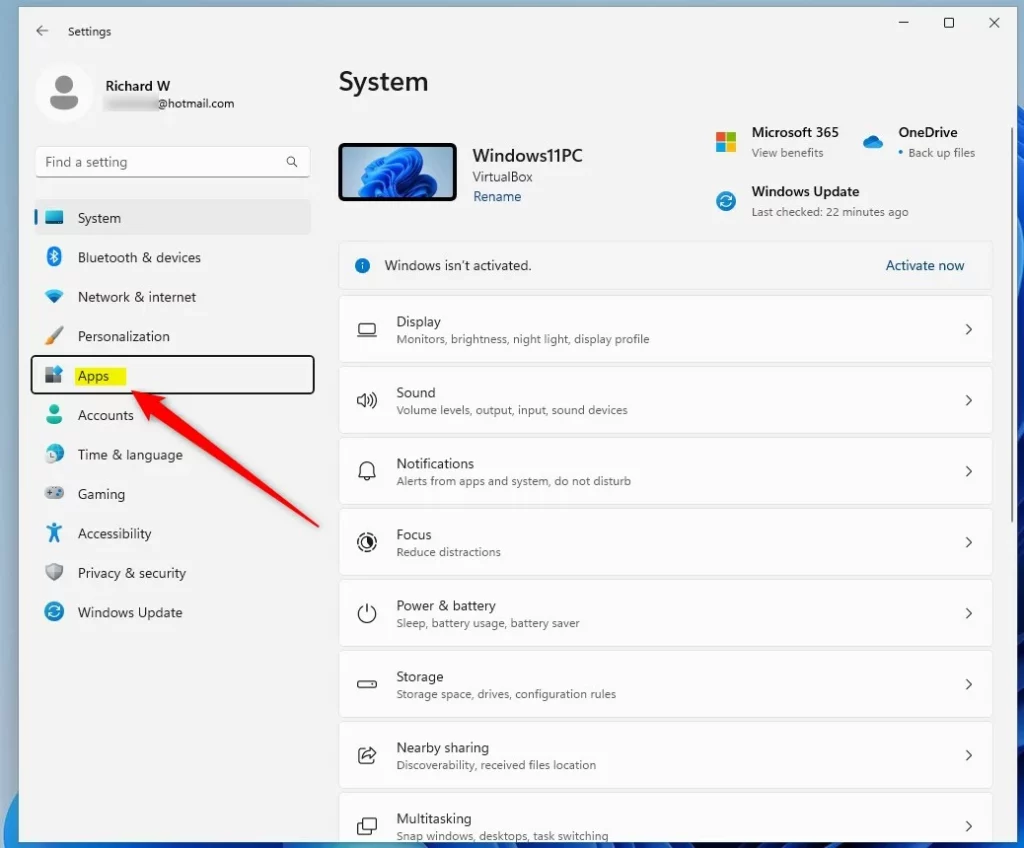
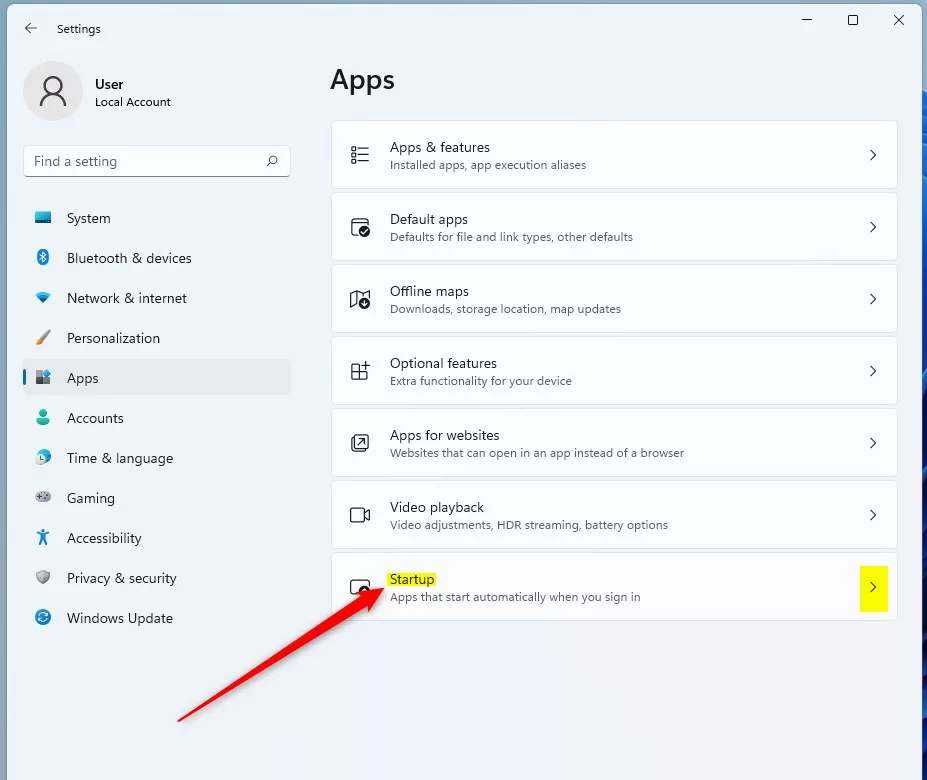
- Click Apps on the left sidebar. The list of app-related pages appears on the right.
- Select Startup. You should see a list of apps, each with an on/off switch and a short impact label such as High impact or Low impact. Use the sort option at the top of the list to order the apps by startup impact, name, or status.
To stop an app from launching at startup, move its switch to Off. To bring it back, move the switch to On. Changes made here and in Task Manager apply to the same list, so one will reflect the other. Neither needs a restart to save, but the app only stops launching the next time you start or sign in.

Advanced Startup Management
Advanced Startup Management: If the standard menus miss certain items, check the startup folder or system registry settings directly. Some programs start through these locations, through scheduled tasks, or as background services, and they may not appear in Task Manager or Settings.
Be careful here. Removing the wrong entry can stop a program or a driver from working. Note down what you change so you can put it back, and back up the registry before editing it. If you are not sure what an entry does, leave it alone and search for the name first.
Decision-Making Checklist
If it is a cloud storage tool or antivirus, keep it enabled. If it is a printer utility or a game launcher you rarely use, it is safe to disable.
Check the Publisher column in Task Manager if you do not recognize a name. Microsoft, your PC maker, and your hardware vendors (audio, graphics, touchpad) often appear there. Leave those on unless you know what they do. For anything else, right-click the app and choose Search online to see what it is.
Disable one or two High impact apps at a time, restart, and see how the PC feels. If something stops working, turn the app back on. This is easier than changing a dozen items and not knowing which one caused the problem.
Summary
Optimizing your Windows 11 startup apps is a quick way to improve performance. By using Task Manager or Settings, you can identify high-impact apps and disable unnecessary ones. Always prioritize keeping security software enabled while disabling non-essential background processes to achieve the best boot time.
Nothing here is permanent. Any app you disable can be switched back on from the same list at any time.
Reference: Microsoft Official Documentation
Have a question about this guide?
Answered by AI from this guide. Good questions may be added to this page — please don't include personal details.
Did this guide fix your problem?

About the Author
Richard
Tech Writer, IT Professional
Richard is a writer at Geek Rewind who turns complex IT tasks into clear, step-by-step guides. He draws on years of hands-on experience in system administration and enterprise IT operations, focusing on Windows, Linux and WordPress: the problems people actually run into, and the fixes that work. His server and WordPress guides come from systems he runs himself. Richard builds and maintains the platform behind Geek Rewind, from its Ubuntu servers and Nginx configuration to its custom WordPress plugins. Many new tutorials start with readers' questions, and he's always glad to answer them in the comments.
No comments yet — be the first to share your thoughts!