How to Use Generative Erase in Windows 11 Photos App
Generative Erase in the Windows 11 Photos app removes unwanted objects from your pictures using AI.
This handy tool acts like a magic eraser, quickly cleaning up distracting elements such as people in the background or stray objects.
Simply brush over the item you want to disappear, and Generative Erase intelligently fills the space with what should be there, making your photo look natural again. You can achieve professional-looking photo edits directly on your PC without needing complicated software.
Generative Erase in the Windows 11 Photos app removes unwanted objects from your pictures. Open the photo, click Edit Image, then select the Erase tab. Paint over the object you want removed, and the app intelligently fills the space.
What is the Photos app?
Windows 11 includes a Photos app to help you view, organize, and edit all your pictures right on your computer.
What is Generative Erase?
Generative Erase, found in Photos app version 2024.11020.21001.0, removes objects from photos. This tool cleanly takes out people, signs, or other unwanted items. Generative Erase surpasses older eraser tools, successfully removing even large photo areas with a natural appearance.
How to Use Generative Erase
Generative erase in the Windows 11 Photos app lets you remove unwanted objects from your pictures. Paint over what you want to remove, and the app intelligently fills in the background, making your photos look clean and natural without needing to be a tech expert.
- Open the Photos app and choose the picture you want to edit.
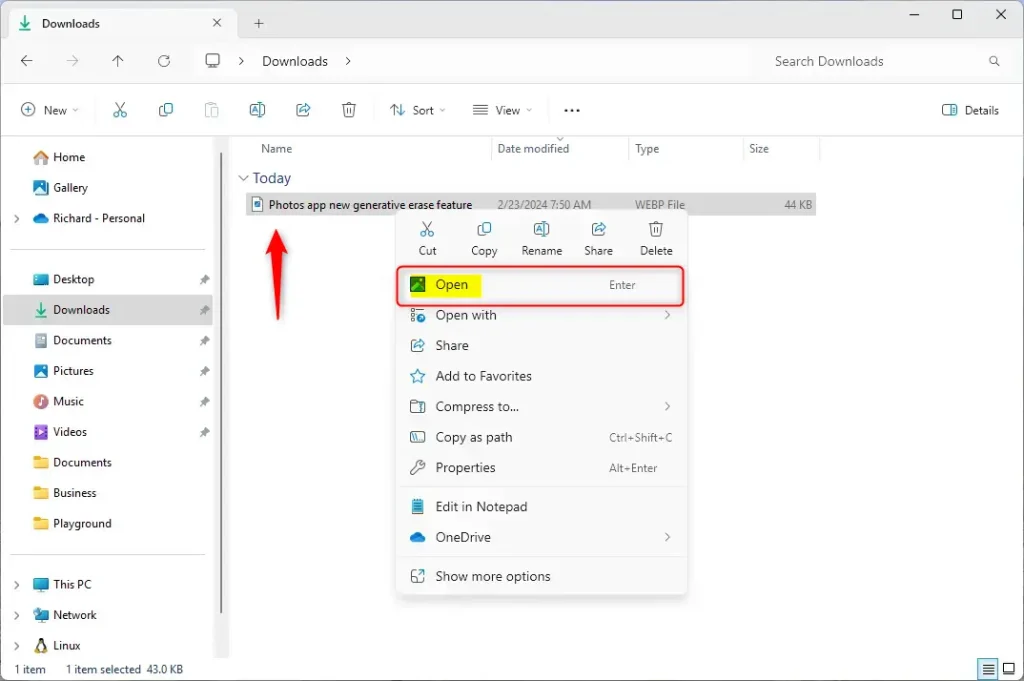
- Click the Edit Image button at the top. You can also press
Ctrl + Eon your keyboard.
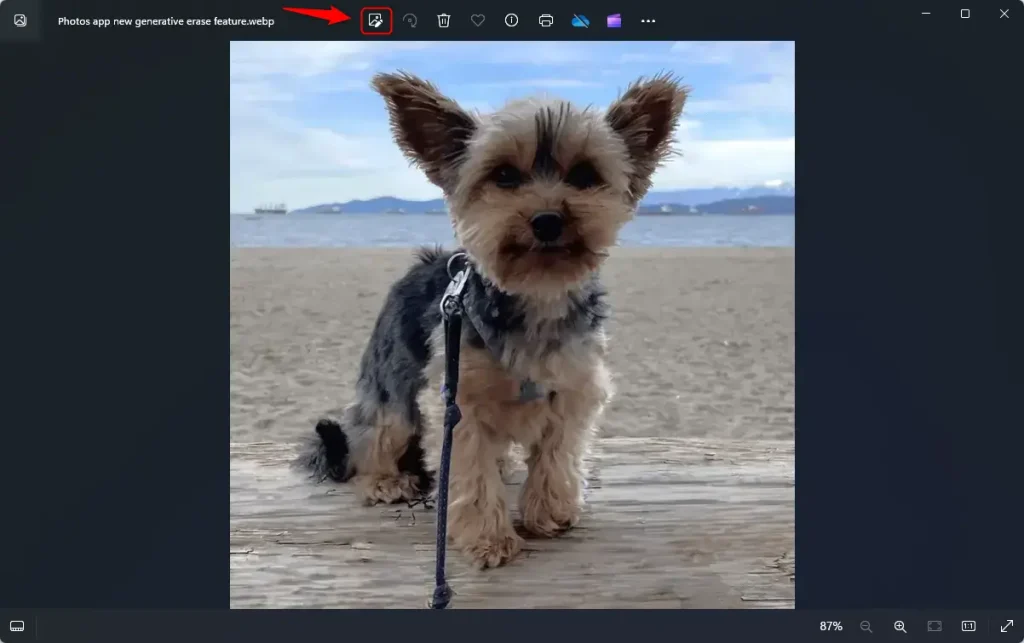
- Look at the toolbar at the top. Click the Erase tab.
- Use your mouse or finger to paint over the object or area you want to remove.
- Change the brush size as needed. Make it smaller for precise edits or bigger for larger areas.
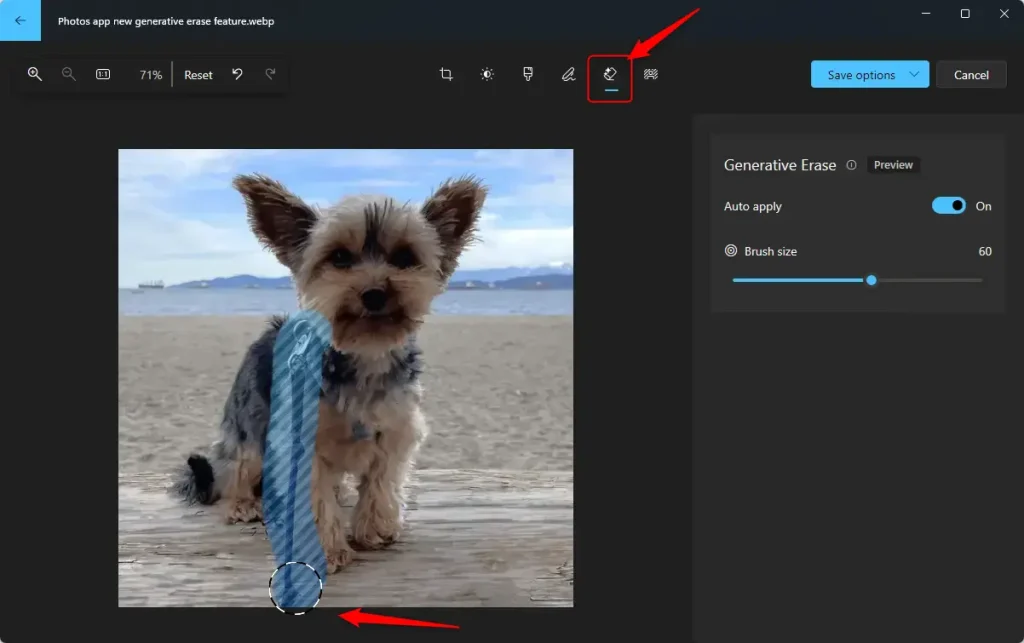
- Watch as the unwanted object disappears. The background fills in naturally!
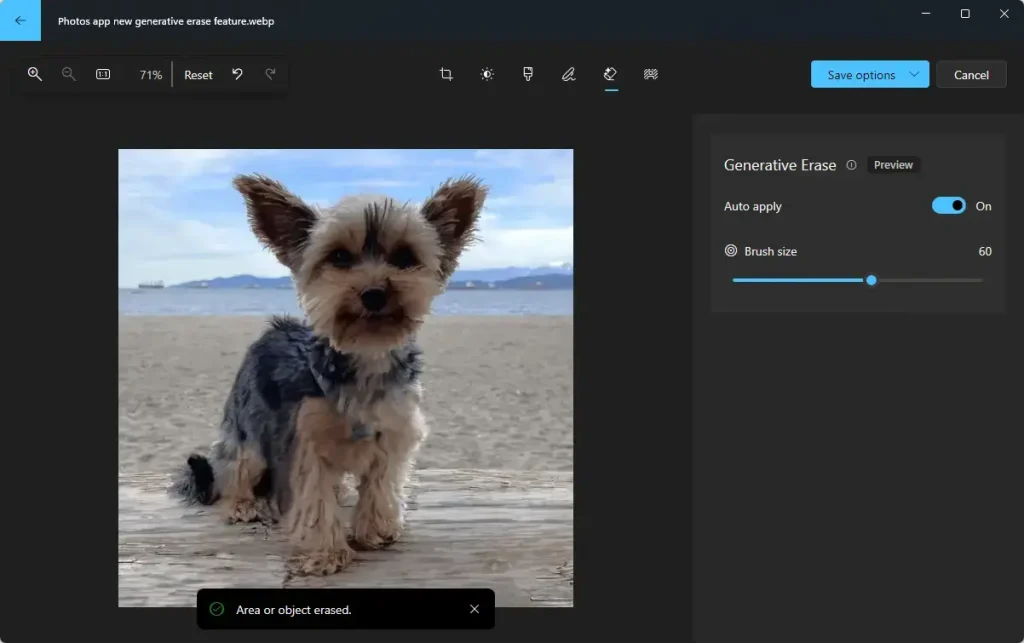
Auto Apply’s automatic feature can be turned off for more control. Disabling Auto Apply allows users to add or remove multiple erased areas, known as masks (these are the areas you’ve erased), before saving a photo. This provides a manual way to edit erased sections in the Windows 11 Photos app.
- When you’re happy with the result, save your edited photo.
Summary
The generative erase tool in the Windows 11 Photos app provides a way to remove unwanted items from your photos. It automatically fills in the blank space, making your pictures look natural without requiring advanced editing skills. You can also change the brush size for more precision and choose not to apply changes automatically if you want to remove several objects before saving.
Adjust brush size for detailed work. Switch off Auto Apply to erase several objects carefully before saving.
Try this feature out and make your photos look cleaner and more professional!
For more information, check out the official Microsoft blog post.
What is generative erase?
Generative erase in Windows 11 Photos is a tool that removes unwanted objects from your pictures, filling the space so it looks like the object was never there, often giving better results than the older Spot fix tool.
Was this guide helpful?

About the Author
Richard
Tech Writer, IT Professional
Richard, a writer for Geek Rewind, is a tech enthusiast who loves breaking down complex IT topics into simple, easy-to-understand ideas. With years of hands-on experience in system administration and enterprise IT operations, he’s developed a knack for offering practical tips and solutions. Richard aims to make technology more accessible and actionable. He's deeply committed to the Geek Rewind community, always ready to answer questions and engage in discussions.


No comments yet — be the first to share your thoughts!