How to Turn On Administrator Protection Using Windows Security in Windows 11

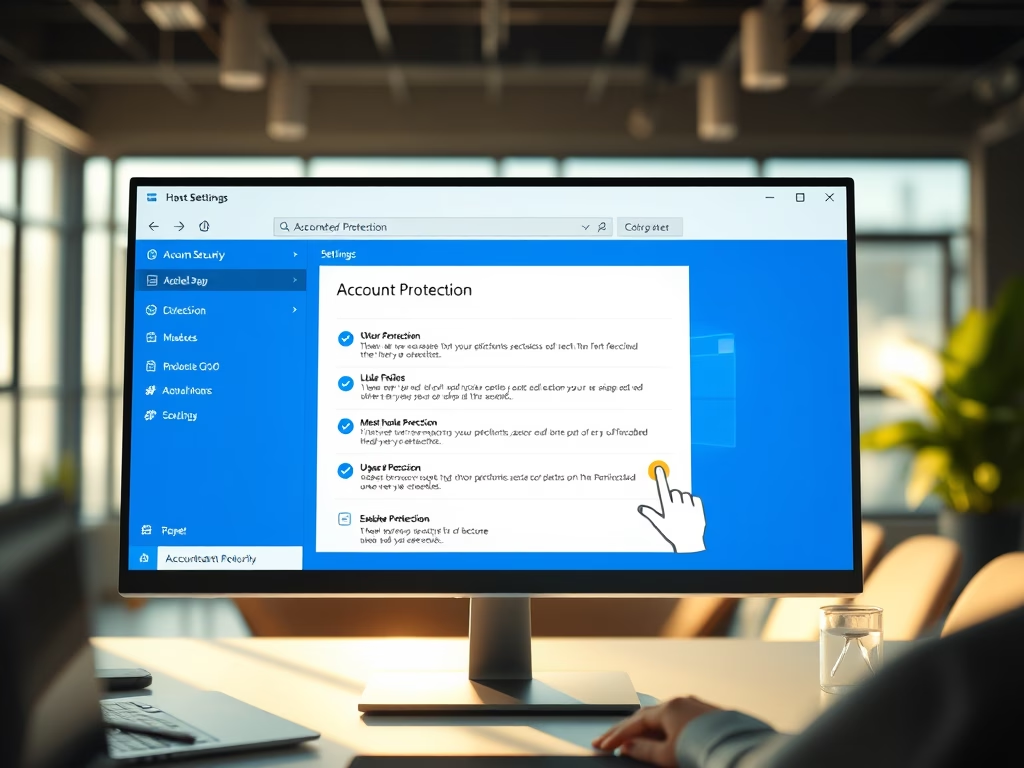
Administrator Protection in Windows 11 is a security setting that stops apps from making major changes to your PC without your direct approval. It helps keep malicious software from altering core system files behind your back.
You turn it on inside the Windows Security app. It needs Windows 11 Build 26100 or later. If you are not sure which build you have, check Settings System About and look at the version details under Windows specifications.
Open Windows Security, navigate to Account Protection, click Account protection settings, and toggle Administrator Protection to On. This feature enhances security by providing clear, color-coded prompts for actions requiring elevated privileges.
What is Administrator Protection?
Administrator Protection requires you to explicitly approve any app that tries to make major, system-level changes. When an app asks for that level of access, Windows stops and asks you first. This blocks unauthorized changes and reduces the risk of hidden or unwanted software modifying your system.
What happens when it is enabled? Whenever software tries to make deep changes to the operating system, you get a distinct prompt that tells you what is being requested. You decide whether to allow it.
You can switch the feature on or off at any time from the Windows Security app. No command line or advanced tools are needed. You do need to be signed in with an account that has administrator rights to change the setting.
Steps to Enable Administrator Protection
Step 1Open Windows Security
Start by opening Windows Security. It is the built-in console where you manage your device’s protection settings, including Administrator Protection.
- Press the Start key on your keyboard.
- Type Windows Security into the search box.
- Click the Windows Security app in the search results.
The Windows Security dashboard should now open, showing tiles for each protection area.
- Click the Start button, then Settings.
- Select Privacy & Security (or Update & Security in some versions).
- Click Windows Security.
- Click Open Windows Security.
Searching from the Start menu is the quickest way in, and it takes you straight to the PC protection settings you need for the next steps.
Step 2Go to Account Protection
- In the Windows Security app, click Account protection. You can use the left sidebar or the tile on the main dashboard.
The Account protection page should open, with sign-in and account options listed.
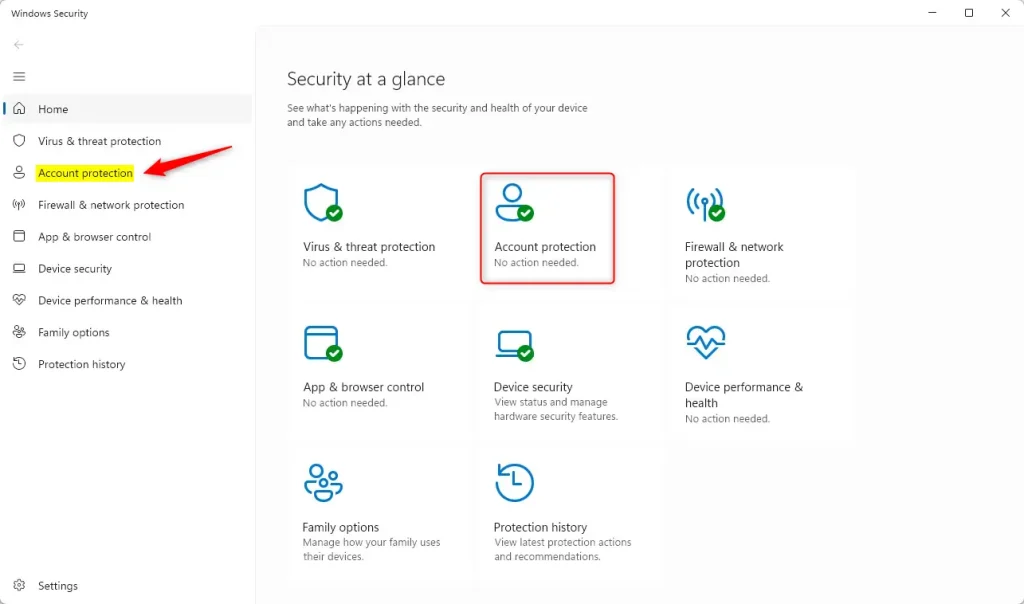
If you do not see Account protection, make sure the app has fully loaded and that you are on the main Windows Security window, not a sub-page.
Step 3Open Account Protection Settings
- Under the main Account protection section, click the Account protection settings link.
A page with the account protection options should appear, including the Administrator Protection switch.
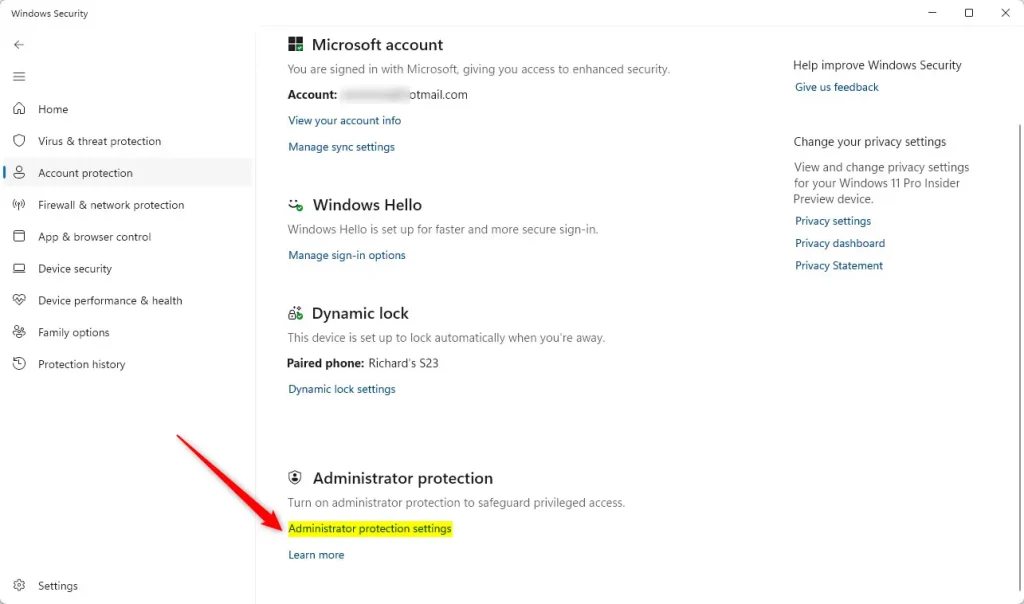
If the link or the switch is missing, your PC is most likely on a build older than 26100. Check your build and install the latest Windows updates.
Step 4Turn Administrator Protection On or Off
- Find the toggle for Administrator Protection.
- Click the switch to set it to On and activate the feature.
- To turn it off later, come back to this page and set the switch to Off.
The switch should now show its new state. If the toggle is greyed out, sign in with an administrator account and try again. Windows may ask you to restart before the change fully takes effect. Save your work and restart when prompted.
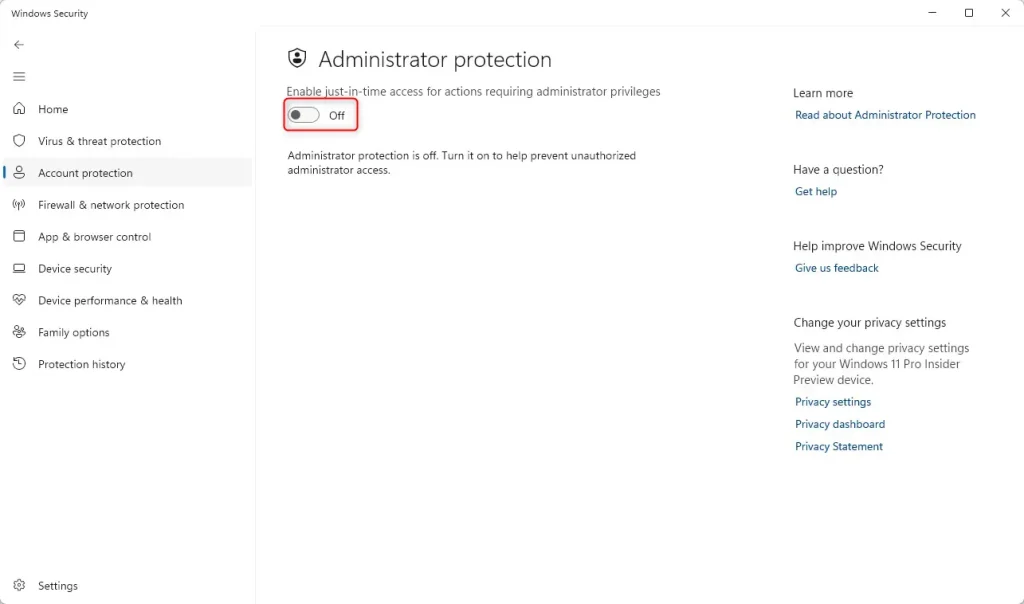
This is what the toggle looks like once it is switched on.
What Does It Look Like When Enabled?
With Administrator Protection active, you will see clear, color-coded prompts whenever software tries to make significant changes to the operating system. Read each prompt before you respond. It shows which app is asking and what it wants to do, so you only grant permissions you actually understand.
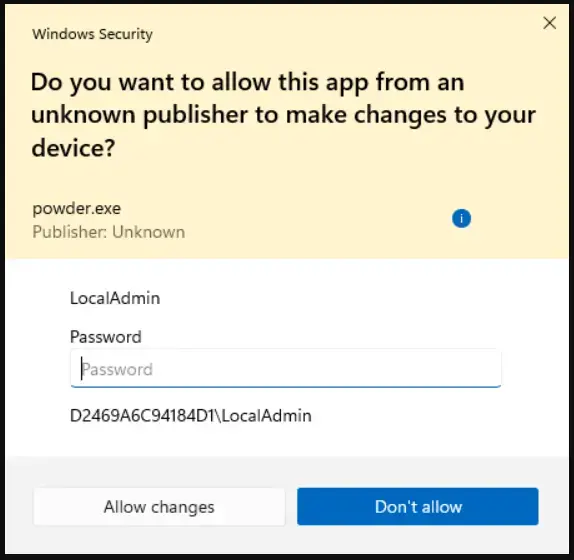
An example of the kind of prompt you may see is shown above. If you do not recognize the app or did not start the action yourself, deny the request.
Why Use Administrator Protection?
- Better Security: It helps protect your PC from risky applications.
- Easy to Use: You can turn it on or off yourself anytime.
- Clear Warnings: Color-coded prompts make it easier to decide what to allow.
- Simple Access: Manage it all from the Windows Security app.
- Future-Ready: This is part of Microsoft's plan to make Windows safer and smarter.
Administrator Protection adds an extra layer of defense by stopping malicious apps from making unauthorized changes behind your back. It helps you catch risky software early, gives you clear warnings before system permissions are granted, and keeps your files safer without getting in the way of your daily work.
Learn More
For additional details, visit the official Microsoft blog.
Review the original guide at Geek Rewind.
Summary
In short, Administrator Protection is a practical security tool. It shows distinct warnings when applications try to make substantial changes, which helps you keep your system intact. If a prompt ever gets in your way for a task you trust, you can switch the feature off again from the same settings page.
Have a question about this guide?
Answered by AI from this guide. Good questions may be added to this page — please don't include personal details.
Did this guide fix your problem?

About the Author
Richard
Tech Writer, IT Professional
Richard is a writer at Geek Rewind who turns complex IT tasks into clear, step-by-step guides. He draws on years of hands-on experience in system administration and enterprise IT operations, focusing on Windows, Linux and WordPress: the problems people actually run into, and the fixes that work. His server and WordPress guides come from systems he runs himself. Richard builds and maintains the platform behind Geek Rewind, from its Ubuntu servers and Nginx configuration to its custom WordPress plugins. Many new tutorials start with readers' questions, and he's always glad to answer them in the comments.
No comments yet — be the first to share your thoughts!