How to Set Max Recording Length in Windows 11 Gameplay Captures
You can set a maximum recording length for your Windows 11 gameplay captures directly within the Xbox Game Bar settings.
The Xbox Game Bar is a built-in Windows 11 feature that allows you to record your PC games using the shortcut Windows key + Alt+G. By default, these recordings have no time limit.
This lack of a default limit can quickly fill up your storage drive with lengthy gameplay footage. Setting a specific maximum duration ensures your recordings automatically stop, preventing excessive file sizes.
You can choose limits like 30 minutes or even up to 2 hours, making your captured clips more manageable and your storage usage predictable.
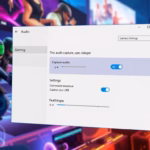
Open the Xbox Game Bar by pressing Windows key + G. Navigate to Settings, then Captures. Under “Record what happened,” set your desired maximum recording length.
Can a 26 screen record?
You can record a video of the screen on your phone if you want to share something with your friends or save the video for later use. Open the application or screen you wish to record. Open the application or screen you wish to record.
Was this guide helpful?

About the Author
Richard
Tech Writer, IT Professional
Richard, a writer for Geek Rewind, is a tech enthusiast who loves breaking down complex IT topics into simple, easy-to-understand ideas. With years of hands-on experience in system administration and enterprise IT operations, he’s developed a knack for offering practical tips and solutions. Richard aims to make technology more accessible and actionable. He's deeply committed to the Geek Rewind community, always ready to answer questions and engage in discussions.

No comments yet — be the first to share your thoughts!