How to Adjust Video Frame Rate and Quality in Windows 11
You adjust video frame rate and quality in Windows 11 to ensure your screen recordings look smooth and retain the detail you need.
Frame rate, measured in frames per second (FPS), controls motion smoothness; for example, 60 FPS offers much smoother playback than the standard 30 FPS. Video quality is largely determined by bitrate, which dictates the amount of data per second and thus the level of detail captured.
Using the Windows 11 Game Bar is the primary way you can manage these settings for all your future recordings.
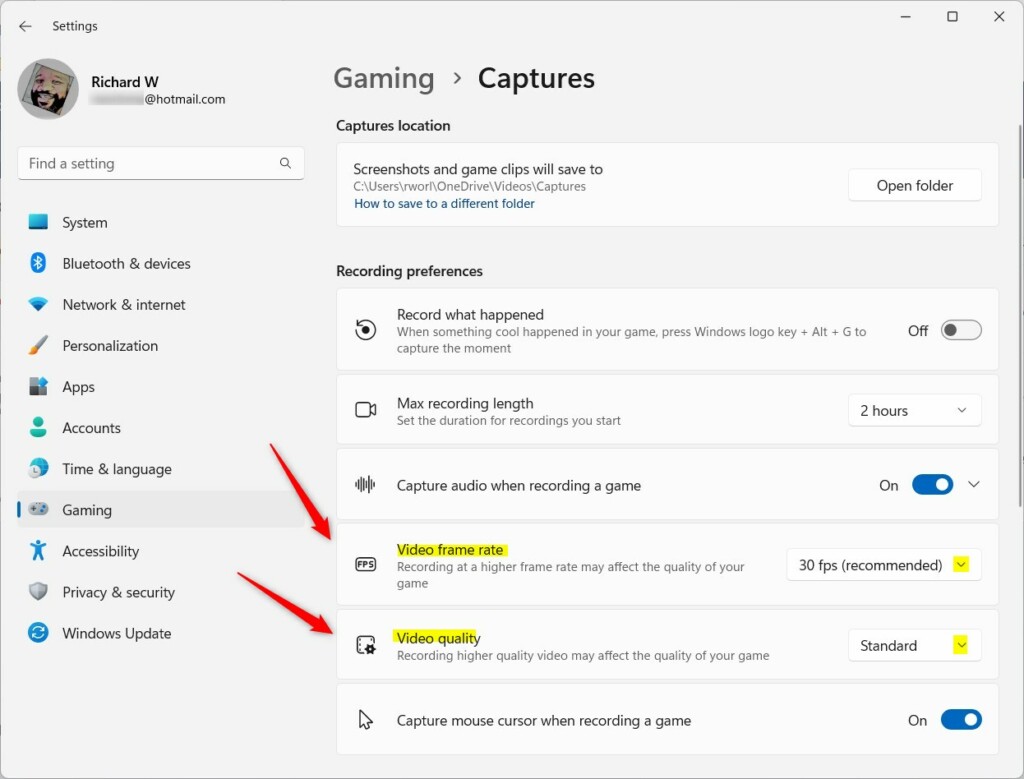
Adjust video frame rate and quality in Windows 11 through the Game Bar settings. Open Settings, go to Gaming > Captures, and select your desired Video frame rate (30 or 60 fps) and Video quality (Standard or High).
How to adjust video frame rate in 🪟 Windows 11
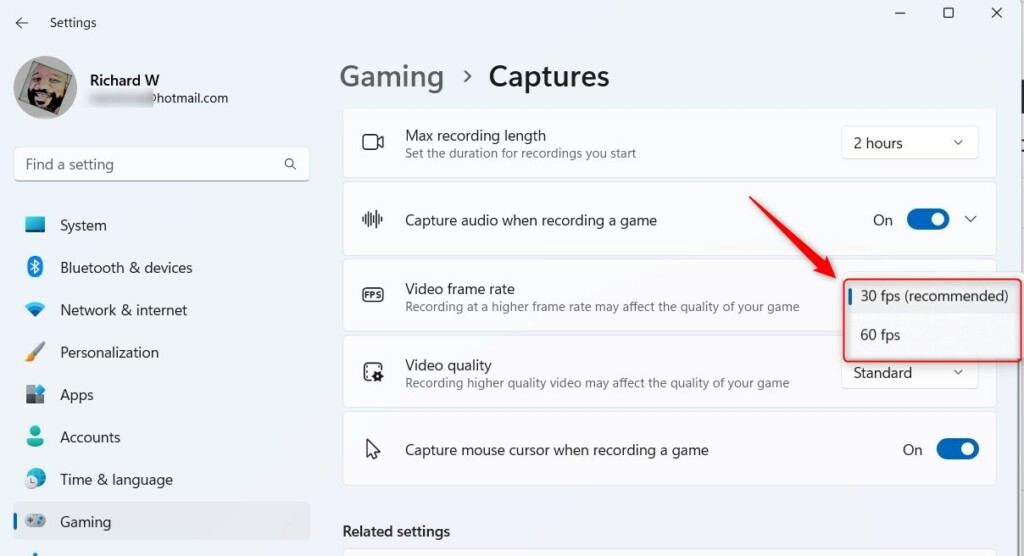
Adjusting your video frame rate in Windows 11 is simple using the Game Bar. You can pick between 30 frames per second (fps) for smaller file sizes or 60 fps for smoother video playback, depending on what you need for your recordings.
- Open the Settings app by pressing Windows key + I.
- Click the Gaming tab on the left.
Turn on or off gameplay video captures in Windows 11 - Select the Captures tile.

Turn on or off gameplay video captures in Windows 11 - Look for Video frame rate and Video quality.
Change video frame rate and quality with gameplay captures - Choose 30 fps or 60 fps.
Change video frame rate and quality with gameplay captures - Choose Standard or High quality.
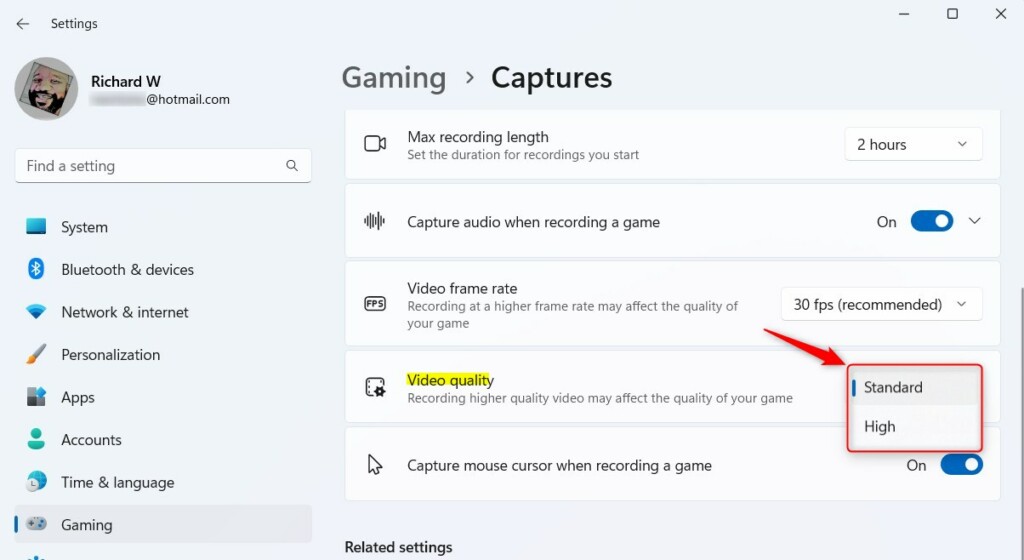
Change video frame rate and quality with gameplay captures
Note: Changing these settings does not require admin privileges.
Technical Concepts: VFR vs. CFR
Understanding Variable Frame Rate (VFR) versus Constant Frame Rate (CFR) is key because VFR can cause audio sync issues in video editors, while CFR is often preferred for editing.
Glossary of Terms
- Bitrate: The amount of data per second in a video file.
- Codec: The software used to compress and decompress video.
- Resolution: The number of pixels on the screen (e.g., 1080p).
- Motion Blur: The natural streaking effect seen in high-speed movement.
Summary
Adjusting your video frame rate and quality in Windows 11 helps you balance smooth playback with file size and performance, so choose 60fps for action and 30fps for less demanding content.
Does changing frame rate affect video quality?
Changing the frame rate does not change the resolution, but it changes how smooth motion appears. High frame rates require more data. If your bitrate is too low, a high frame rate can actually make the video look blurry or pixelated because the data is spread too thin.
What is the best frame rate for YouTube?
For most gaming videos, 60fps is the gold standard. It provides smooth motion that looks great on modern screens. If you are recording simple tutorials or desktop work, 30fps is perfectly fine and results in smaller file sizes that are faster to upload to the internet.
Can I change frame rate without re-encoding?
Generally, no. Changing the frame rate requires the computer to process the video data again, which is called re-encoding or rendering. While some tools can change the metadata, this often causes playback errors. It is best to record at the desired frame rate from the start.
Was this guide helpful?

About the Author
Richard
Tech Writer, IT Professional
Richard, a writer for Geek Rewind, is a tech enthusiast who loves breaking down complex IT topics into simple, easy-to-understand ideas. With years of hands-on experience in system administration and enterprise IT operations, he’s developed a knack for offering practical tips and solutions. Richard aims to make technology more accessible and actionable. He's deeply committed to the Geek Rewind community, always ready to answer questions and engage in discussions.

No comments yet — be the first to share your thoughts!