How to Rename Audio Devices on Windows 11


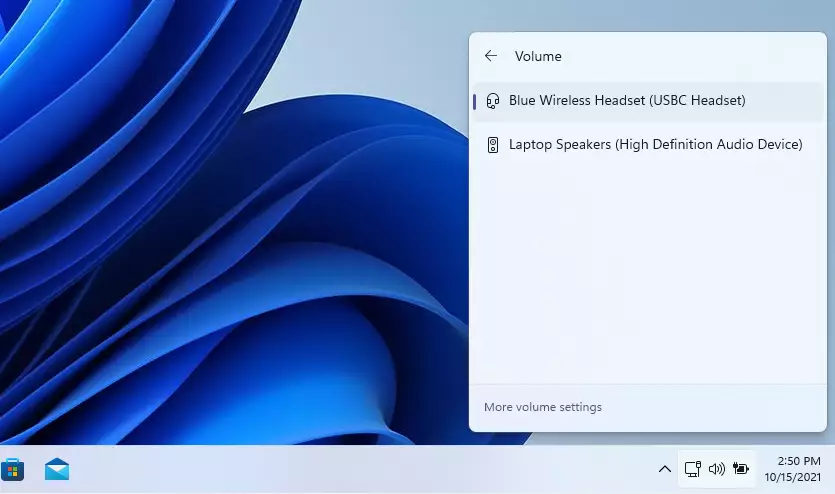
Renaming audio devices on Windows 11 lets you swap confusing default names like “Realtek(R) Audio” for clear labels like “Desk Speakers” or “Gaming Headphones”. This custom name shows up instantly in your volume menu and sound settings on any PC running version 22H2 or newer so you always pick the right gear for calls or music.
You can change these names in a few clicks right from the main Settings app without downloading extra software. Custom names stay saved until you change them again or reset the device.
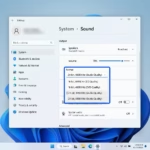
Open Settings , go to System, then Sound. Click the arrow next to the device you want to rename, click the Rename button, type your new name, and click Rename. This applies to both output and input devices.
How to rename audio devices on 🪟 Windows 11
You can rename audio devices on Windows 11 through the main Settings app to tell your speakers, headphones, and microphones apart. Open Settings, go to System, then Sound, and click on the audio device you want to change. Scroll down and type a new name in the text box to update it immediately.
- Open your Settings app. Press Win+I on your keyboard or click Start and select Settings.

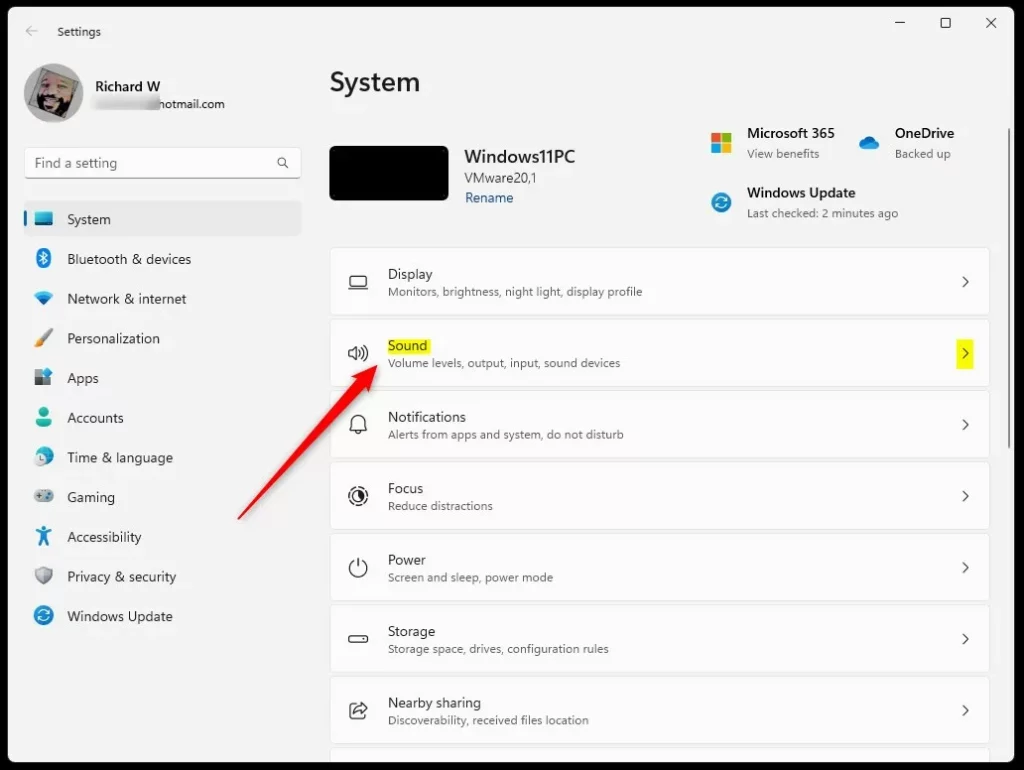
windows 11 start settings - In the menu on the left, click System. Then, click on Sound on the right side of your screen.
Windows Sound tile in Windows Settings app - Look under the Output section to see your connected speakers or headphones. Click the arrow next to the device you want to change.
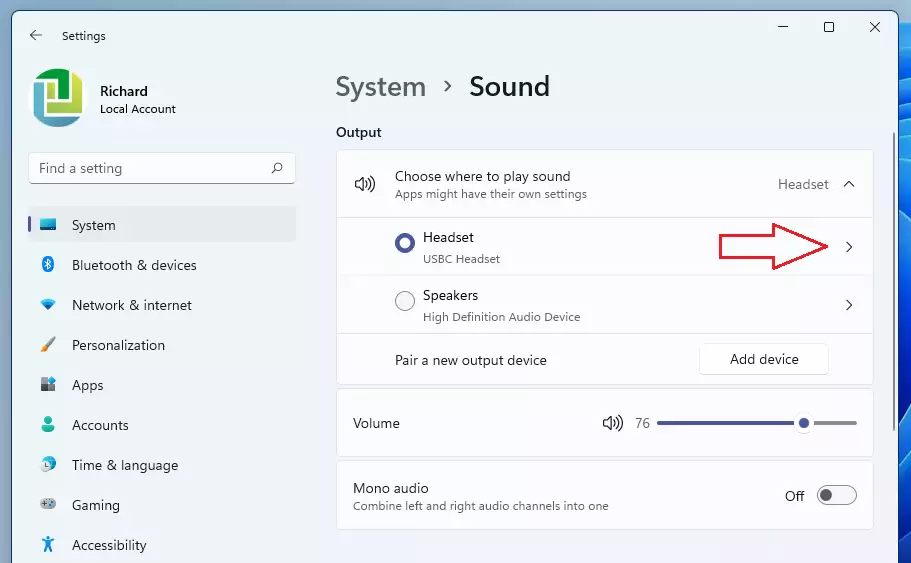
rename sound device on windows 11 - Look for the device name and click the Rename button.
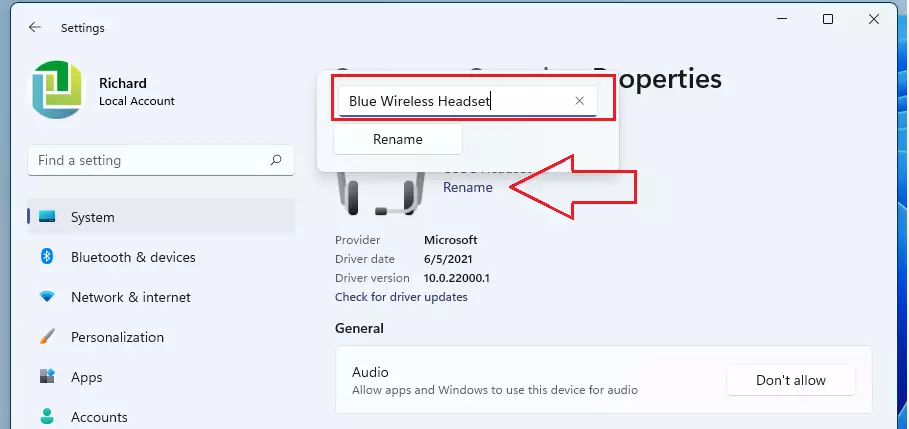
- Type in your preferred name and click Rename to save your changes.
windows 11 rename audio device
You can follow these same steps for your microphones or other recording gear found under the Input section. Your changes will take effect right away.
Advanced: Registry-level renaming
You can rename audio devices in the Registry Editor when Windows 11 keeps resetting your custom names back to the default ones. Open the Registry Editor by typing regedit in the Start menu search bar , then find the specific keys for your sound hardware to change their names manually. Make sure to back up your system first since mistakes can cause permanent issues.
If a device name keeps resetting, you may need to edit the registry directly. Press Win+R, type regedit, and press Enter. Navigate to:
HKEY_LOCAL_MACHINE\SOFTWARE\Microsoft\Windows\CurrentVersion\MMDevices\Audio\Render
You can modify the DeviceDesc string to force a name change. This is useful for persistent naming issues where the standard settings app fails to save your preferences.
Troubleshooting persistent device names
This happens because the driver overwrites the registry entry. To fix this, ensure your drivers are up to date via Device Manager. If the issue persists, try disabling and re-enabling the device in the Sound Control Panel.
Summary
Renaming audio devices on Windows 11 helps you organize your sound setup, avoid sending audio to the wrong place, and makes setup easier with quick, clear labels.Can I rename Bluetooth audio devices?
Yes, you can rename Bluetooth audio devices. Navigate to Settings Bluetooth & devices Devices. Find your audio device, click the three dots, and select Rename. This changes how the device appears across your entire Windows 11 system, ensuring consistency when you connect your wireless headphones or speakers.
Was this guide helpful?

About the Author
Richard
Tech Writer, IT Professional
Richard is a writer at Geek Rewind who turns complex IT tasks into clear, step-by-step guides. He draws on years of hands-on experience in system administration and enterprise IT operations, focusing on Windows, Linux and WordPress: the problems people actually run into, and the fixes that work. His server and WordPress guides come from systems he runs himself. Richard builds and maintains the platform behind Geek Rewind, from its Ubuntu servers and Nginx configuration to its custom WordPress plugins. Many new tutorials start with readers' questions, and he's always glad to answer them in the comments.

No comments yet — be the first to share your thoughts!