This post shows students and new users how to make a user administrator in Windows 11.
The new Windows 11 also comes with these legacy account types. There are two types of accounts on Windows 11: Standard and Administrator.
When you create a new user account in Windows 11, the user does not automatically become an administrator. The account you create will be a standard account with limited rights to do or change any critical settings on the computer, including installing and removing programs.
Learning how to make a user an Administrator in Windows 11 can be useful in various situations. For instance, if you share your computer with family members or colleagues, you may want to grant them more access to the system to perform certain tasks or install new software.
By making them an Administrator, they will have full access to the system and be able to perform tasks that a standard user cannot. Additionally, if you are a system administrator or IT professional, you may need to manage user accounts and permissions for multiple users on a network.
Knowing how to make a user an Administrator can be important in such cases.
To get started with changing a standard user to an Administrator, follow the steps below:
Change Standard to Administrator in Windows 11
As mentioned above, you can create two accounts in Windows 11—a standard user and an administrator account. You typically create a standard account, then change the account type from Standard to Administrator.
To do that, use the steps below.
Windows 11 has a centralized location for the majority of its settings. Everything can be done, from system configurations to creating new users and updating Windows from its System Settings pane.
To get to System Settings, you can use the Windows key + I shortcut or click on Start ==> Settings, as shown in the image below:

Alternatively, you can use the search box on the taskbar and search for Settings. Then select to open it.
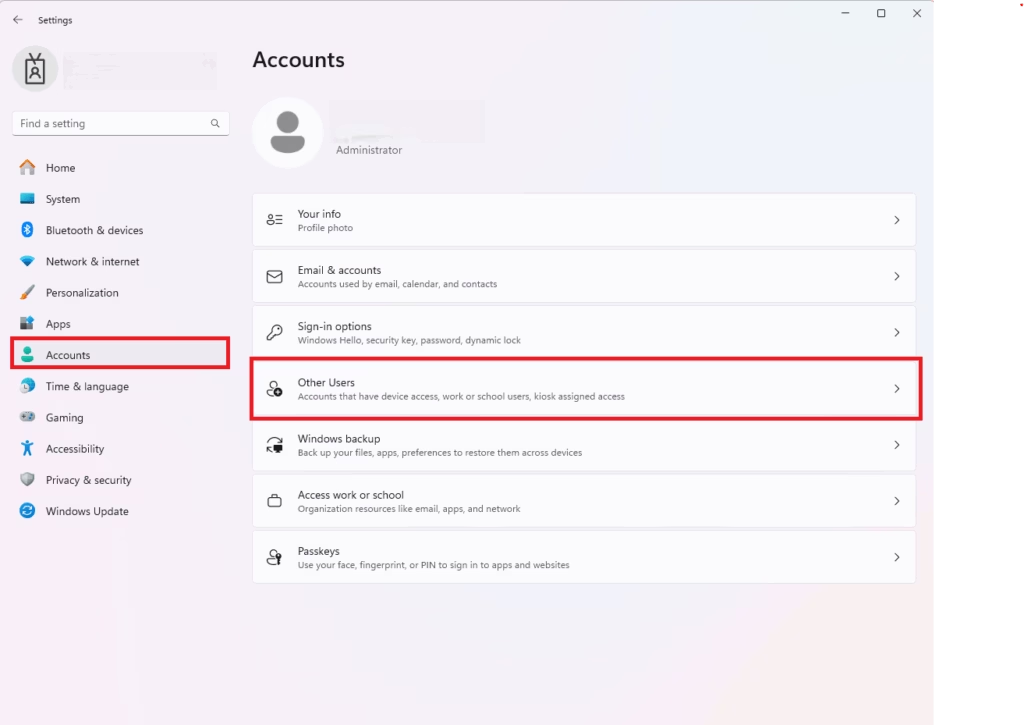
Windows Settings pane should look similar to the image below. In Windows Settings, click Accounts, and select Family & Other Users on the right pane of your screen, as shown in the image below.

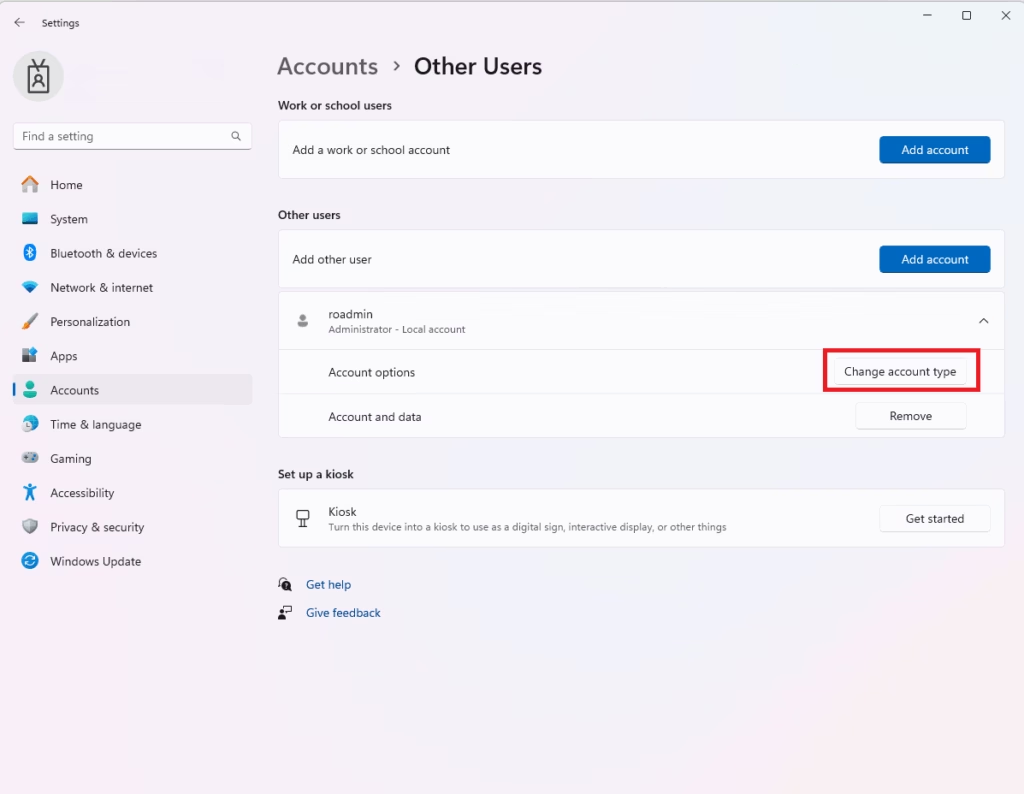
On the Family & Other Users settings pane, scroll down to Other Users as highlighted below. Then select and expand the account for which you want to make an administrator.
Click the Change account type button as shown below.

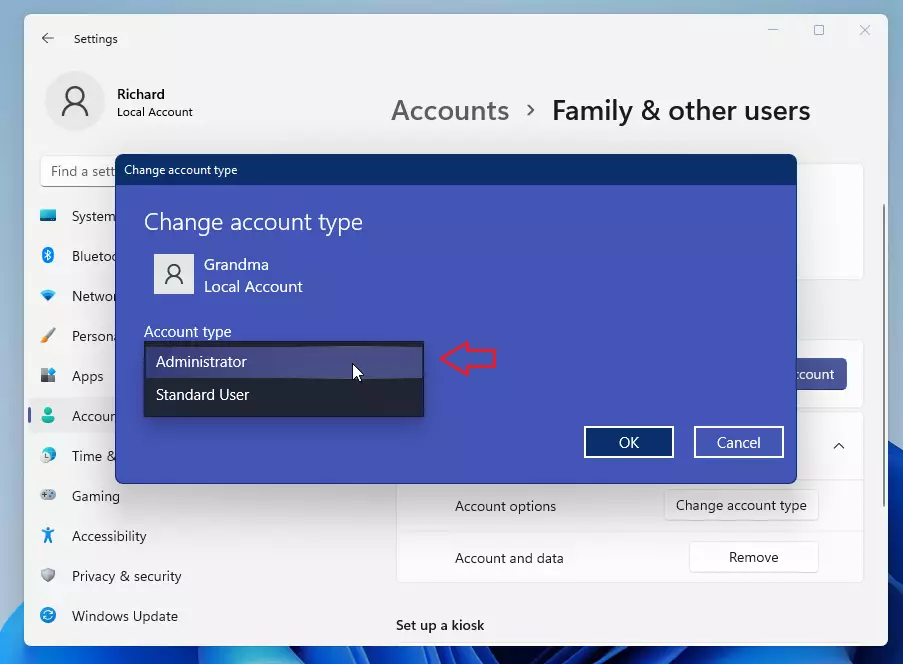
That will open another settings pane. There, change the account type from Standard to Administrator, as shown below. Click OK to save your changes.

The account should now be an administrator.

That should do it!
If you want to remove administrator rights from user accounts, reverse the steps above and switch the user back to the standard user type.
Conclusion:
In summary, making a user an administrator in Windows 11 is a straightforward process that can enhance your system’s functionality. Here are the key points to remember:
- Windows 11 offers two account types: Standard and Administrator.
- A standard user account has limited rights and cannot perform critical system changes.
- Granting administrator rights allows users to install software and modify system settings.
- The transition from standard to administrator can easily be done through the System Settings.
- To change an account type, navigate to Accounts > Family & Other Users, select the user, and change the account type.
- If needed, you can revert administrator rights back to a standard user following the same steps.
By following these guidelines, you can efficiently manage user permissions on your Windows 11 system.
Leave a Reply