How to Install Windows Wireless Display App on Windows 11

The Wireless Display app turns your Windows 11 PC into a wireless screen receiver that lets you mirror phones, tablets, or other laptops without cables using Miracast technology. Microsoft removed this feature from the default installation list in recent Windows updates, so you must now add it manually through your system settings before you can beam videos, photos, or presentations straight to your monitor.
Install the Wireless Display app through Settings by navigating to Apps Optional features View features. Search for “Wireless Display,” select it, and click Install. This turns your PC into a Miracast receiver.
How to install the Windows Wireless Display app
The Windows Wireless Display app is installed through the Settings app on Windows 11 by adding an optional feature to your computer. Open Settings, go to Apps, select Optional features, and click View features to search for and install the app so you can share screens wirelessly.

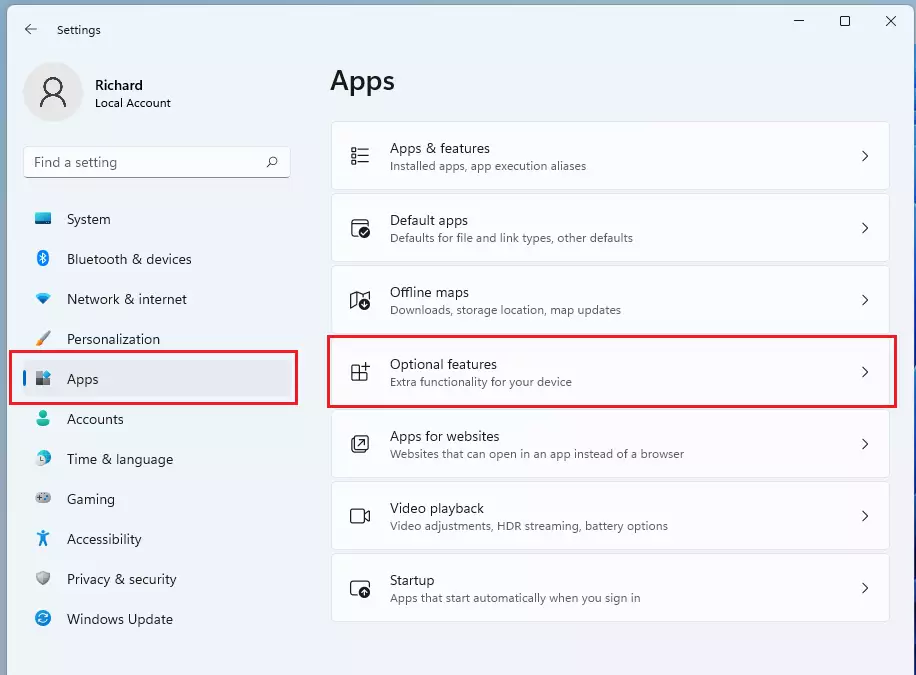
Open Settings and navigate to Apps > Optional features.
Click View features to open the app directory.
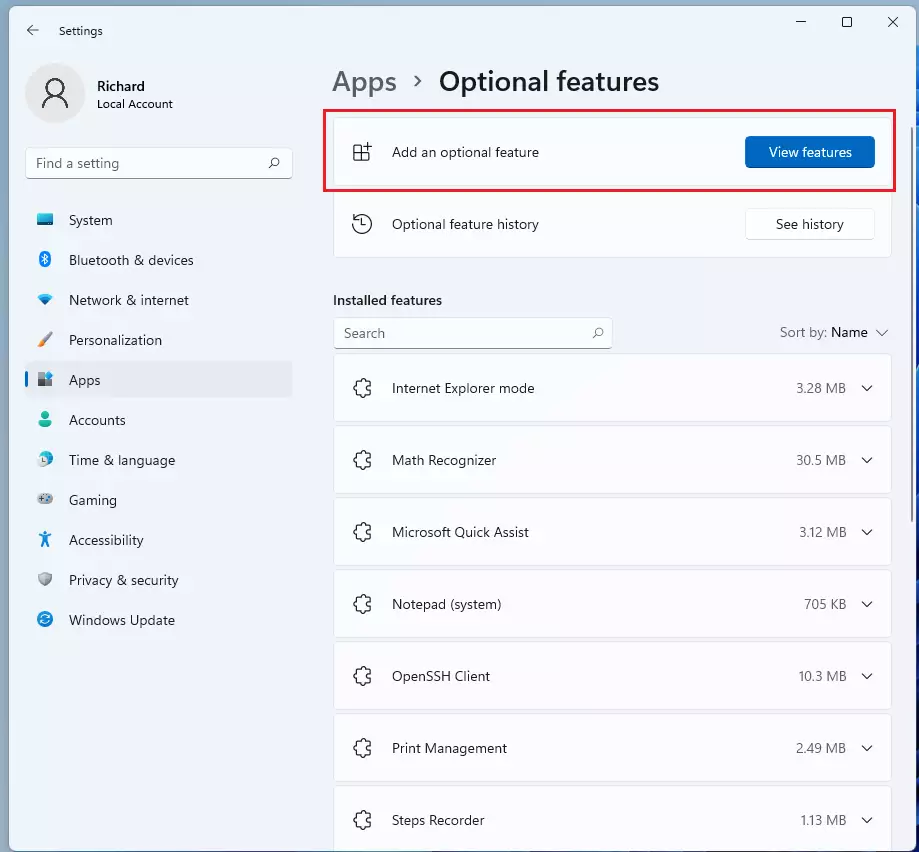
Open Settings and select Apps Optional features. Click View features, type “Wireless Display” into the search bar, check the box next to the app name, and click Next then Install.
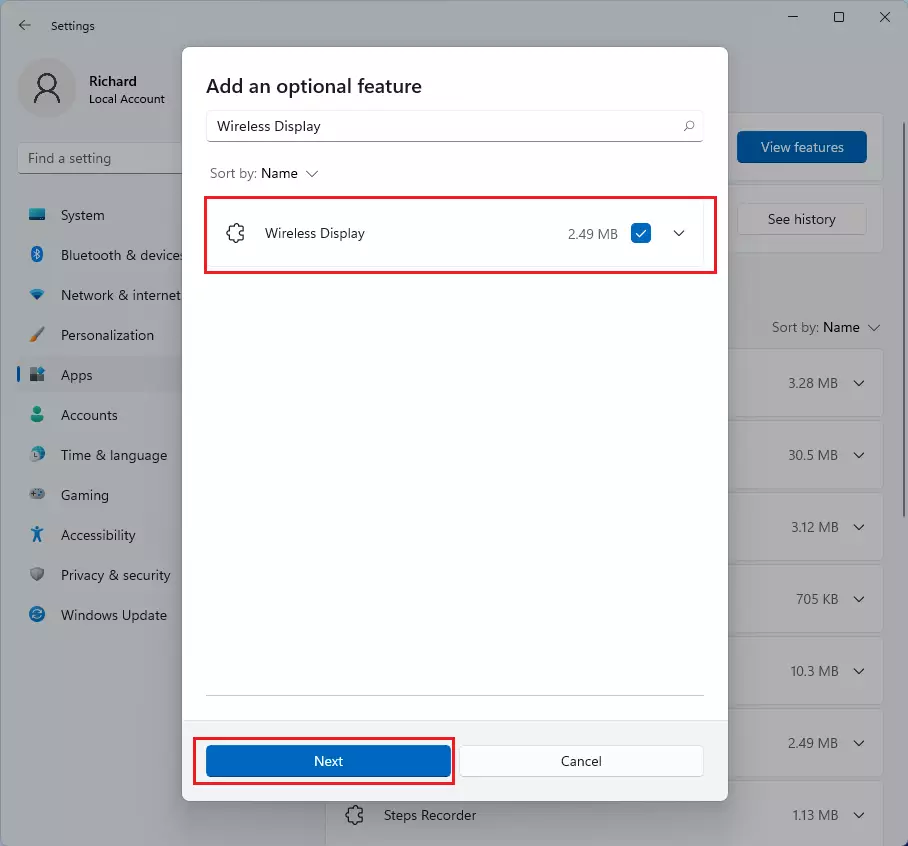
Admin privileges are required to modify system features during this process.
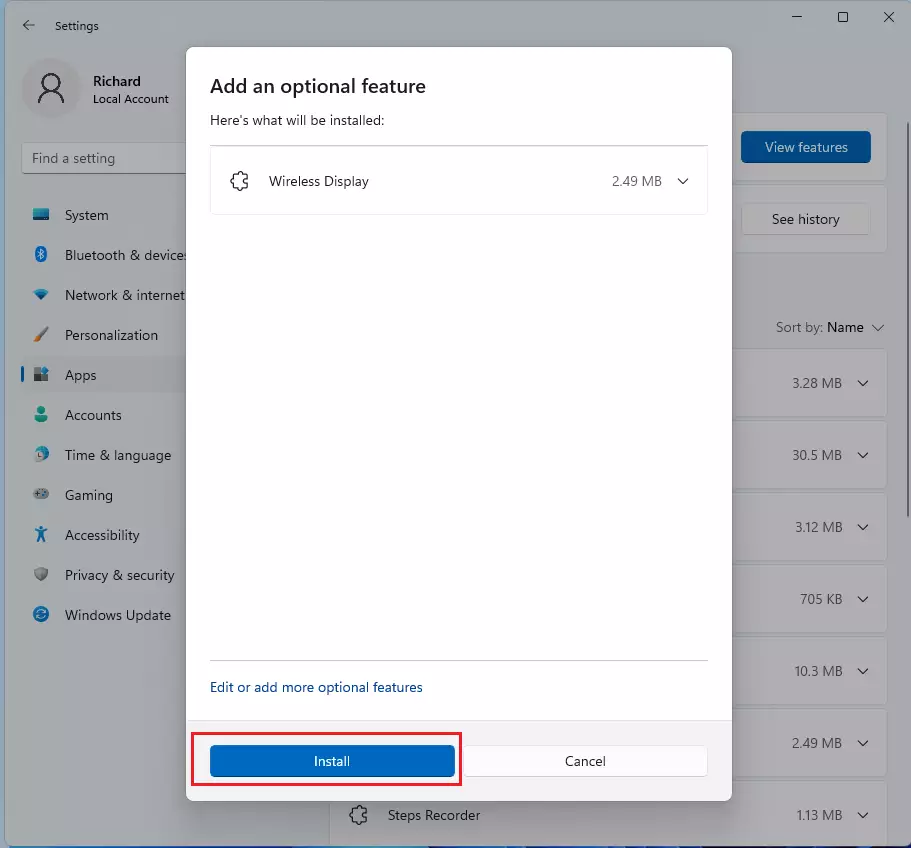
Once the progress bar finishes, the app is installed and ready to use. Management tools are also available for download directly from the official Microsoft Store.
Managing Firmware and Troubleshooting
Keeping the Miracast adapter firmware up-to-date is important for a smooth connection, and the Microsoft Wireless Display Adapter app helps track this.
How to update adapter firmware
- Open the Microsoft Wireless Display Adapter app.
- Connect to your adapter.
- Look for the Firmware section to see if an update is available.
- Follow the on-screen prompts to install.
Overscan and Display Settings
Overscan issues that cause blurry edges or cut-off screens on your wireless monitor are fixed by adjusting your TV or physical monitor settings. You can also resolve audio sync problems by opening Sound settings and making sure your wireless display is selected as the active output device.
Changing the audio format in Advanced Sound settings fixes the delay in many cases.
How to use the Wireless Display app
Using the Windows Wireless Display app requires you to open Settings, go to System, and select Project to this PC to configure how other devices connect to your computer. From this menu, you can choose where the app is available and launch the display receiver to start casting.
- Available everywhere on secure networks
- Available everywhere
- Always Off (Recommended)
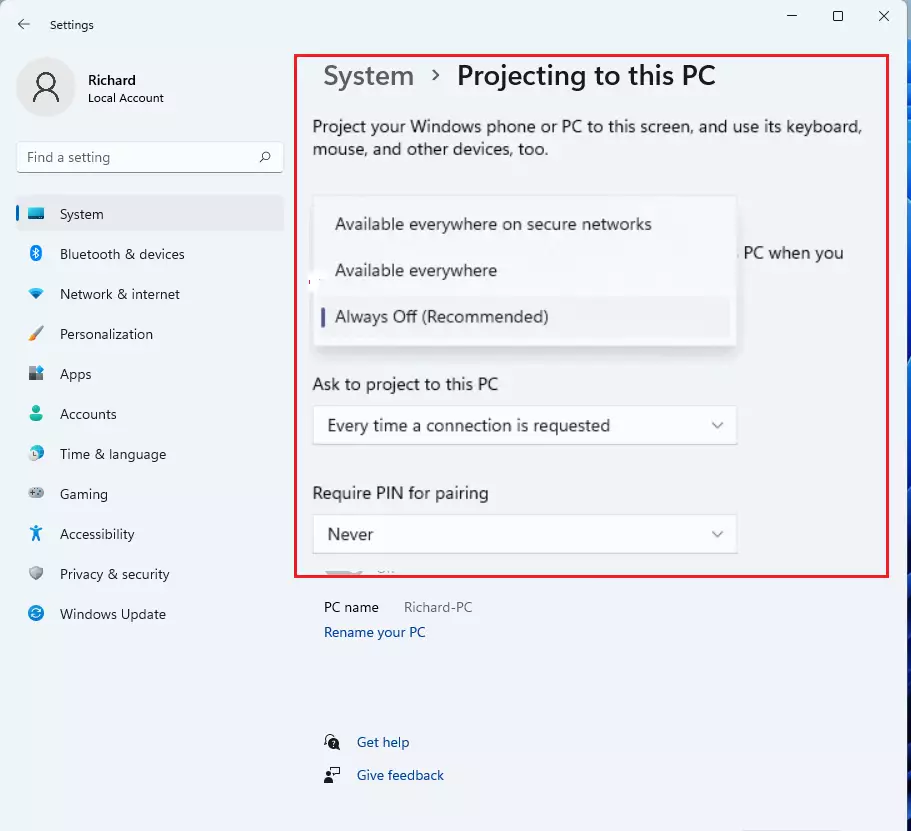
Click the link that says Launch the Connect app to project to this PC. The computer now waits for a signal from another device.
How to uninstall the app
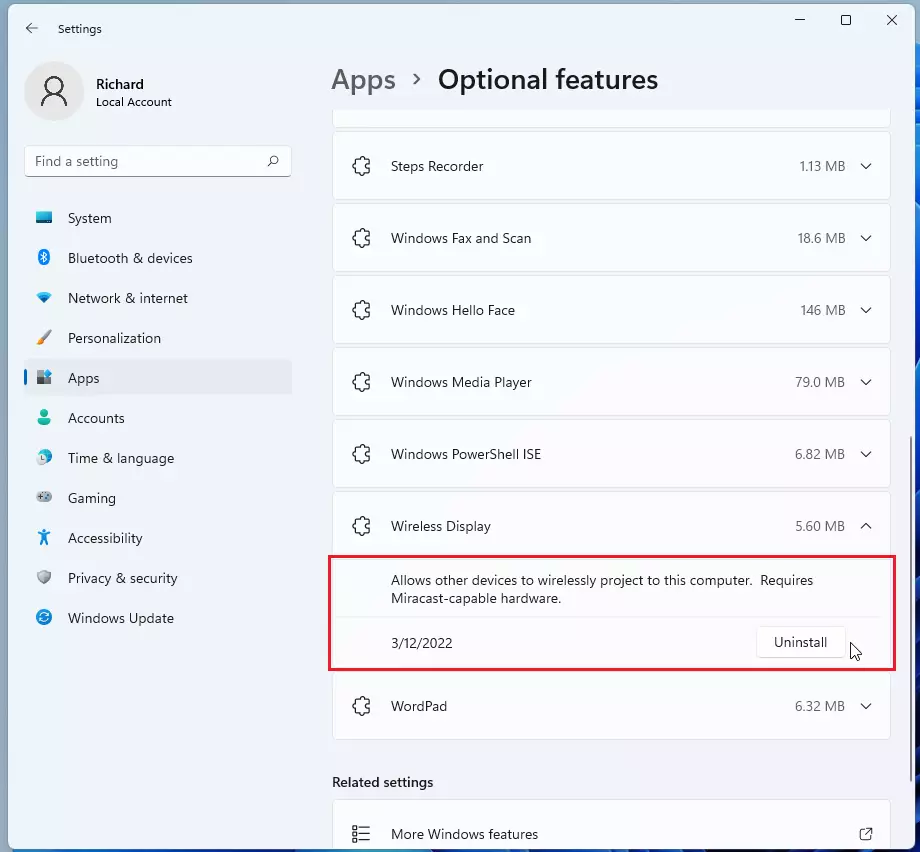
Remove the app if you no longer need it to free up disk space. Go to Settings Apps Optional features. Find the Wireless Display tile in the list of installed features, click it to expand, and select Uninstall.
Summary
The Windows Wireless Display app lets users mirror screens wirelessly using Miracast, and installation happens quickly through the Optional features menu.
Was this guide helpful?

About the Author
Richard
Tech Writer, IT Professional
Richard is a writer at Geek Rewind who turns complex IT tasks into clear, step-by-step guides. He draws on years of hands-on experience in system administration and enterprise IT operations, focusing on Windows, Linux and WordPress: the problems people actually run into, and the fixes that work. His server and WordPress guides come from systems he runs himself. Richard builds and maintains the platform behind Geek Rewind, from its Ubuntu servers and Nginx configuration to its custom WordPress plugins. Many new tutorials start with readers' questions, and he's always glad to answer them in the comments.


No comments yet — be the first to share your thoughts!