How to Install vTiger CRM with Apache on Ubuntu 24.04


Installing vTiger CRM 7.4 with the Apache web server on Ubuntu 24.04 LTS gives you a private workspace that brings your sales, marketing and customer support data into one place. This free setup lets you track leads and manage customers in your web browser without paying for software subscriptions.
The stack has four parts: Apache serves the pages, MariaDB stores the data, PHP runs the application code, and an optional Let’s Encrypt certificate encrypts the traffic. You need a fresh Ubuntu 24.04 server, a user with sudo rights, and an internet connection. Run the commands in order, because each part depends on the one before it.
To install vTiger CRM on Ubuntu 24.04, first install the Apache web server and MariaDB database. Run sudo apt update, then sudo apt install apache2, and sudo apt install mariadb-server in the terminal. Enable both services with sudo systemctl enable apache2 and sudo systemctl enable mariadb so they restart after a reboot.
Install Apache HTTP server on Ubuntu
Apache is the web server that delivers your vTiger CRM pages to users over the network. You install it from the terminal in two stages: refresh the package list, then install the web server package.
Updating the package list first makes sure Ubuntu installs the current version from its repositories instead of an outdated one.
- Open the Ubuntu terminal.
- Run the commands below, one after the other, to update the package list and install the Apache web server.
- If you are asked to confirm the installation, type Y and press Enter. When the prompt returns, Apache is installed.
sudo apt update
sudo apt install apache2
On Ubuntu, Apache normally starts as soon as it is installed. Even so, you should know how to control it. The commands below start Apache, stop it, and enable it so it starts by itself every time the server boots.
Run the enable command at least once. Without it, Apache may not come back after a reboot, and vTiger will be unreachable until you start it by hand.
sudo systemctl stop apache2
sudo systemctl start apache2
sudo systemctl enable apache2
Next, check that Apache is serving pages. Open a web browser and go to the server's localhost address or its IP address.
If you are connecting from another computer, use the server's IP address instead. In that case, make sure the server's firewall lets web traffic through on port 80. If it blocks it, the page will time out even though Apache is running.
http://localhost
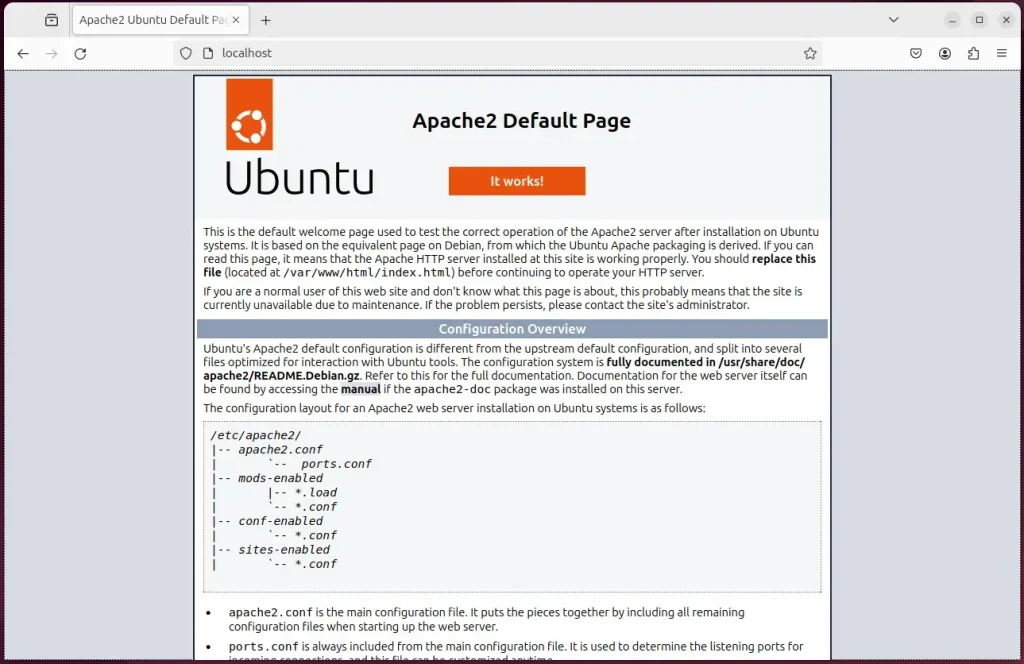
When you see the Apache2 Default Page, the Apache HTTP server is installed and working. If you do not see it, the page may be blocked by a firewall, or the address may be wrong. Fix that before you go any further, because every later step depends on a working web server.
Additional help on installing Apache on Ubuntu is in the link below.
Install the MariaDB database server on Ubuntu
MariaDB is the database vTiger CRM uses to store customer records, settings and application data. You install it from the terminal in the same way as Apache, using the packages from the Ubuntu repositories.
The instructions below install the MariaDB database server, make sure it runs at boot, and check that it works.
- Open the Ubuntu terminal.
- Run the commands below to install the MariaDB database server.
- Confirm any prompt that appears. When the prompt returns, the installation is done.
sudo apt update
sudo apt install mariadb-server
Once MariaDB is installed, use the commands below to stop it, start it, and enable it so it starts automatically when the server boots. Enabling it matters because vTiger stops working if the database is not running after a reboot.
sudo systemctl stop mariadb
sudo systemctl start mariadb
sudo systemctl enable mariadb
Run the commands below to check that the MariaDB database server is installed and working.
sudo mariadb
After you run the commands above, you are logged on to the MariaDB console. It shows a welcome message similar to the one below.
Welcome to the MariaDB monitor.  Commands end with ; or g.
Your MariaDB connection id is 32
Server version: 10.11.2-MariaDB-1 Ubuntu 23.04

Copyright (c) 2000, 2018, Oracle, MariaDB Corporation Ab and others.

Type 'help;' or 'h' for help. Type 'c' to clear the current input statement.

MariaDB [(none)]>
The message confirms that the server is installed and accepting connections. If you get an error instead, check that the MariaDB service is running before you continue.
Additional help on installing MariaDB.
- How to install MariaDB on Ubuntu Linux
- MariaDB without password prompt
Create a vTiger database
vTiger CRM needs its own database and its own database user. Keeping its data separate from everything else on the server is safer, and it makes backups and clean-ups easier. You do this from the MariaDB command line: log in, create the database, create the user, and grant that user full access to the new database.
As part of the setup, we will create a vtigerdb database and a user account called vtigerdbuser. You can use other names if you prefer. If you do, use the same names in the commands, and again later in the vTiger installation wizard.
Finally, we'll grant the vtigerdbuser full access to the vtigerdb database. The user only has rights on this one database, not on the rest of the server.
All the database steps above can be done using the commands below:
But first, log on to the MariaDB database server:
sudo mariadb
Then run the commands below to complete the steps. Run them inside the MariaDB console, not in the normal shell. You will know you are in the right place because the prompt changes to the MariaDB prompt.
CREATE DATABASE vtigerdb CHARACTER SET utf8mb4 COLLATE utf8mb4_general_ci;
CREATE USER vtigerdbuser@localhost IDENTIFIED BY 'type_your_password_here';
GRANT ALL ON vtigerdb.* TO vtigerdbuser@localhost WITH GRANT OPTION;
FLUSH PRIVILEGES;
exit
Replace 'type_your_password_here ' with your own password, and keep the quotation marks around it. Use a long, unique password and write it down somewhere safe. You will type it again in the vTiger installation wizard.
Install PHP on Ubuntu Linux
PHP is the scripting language vTiger CRM is written in. It processes requests and connects the application to the database. vTiger also needs several PHP modules for things like database access, text handling, image support and file uploads, so you install PHP and its modules together in one terminal command.
Ubuntu 24.04 ships its own default PHP version in the standard repositories, and that is the version the command below installs.
- Open the Ubuntu terminal.
- Run the commands below to install PHP and its modules.
- Wait for the installation to finish and for the prompt to return.
sudo apt install php libapache2-mod-php php-intl php-mysql php-curl php-cli php-zip php-xml php-gd php-common php-mbstring php-xmlrpc php-sqlite3 php-soap php-ldap php-imap
Additional help on installing PHP
Download vTiger files
Here you download the vTiger CRM archive from the official website, extract it, and move the files into the Apache web root folder. That puts the website files where Apache can read and serve them.
If a newer version is available, replace the version number in the download link in the commands below. This guide uses version 7.4.
First, go to the /tmp/ directory and download the vTiger files. Then unzip the archive and move its contents into the vTiger folder in the Apache root directory. Files in /tmp are temporary, so it is a good place for the download. Only the extracted files need to end up in the web root.
The last step is to change the ownership and permissions. This lets the Apache web server read and write the files vTiger needs, such as uploads and configuration, while keeping the rest of the system protected. Without it, the installation wizard may fail with permission errors.
cd /tmp
wget https://phoenixnap.dl.sourceforge.net/project/vtigercrm/vtiger%20CRM%207.4.0/Core%20Product/vtigercrm7.4.0.tar.gz
tar -xvf vtigercrm7.4.0.tar.gz
sudo mv vtigercrm /var/www/vtigercrm
sudo chown -R www-data:www-data /var/www/vtigercrm
When all the steps above are done, configure the Apache web server to serve the vTiger content. Apache does this through a virtual host file, which tells it which site name to answer to and which folder holds that site's files.
Run the commands below to create an Apache virtual host file for vTiger.
sudo nano /etc/apache2/sites-available/vtigercrm.conf
Then copy and paste the content block below into the new virtual host file. Before you save it, check that the server name matches your own domain name or server IP address. Also check that the document root points to the vTiger folder you created earlier.
<VirtualHost *:80>
  ServerName vtigercrm.example.com
  ServerAlias www.vtigercrm.example.com
  ServerAdmin admin@example.com
  DocumentRoot /var/www/vtigercrm

  <Directory /var/www/vtigercrm/>
       Options FollowSymlinks
       AllowOverride All
       Require all granted
  </Directory>

       ErrorLog ${APACHE_LOG_DIR}/error.log
       CustomLog ${APACHE_LOG_DIR}/access.log combined
</VirtualHost>
Save the file.
Next, enable the virtual host for vTiger CRM and restart Apache. Enabling the virtual host tells Apache about the new configuration. The restart makes Apache load it. After both steps, vTiger CRM can be reached from your web browser.
If Apache fails to restart, the usual cause is a typo in the virtual host file. Open the file again and compare it with the content block above.
sudo a2ensite vtigercrm.conf
sudo a2enmod rewrite
sudo systemctl restart apache2
Setup Let's Encrypt SSL/TLS for vTiger
You should secure the vTiger CRM login and your customer data with a free Let's Encrypt SSL/TLS certificate for Apache. The certificate encrypts the traffic between your users and the server, so passwords and customer details are not sent in plain text.
This step is optional for a quick test on a private network, but you should do it for any server that people reach over the internet. Let's Encrypt generally needs a real domain name that points to your server, and the server must be reachable on ports 80 and 443.
Please read the post below for more on installing and creating Let's Encrypt SSL certificates for Apache.
How to set up Let's Encrypt SSL certificate for Apache on Ubuntu Linux
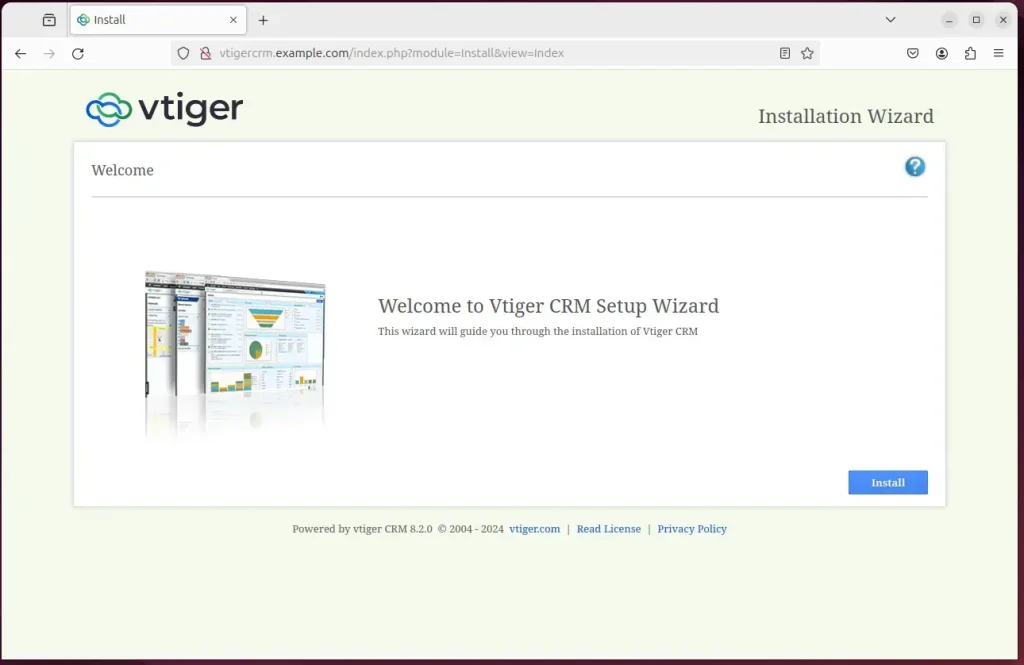
After you restart Apache, open your browser and go to the server hostname or IP address defined in the Apache virtual host file. Use the same name you set as the server name. If you use a different name, Apache may show the default page instead of vTiger.
http://vtigercrm.example.com
The vTiger installation wizard should appear. Click Install to begin. If the wizard reports a missing PHP module or a setting that is too low, fix it on the server, restart Apache, and reload the page.
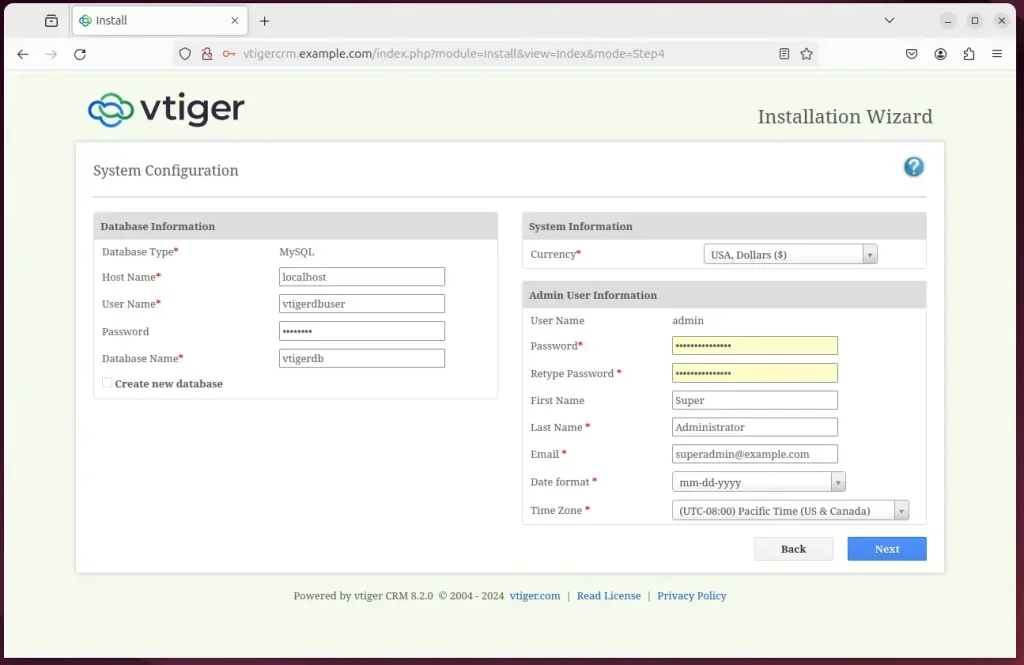
Next, enter the database name, the database account and its password. These are the values you created earlier in MariaDB. Then create an administrator account for vTiger and continue. Keep the administrator login safe, because it controls the whole CRM.
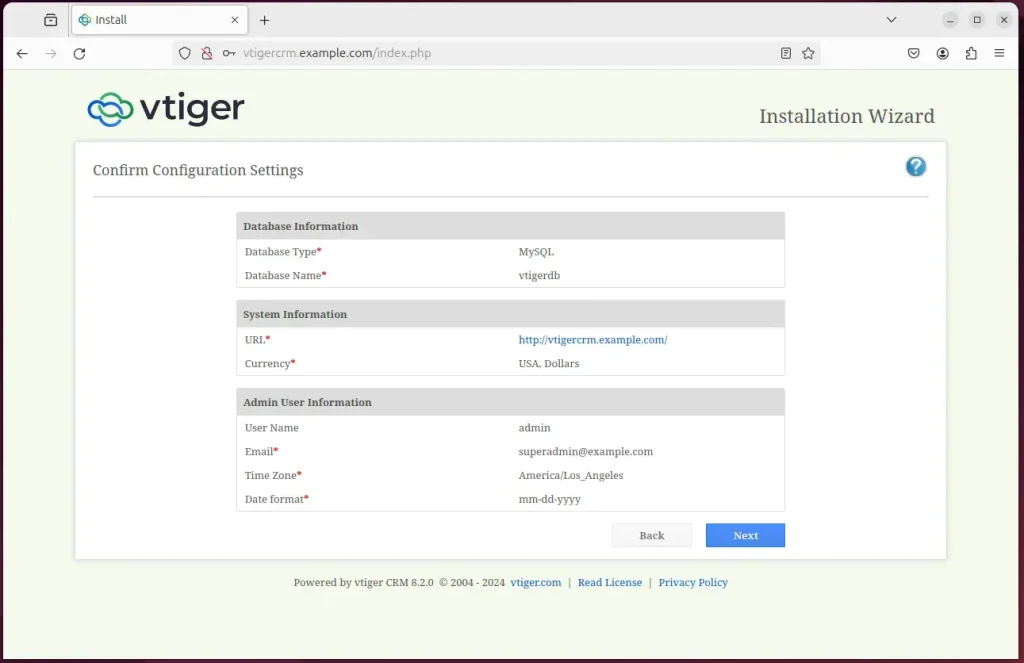
Review the setup information on the screen. If everything is correct, confirm it and continue. If something is wrong, go back and fix it before you continue.
On the next screen, create a user account and complete the installation. Then choose which vTiger CRM features you want to install and continue. The installer sets up the database tables, so this step can take a few minutes. Do not close the browser tab while it runs.
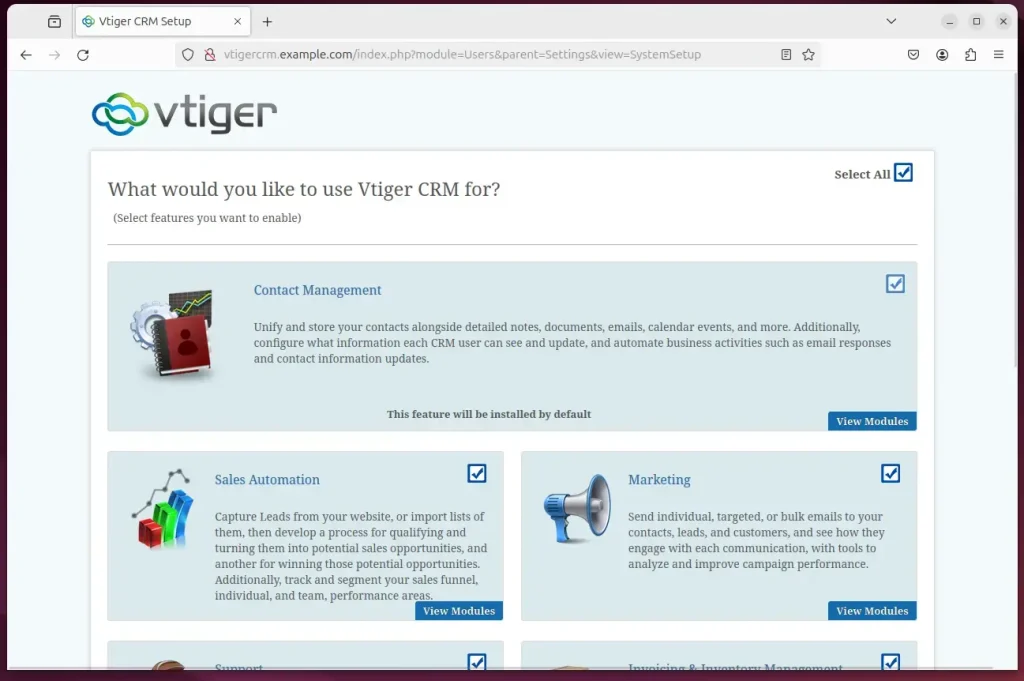
Your vTiger site should now be set up and ready to use. Sign in with the account you created and look around the dashboard to confirm it loads.
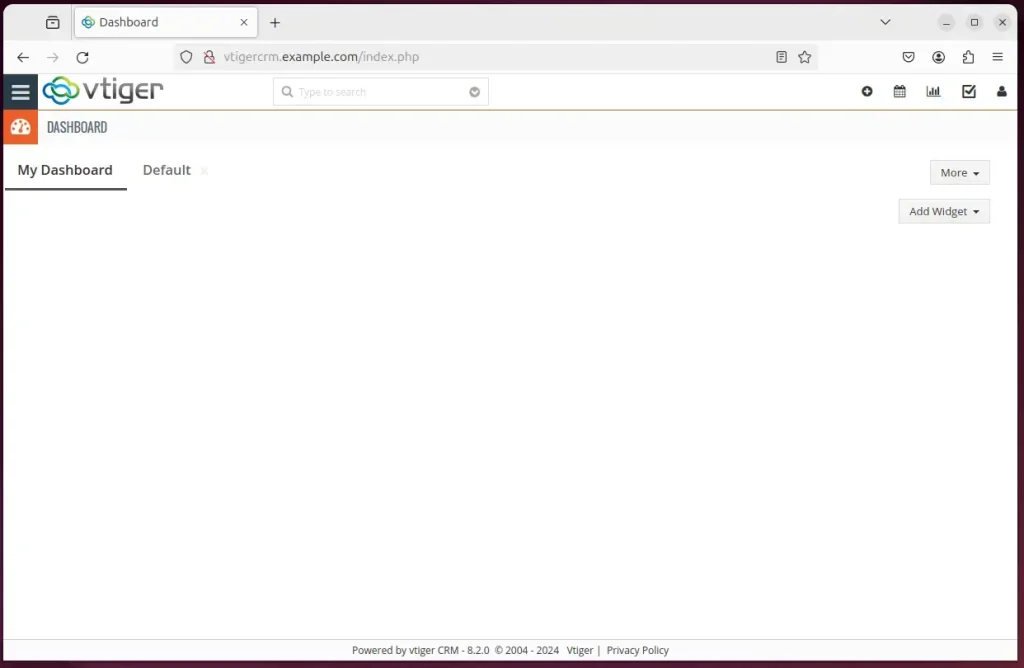
That should do it!
Conclusion:
- Installing vTiger CRM on Ubuntu with Apache gives you a solid platform for keeping customer data in one place, with full control over where it is stored and who can reach it.
- Apache's web server features and Ubuntu's stability and security make a good environment for hosting vTiger CRM. This supports effective customer relationship management and smoother sales, marketing and customer support work.
- The process involves installing an Apache HTTP server and a MariaDB database server, creating a vTiger database, installing PHP, downloading the vTiger files, configuring an Apache virtual host, and setting up Let's Encrypt SSL/TLS to secure the installation.
- By following the steps in this article, you can set up vTiger CRM on Ubuntu with Apache and have a reliable solution for your business needs.
Have a question about this guide?
Answered by AI from this guide. Good questions may be added to this page — please don't include personal details.
Did this guide fix your problem?

About the Author
Richard
Tech Writer, IT Professional
Richard is a writer at Geek Rewind who turns complex IT tasks into clear, step-by-step guides. He draws on years of hands-on experience in system administration and enterprise IT operations, focusing on Windows, Linux and WordPress: the problems people actually run into, and the fixes that work. His server and WordPress guides come from systems he runs himself. Richard builds and maintains the platform behind Geek Rewind, from its Ubuntu servers and Nginx configuration to its custom WordPress plugins. Many new tutorials start with readers' questions, and he's always glad to answer them in the comments.
No comments yet — be the first to share your thoughts!