How to Install Usermin on Ubuntu 24.04

Usermin is a web-based control panel that lets you manage your server account on Ubuntu 24.04 without needing full administrator rights. The software gives you a simple browser page to handle everyday jobs like checking email, changing your password, and managing files. This setup keeps your server safer because fewer people need top-level access.
While Webmin handles deep system setup tasks for administrators, Usermin takes care of standard user accounts. You can install Usermin on Ubuntu 24.04 in just a few minutes using the command line.
Install Usermin on Ubuntu 24.04 by first installing required packages with `sudo apt install python3 apt-show-versions shared-mime-info unzip libapt-pkg-perl libauthen-pam-perl libio-pty-perl libnet-ssleay-perl`. Then, download and install Usermin using `curl -L -O https://www.webmin.com/download/deb/usermin-current.deb` followed by `sudo dpkg -i usermin-current.deb`.
Install required packages
Before installing Usermin on Ubuntu 24.04, prepare a few essential packages.
Run the command below to install them.
sudo apt install python3 apt-show-versions shared-mime-info unzip libapt-pkg-perl libauthen-pam-perl libio-pty-perl libnet-ssleay-perl
Once those are in place, download the Usermin installer package.
Download and install Usermin
Usermin installation on Ubuntu 24.04 starts by downloading the official setup package directly to your server using the command line. You complete the setup by running a simple package manager command in your terminal, which puts all the necessary files in place so you can open the Usermin web interface in your browser.
Run the command below to download the latest version.
curl -L -O https://www.webmin.com/download/deb/usermin-current.deb
Note that installing `curl` [sudo apt install curl] may be necessary if it is missing.
After downloading, install Usermin with the command shown below.
Open the configuration file for editing by running `sudo nano /etc/usermin/config` in your terminal.
sudo nano /etc/usermin/miniserv.conf
Inside this file, add a new line specifying the IP addresses you want to allow access from, and a separate line to deny root login. An example appears below.
# add a new line at the end to allow IP addresses
allow=127.0.0.1 192.168.0.0/24

# prohibit login as root account
denyusers=root
After making these changes, save and exit the file.
Restart Usermin with the command provided below.
sudo systemctl restart usermin
Reach the control panel by entering your server hostname or IP address followed by port 20000 in a web browser (for example, http://example.com:20000).
http://example.com:20000
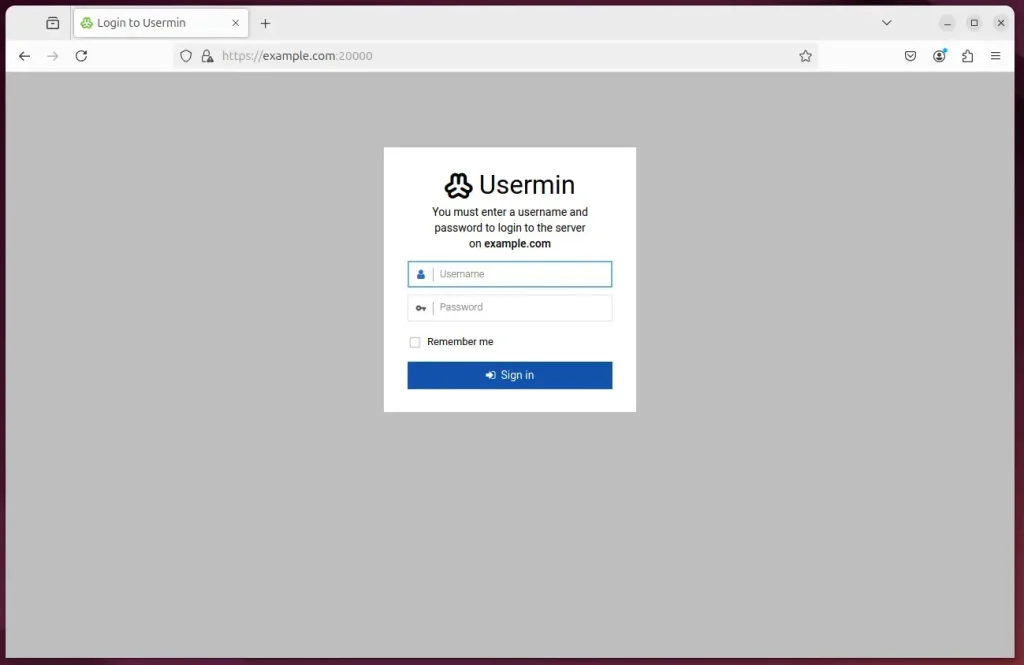
Start managing your server.
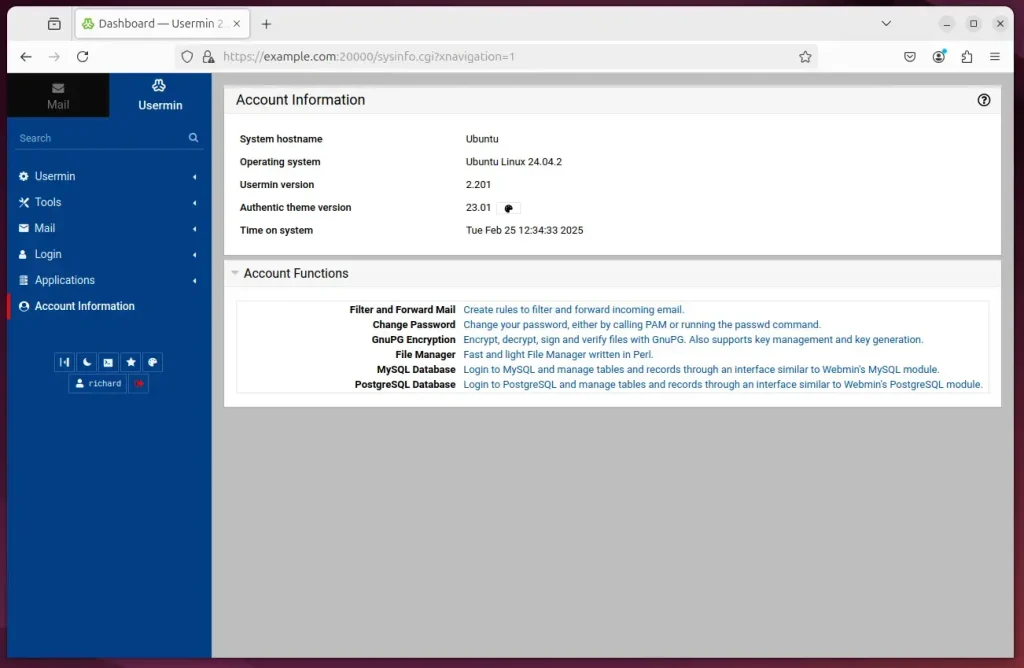
That completes the setup process.
Conclusion:
- Usermin provides an efficient way for end-users to manage their mail and services without full server access.
- The installation process involves installing necessary packages and configuring Usermin settings.
- Ensure that specific IP addresses are allowed and that root access is denied to enhance security.
- Access Usermin through the server's hostname or IP followed by port 20000.
- With Usermin, users can easily manage their accounts, change passwords, and utilize services like email.
Was this guide helpful?

About the Author
Richard
Tech Writer, IT Professional
Richard is a writer at Geek Rewind who turns complex IT tasks into clear, step-by-step guides. He draws on years of hands-on experience in system administration and enterprise IT operations, focusing on Windows, Linux and WordPress: the problems people actually run into, and the fixes that work. His server and WordPress guides come from systems he runs himself. Richard builds and maintains the platform behind Geek Rewind, from its Ubuntu servers and Nginx configuration to its custom WordPress plugins. Many new tutorials start with readers' questions, and he's always glad to answer them in the comments.


No comments yet — be the first to share your thoughts!