
This article explains installing additional languages for Voice access in Windows 11.
Voice access is a new experience that enables anyone to control their PC and send text messages using their voice. With Voice access, users can navigate the Windows interface, open applications, and execute commands, all through spoken commands.
When you turn on Voice access for the first time, it will prompt you to download voice-access language files for use by on-device speech recognition.
At first, only the US English language was supported. Support has been included for the following dialects – English – US, English – UK, English – India, English – New Zealand, English – Canada, and English – Australia.
The first time you launch voice access, Windows checks if your display language is supported. If so, you can continue with the setup experience. The steps below show you how if you use Voice access in one language and want to switch.
Install language Voice access language
As mentioned above, voice access in Windows supports more languages. If you want to install a language pack with Voice access, use the steps below.
First, turn on Voice access.
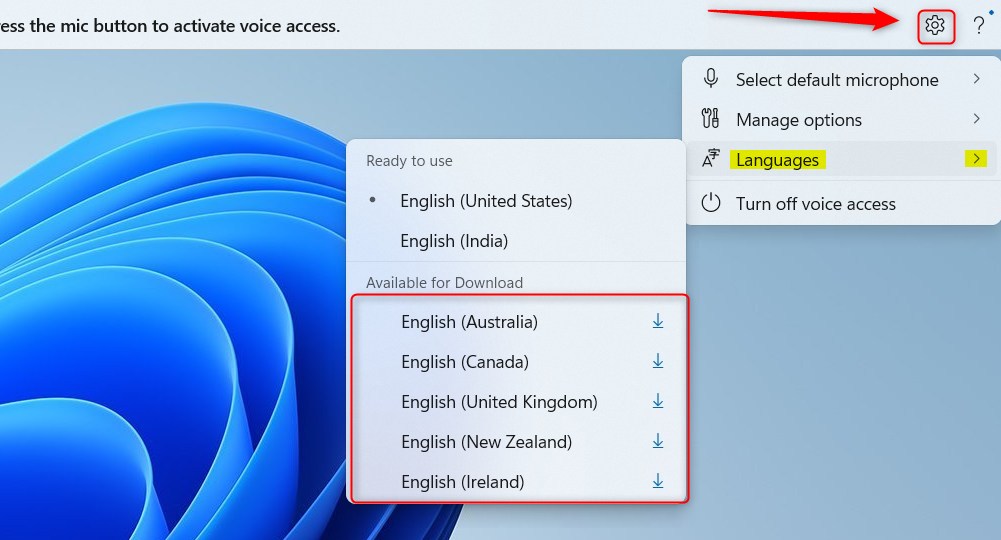
Once Voice access is started, a new control bar is displayed at the top of your screen. Next, click the Settings (gear) icon on the voice access toolbar and select the Language tile to expand it.
Then, on the context menu, under Available for Download, choose a supported language to install.
Once you select a language to download, a pop-up with a Download button will appear at the top of your screen.
Click on Download to download the new language pack for Voice access. The Download might take a few minutes.

After downloading, the language will be available and ready to use with Voice access.
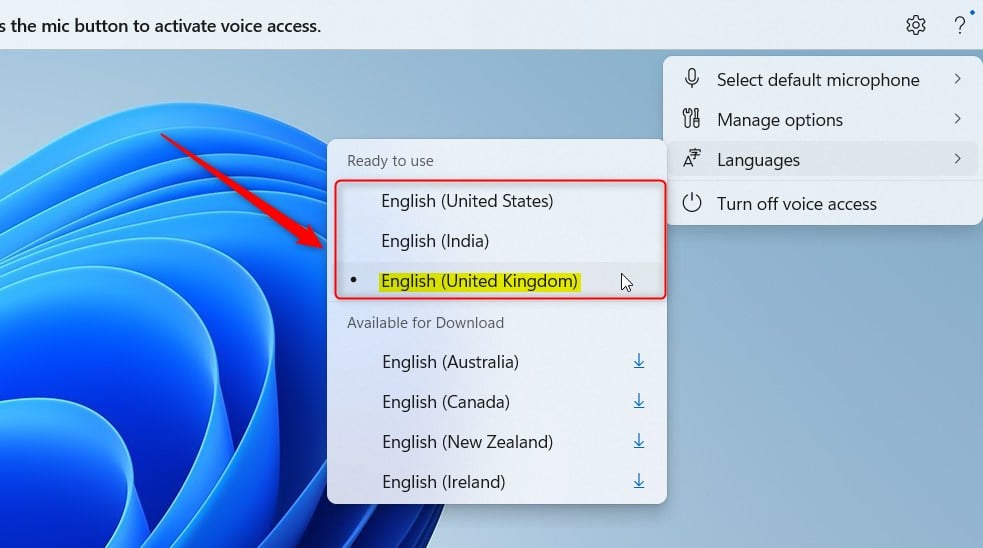
You can switch to a different language anytime from Voice Access Settings > Languages.
That should do it!
Reference:
Conclusion:
- Voice access in Windows 11 empowers users to control their PC and send text messages using spoken commands
- Initially supporting US English, it now includes dialects such as UK, India, New Zealand, Canada, and Australia
- To install a language pack, users need to enable Voice access, select their preferred language, and download the language pack
- Once downloaded, the new language will be available for immediate use with Voice Access
- Users can switch between languages at any time from Voice Access Settings
- This article provided a comprehensive guide on installing additional languages for Voice access in Windows 11.

Leave a Reply