
This article discusses how to enable or disable secure DNS, also known as DNS over HTTPS, in Google Chrome.
Google Chrome is a web browser developed by Google that runs on multiple platforms. It shares the same codebase as Microsoft Edge, making the two browsers nearly identical in their basic functionalities.
When using the Google Chrome browser, you can utilize the DnsOverHttpsMode policy to enable or disable secure DNS or control the mode of the DNS-over-HTTPS resolver.
If this policy is set to “off,” it will disable DNS-over-HTTPS. The “automatic” mode will prioritize DNS-over-HTTPS queries if a DNS-over-HTTPS server is available, but it may revert to sending insecure queries if an error occurs.
The “secure” mode exclusively sends DNS-over-HTTPS queries and will not resolve if an error occurs.
Enable/Disable DNS Over HTTPS in Chrome
Users can enable or disable DNS over HTTPS in Chrome using the DnsOverHttpsMode policy.
Here’s how to do it.
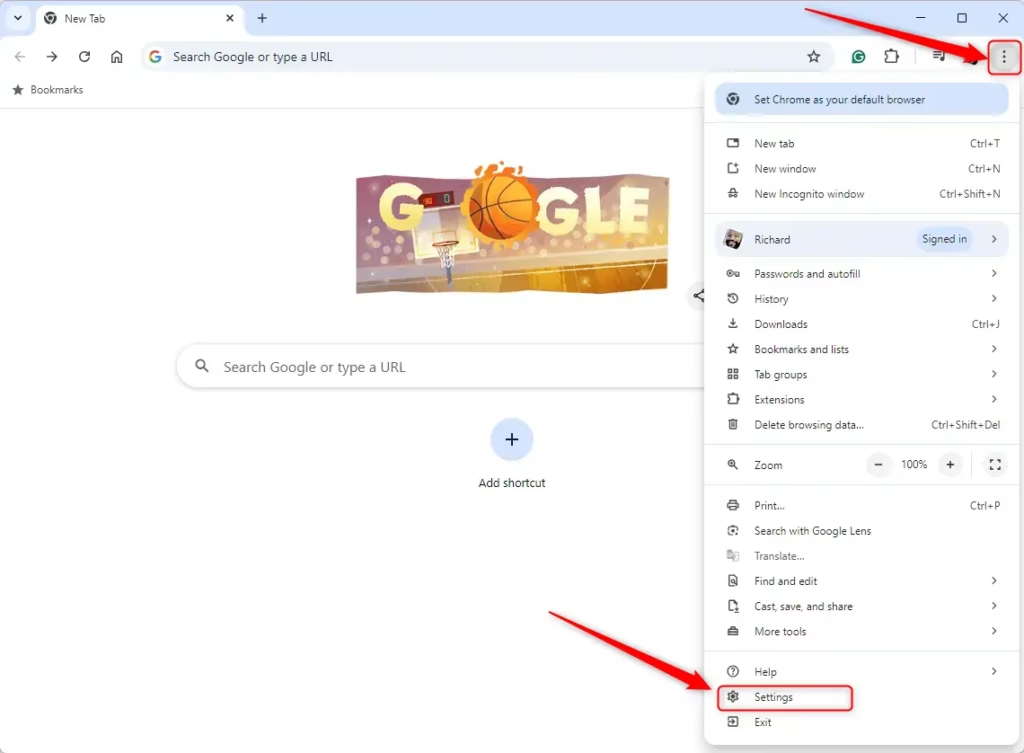
First, open the Google Chrome browser.
Then, click on the Customize and Control (3 vertical dots button) in the top right corner and select Settings.
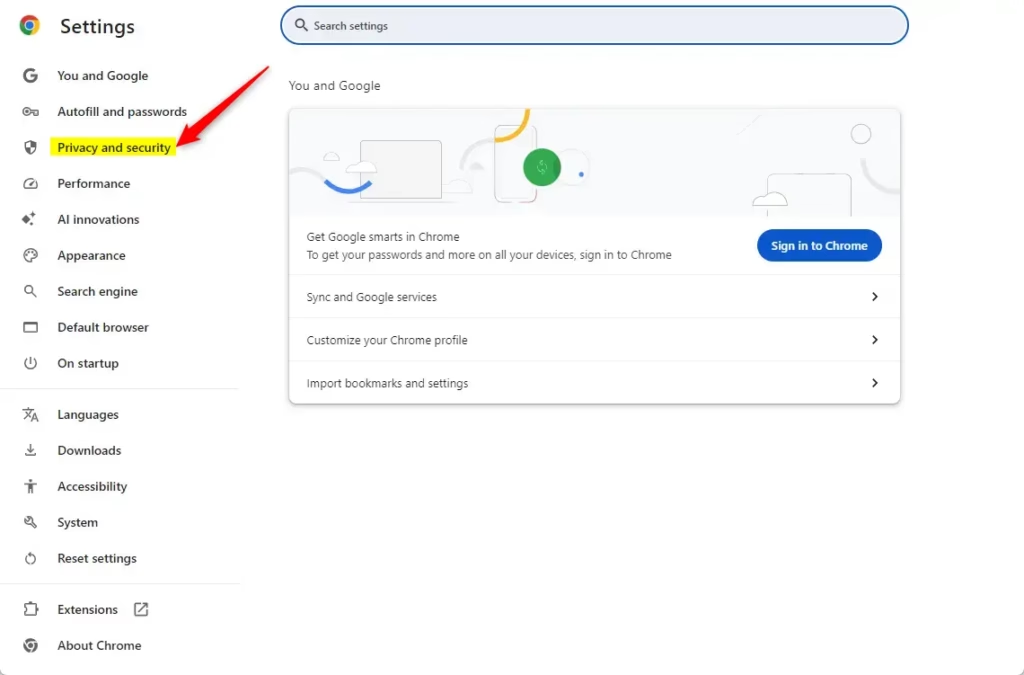
Next, click the “Privacy and security” link on the left menu on the Settings page.
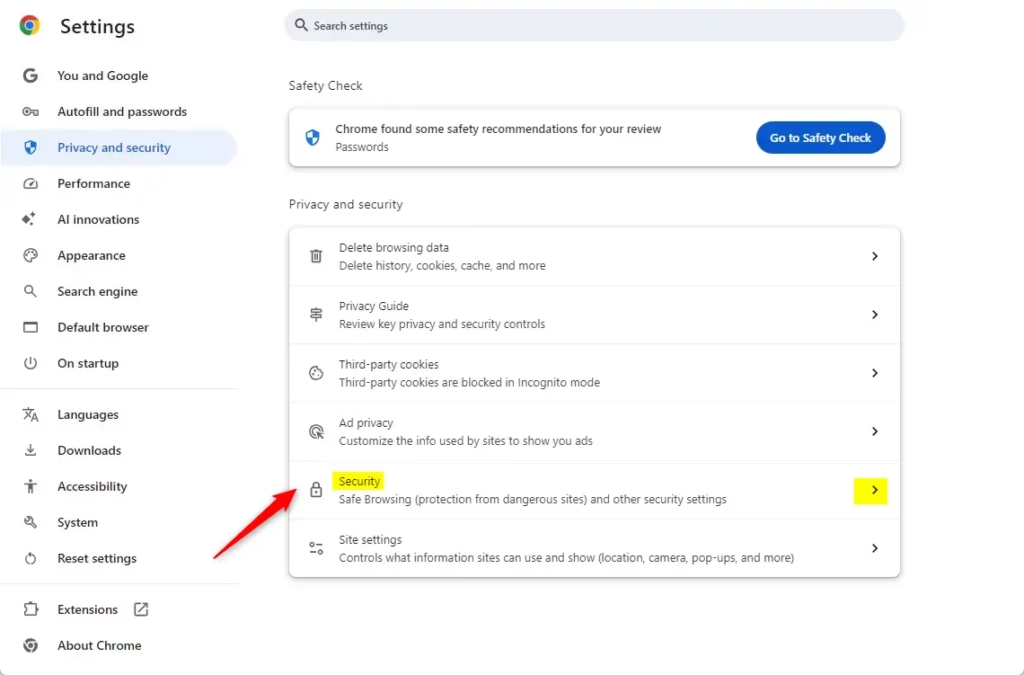
On the right, click the tile labeled “Security” to expand it.
On the Security settings page, under “Advanced,” select the “Use secure DNS” option. Then, toggle the switch to enable or disable it.
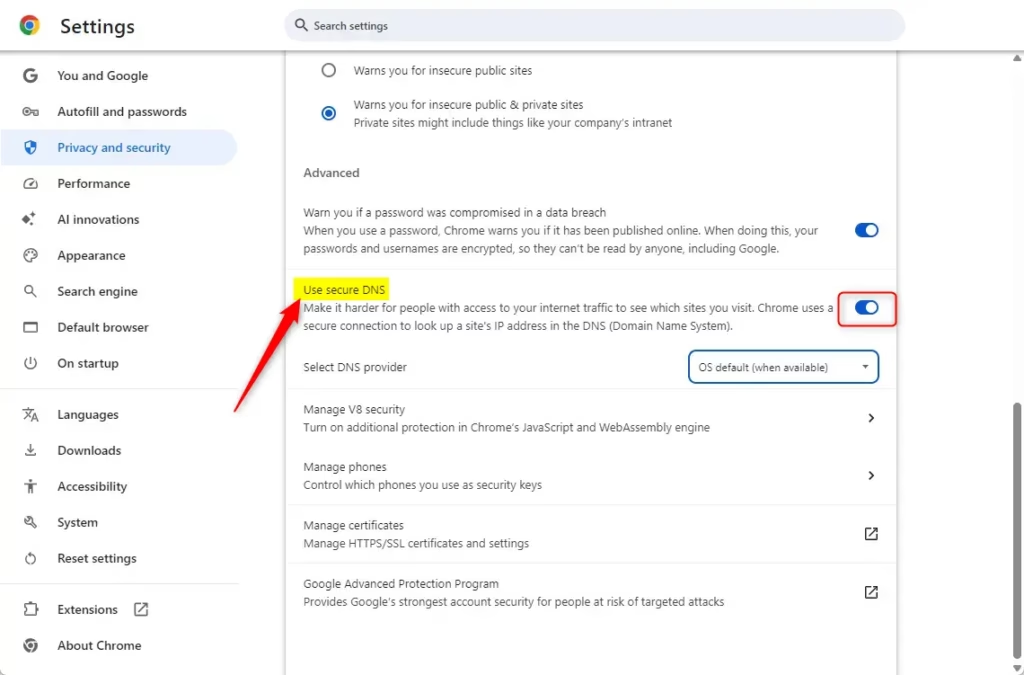
You can close the Chrome settings page when finished.
Enable / Disable Secure DNS in Chrome using the Registry
Another way to enable or disable secure DNS in Chrome is to use the Windows Registry Editor.
First, open the Windows Registry and navigate to the folder key path below.
Remember to back up your registry before making any changes, or create a System Restore point as a precaution.
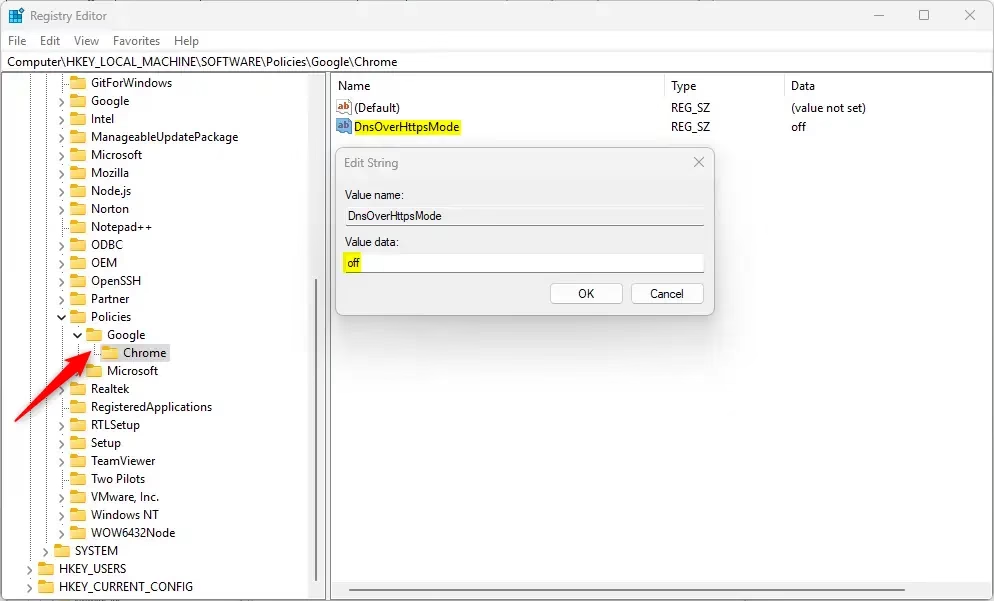
Computer\HKEY_LOCAL_MACHINE\SOFTWARE\Policies\Google\Chrome
In the registry key paths, if you do not see Google, right-click on the Policies key and create a new key named Google. Do the same for Chrome if it is not listed.
Once there, right-click Chrome > New > String Value and name the new REG_SZ DnsOverHttpsMode.
Double-click and open the DnsOverHttpsMode name and set the value to one of the values referenced below.
- off = Disable DNS-over-HTTPS
- automatic = Enable DNS-over-HTTPS with insecure fallback
- secure = Enable DNS-over-HTTPS without insecure fallback
Delete the “DnsOverHttpsMode” name created above to restore the default behavior and allow users to enable or disable secure DNS in the UI.
DnsOverHttpsMode
You may have to reboot your computer to apply the changes.
If you enable “secure” mode, you must only send DNS-over-HTTPS queries; otherwise, it will fail to resolve.
This post lets you configure a DnsOverHttpsTemplates or select a provider to use with the automatic or secure mode settings.
That should do it!
Reference:
Conclusion:
Enabling or disabling secure DNS in Google Chrome is straightforward, whether through the browser settings or the Windows Registry. Here are the key points to remember:
- Multiple Options: You can select from “off,” “automatic,” or “secure” modes based on your privacy needs.
- Ease of Access: Adjustments can be made quickly in the Chrome settings or via Registry Editor for more advanced users.
- Backup Precaution: Always remember to back up your registry before making changes to avoid potential issues.
- Restore Defaults: Deleting the “DnsOverHttpsMode” entry will revert Chrome to its default settings, allowing user-configurable options.
- Reboot Required: A computer restart may be necessary for changes to take effect fully.
- Dedicated Support: For enterprise environments, refer to the Chrome Enterprise Policy for additional configuration options.
By understanding these options, users can enhance their browsing privacy and security effectively.
You May Also Like


One response to “How to Enable Secure DNS in Google Chrome”
-
[…] article explains how to select the URI template (DNS provider) for the desired DNS-over-HTTPS resolver in Google […]
Leave a Reply