
A few days ago, Cloudflare launched its DNS service, promising to be fast, secure, and more focused on privacy than any other DNS services available today for consumers, and it will be free.
If you subscribe to an Internet Service Provider (ISP) like Comcast, Century Link, and others, your computers are probably assigned DNS servers automatically from your ISP.
Although Cloudflare’s speed benefit might not be a significant factor compared to Google and other well-known DNS providers, a private and secure DNS service might appeal to privacy-conscious folks.
If what Cloudflare is saying about the privacy benefits of its DNS systems is true, then you may want to take advantage of that.
This brief tutorial shows students and new users how to configure an Ubuntu desktop to use Cloudflare’s fast and more secure DNS service.
Continue the steps below to configure the Ubuntu desktop with Cloudflare DNS service.
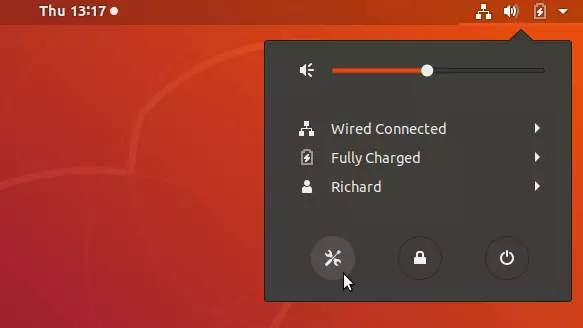
How to open the Ubuntu network manager
On the Ubuntu desktop, Network Manager helps manage network settings. Click on the system menu and select System Settings.
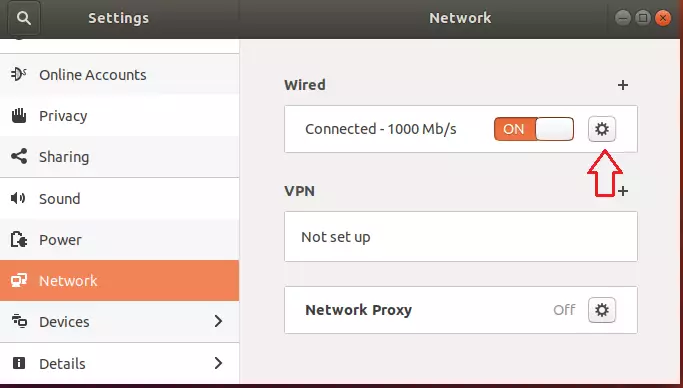
Then go to Network, as shown in the image below. Select the setting button for your network device to connect to the Internet. This could be a Wired or Wi-Fi connection type.
You’ll have to do this twice if you have both network interfaces (Wired and Wi-Fi).
When the Interface configuration page opens, select IPv4 and IPv6 and turn off automatic DNS IP settings. Then, type the custom Cloudflare DNS IP addresses you want to use.
How to add Cloudflare DNS on Ubuntu Linux
On the Interface configuration page, turn off the Automatic DNS configuration. Then, type the Cloudflare DNS IPs. You should select both the IPv4 and IPv6 tabs and enter Cloudflare DNS IP addresses.
The format is shown below:
IPv4 IPs
1.1.1.1, 1.0.0.1
IPv6 IPs
2606:4700:4700::1111, 2606:4700:4700::1001
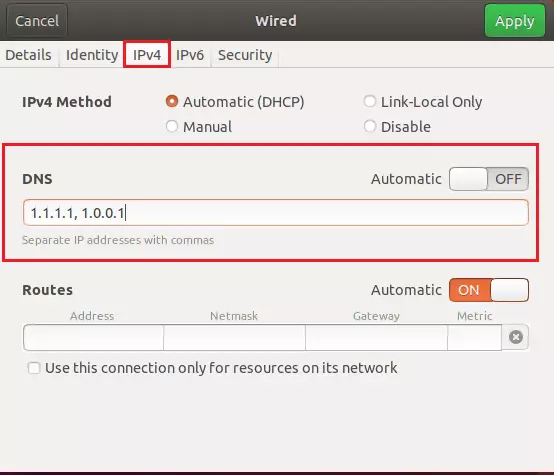
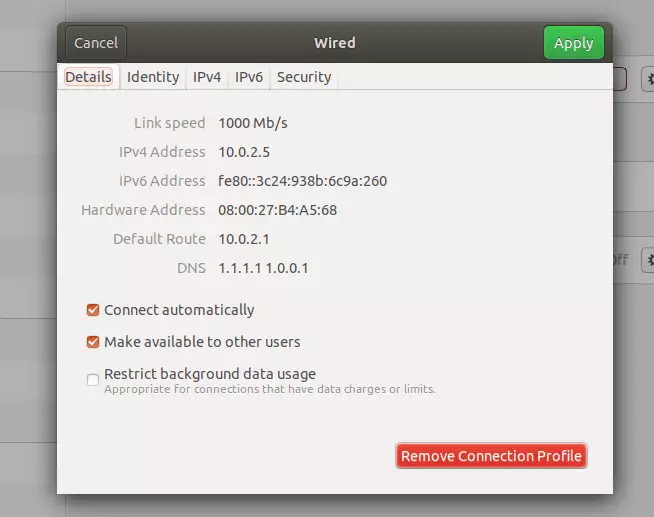
When you’re done, click the green Apply button to save your changes.
You can configure individual computer DNS settings; however, changing the DNS configuration at the router’s level is best. Adding Cloudflare DNS on your router ensures that all the devices connected to your router will automatically be configured with Cloudflare’s DNS IP addresses.
That’s it! Your devices should have the fastest and most private DNS systems.
You may also like the post below:
Leave a Reply