How to use Cloudflare Origin Certificates with Apache on Ubuntu Linux
Cloudflare Origin Certificates secure your Apache web server on Ubuntu Linux by creating an encrypted connection directly between your server and Cloudflare. This certificate acts like a special key, ensuring that only Cloudflare can talk to your server, and only using a secure, encrypted method.
Generate a Cloudflare Origin Certificate from your Cloudflare dashboard under the Crypto tab. Select Origin Certificates, then click Create Certificate. Copy the generated certificate and private key, then paste them into respective files on your Ubuntu server.
Setting up these certificates is crucial when you use Cloudflare’s Full SSL (Strict) mode to protect your website. It guarantees end-to-end encryption, meaning your data stays safe even as it travels from Cloudflare to your server.
These certificates are free and can be valid for up to 15 years, and you can even use a wildcard like *.example.com to cover all your subdomains at once.
How to sign up for Cloudflare
The first step in this tutorial is to sign up for a Cloudflare account. This guide assumes you already have a registered domain name. If not, please register one before proceeding.
If you already have a Cloudflare account, skip the registration steps below.
https://dash.cloudflare.com/sign-up
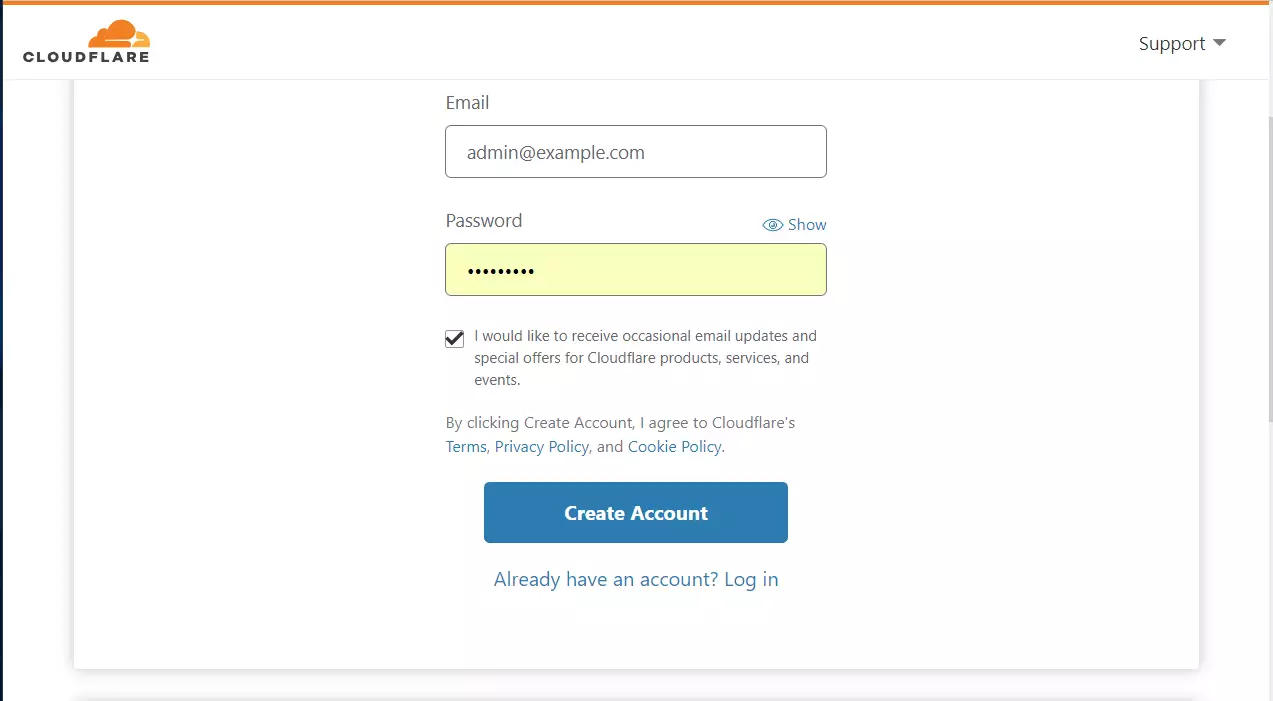
Type in your email address and click Create Account.
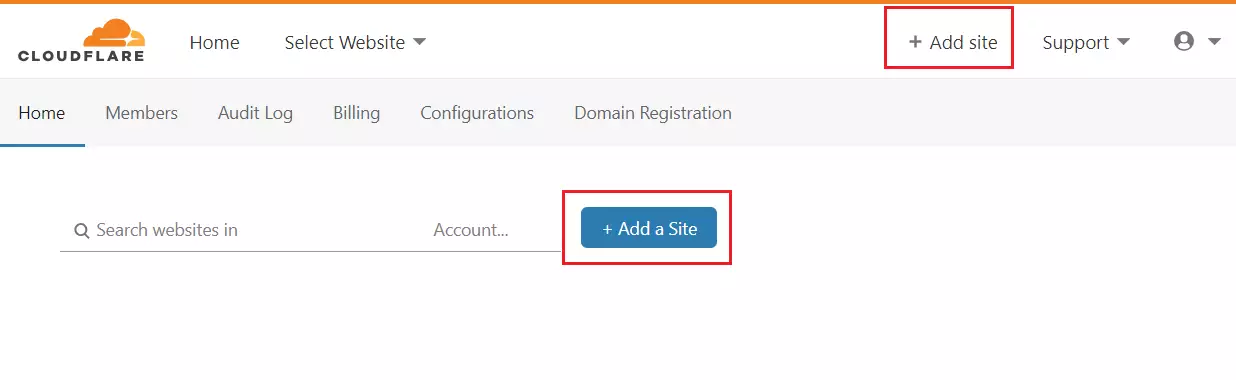
Once the account is created, verify your email address, and log back into your Cloudflare account. Click the Add a Site button or link to add a site.
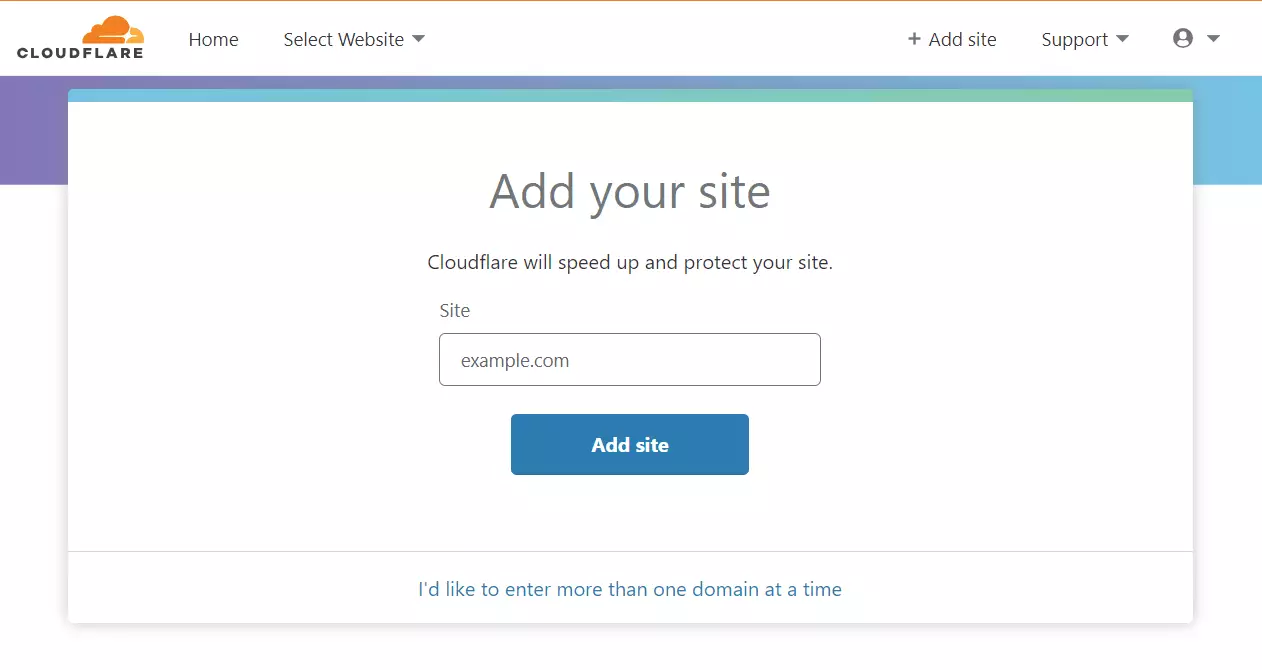
Next, enter the domain name you registered. Cloudflare’s service helps speed up and protect the site you add.
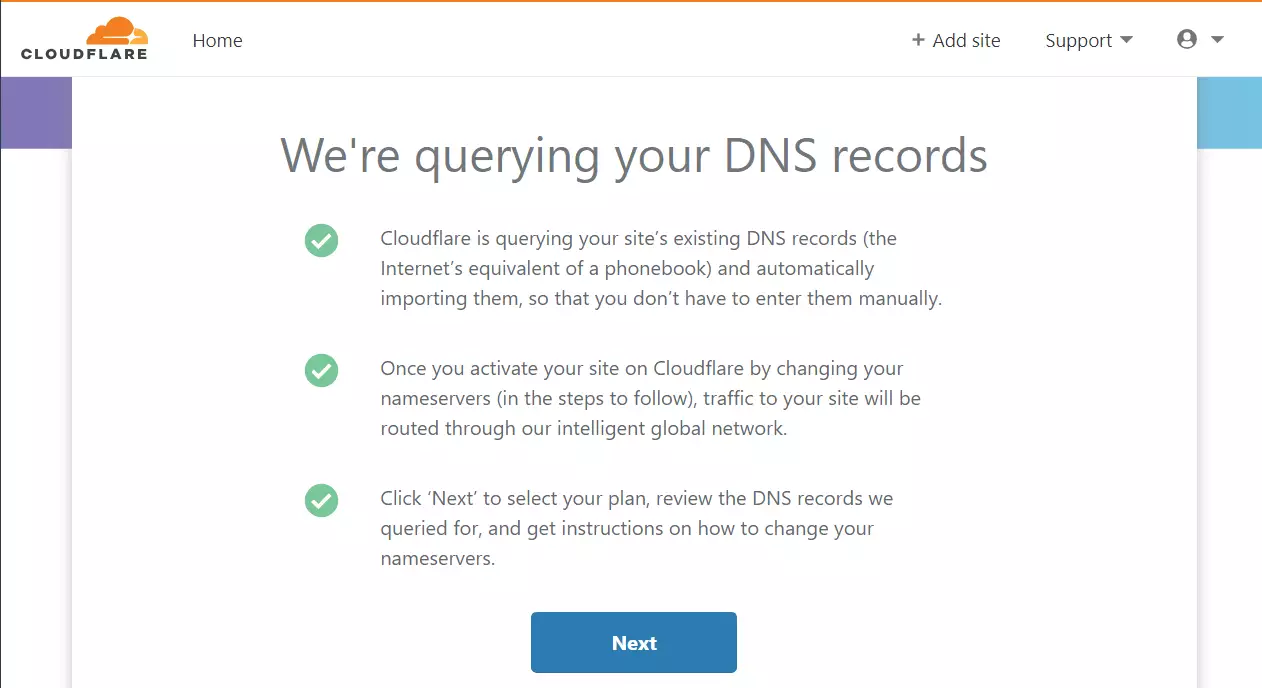
Cloudflare will then query your domain’s DNS provider for the records in the DNS table. If your DNS is online, Cloudflare should find the domain and import the records into its systems.
Finally, select your plan; we’ll use the free plan for this tutorial.

Once complete, Cloudflare will provide two nameservers. You’ll need to log on to your domain provider’s portal. Then, replace your existing nameservers with the ones Cloudflare provides.
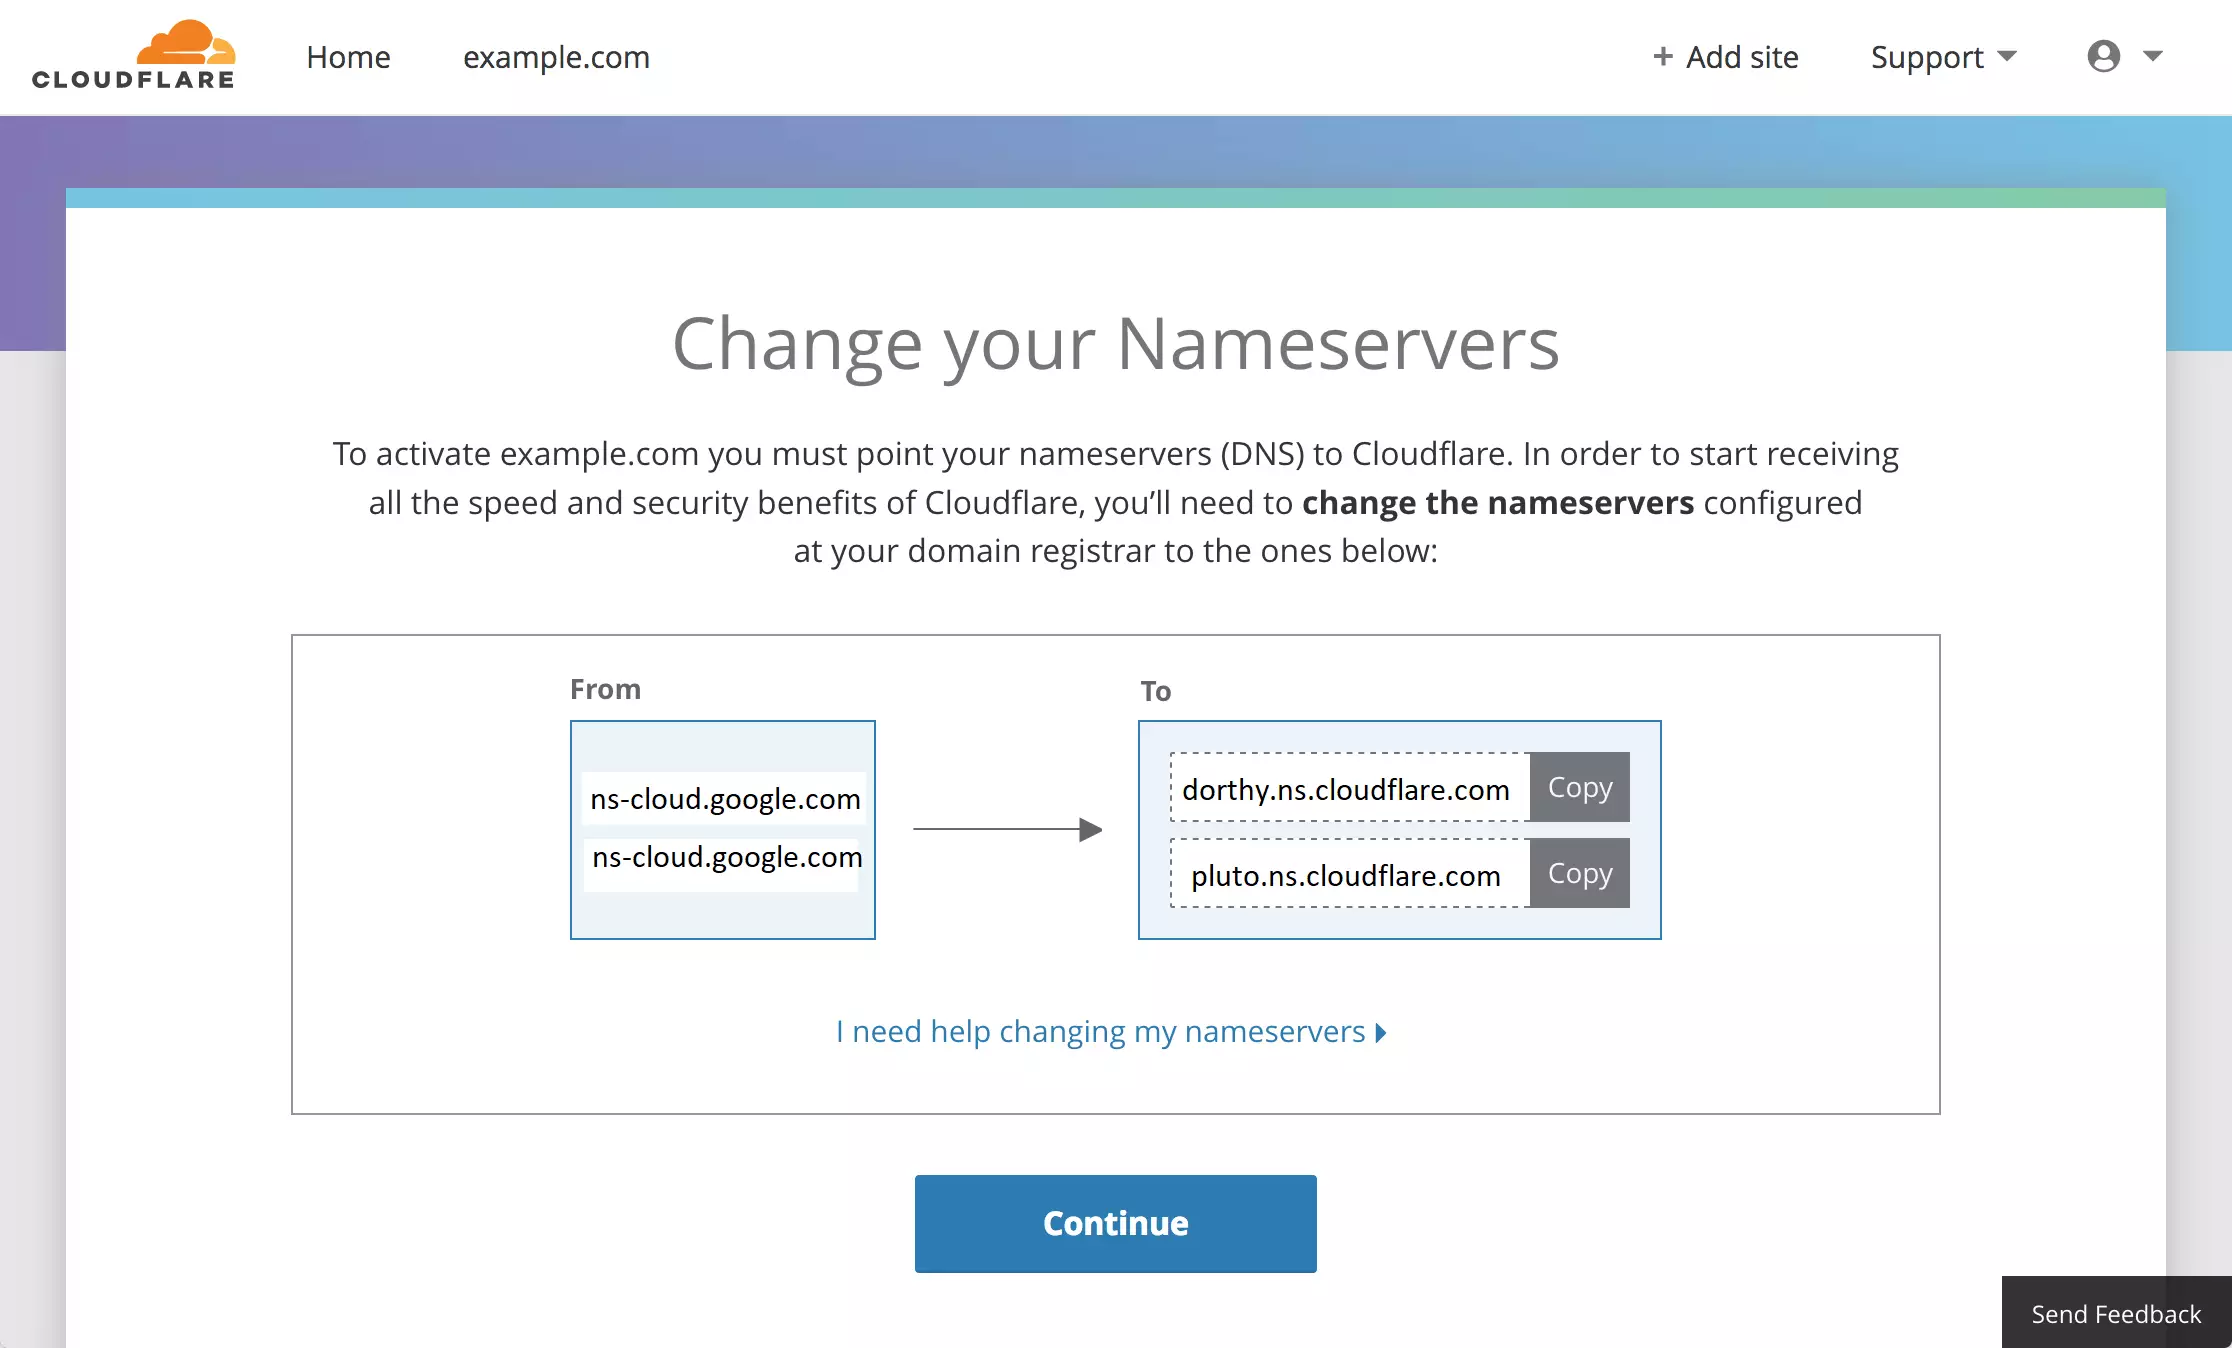
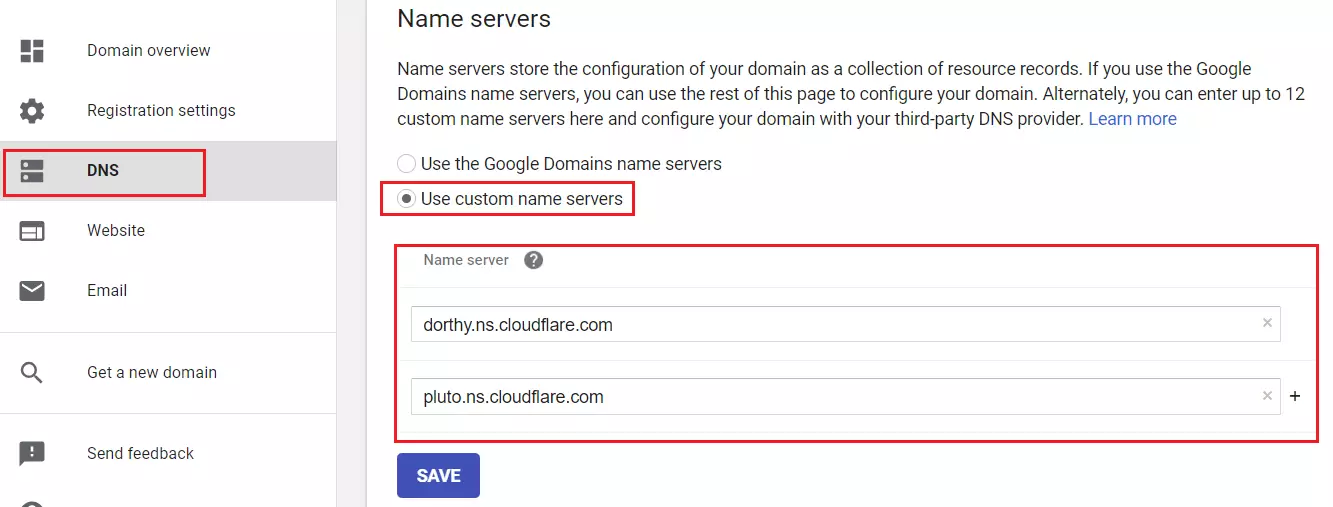
For example, our example.com site is hosted with Google Domains. Log on to your Google Domains account and select “use custom nameservers.”
You’ll have the option to enter the nameservers Cloudflare provided. Save your changes when finished.
After saving your custom nameserver changes, return to your Cloudflare account and wait for Cloudflare to detect them. Depending on your domain provider, DNS changes can take up to an hour to become visible on Cloudflare.
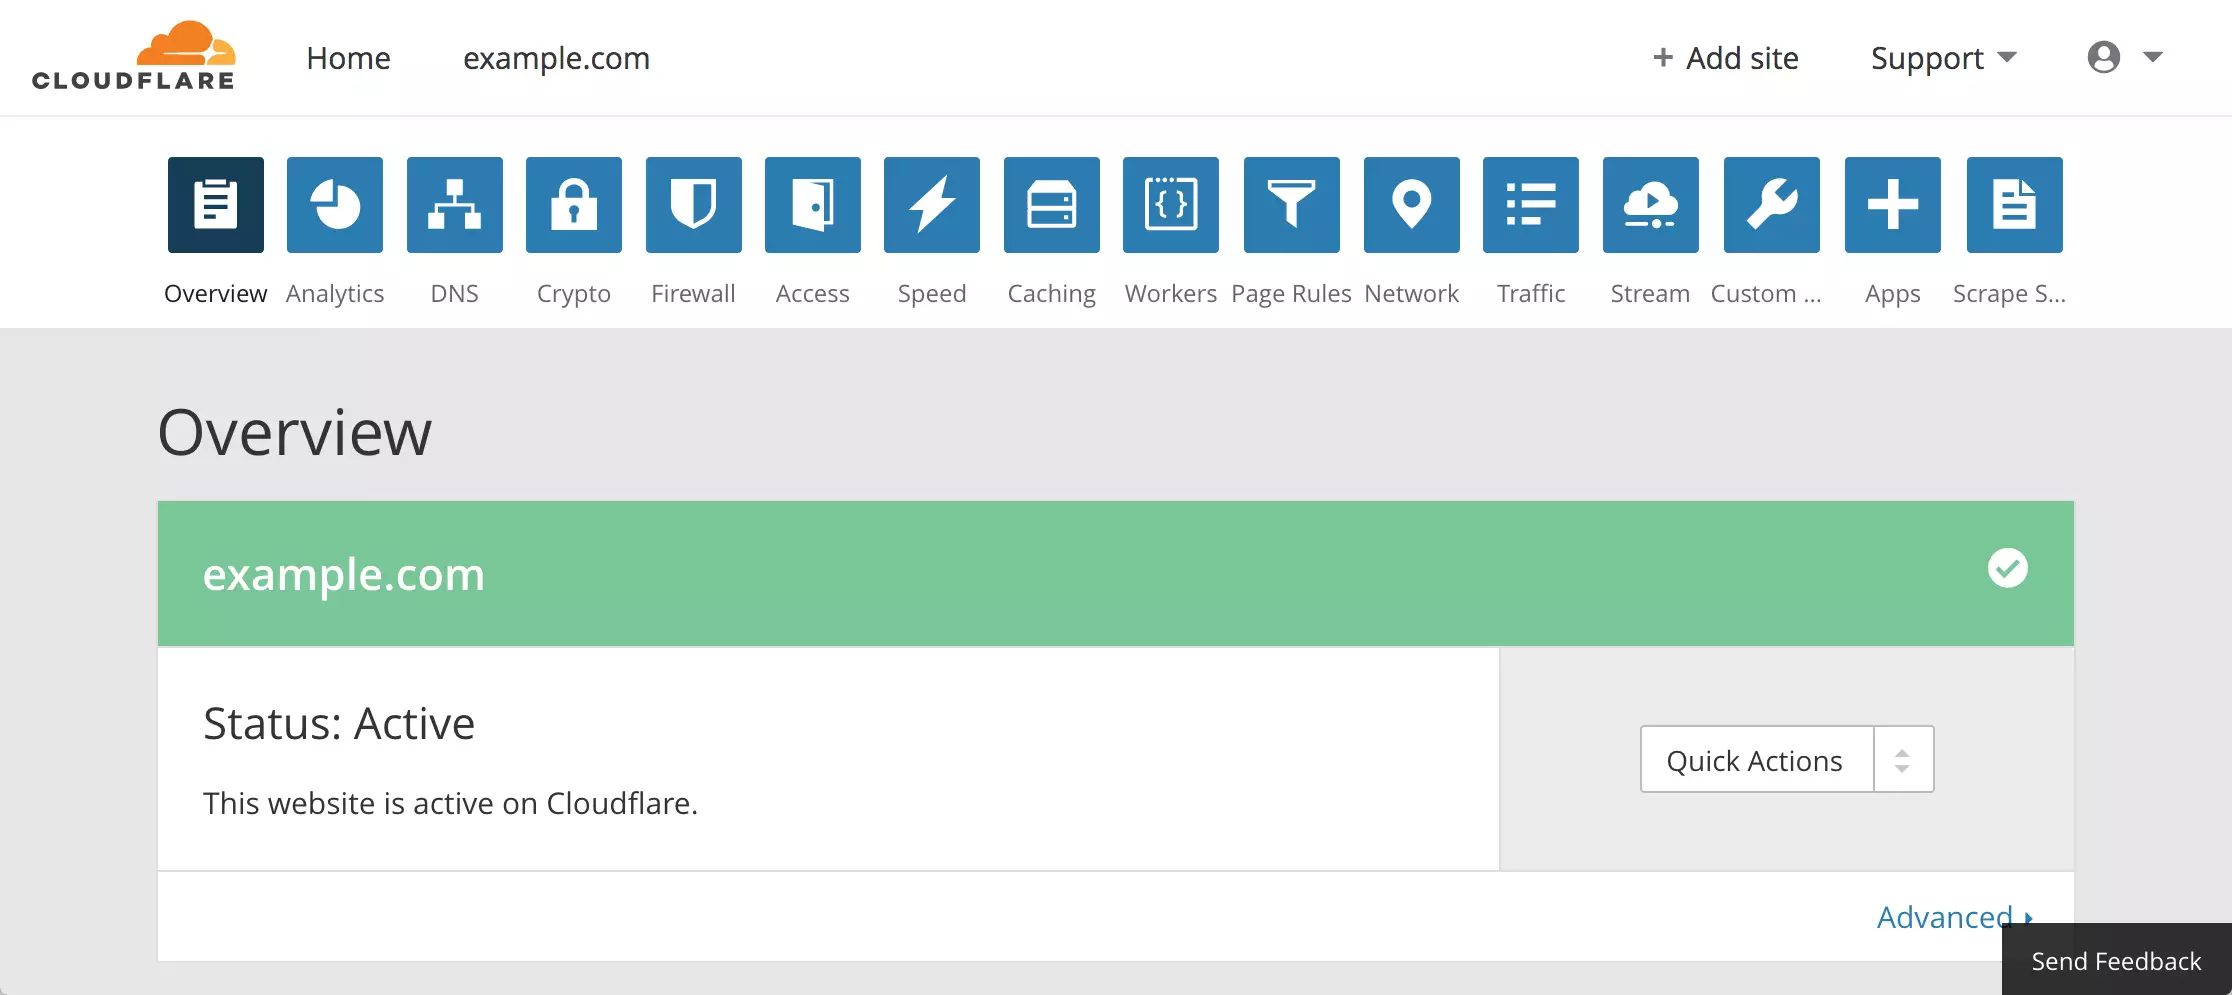
Once everything is ready, your site status will show as Active.
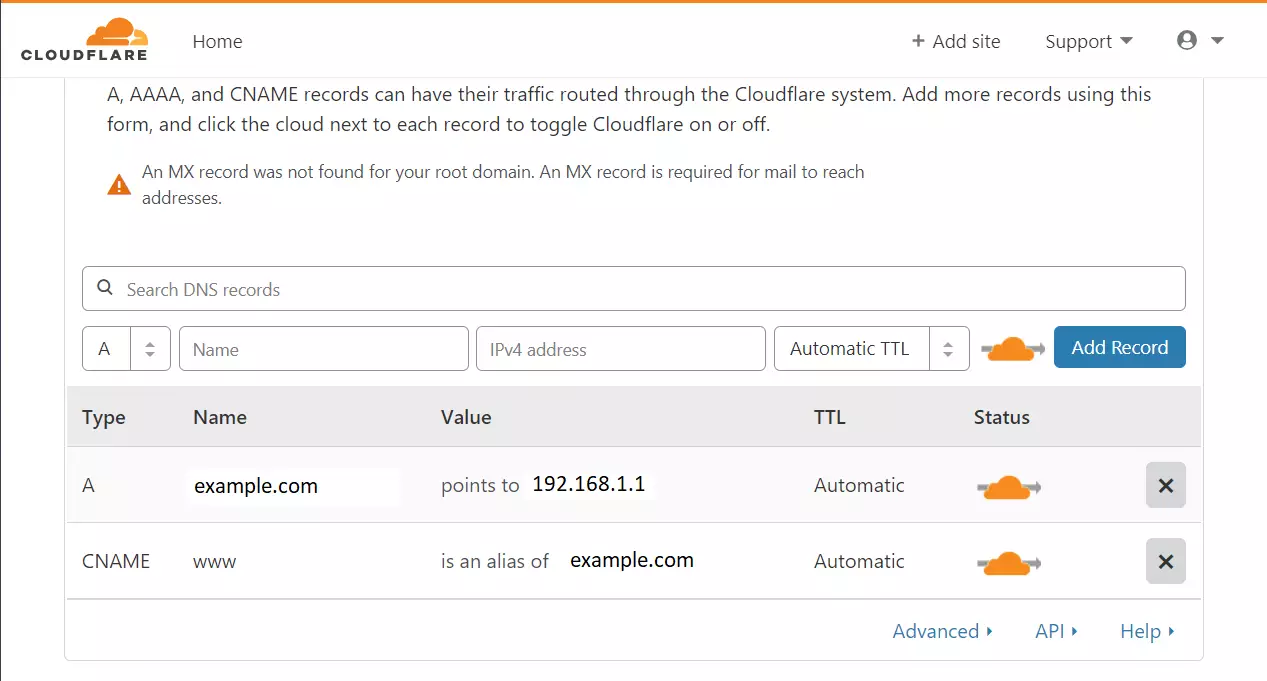
You should also see your Cloudflare account populated with DNS entries, as shown below. Your DNS records might include more entries than the two displayed.
These two entries are essential for running your website.
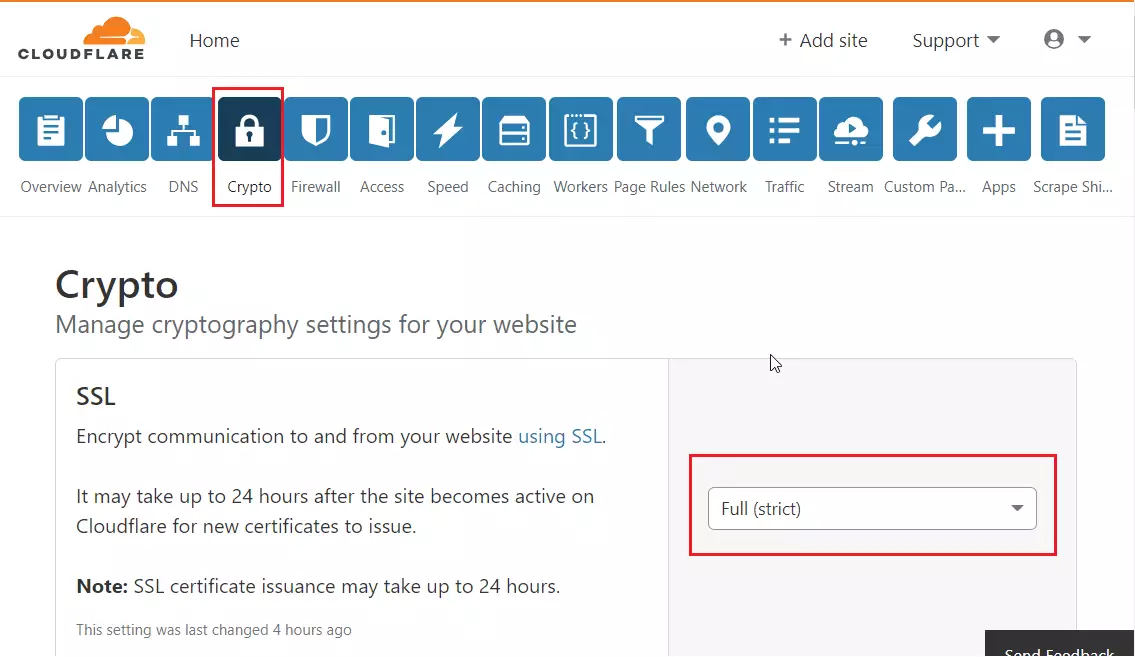
Next, click the Crypto tab and choose to enable Full (strict) SSL. This action should activate SSL for your site.
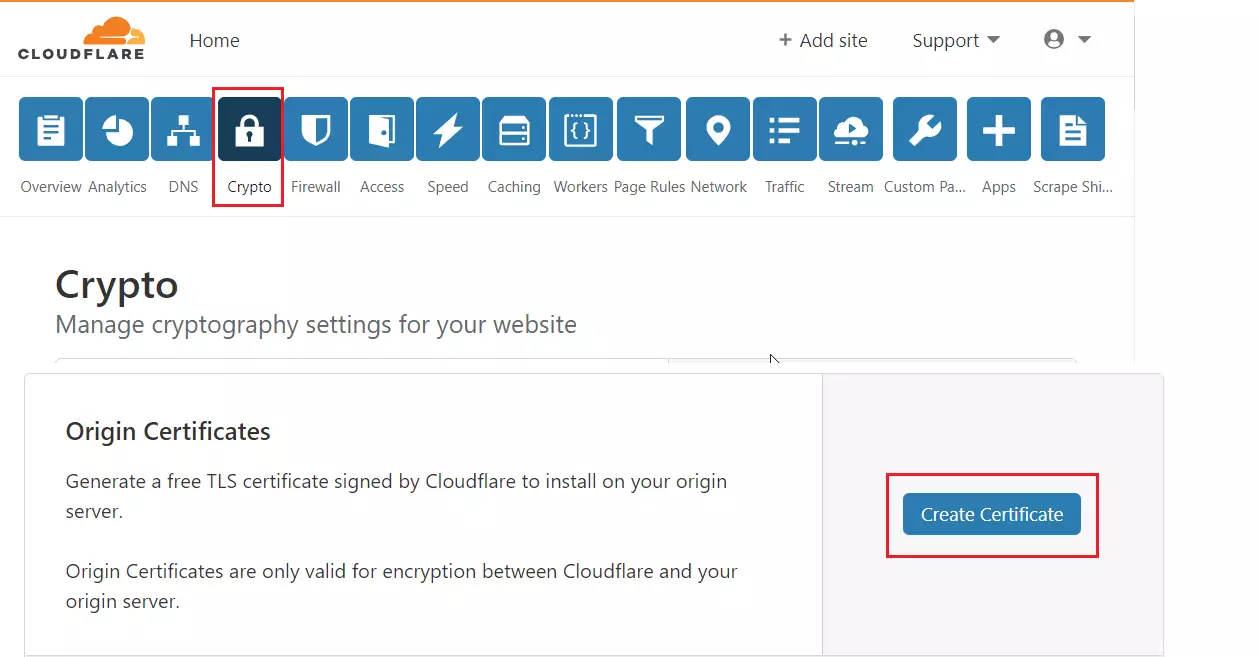
While still on the Crypto tab, scroll down to Origin Certificates. Then click the button to create the Certificate.
Use the free TLS certificate signed by Cloudflare, which you will install on your origin server. Origin Certificates are specifically for encryption between Cloudflare and your origin server.
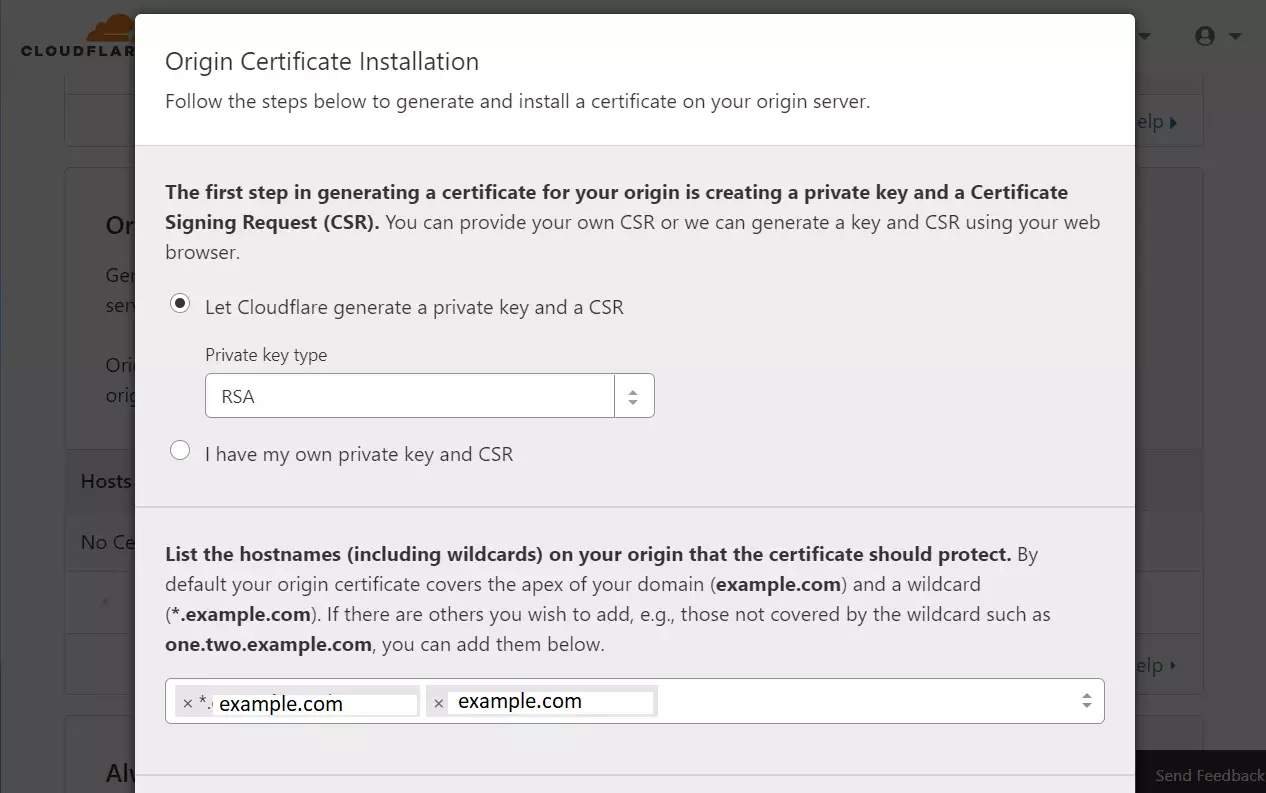
Next, let Cloudflare generate a private key and a CSR for the domain. Click Next.
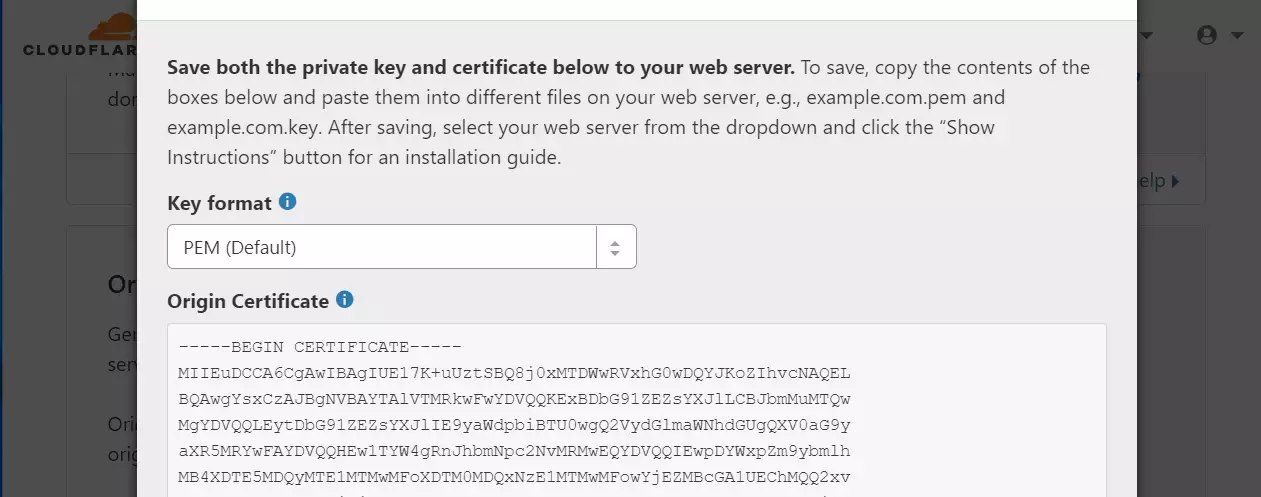
Then, copy and paste these into a text file on your server.
Run the commands below on Ubuntu to create the Private key, Certificate, and Origin pull files (3 files total). Copy and paste the content of each into its respective file, then save.
For the Private key file, execute this command, copy and paste the private key provided into the file, and save it.
sudo nano /etc/ssl/private/cloudflare_key_example.com.pemFor the certificate file, run this command, copy and paste the certificate content into the file, and save it.
sudo nano /etc/ssl/certs/cloudflare_example.com.pemDownload the Cloudflare Origin Pull certificate as well. You can find it at the link below:
Set up authenticated Origin pulls · Cloudflare SSL docs
Zone-Level — Cloudflare certificate
Under Zone-level certificate, expand the certificate button and copy its content.
Next, run the commands below to create an origin-pull-ca.pem file. Paste the certificate content into the file below, and save it.
sudo nano /etc/ssl/certs/origin-pull-ca.pem
Once done, you should have three files: cloudflare_key_example.com.pem, cloudflare_example.com.pem, and origin-pull-ca.pem.
We’ll use these files in the Apache configuration below.
Keep these certificate files handy after saving the key, Certificate, and Origin. Continue below.
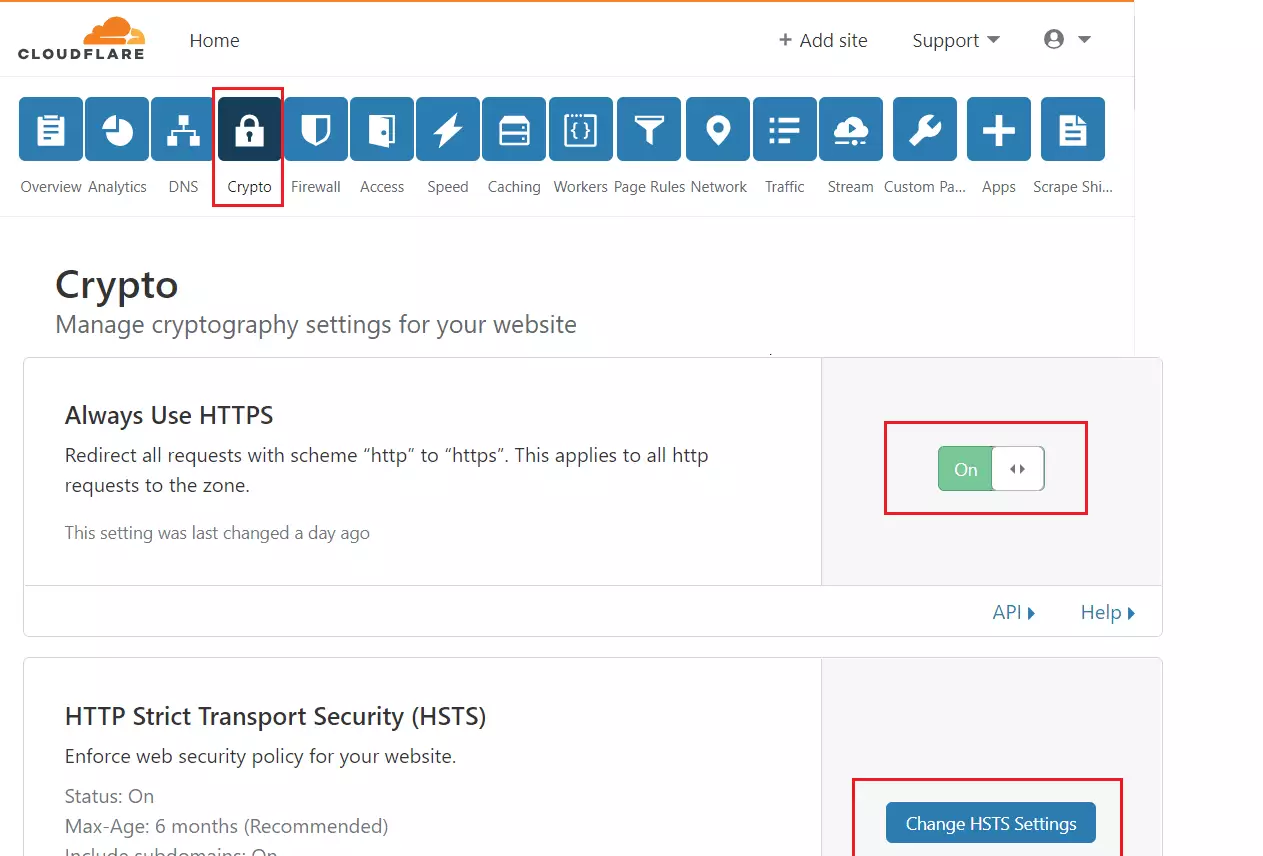
Still on the Crypto page in your Cloudflare account, enable Always use HTTPS. You can also change settings for HSTS, though it’s not required.
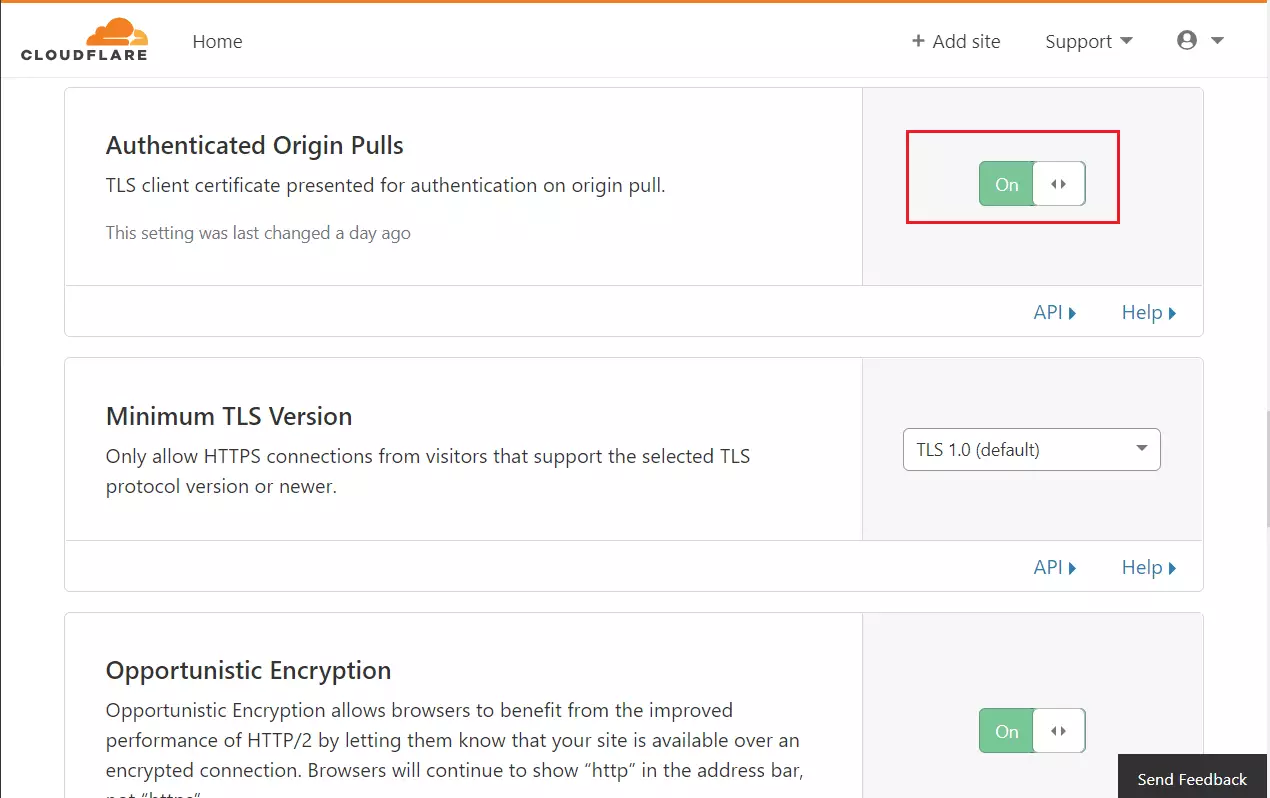
Next, turn on Authenticated Origin Pulls and Opportunistic Encryption, then proceed.
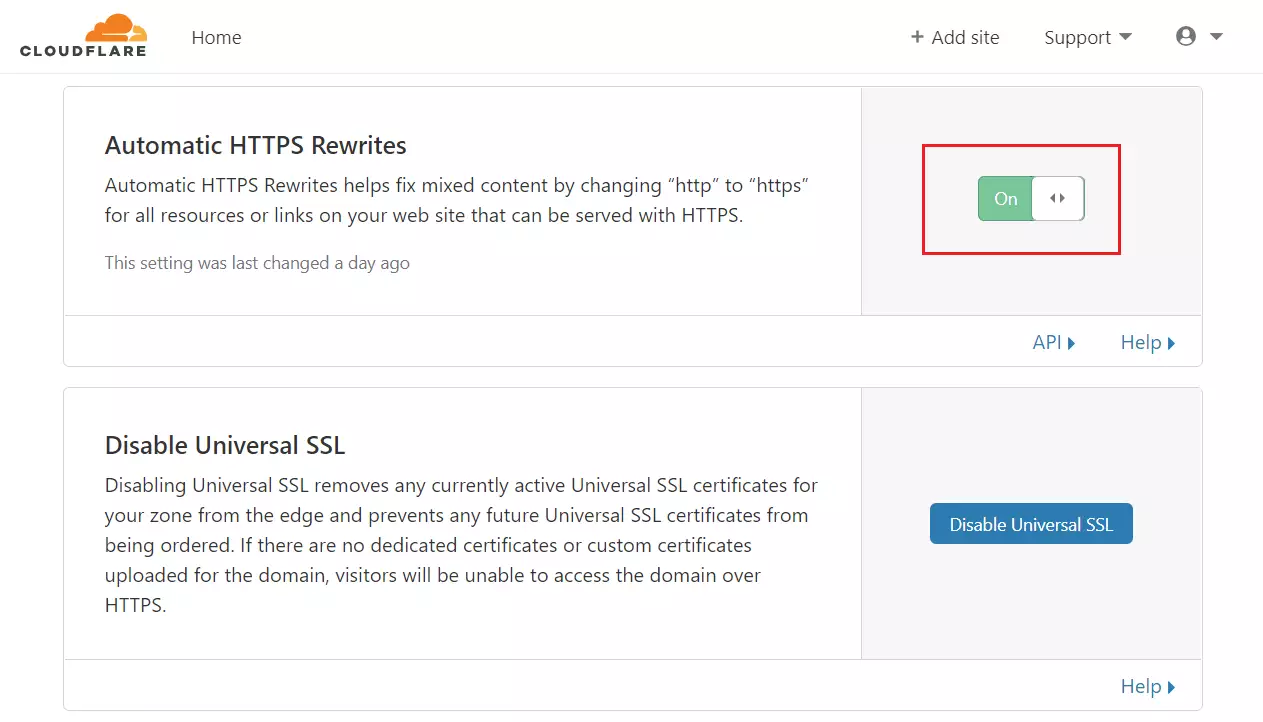
Then, turn on Automatic HTTPS Rewrites and proceed.
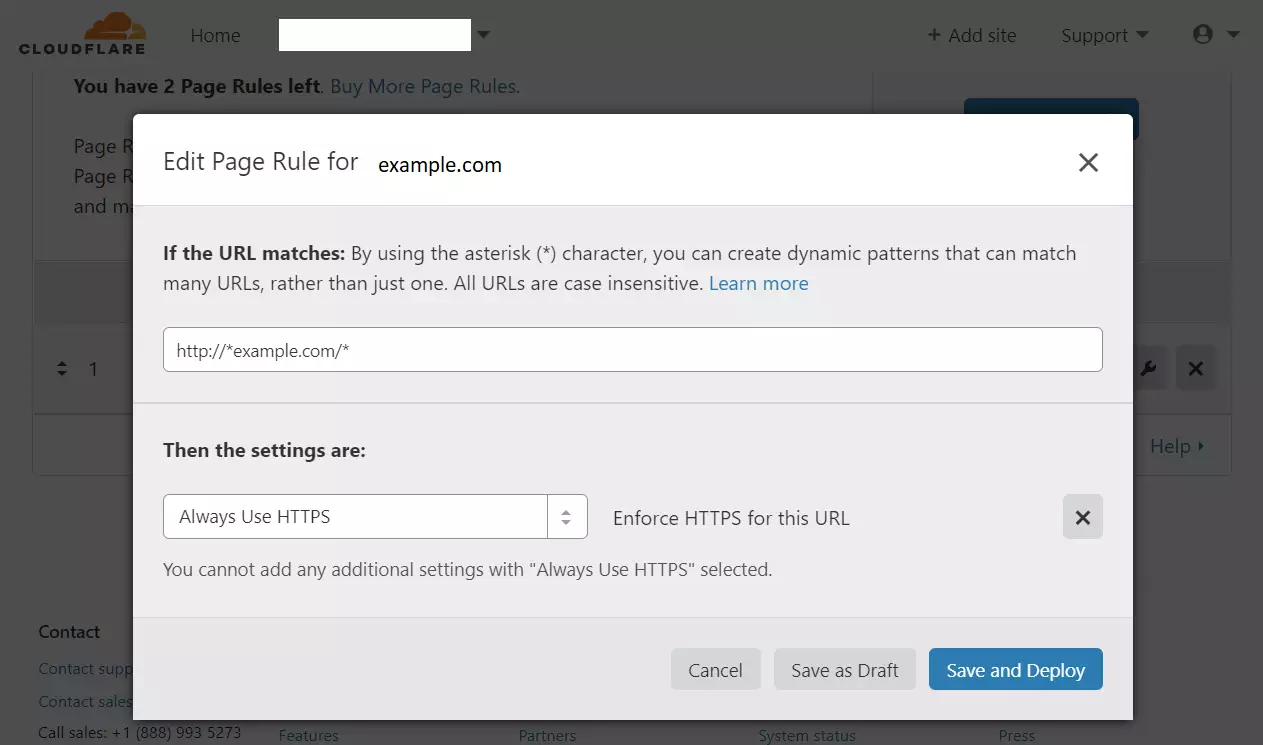
Next, navigate to the Page Rules tab. Create a new rule for your site. Enter the URL and choose Always Use HTTPS.
HTTP://* example.com/*
Always Use HTTPS
Save your settings. You’ve now completed the Cloudflare setup.
How to configure Apache with Cloudflare
Finally, configure the Apache site configuration file for your website. This file dictates how users access your website content. Run the commands below to create a new configuration file named example.com.
sudo nano /etc/apache2/sites-available/example.com.confThen copy and paste the content below into the file and save it. Replace the highlighted line with your domain name and directory root location.
Also, reference the certificate files created earlier during the Cloudflare setup.
<VirtualHost *:80>
  ServerName example.com
  ServerAlias www.example.com
</VirtualHost>

<VirtualHost *:443>
     Protocols h2 http/1.1
     ServerAdmin admin@example.com
     DocumentRoot /var/www/html/example.com
     ServerName example.com
     ServerAlias www.example.com

     SSLEngine on
     SSLCertificateFile /etc/ssl/certs/cloudflare_example.com.pem
     SSLCertificateKeyFile /etc/ssl/private/cloudflare_key_example.com.pem
     SSLCACertificateFile /etc/ssl/certs/origin-pull-ca.pem
     SSLVerifyClient require
     SSLVerifyDepth 1

     <Directory /var/www/html/example.com/>
          Options FollowSymlinks
          AllowOverride All
          Require all granted
     </Directory>

     ErrorLog ${APACHE_LOG_DIR}/error.log
     CustomLog ${APACHE_LOG_DIR}/access.log combined

</VirtualHost>
Save the file and exit.
How to enable VirtualHost block with Apache
After configuring the server block above, enable it by running the commands below.
sudo a2ensite example.com.conf
sudo systemctl restart apache2.service
Then open your browser and navigate to your server’s domain name.
That should complete the process!
Conclusion:
This post guided you through enabling a Cloudflare origin certificate to enhance and secure the connection between Cloudflare’s servers and your own. If you encounter any errors, please use the comment form below to report them.
Was this guide helpful?

About the Author
Richard
Tech Writer, IT Professional
Richard, a writer for Geek Rewind, is a tech enthusiast who loves breaking down complex IT topics into simple, easy-to-understand ideas. With years of hands-on experience in system administration and enterprise IT operations, he’s developed a knack for offering practical tips and solutions. Richard aims to make technology more accessible and actionable. He's deeply committed to the Geek Rewind community, always ready to answer questions and engage in discussions.
This tutorial is messed up. You clearly instructing to create3 files: a private key file, a certificate file, and an origin pull certificate. You have given the example to create the private key file as “sudo nano /etc/ssl/private/cloudflare_example.com.pem”, the certificate file as “sudo /etc/ssl/certs/cloudflare_example.com.pem”. However, if you followed the steps on CloudFlare, you should know that you DO NOT get 2 “pem” files. You get a “key” file and a “pem” file. In your example you show a “pem” file for both key and certificate files. This is conflicting, confusing, and frustrating for a person, like me, how is doing this the first time. If you know what you are talking about, please give CORRECT instructions. If you do not, then DO NOT give confusing or otherwise misleading instructions. Thank you.
Please do the world a favor and STOP writing another tutorial until you are thoroughly familiar with the topic and included ALL steps necessary. Otherwise you just leave people in limbo and frustration.
SSLEngine on
Invalid command ‘SSLEngine’, perhaps misspelled or defined by a module not included in the server configuration
If this is important and required, maybe you should spell this out how to enable it!
Thank you for the tutorial very details, I think you forgot to mention
sudo a2enmod ssl
run the above cmd, if you are getting SSLEngine on
Invalid command ‘SSLEngine’, perhaps misspelled or defined by a module not included in the server configuration
Thanks for your help! This guide is perfectly detailed.
(Sorry for my english)
No its not…its a mess and has caused lots of problems for my server.
To be honest the instructor should try it out on a real server.
Thanks to this tutorial and the SSLEngine on syntax error my apache is stuffed up!!
I take that all back……..I stuffed it up your tutorial is one of the bets and it works…..except for one typo where “nano” is not specified in the sudo for the cert paste:)
Keep up the good work :)))))
Thank
IOS Broken . Need Del :
Protocols h2 http:/1.1 —–> Protocols h2 http/1.1
sudo a2ensite example.com.conf
: command not found
this command doesnt work on me using centos 7