How to Create Your Website Domain


A website domain is your address on the internet, like example.com, and buying one is the first step to putting a site online.
Go to Google Domains, search for your desired domain name, and click “Get it.” If available, add it to your cart and complete the checkout process to register it.
Millions of .com names already belong to someone else, so finding an available option takes patience. Pick a short name that you can spell, say, and remember easily to give your new site the best start.
- Easy to say and spell. Successful websites have easy-to-remember domain names. If you can come up with something easy to remember, short, and available, then register it.
- Use .com, .org, or .net. domain extension. If you’re creating an online business, you’ll probably want to use .com extension. You want people to be able to remember it; after all, .org and .net also are good alternatives.
For this tutorial, we’ll use example.com.
This example domain name is for testing purposes only and cannot be registered by anyone.
Head to a domain registrar like Google Domains to check availability. (Note: Google Domains accounts have transitioned to Squarespace, though the search and purchase steps remain similar.)
We’ll use Google Domains as our domain registrar for this guide. Claiming a domain requires registration. While many registrars exist, Google Domains offers convenience for this demonstration.
Google Domains – Register Your Domain Name
On the Google Domains page, type the desired domain name into the search box and click the Get it button. If the domain remains available, the platform guides buyers through the registration process.
If the name is already taken, the platform shows that it's unavailable and suggests other extensions.
Available alternatives might include .net, .org, or other extensions.
Testers often need several attempts before finding an open name suitable for registration.

Add the domain to your cart and complete the checkout form. Standard registration costs about $12 per year.
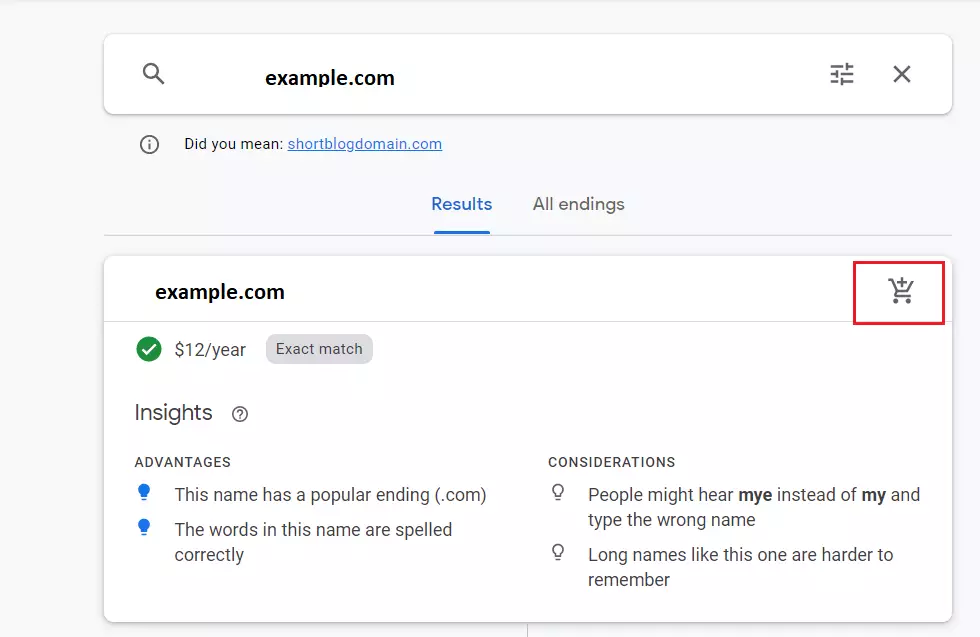
Domain names registered through Google typically cost $12 per year.

Using Google Domains makes having a Gmail account helpful. Existing account holders log in to finalize payment for the domain name.
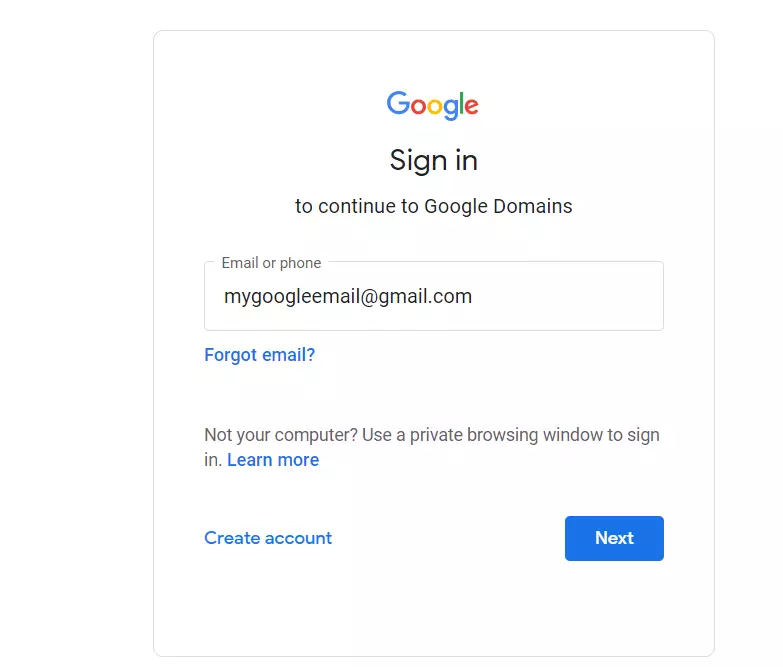
Completing payment grants official ownership of the domain. Google acts as the domain registrar, and management happens through the Google Domains website.
Logging in reveals the newly registered domain name. Clicking the domain name opens options for managing settings.
The domain overview page displays details like expiration dates and privacy protection status.

That covers the basics for now. A domain name is now registered and ready for online deployment.
However, because the domain lacks a server connection, typing it into a browser currently displays a Google Domains placeholder rather than website content.
Directing the domain to a server remains necessary for website functionality.
Upcoming tutorials cover registering a Google Cloud server and connecting the domain to that server's IP address.
Until then, stay tuned.
Conclusion:
Registering a domain is the first brick in building your online presence. Keep these points in mind:
- Choose Wisely: Select a domain name that is easy to remember, say, and spell.
- Check Availability: Use Google Domains or other registrars to see if your preferred domain is available.
- Consider Extensions: Opt for widely recognized domain extensions such as .com, .org, or .net.
- Be Persistent: If your first choice is taken, keep brainstorming until you find an available option that fits your needs.
- Finalize Your Registration: Once you settle on a name, complete the registration process to make it yours.
Look forward to the next post, which guides readers through setting up a Google Cloud server and connecting a newly registered domain!
Was this guide helpful?
50% of readers found this helpful (2 votes)

About the Author
Richard
Tech Writer, IT Professional
Richard is a writer at Geek Rewind who turns complex IT tasks into clear, step-by-step guides. He draws on years of hands-on experience in system administration and enterprise IT operations, focusing on Windows, Linux and WordPress: the problems people actually run into, and the fixes that work. His server and WordPress guides come from systems he runs himself. Richard builds and maintains the platform behind Geek Rewind, from its Ubuntu servers and Nginx configuration to its custom WordPress plugins. Many new tutorials start with readers' questions, and he's always glad to answer them in the comments.



No comments yet — be the first to share your thoughts!