How to Enable Picture-in-Picture in Microsoft Edge

Picture-in-Picture (PiP) mode in Microsoft Edge moves a web video into a small, floating window that stays on top of your other apps. It is built into the browser, so you can keep watching a video while you work on something else without installing extra software. PiP works on most sites that play video in the browser. Some sites or players may block it.
The fastest way to turn it on is to right-click the video twice and choose Enter Picture-in-Picture. The first right-click often opens the site’s own menu, as it does on YouTube. The second right-click opens the standard Edge menu, which includes the PiP option. You can also hover over the video and click the PiP button if Edge shows one. The floating window shrinks the video, but it stays visible while you switch tabs or apps.
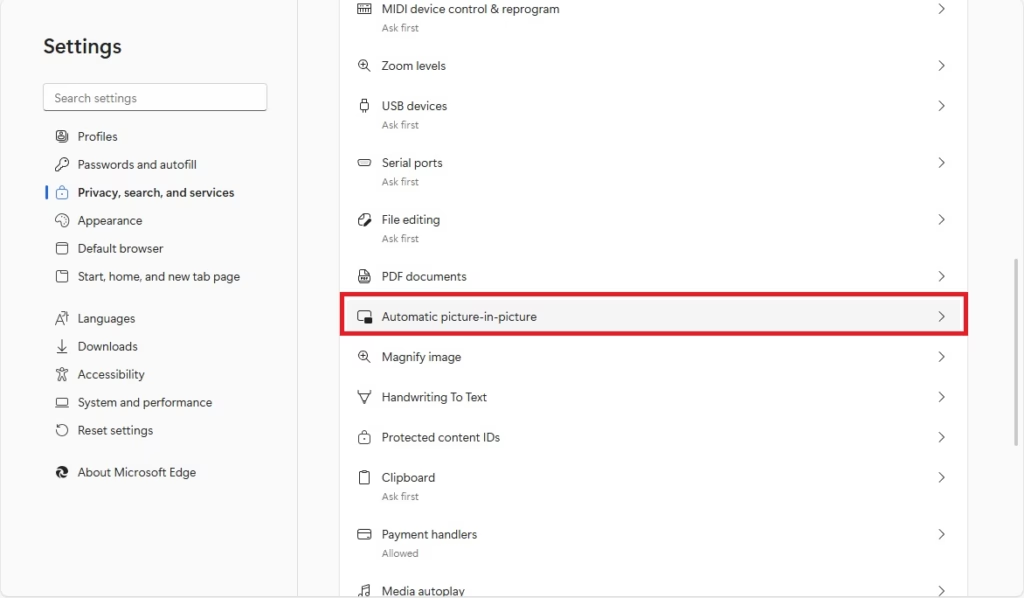
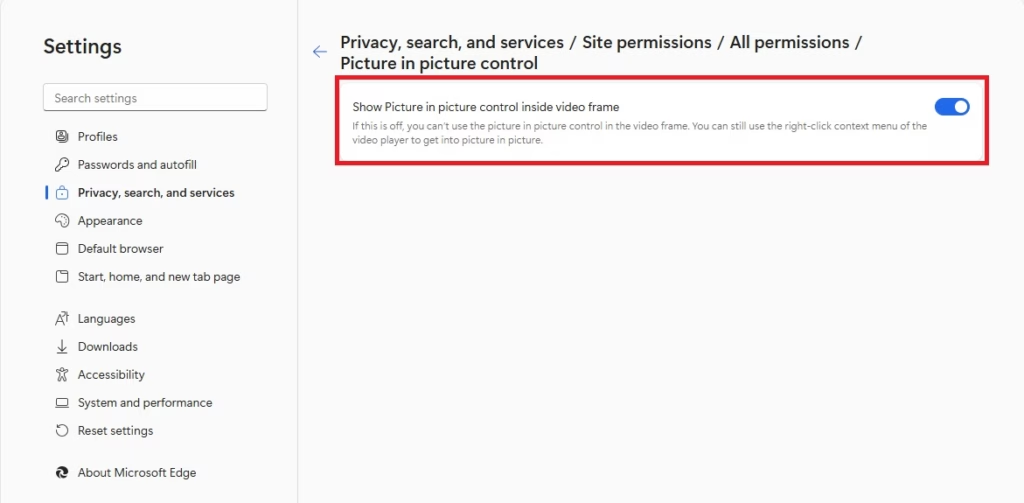
Right-click a video in Microsoft Edge and select Enter Picture-in-Picture, or go to Settings Privacy, search, and services > Site permissions All permissions Automatic picture-in-picture and toggle the switch On. The video moves into a floating window that stays on top while you work.
Enable or Disable Picture-in-Picture in Edge Settings
You can manage Picture-in-Picture from Edge’s own settings. This is the safest method, because it changes nothing outside the browser. The steps below open the Edge menu, go into Settings, and find the automatic Picture-in-Picture switch under the site permissions options. You can turn it on or off there, and you can reverse the change at any time by repeating the steps.
- Open the Microsoft Edge browser. You should see a browser window with the tab bar at the top.
- Click the three horizontal dots in the top right corner and select Settings. The Settings page opens in a new tab with a list of categories on the left.
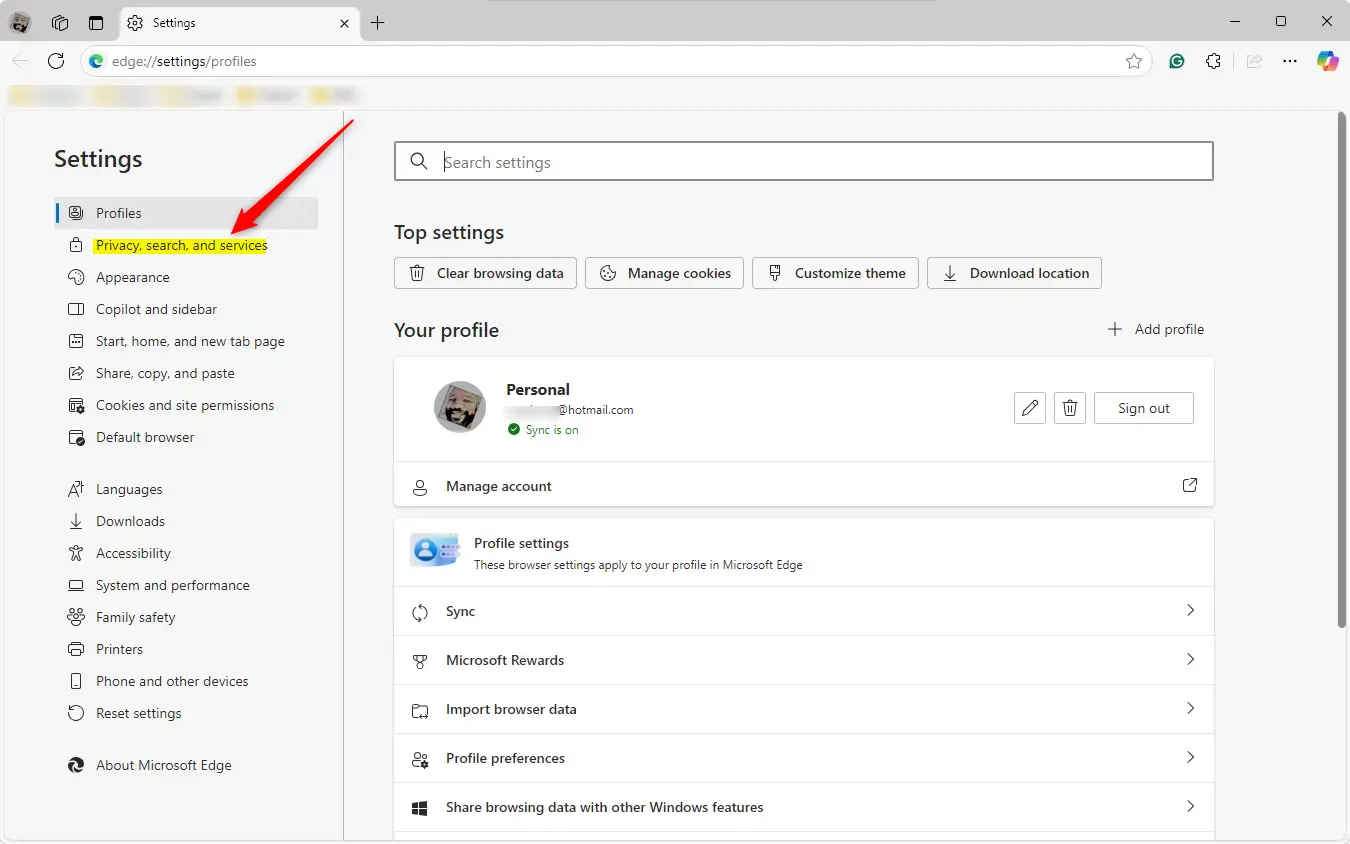
- Click Privacy, search, and services on the left side. If your version of Edge doesn’t show this item, look for Cookies and site permissions in the same list. Newer Edge builds keep the site permission options there.

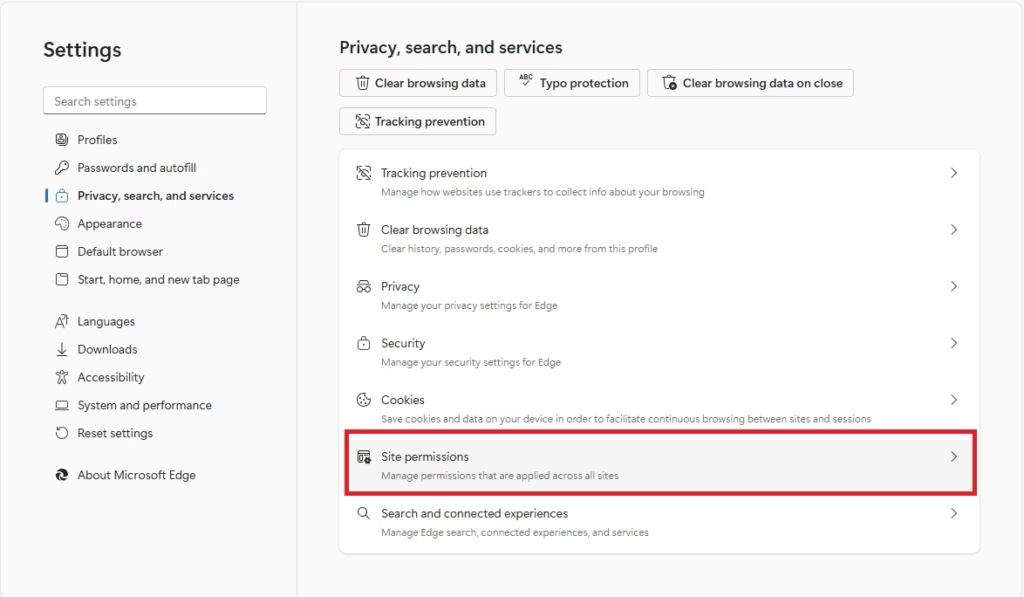
- Find the Site permissions section and click it. The page now lists the permission types, such as location, camera and notifications.
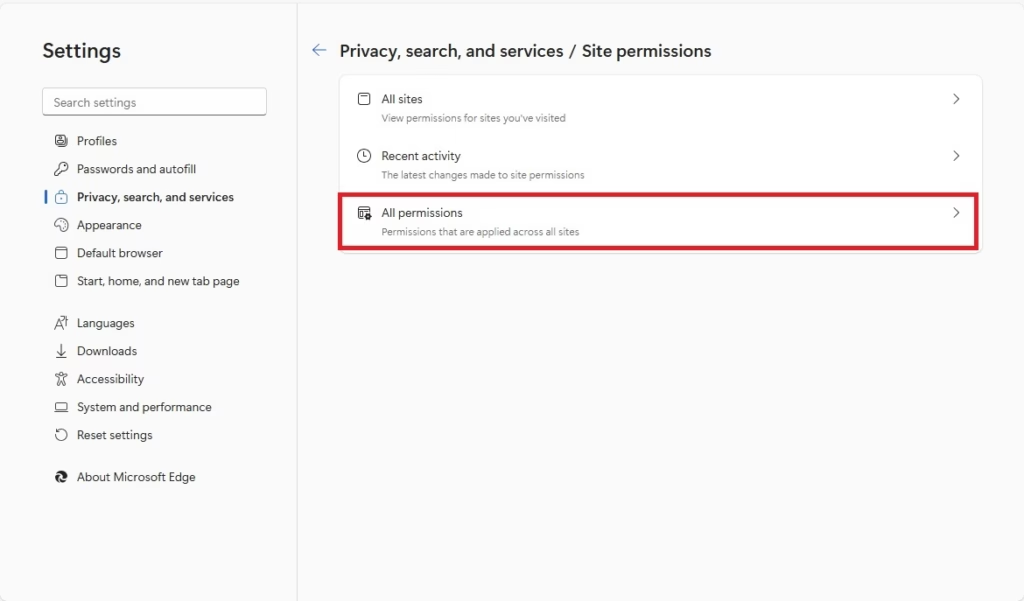
- Click All permissions to see more options. A longer list of permission types appears, including the ones that are not shown by default.
- Click Automatic picture-in-picture. If you can’t find it, scroll further down the list. Older Edge versions may not have this option, so update Edge if it is missing.
- Toggle the switch to On or Off. The change applies straight away and you don’t need to restart Edge. To undo it, come back to this page and flip the switch the other way.
Enable or Disable Picture-in-Picture via Registry
Treat this as a second option. Microsoft doesn’t document this value for Edge, so if nothing changes after you apply it, go back to the browser settings above.
In Registry Editor, choose File Export, pick a location and save the file. You need an administrator account, because the key sits under 🗝️HKEY_LOCAL_MACHINE. The registry works the same on Windows 11 Home and Pro.
1. Open the Registry Editor by searching for it in the Start menu and choosing it. Approve the User Account Control prompt if one appears. Then go to this registry path: 🗝️HKEY_LOCAL_MACHINE\
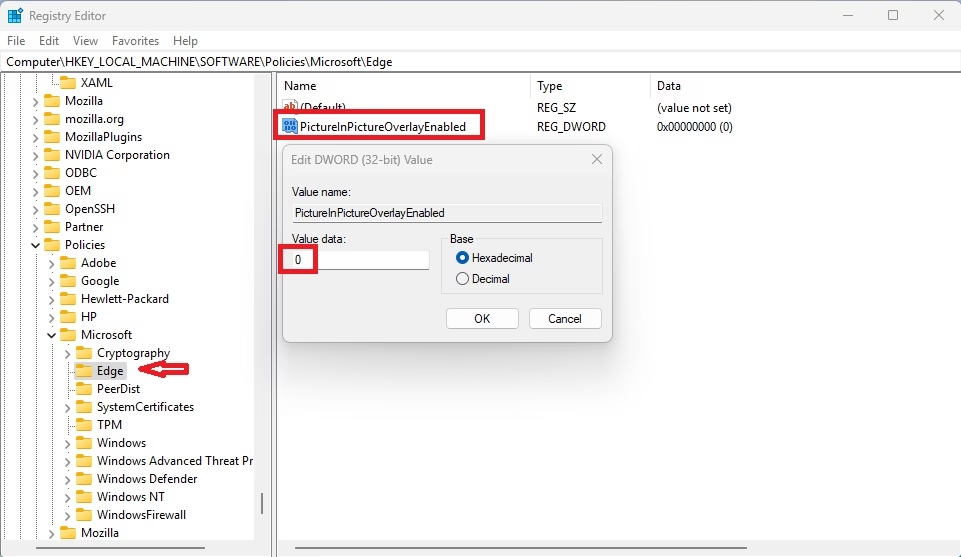
- Right-click the AppModel key and choose New DWORD (32-bit) Value. Name it PictureInPictureOverlayEnabled. This entry acts as a switch that turns the overlay on or off for the browser. The new value should appear in the right pane.
- Double-click the new value to edit it. An Edit DWORD (32-bit) Value box opens.
Set its value data to 1 to turn on the overlay, or 0 to turn it off. Then click OK.
- To revert to the original settings, delete the PictureInPictureOverlayEnabled value. It is a registry value, not a file. Right-click it in the right pane, choose Delete, and confirm. If you exported a backup earlier, you can also restore it with File Import
PictureInPictureOverlayEnabled
You may need to restart your computer to see the changes. Close Edge fully before you restart, then play a video again to test it.
Summary
Picture-in-Picture in Edge is a handy tool for multitasking. It lets you watch videos while you do other things online. For everyday use, the right-click method and the browser settings are all you need. The Windows Registry is there as a backup option if you can't get the browser settings to work.
Have a question about this guide?
Answered by AI from this guide. Good questions may be added to this page — please don't include personal details.
Did this guide fix your problem?

About the Author
Richard
Tech Writer, IT Professional
Richard is a writer at Geek Rewind who turns complex IT tasks into clear, step-by-step guides. He draws on years of hands-on experience in system administration and enterprise IT operations, focusing on Windows, Linux and WordPress: the problems people actually run into, and the fixes that work. His server and WordPress guides come from systems he runs himself. Richard builds and maintains the platform behind Geek Rewind, from its Ubuntu servers and Nginx configuration to its custom WordPress plugins. Many new tutorials start with readers' questions, and he's always glad to answer them in the comments.
No comments yet — be the first to share your thoughts!