How to Enable or Disable Visual Search in Microsoft Edge
This article explains how to turn on or off the Visual Search feature in Microsoft Edge. Visual Search shows a small icon when you hover your mouse over an image on a website.
Microsoft Edge browser is the default browser in Windows 11. You can switch to their preferred or favorite browser if you want to use a different one. Edge is based on Chromium, which is the same technology used by Google Chrome and many other browsers.
Edge has a useful feature called Visual Search. When you hover over an image on a webpage, a small icon appears in the top right corner of that image. If you click this icon, Edge searches the web for similar images and related content.
This feature is part of the Smart Explore function. Smart Explore gives you quick options to find more information while you browse the web.
Open Microsoft Edge, click the three dots, select Settings, then Appearance. Toggle “Show hover menu on image hover” to enable or disable Visual Search. Alternatively, use the registry editor to modify the VisualSearchEnabled DWORD value.
Why Use Visual Search?
Visual Search helps you discover more content online related to images you see while browsing. It’s handy when you want to find similar products, learn more about a picture, or explore related topics.
Method 1Turn Visual Search On or Off Using Browser Settings
What You’ll Need: Access to your Microsoft Edge browser settings.
Step 1: Open Microsoft Edge. Microsoft Edge browser
Step 2: Click the Settings and more button. This is the 3 horizontal dots icon in the top right corner. You can also press Alt+F on your keyboard.
Step 3: Select Settings from the menu that appears.
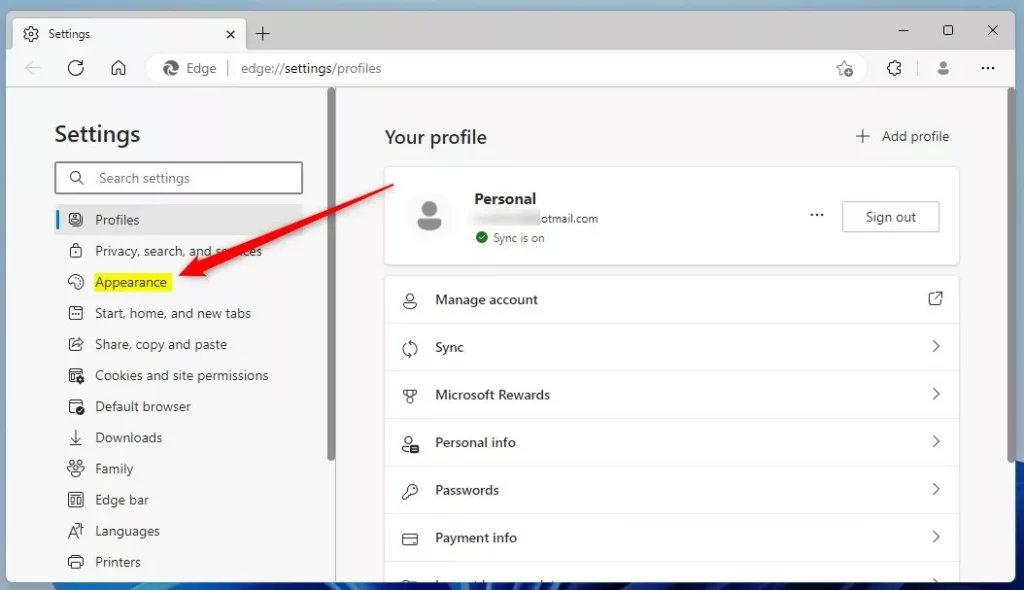
Step 4: Click Appearance on the left side panel.
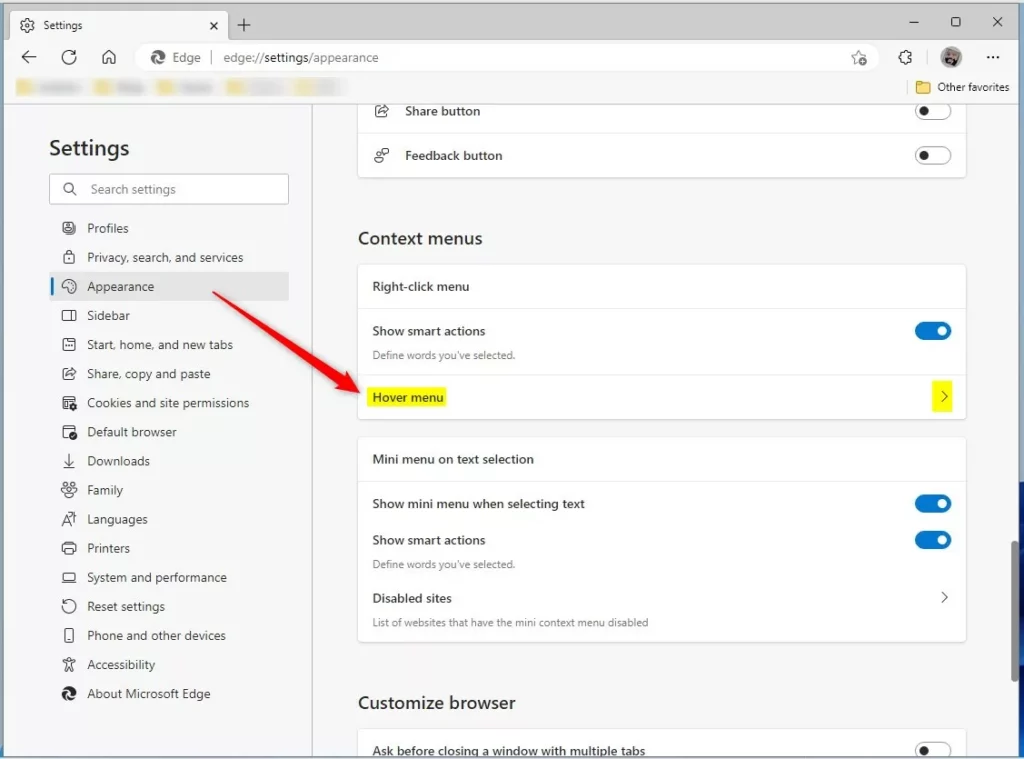
Step 5: Look for the Hover menu section under Context menu. Click on it to expand the options.
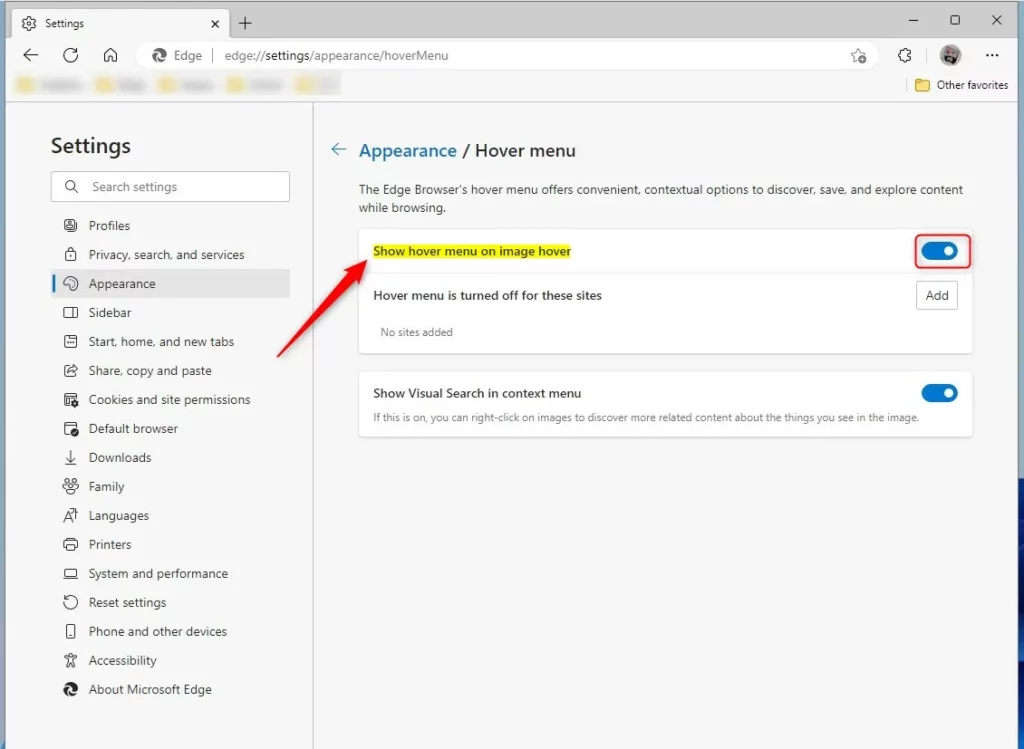
Step 6: You’ll see a toggle switch for Show hover menu on image hover.
To turn Visual Search ON: Click the toggle switch so it moves to the right and turns blue.
To turn Visual Search OFF: Click the toggle switch so it moves to the left and turns gray.
Step 7: Your changes happen right away. Close and reopen Microsoft Edge to make sure everything works properly.
Method 2Turn Visual Search On or Off Using Windows Registry
⚠️ Admin Privileges Required: You need administrator access to edit the Windows Registry.
What You’ll Need: Access to the Windows Registry Editor. Only use this method if you’re comfortable working with the registry.
Step 1: Open the Windows Registry. You can type regedit in the Windows search bar and press Enter.
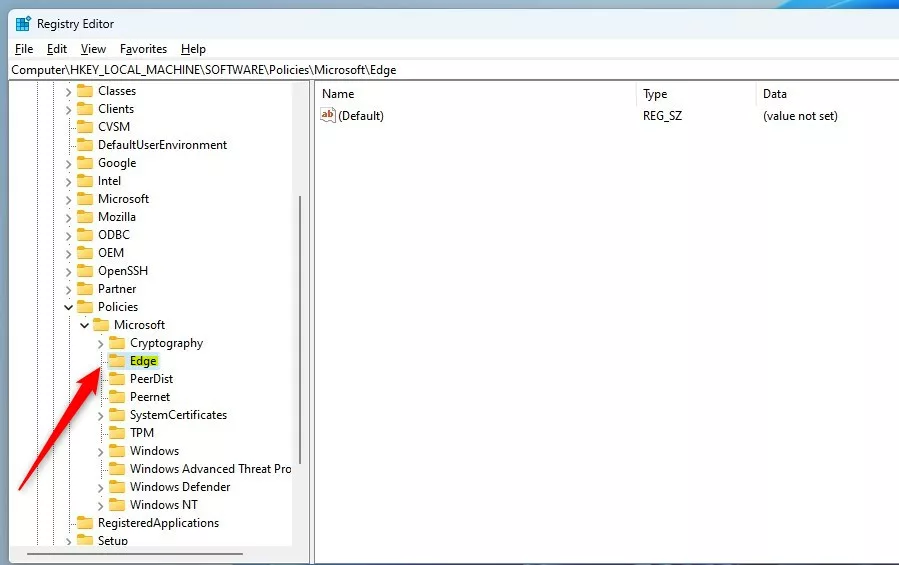
Step 2: Navigate to this folder path:
HKEY_LOCAL_MACHINE\SOFTWARE\Policies\Microsoft\EdgeStep 3: If you don’t see an Edge folder, right-click on the Microsoft folder. Select New and then Key. Name it Edge.
Step 4: Right-click inside the Edge folder’s right pane. Select New and then DWORD (32-bit) Value.
Step 5: Type the name: VisualSearchEnabled
Step 6: Double-click the VisualSearchEnabled item you just created.
Step 7: Make sure the Base is set to Decimal. Then change the Value data:
To turn Visual Search ON: Type 1
To turn Visual Search OFF: Type 0
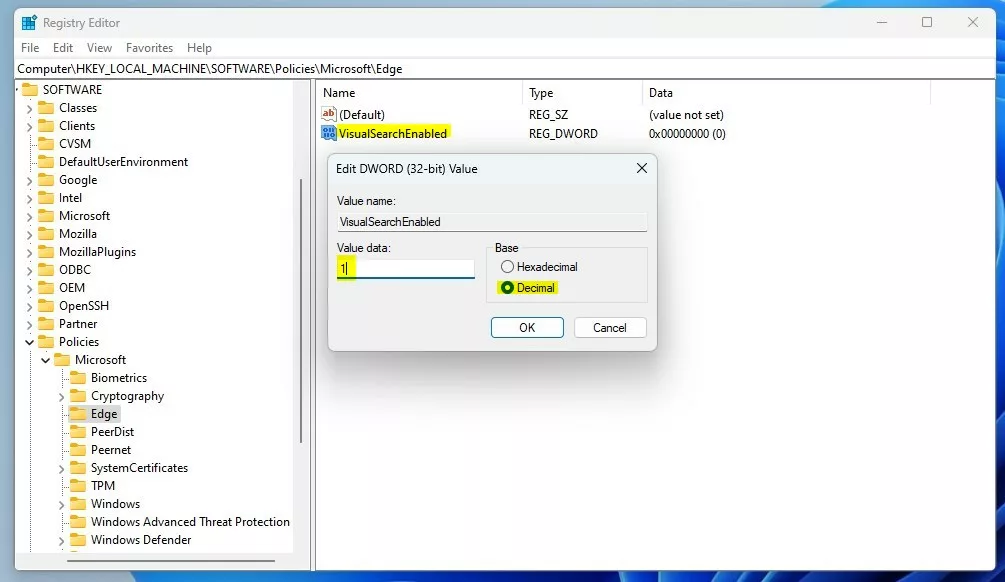
Step 8: Click OK to save your change.
Step 9: Restart your computer for the changes to take effect.
Summary
Visual Search is a handy tool in Microsoft Edge that helps you find more information about images on websites. You can easily turn this feature on or off in two ways:
- Using Browser Settings: Go to Settings, click Appearance, find Hover menu, and toggle the switch. This is the easiest method for most users.
- Using Windows Registry: Edit the registry to change the VisualSearchEnabled value to 1 (on) or 0 (off). This method requires administrator access and is best for advanced users or IT professionals.
Both methods work equally well. Choose whichever method feels most comfortable for you. Your changes take effect either right away or after restarting your computer, depending on which method you use.
Was this guide helpful?

About the Author
Richard
Tech Writer, IT Professional
Richard, a writer for Geek Rewind, is a tech enthusiast who loves breaking down complex IT topics into simple, easy-to-understand ideas. With years of hands-on experience in system administration and enterprise IT operations, he’s developed a knack for offering practical tips and solutions. Richard aims to make technology more accessible and actionable. He's deeply committed to the Geek Rewind community, always ready to answer questions and engage in discussions.


No comments yet — be the first to share your thoughts!