

This article explains how to enable or disable the automatic saving of screen recordings in the Snipping Tool on Windows 11.
The Snipping Tool is a built-in screenshot tool in Windows that allows you to capture screenshots of any part of your screen, including full-screen captures, individual windows, or user-defined capture areas.
With the Snipping Tool, you can redact text, disable screen capture and recording, including system audio and microphone when recording, disable automatically saving screenshots, and more.
A recent update to the app will automatically save the original screen recordings to your Video > Screen Recordings folder in Windows. You can turn this off anytime.
This feature provides convenience for users who want their recordings saved automatically. Still, it may not be ideal for others who prefer to manage their recordings and save storage space manually.
Turn on or off automatically saving screen recordings in the Snipping Tool
As mentioned above, users can enable or disable a feature with the Snipping Tool that automatically saves screen recordings to their Video > Screen Recordings folder.
Here’s how to do it.
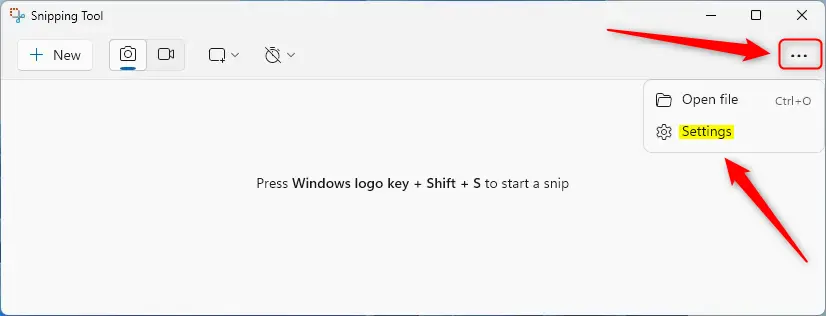
First, open the Snipping Tool.
Then, click the See more (three dots) button and select Settings to open the Settings page.
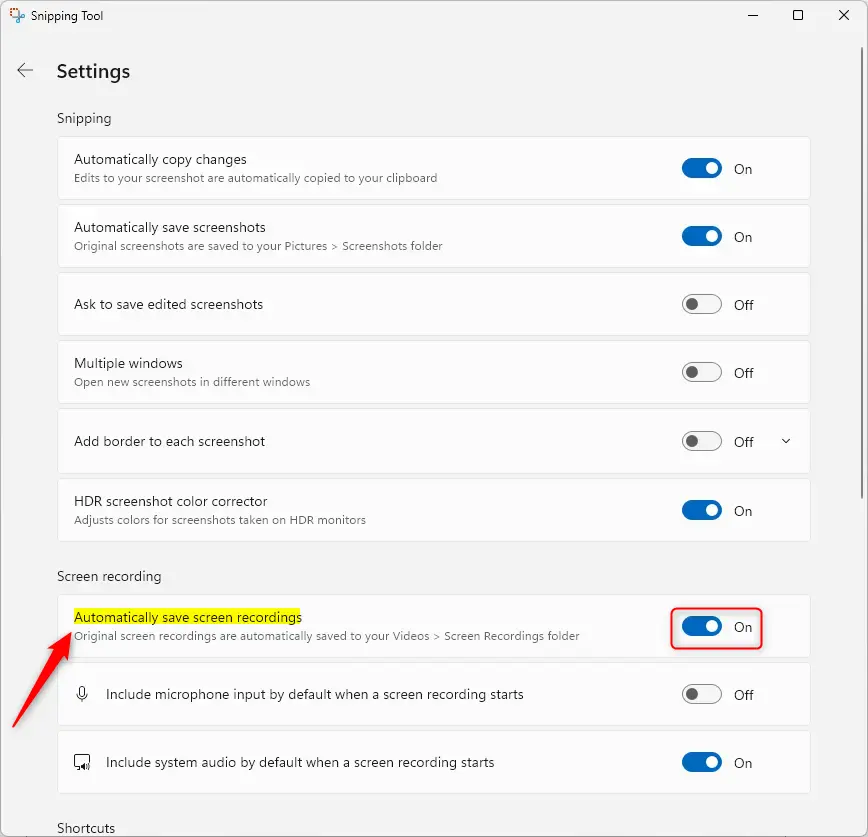
Under the ‘Screen recording‘ section, select the “Automatically save screen recordings” tile. Then, toggle the switch button to the On or Off position to enable or disable this feature in the app.
Close the app when you are done.
That should do it!
Conclusion:
In conclusion, the Snipping Tool in Windows 11 offers the convenient option of automatically saving screen recordings to the designated folder. This can be useful for users who prefer a hands-free approach to managing their recordings. However, for those who prefer more manual control over their storage and files, quickly toggling this feature on or off ensures a personalized experience tailored to individual preferences.
Leave a Reply