How to Enable or Disable Seconds in Windows 11 System Tray Clock
Windows 11 lets you see the exact time down to the second in your taskbar. This guide shows you how to turn this setting on or off.
To show or hide seconds in your Windows 11 system tray clock, open Settings, go to Personalization, then Taskbar, and expand Taskbar behaviors. Check or uncheck the “Show seconds in the system tray clock” box. This setting is available in Windows 11 version 22H2 and later.
Why show seconds?
Showing seconds in your Windows 11 system tray clock is helpful for tasks needing precise timing, giving you an instant reference without needing a separate timer.
What happens when done?
Once you apply these changes, your clock in the bottom-right corner of the screen will either display or hide the ticking seconds. This change takes effect immediately without requiring a system restart.
Version Compatibility and History
You can only show seconds in the Windows 11 clock if you’re using version 22H2 or a newer update, specifically the Moment 2 update or later.
Method 1Using the Settings App
You can easily show seconds in your Windows 11 clock by using the Settings app, which lets you quickly turn this feature on or off.
- Open the Windows Settings app by clicking the Start menu and selecting the gear icon.
windows 11 new settings button - Click on Personalization in the left menu.
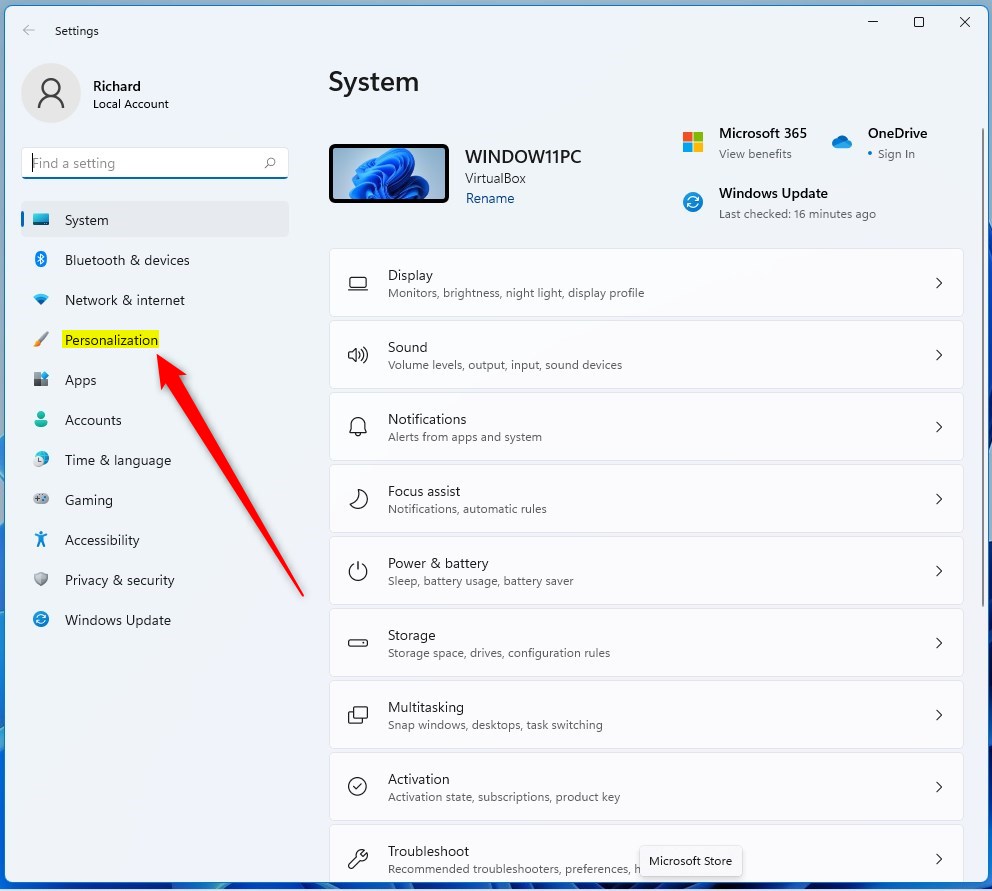
windows 11 personalization tile setting - On the right side, click on Taskbar.
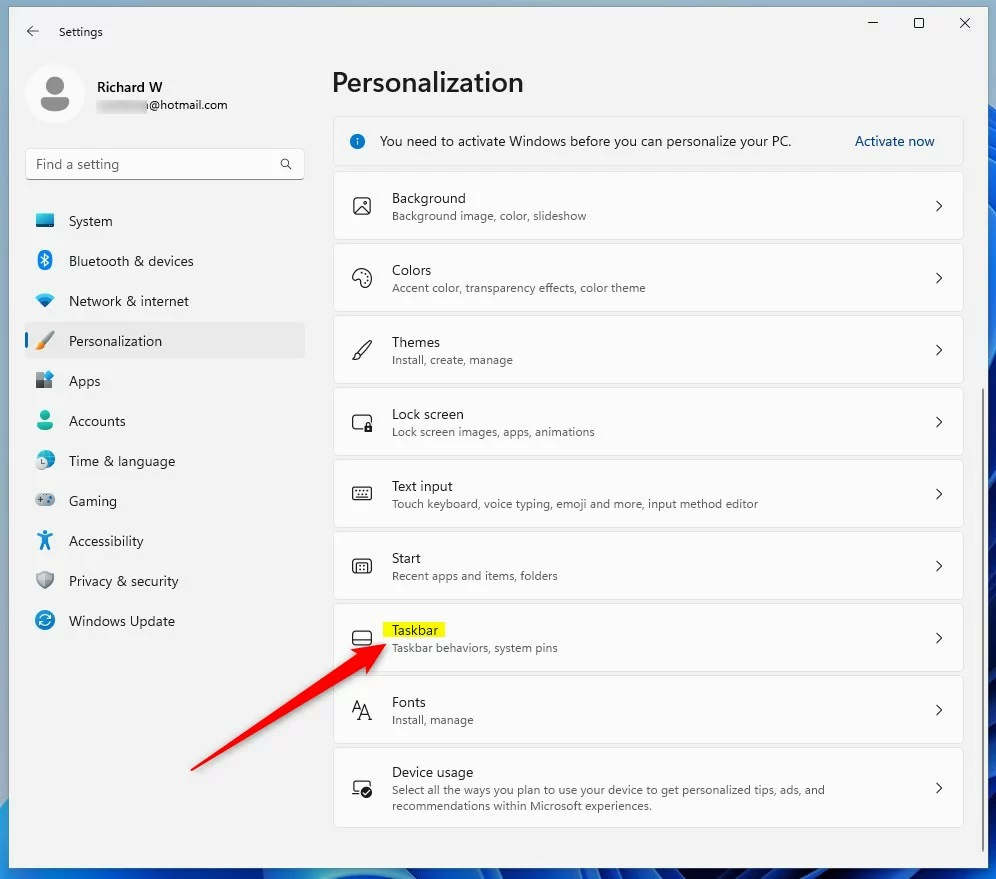
windows 11 personalization taskbar tile - Scroll down and click Taskbar behaviors to open the menu.
- Check the box next to Show seconds in the system tray clock to turn them on. Uncheck the box to hide them.

windows 11 show seconds in system tray clock tile - Close the Settings app.
Method 2Using the Windows Registry
If the Settings app doesn’t work, you can use the Windows Registry to show seconds in your system tray clock, but this method is for more advanced users.
- Open the Windows Registry by typing
regeditin your Start menu search bar. - Go to the following path:
HKEY_CURRENT_USER\Software\Microsoft\Windows\CurrentVersion\Explorer\Advanced 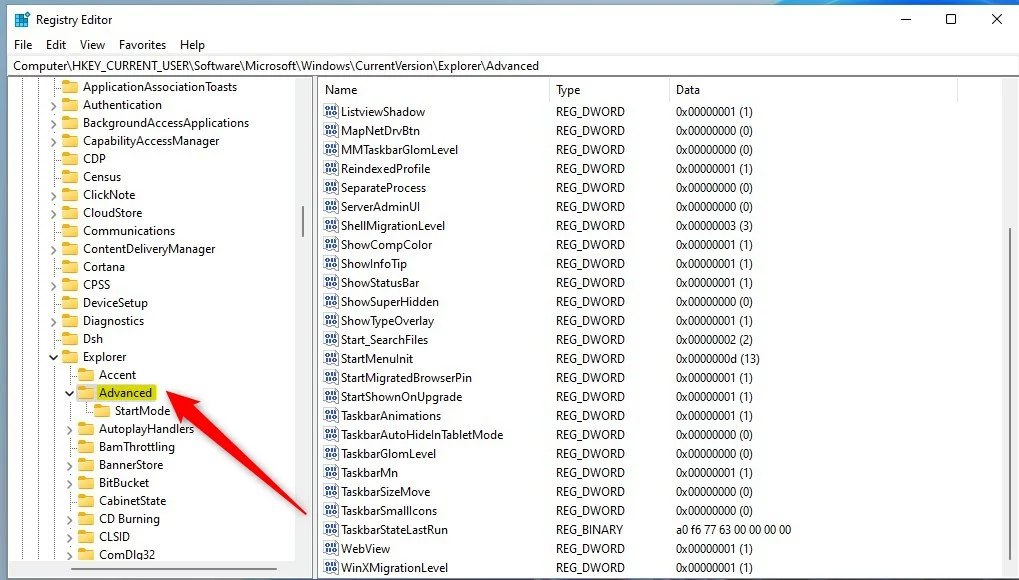
windows 11 show seconds in system tray clock registry - Look for the value named
ShowSecondsInSystemClockon the right side. If you do not see it, right-click an empty space, select New, then DWORD (32-bit) Value, and name itShowSecondsInSystemClock. - Double-click the value. Change the data to
1to show seconds, or0to hide them. 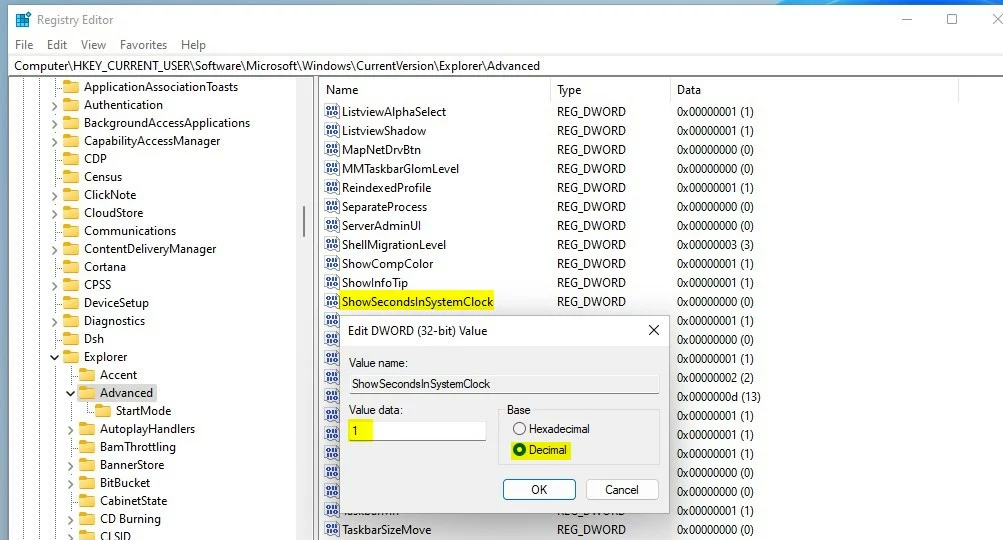
windows 11 showSecondsInSystemClock value key - Close the Registry Editor.
Performance Impact and Battery Life
Showing seconds in your Windows 11 clock uses a tiny bit more power because the clock updates more often, which might slightly reduce battery life on older devices.
Troubleshooting Registry Issues
If the registry edit to show seconds in your Windows 11 clock isn’t working, double-check you created a DWORD value, not a text string, and you can always reset it.
Summary
You can easily turn on or off showing seconds in your Windows 11 clock using either the simple Settings app or the more advanced Registry editor.
Is the registry method still necessary after the 22H2 update?
No, the registry method is generally not necessary for users on Windows 11 version 22H2 or newer. Microsoft added a native toggle in the Taskbar settings menu, making it much safer and easier for everyday users to enable or disable seconds without editing system files manually.
Was this guide helpful?

About the Author
Richard
Tech Writer, IT Professional
Richard, a writer for Geek Rewind, is a tech enthusiast who loves breaking down complex IT topics into simple, easy-to-understand ideas. With years of hands-on experience in system administration and enterprise IT operations, he’s developed a knack for offering practical tips and solutions. Richard aims to make technology more accessible and actionable. He's deeply committed to the Geek Rewind community, always ready to answer questions and engage in discussions.


No comments yet — be the first to share your thoughts!