How to Share a Document with Nearby Devices in Windows 11
You can share a document with nearby devices in Windows 11 using the built-in Nearby sharing feature.
Nearby sharing lets you send files like documents, photos, or links directly to another Windows PC on the same local network or via Bluetooth, without needing cloud storage or USB drives.
This feature is available in Windows 10 and Windows 11, making it a convenient way to transfer content between your own devices or with colleagues and friends nearby.
You’ll find Nearby sharing particularly useful for quick transfers when you need to move a file between your work and home computers, or share a presentation slide just before a meeting.
Getting Ready: Turning on Nearby Sharing
Before you can share, you need to turn on Nearby sharing on both computers. Think of it like making sure both your phones are on and have Bluetooth ready before you try to connect them.
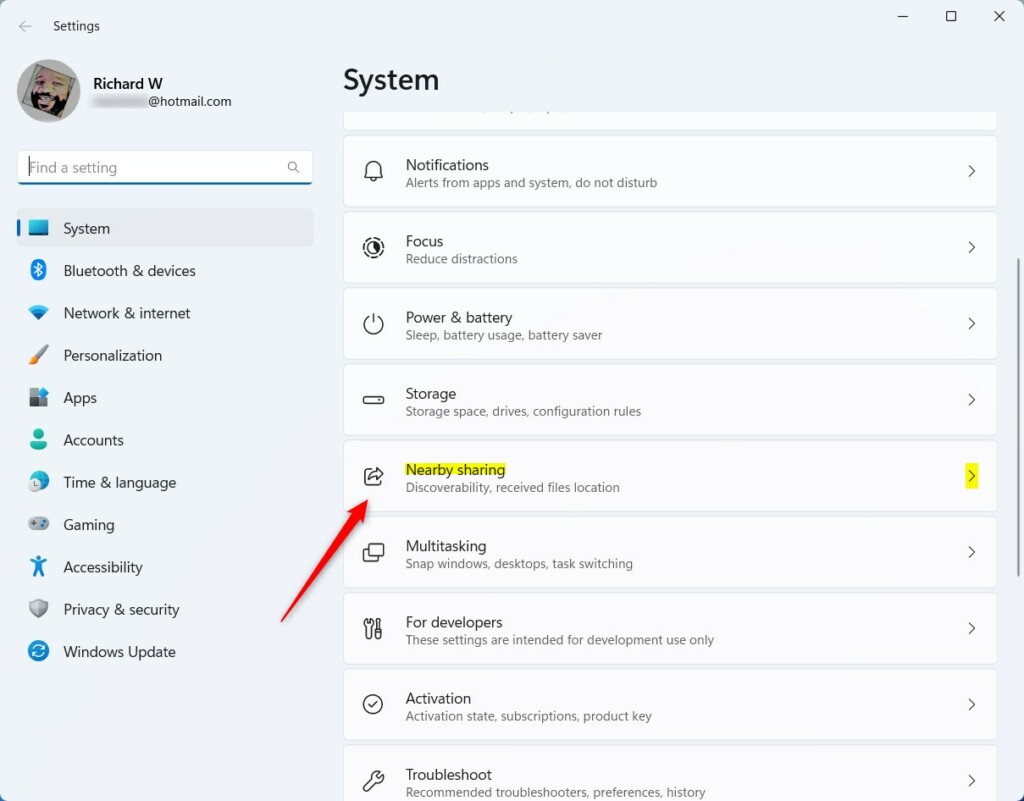
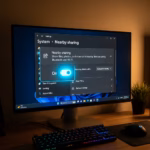
Step 1 Open Settings on Both Computers
You’ll need to do this on every computer you plan to share with, or from.
- Click the Start button.
- Select the Settings gear icon.
- Go to System.
- Find and click on Nearby sharing.
Step 2Set Up Your Sharing Options
In the Nearby sharing settings, you will see a choice like “I can share or receive content from.” You have two options:
- Everyone nearby: This is the most open setting. Any Windows device nearby that also has Nearby sharing turned on can send files to you, and you can send files to them.
- My devices only: This is more private. You can only share with or get files from devices where you are logged in with the same Microsoft account. This is good for sharing between your own computers.
Pick the option that works best for you. Crucially, make sure you choose the same setting on both computers.
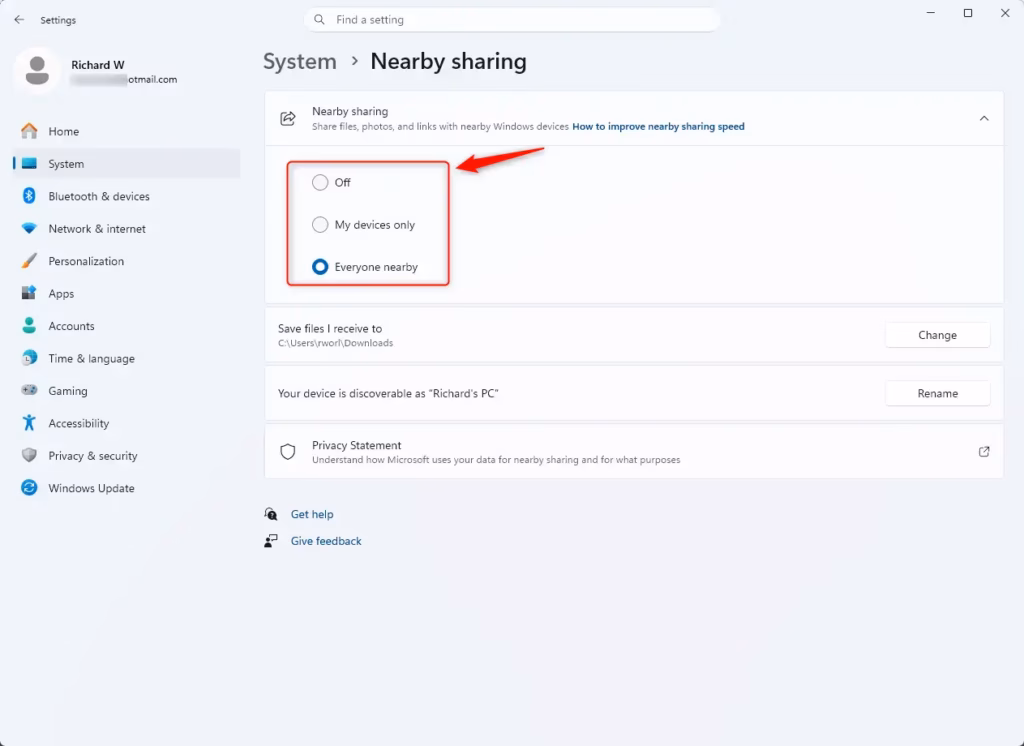
Pro Tip: If you pick “Everyone nearby,” your computer’s Bluetooth name will be shown to others. This helps devices find each other. If you are worried about privacy, use “My devices only.”
Step 3Choose Where to Save Files You Receive
You will also see a setting for “Save files I receive to.” By default, Windows saves received files in your Downloads folder. If you want files to go somewhere else, like a folder named “Shared Files,” click Change and pick a different folder. This helps keep things tidy.
Step 4Make Sure Bluetooth or Wi-Fi is On
Nearby sharing uses Bluetooth or Wi-Fi. For the best results, especially with large files, Wi-Fi is usually better. If both computers are connected to the same private Wi-Fi network, you’ll likely get a stronger connection. When sharing with Bluetooth, ensure both devices have it turned on and are within about 30 feet (10 meters) of each other.
Warning: If you are trying to share with a computer running Windows 10, it needs to be version 1803 or newer. You can check your Windows version by searching for “About your PC” in the Start menu.
Sharing a Document in Just a Few Clicks
Now that Nearby sharing is set up on both computers, let’s share a document. This is where it gets interesting.
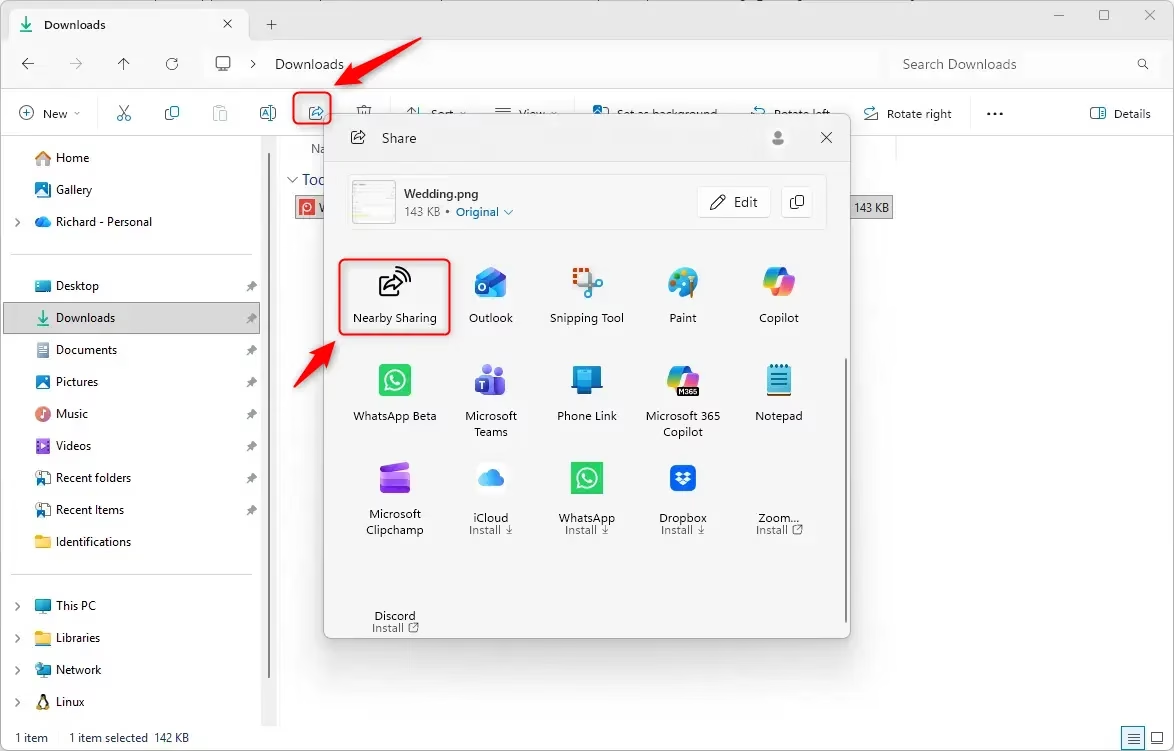
Step 1Find the Document
On the computer that has the document you want to share, open File Explorer. You can click the folder icon on your taskbar or search for “ File Explorer” in the Start menu.
Step 2Select the Document
Go to where your document is saved and click on it once to select it. Do not open it, just select it.
Step 3Start the Share
Once the document is selected, look at the top of the File Explorer window. You should see a ‘Share’ button in the toolbar. Click it.
Or, you can right-click on the document file. A menu will appear, and you should see a Share option there too. Select it.
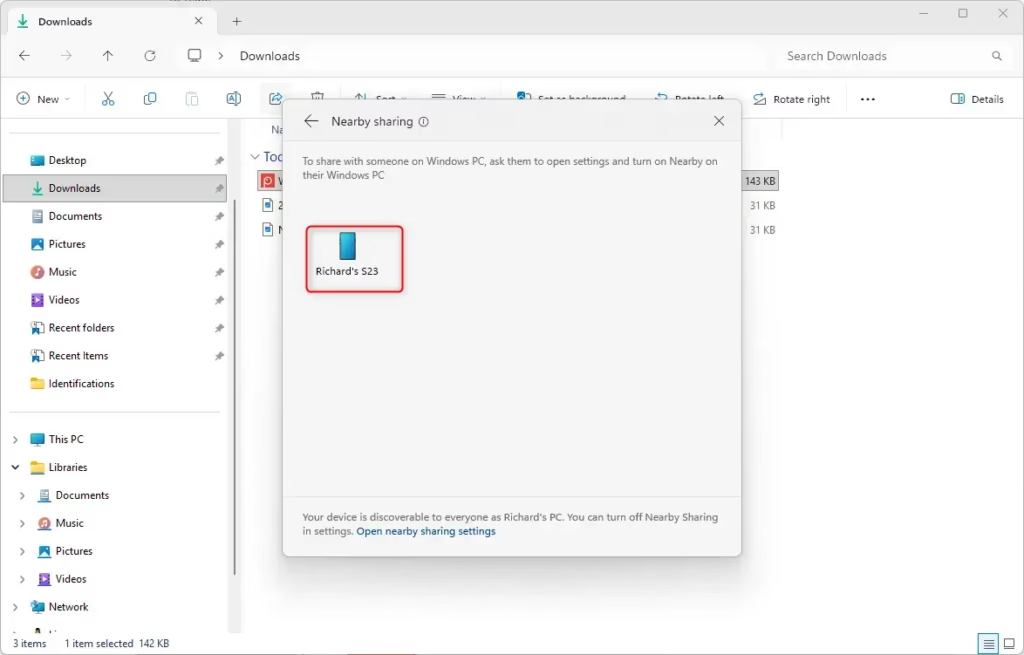
Step 4Pick Which Computer to Send To
A sharing window will pop up. It will show a list of nearby computers that have Nearby sharing turned on. Click the name of the computer you want to send the document to.
Step 5Approve the Transfer
On the computer receiving the file, a notification will pop up, letting you know a file is on its way. You will see options like Save & open or Save. Choose the option that is best for you. If you choose “Save,” the file will go to the folder you picked in the Nearby sharing settings.
Helpful Tip: If you want to share more than one document, you can select all of them in File Explorer before clicking the Share button. This lets you send them all at once.
Reference:
Summary
Nearby sharing in Windows 11 lets you send files like documents and pictures to other Windows computers nearby using Bluetooth or Wi-Fi. You need to turn it on in Settings on both computers, choosing whether to share with “Everyone nearby” or “My devices only.” You can also set where received files are saved. Once set up, you can share files directly from File Explorer by selecting a file, clicking the Share button, and choosing the target computer.
Was this guide helpful?

About the Author
Richard
Tech Writer, IT Professional
Richard, a writer for Geek Rewind, is a tech enthusiast who loves breaking down complex IT topics into simple, easy-to-understand ideas. With years of hands-on experience in system administration and enterprise IT operations, he’s developed a knack for offering practical tips and solutions. Richard aims to make technology more accessible and actionable. He's deeply committed to the Geek Rewind community, always ready to answer questions and engage in discussions.

No comments yet — be the first to share your thoughts!