How to Enable or Disable Projecting to this PC in Windows 11
Written by
Richard
Oct 9, 2022
Updated May 24, 2026
2 min read
You enable or disable Projecting to this PC in Windows 11 to allow your computer to wirelessly receive screen mirroring from other devices.
Projecting to this PC turns your Windows 11 machine into a Miracast-enabled display, letting you cast content from phones, tablets, or other laptops directly to your screen. This eliminates the need for physical cables like HDMI.
When enabled, your PC functions as a secondary monitor, allowing you to view and interact with the content from your other device wirelessly. This feature is especially useful for sharing presentations or viewing photos on a larger display.
Prerequisites for Wireless Display
Before you start, your hardware must support Wi-Fi Direct and Miracast. Most modern computers support this, but older hardware might not. You also need the Wireless Display feature installed as an Optional Feature in Windows.How to check if your PC supports Miracast
1. Press Windows Key + R, type dxdiag, and hit Enter. 2. Click Save All Information and open the text file. 3. Search for Miracast. If it says Available, your PC is ready.How to Enable or Disable Projecting to this PC
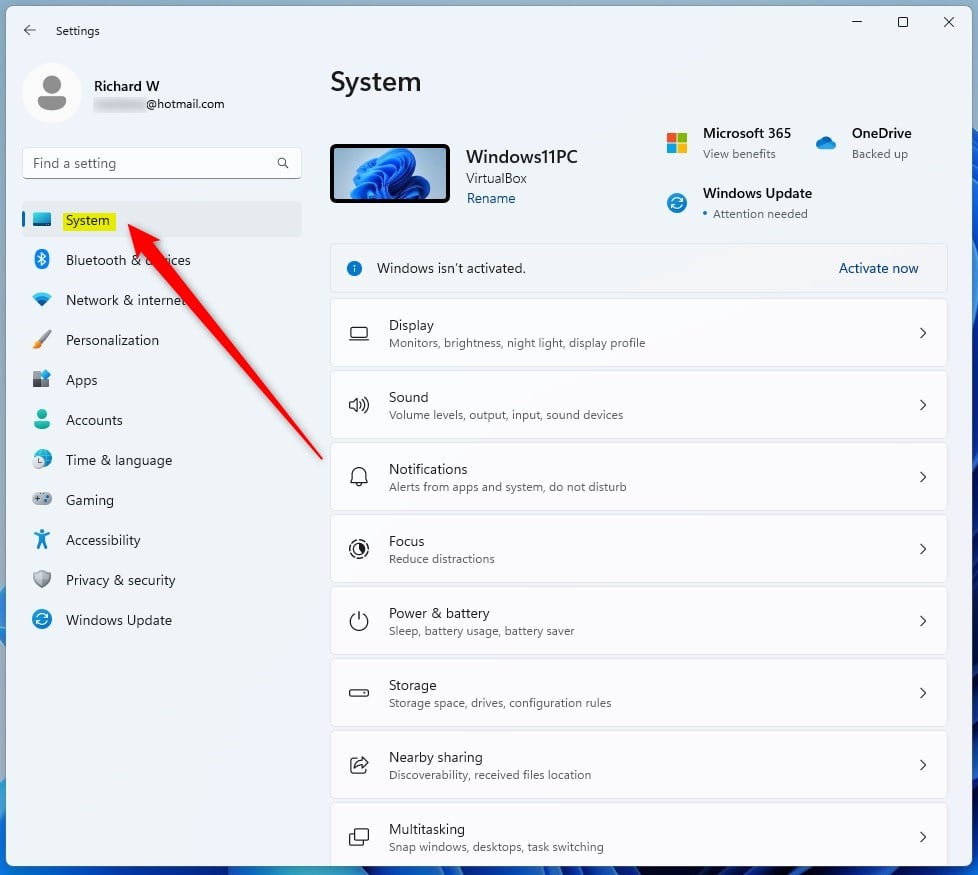
Follow these steps to manage your settings. Note: This process requires admin privileges to modify system-wide display settings.- Open Settings by pressing Windows Key + I.

- Click System on the left sidebar.
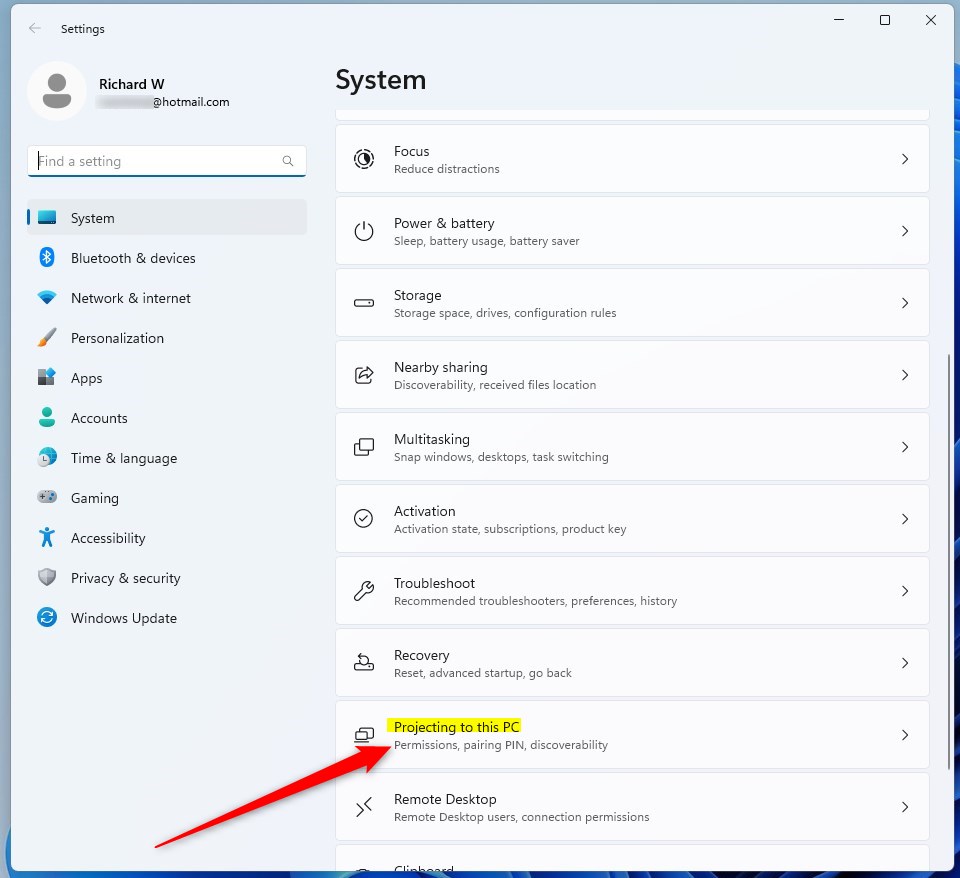
- Select Projecting to this PC.
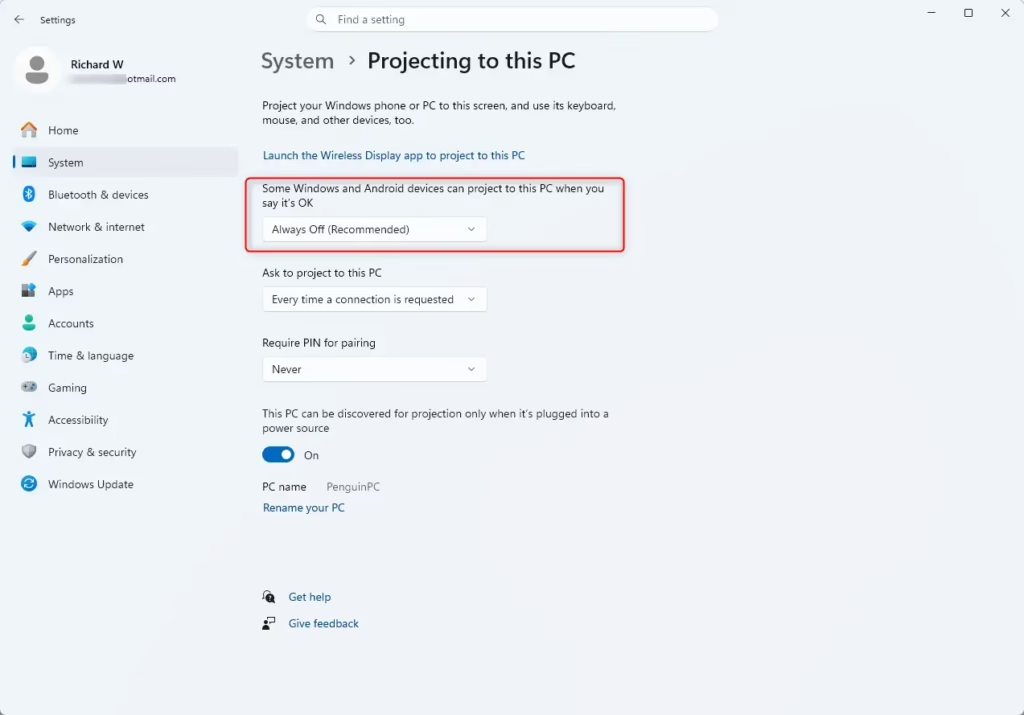
- Choose your preferred connection mode from the dropdown menu.
Troubleshooting Connection Issues
If the Projecting to this PC option is greyed out, you likely need to install the Wireless Display feature. Go to Settings > Apps > Optional features > View features and search for Wireless Display. Install it and restart your computer. If you experience lag, ensure both devices are on the same 5GHz Wi-Fi network to improve bandwidth.Summary
Projecting to this PC is a powerful way to share screens wirelessly using Miracast. By ensuring your hardware supports the Wireless Display feature and configuring your network settings, you can easily mirror devices. Remember to keep your settings on ‘Always Off’ when not in use to maintain your system’s security. For more details, visit the official Microsoft support page.Do I need an internet connection to project to my PC?
No, you do not need an active internet connection. Projecting to this PC uses Wi-Fi Direct, which creates a direct wireless connection between your devices. As long as both devices have Wi-Fi enabled and support Miracast, they can communicate locally without needing to access the internet or a router.
Can I project to a PC that is not on the same Wi-Fi network?
Generally, no. Miracast technology is designed for local proximity. While you do not need an internet connection, both devices must be in physical range of each other. If you are on different networks, the devices may fail to discover each other because they cannot establish the necessary peer-to-peer handshake.
Was this guide helpful?
Was this helpful?

About the Author
Richard
Tech Writer, IT Professional
Richard, a writer for Geek Rewind, is a tech enthusiast who loves breaking down complex IT topics into simple, easy-to-understand ideas. With years of hands-on experience in system administration and enterprise IT operations, he’s developed a knack for offering practical tips and solutions. Richard aims to make technology more accessible and actionable. He's deeply committed to the Geek Rewind community, always ready to answer questions and engage in discussions.

[…] change how often your computer asks for permission to “Ask to project to this PC” when projecting to this PC in Windows […]
[…] guide explains how to turn the “Require PIN for pairing” feature on or off when projecting to this PC in Windows […]