
This article describes enabling or disabling the driver signature enforcement feature in Windows 11.
Windows has a driver signature enforcement feature that requires Microsoft to sign all drivers before they can be installed and loaded into the kernel.
This feature is there to help prevent malicious and unwanted software from being installed on your machine. Before a code or package can be loaded into the Windows kernel, the publisher’s identity and integrity must be validated.
However, there may be cases where you want to use a particular device driver that isn’t signed or trusted by Microsoft. With driver signature enforcement enabled you won’t be able to install the device driver.
To install unsigned drivers, you must disable driver signature enforcement, and the steps below show you how to do that.
Turn on or off driver signature enforcement in Windows 11
As described above, Microsoft recommends that all drivers be signed and trusted to protect your Windows device before loading into the Windows kernel.
For older drivers who want to install it on their Windows machine, you may have to disable the driver signature enforcement feature in Windows.
Here’s how to enable or disable it.
First, you must suspend or turn off BitLocker. If you have Secure Boot enabled, you must also turn it off before you can disable driver signature enforcement.
Next, restart Windows into Advanced Startup (WinRE).
In Windows 11, click on Start > Settings > System > Recovery. Under Recovery options, select the Advanced startup tile, then click Restart now.
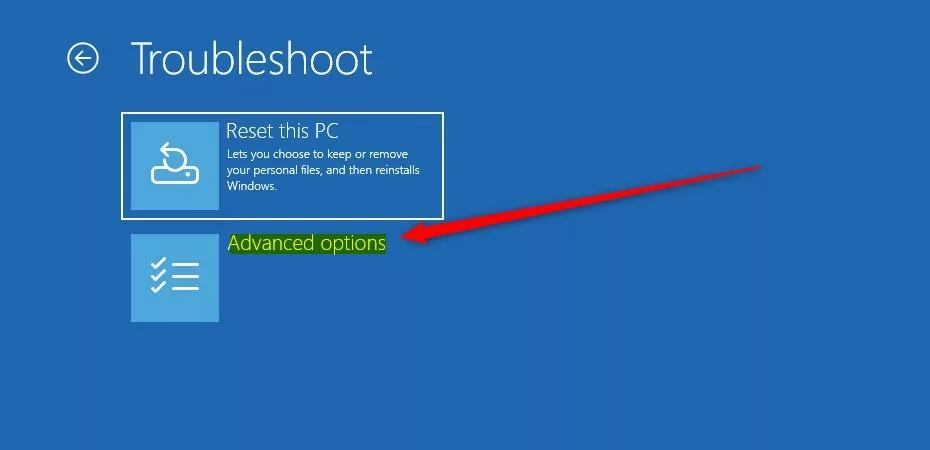
Windows will reboot into its Advanced Startup menu. There, select Troubleshoot.

Next, select Advanced options.
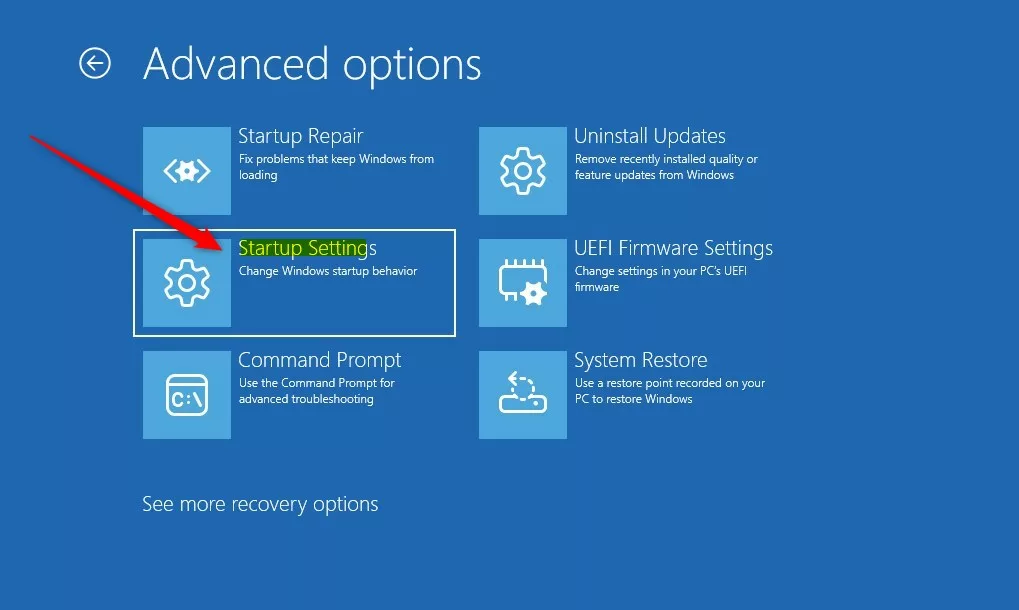
On the Advanced options menu, select Startup Settings.
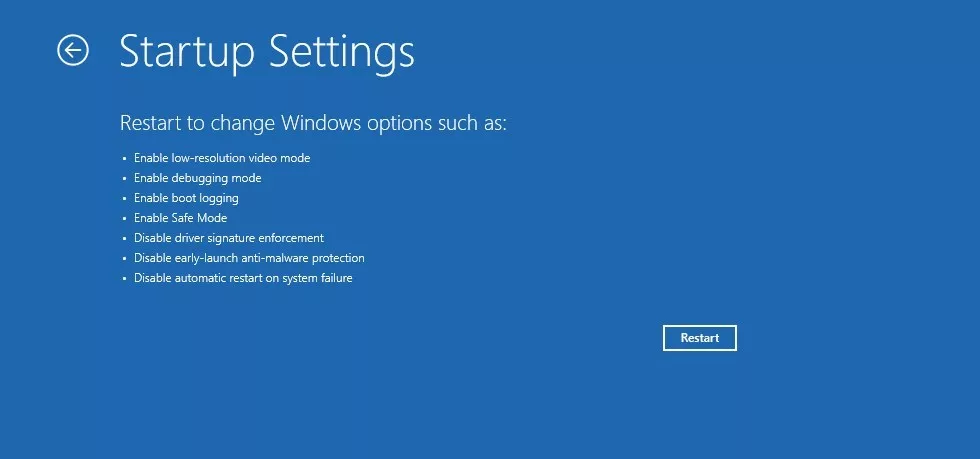
Click the Restart button to restart and change Windows options on the Startup Settings menu.
Once Windows restarts, click the number 7 or F7 function key on your keyboard to select the drive signature enforcement option on the list.
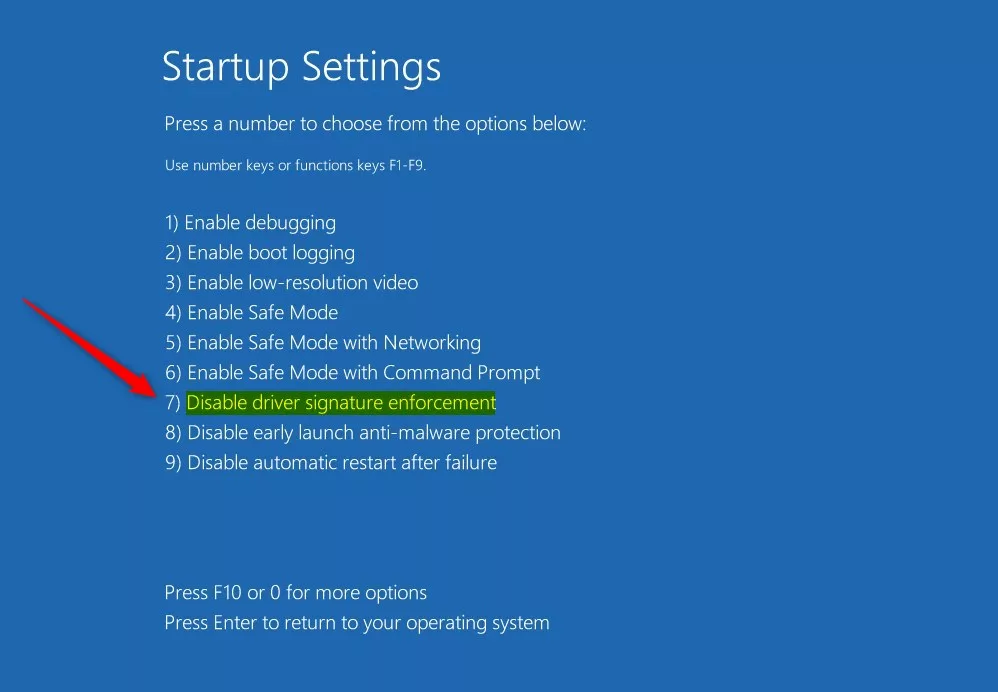
After selecting the option above, Windows will boot normally with the driver signature enforcement feature disabled, allowing you to install unsigned drivers on the computer.
To reenable, follow the steps above and select the number 7 or F7 function key on your keyboard.
Enable or Disable Driver Signature Enforcement via the Command Prompt
Alternatively, you can use the comment prompt to enable or disable driver signature enforcement feature in Windows 11.
You must also suspend or turn off BitLocker and disable Secure Boot.
After that, open the Windows Terminal app as administrator, and open the Command Prompt tab.
Once the Terminal app opens, run the commands below to turn off driver signature enforcement.
bcdedit /set nointegritychecks off
To turn it back on, run the commands below:
bcdedit /set nointegritychecks on
Then, restart your computer to apply the changes.
Conclusion:
- Enabling or disabling driver signature enforcement in Windows 11 is essential for installing unsigned drivers when necessary.
- Following the steps, including suspension of BitLocker and disabling Secure Boot, users can toggle driver signature enforcement via the Advanced Startup menu or Command Prompt commands.
- It’s important to exercise caution and only disable driver signature enforcement when dealing with trusted unsigned drivers to maintain system security.
Leave a Reply