How to Enable or Disable Microsoft Vulnerable Driver Blocklist in Windows 11

This guide explains how to manage the Microsoft Vulnerable Driver Blocklist in Windows 11. This feature keeps your computer safe by stopping known bad drivers from running.
To enable or disable the Microsoft Vulnerable Driver Blocklist, open Windows Security, navigate to Device security, select Core isolation details, and toggle the Microsoft Vulnerable Driver Blocklist switch. This setting requires administrator privileges.
What is the Microsoft Vulnerable Driver Blocklist?
The Microsoft Vulnerable Driver Blocklist is a Windows security tool that stops known unsafe drivers from running on your computer.
Why use this feature?
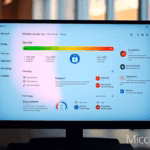
The vulnerable driver blocklist helps maintain your system's security. The blocklist prevents drivers flagged for kernel-mode code signing issues or known exploits from running. This ensures your computer remains stable and protected against unauthorized access.
What happens when you change it?
How to Enable or Disable the Blocklist
You manage the Microsoft Vulnerable Driver Blocklist setting through the Windows Security app. This setting prevents outdated or insecure drivers from running on your computer, protecting you from potential malware. This process requires admin privileges on your Windows 11 device.
- Open the Start menu.
- Type Windows Security and click the app.
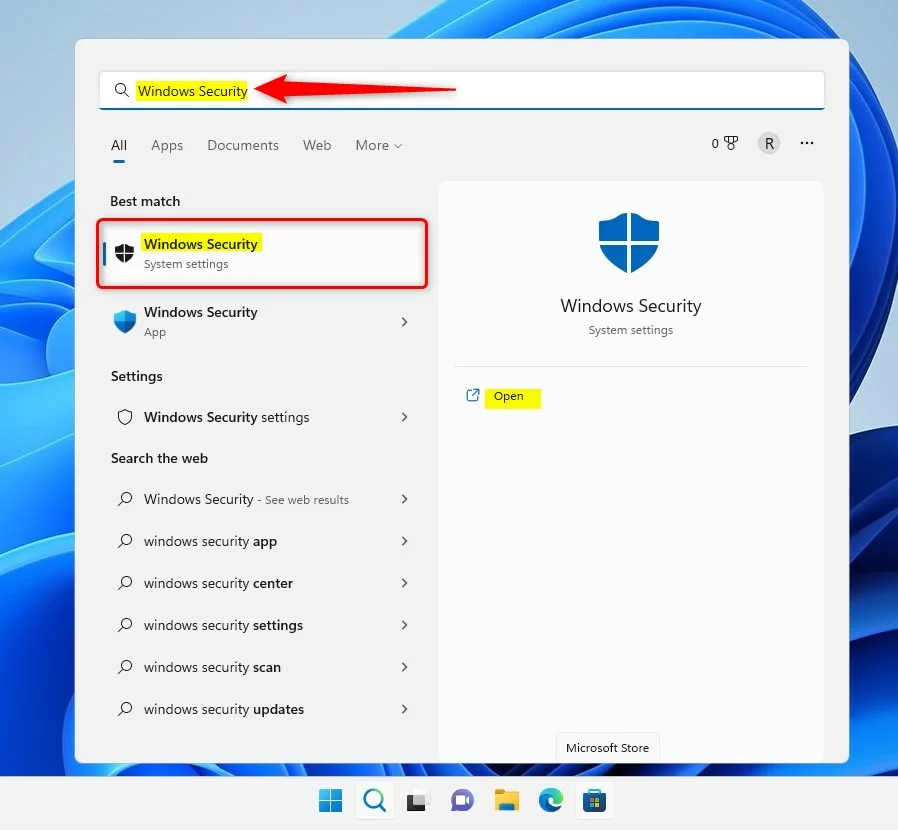
windows 11 search windows security app on start menu - Click Device security on the left sidebar.
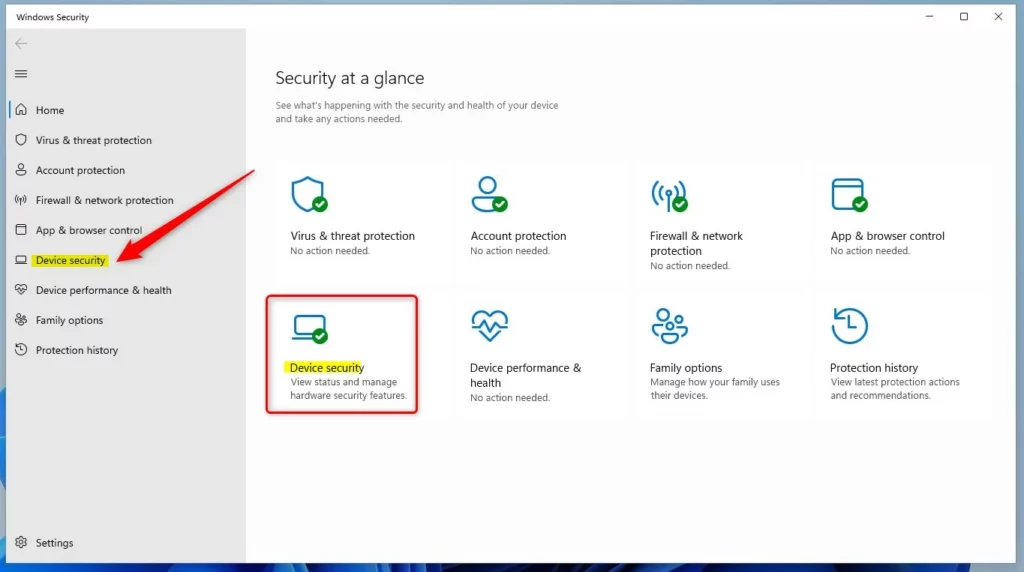
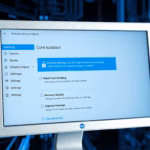
windows 11 security app device security option - Select Core isolation details.
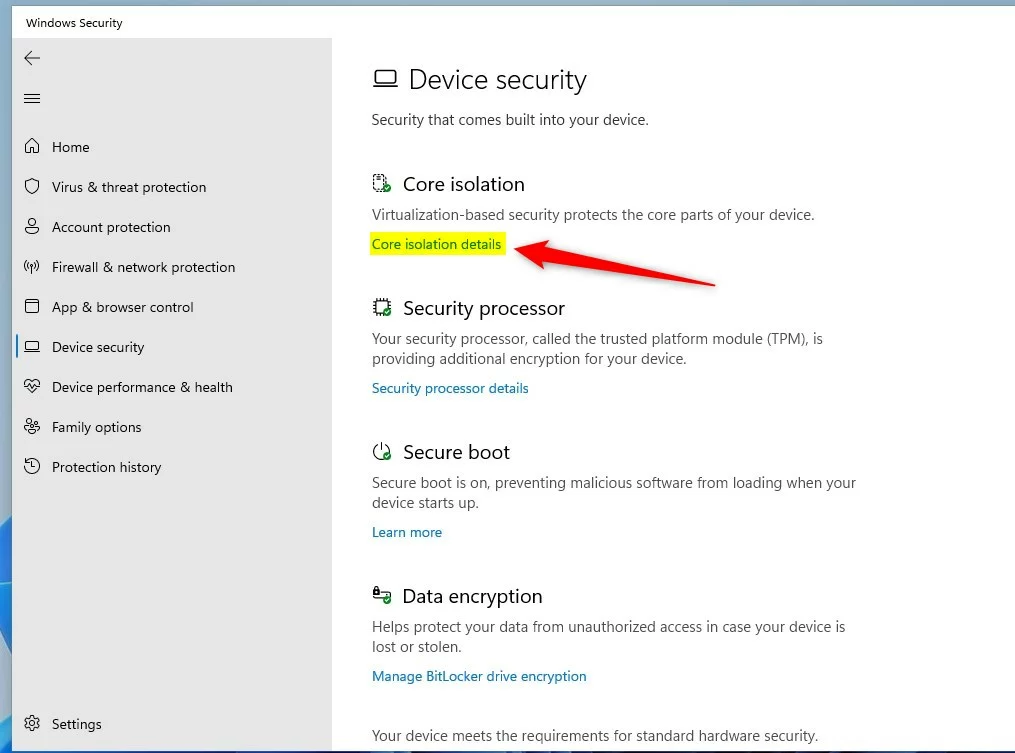
windows 11 core isolation details link - Toggle the Microsoft Vulnerable Driver Blocklist switch to your preferred setting.
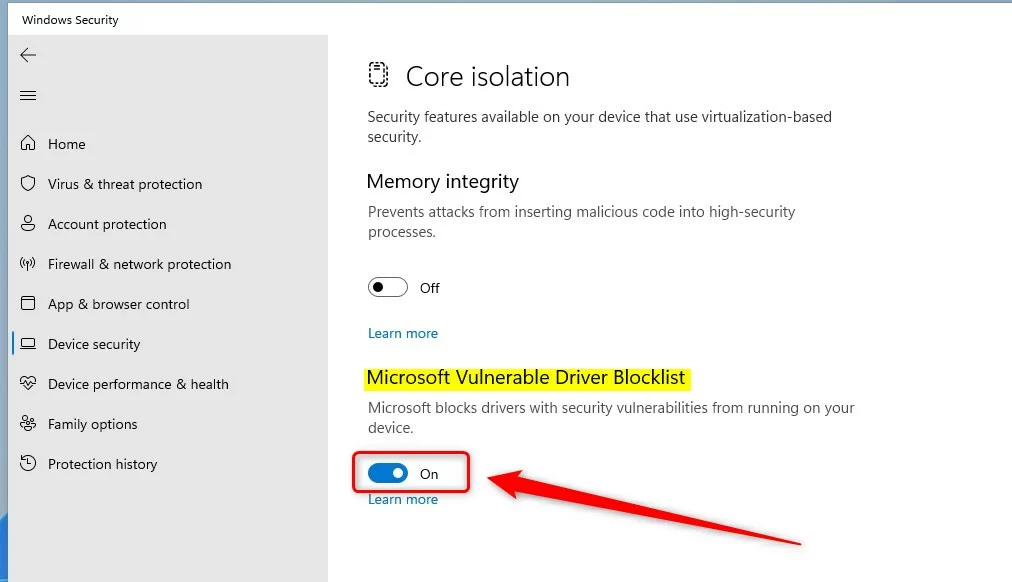
windows 11 microsoft vulnerable driver blocklist button
Technical Implementation and Troubleshooting
If the Microsoft Vulnerable Driver Blocklist blocks a driver, you can find out which one and why. Checking the Event Viewer or running a simple PowerShell command like Get-WdacPolicy -Type DriverBlocklist shows the exact error. This helps you fix any problems that happen after you turn on the blocklist.
Get-WdacPolicy -Type DriverBlocklist
Summary
The Microsoft Vulnerable Driver Blocklist is an important security layer that helps keep your PC safe from bad drivers.
Does the blocklist affect third-party antivirus software?
Usually, the Microsoft Vulnerable Driver Blocklist doesn’t cause problems with your antivirus software.
Can I manually add drivers to the blocklist?
Individual users cannot manually add drivers to the built-in Microsoft list. However, IT administrators can use Windows Defender Application Control (WDAC) to create custom policies that block specific drivers in their environment. This allows organizations to enforce their own security standards beyond the default Microsoft-provided blocklist.
Was this guide helpful?

About the Author
Richard
Tech Writer, IT Professional
Richard, a writer for Geek Rewind, is a tech enthusiast who loves breaking down complex IT topics into simple, easy-to-understand ideas. With years of hands-on experience in system administration and enterprise IT operations, he’s developed a knack for offering practical tips and solutions. Richard aims to make technology more accessible and actionable. He's deeply committed to the Geek Rewind community, always ready to answer questions and engage in discussions.
No comments yet — be the first to share your thoughts!