This article lists some steps that one can use to empty the “Recycle Bin” in Windows 11.
The Recycle Bin in Windows is a storage area for deleted files and folders. When you delete a file or folder, it is sent to the Recycle Bin, where it can be restored if needed or permanently deleted.
If your Windows device has multiple hard drives, partitions, or external hard drives, each drive will have its own hidden $Recycle.Bin system folder at the root of each volume. By default, removable drives, such as USB flash drives and memory cards, do not have a Recycle Bin.
However, you can enable the Recycle Bin for removable drives so that deleted items go to the Recycle Bin.
Learning how to empty the Recycle Bin in Windows is essential because it can help you free up space on your device and improve its performance. When you delete a file or folder, it is not permanently removed from your device.
Instead, it is moved to the Recycle Bin, where it continues to take up storage space. Over time, this can add up and slow down your device. Regularly emptying the Recycle Bin can free up space and improve your device’s performance.
Additionally, emptying the Recycle Bin can help protect your privacy by permanently deleting sensitive or confidential files you no longer need.
Empty the Recycle Bin in Windows
As mentioned above, learning how to empty the Recycle Bin in Windows can help free up space on your device, improve its performance, and protect your privacy by permanently deleting sensitive or confidential files you no longer need.
Here are the steps to empty the Recycle Bin
On most Windows Desktops, the Recycle Bin icon is accessible. Right-click on the Recycle Bin from the Desktop, then select the “Empty Recycle Bin” command on the context menu.
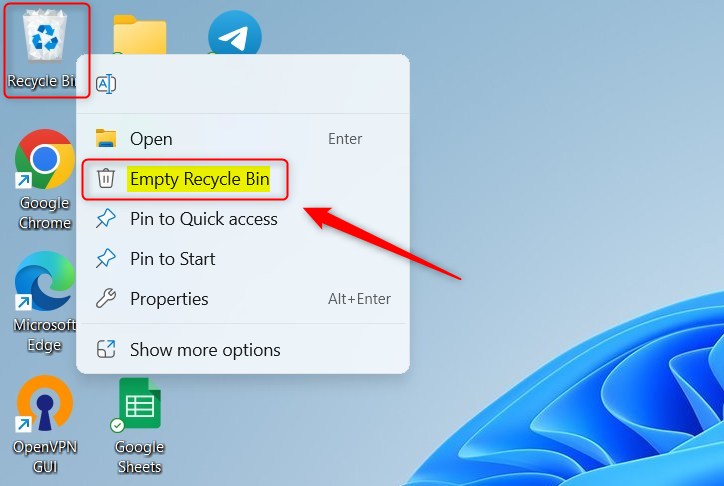
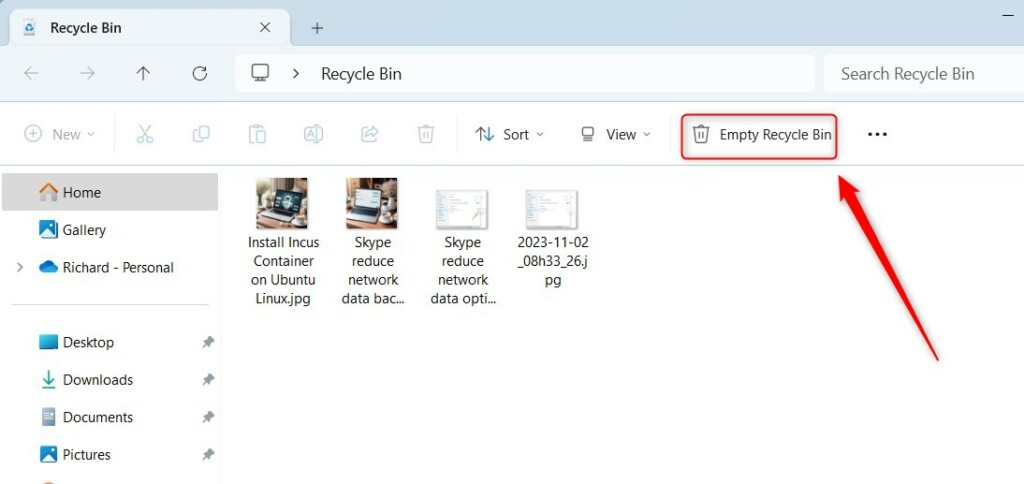
If you cannot right-click on the icon, double-click it to open the Recycle Bin in Windows File Explorer.
Then, click “Empty Recycle Bin” from the File Explorer command bar.
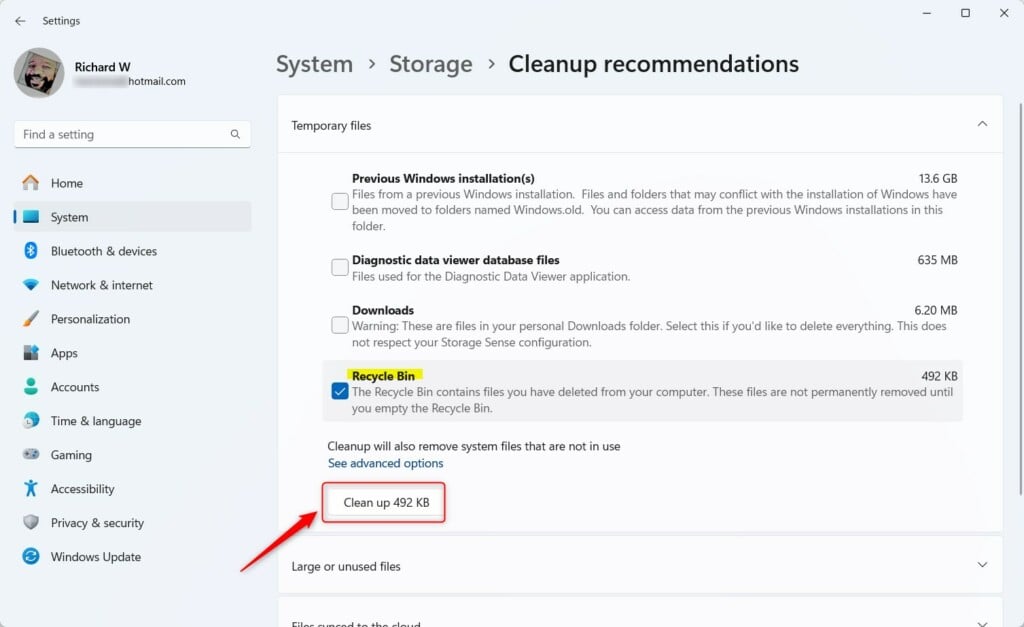
Alternatively, you can use the “Disk Cleanup” tool to empty the Recycle Bin in Windows routinely.
On Windows, click the Start menu and select Settings. Then, select System -> Storage -> Cleanup recommendations.
Next, select the Recycle Bin tile and click the “Clean up” button to empty the Recycle Bin.
Using PowerShell, you can empty the Recycle Bin for all drives on the system. To do that, first, open Windows PowerShell.
Then, run the command below.
Clear-RecycleBin -force -ErrorAction:Ignore
Run the command below for specific drives, replacing the drive letter (ex. C).
Clear-RecycleBin -DriveLetter C -force -ErrorAction:Ignore
That should do it!
Conclusion:
- Emptying the “Recycle Bin” is crucial to free up space on your Windows 11 device and improve its performance.
- Regularly emptying the “Recycle Bin” can help protect your privacy by permanently deleting sensitive or confidential files you no longer need.
- You can empty the “Recycle Bin” from the Desktop, File Explorer, using Disk Cleanup, or through PowerShell commands to efficiently manage your storage.

Leave a Reply