How to Delete Folders in Windows 11
Want to get rid of folders you don’t need on your Windows 11 PC? This simple guide will show you how to delete folders safely and easily.
Select the folder, then press the Delete key or click the Delete button in File Explorer’s command bar. For permanent deletion, use Shift+Del or Shift + click the Delete button.
What is a Folder?
A folder is like a box on your computer. It holds files and sometimes other folders inside it. Folders help you keep your stuff organized so you can find things quickly.
Where Do Deleted Folders Go?
When you delete folders in Windows 11, those folders normally go to the Recycle Bin. The Recycle Bin lets you get folders back if you change your mind. However, folders deleted from a USB drive or memory card are gone forever and do not go to the Recycle Bin.
You can turn on Recycle Bin for removable drives if you want to be safer when deleting files from those devices.
Why Learn to Delete Folders?
- Free up space on your computer.
- Keep your files tidy and organized.
- Protect your private information by deleting sensitive folders.
- Stop other users from messing with your important files.
How to Delete Folders in 🪟 Windows 11
1Using Keyboard Shortcuts
You can delete folders in Windows 11 quickly using keyboard shortcuts. Select the folder you want to remove and then press specific keys. One shortcut sends the folder to the Recycle Bin, while another deletes it permanently, bypassing the Recycle Bin.
- Select the folder you want to delete by clicking it once.
- Press one of the following keys on your keyboard:
| Shortcut Keys | What It Does |
|---|---|
| Delete | Deletes folder and sends it to Recycle Bin |
| Ctrl+D | Also deletes folder and sends it to Recycle Bin |
| Shift+Del | Permanently deletes folder (no Recycle Bin) |
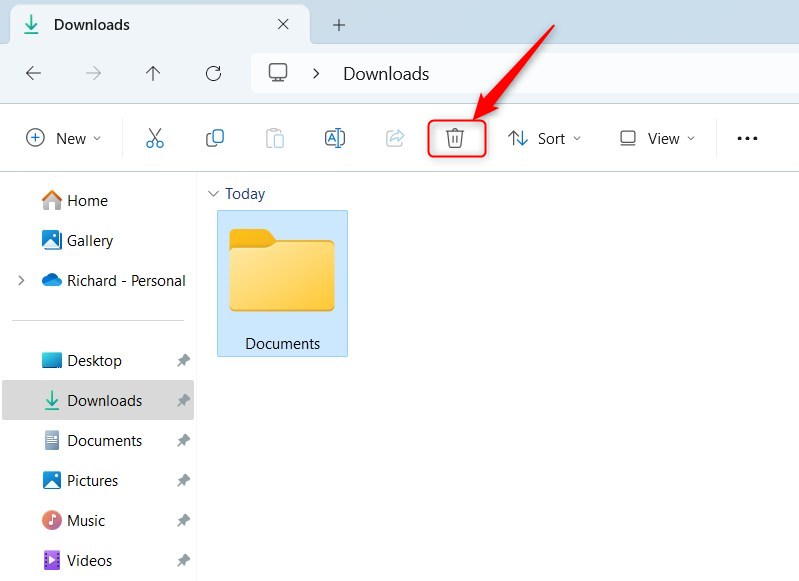
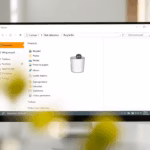
2Using File Explorer Command Bar
- Open Open File Explorer (the folder icon on your taskbar or press ⊞ Win+E).
- Find and click the folder you want to delete.
- At the top, click the Delete button (trash can icon).
Deleting folders in Windows 11 is easy with the File Explorer command bar. Open File Explorer, find the folder you want to get rid of, and click the trash can icon. This action sends the selected folder to the Recycle Bin for easy recovery.
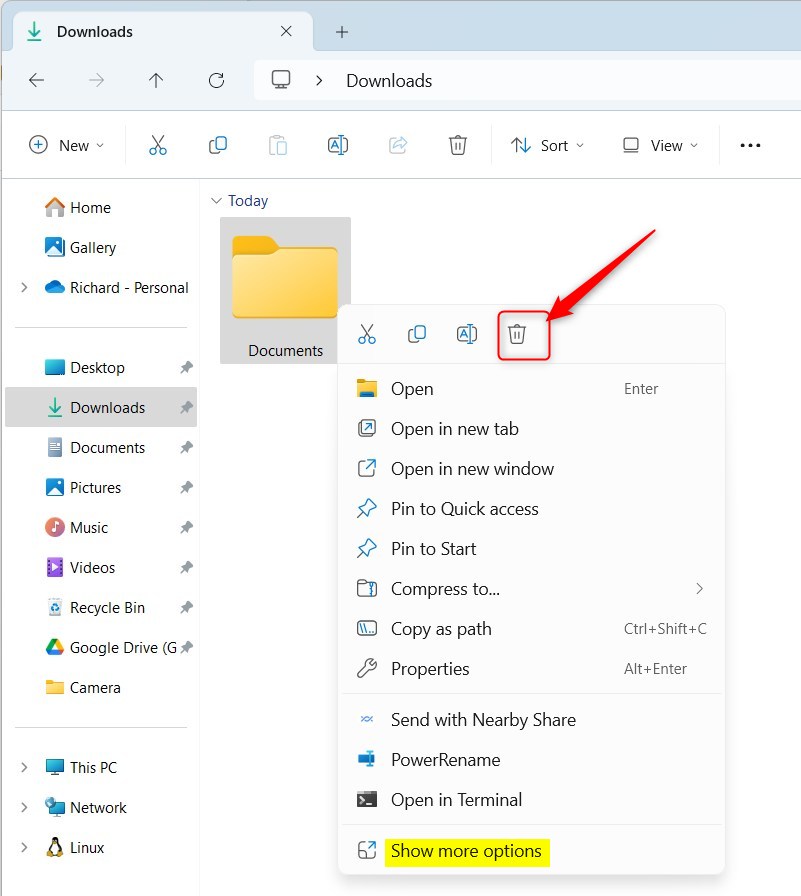
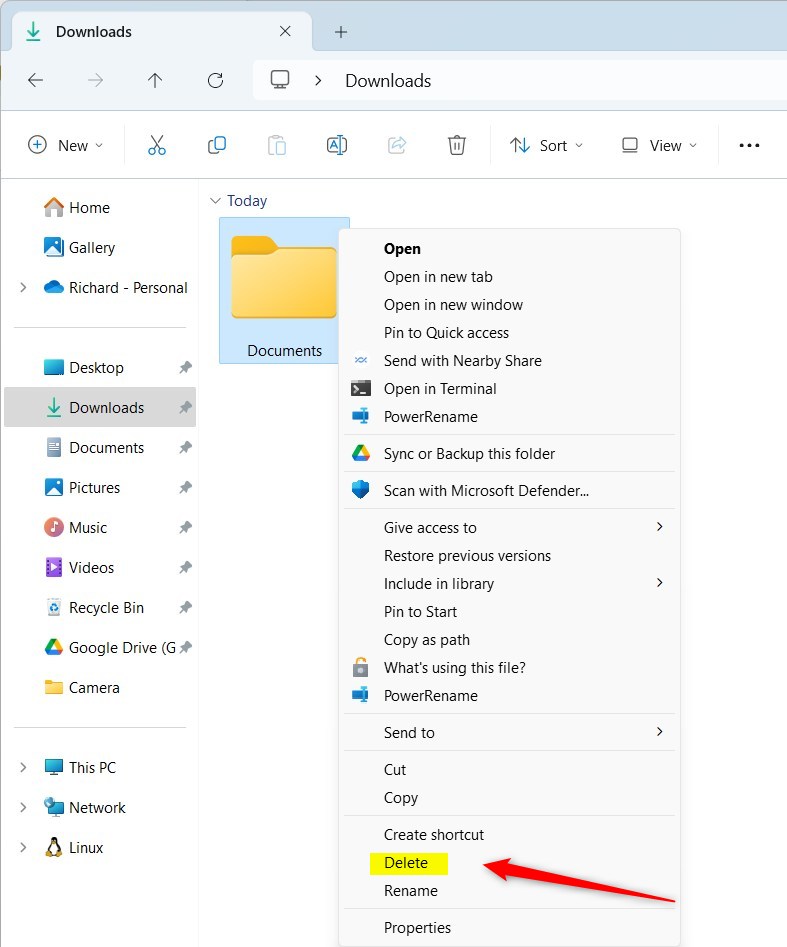
3Using Right-Click ( Context Menu)
- Open File Explorer.
- Right-click on the folder you want to delete.
- Click Del from the menu that appears.
4Deleting Folders Using PowerShell (Advanced)
PowerShell offers a command-line method for permanently deleting folders in Windows 11. You must open Windows Terminal as an administrator and then type a specific command. This command provides exact control to remove folders, bypassing the Recycle Bin entirely.
- Open Windows Terminal and choose the PowerShell tab. [Admin privileges required]
- Type the command below to permanently delete a folder (replace the path with your folder’s location):
Remove-Item -Path "C:\Users\User\Downloads\MyFolder" -Recurse -ForceExample:
Remove-Item -Path "C:\Users\User\Downloads\MyFolder" -Recurse -ForceTo delete a folder to the Recycle Bin using PowerShell, use this command:
(New-Object -ComObject "Shell.Application").Namespace(0).ParseName("C:\Users\User\Downloads\MyFolder").InvokeVerb("delete")5Deleting Folders Using Command Prompt
- Open Windows Terminal and choose the Command Prompt tab. [Admin privileges required]
- Type this command to permanently delete a folder (change the path):
You can also delete folders in Windows 11 using the Command Prompt, which is handy for quick, permanent removals. Open Windows Terminal as an administrator and type a specific command. Remember to change the path to the folder you want to delete.The `Remove-Item -Path "folder_path"` PowerShell command moves a specified folder to the Recycle Bin in Windows 11. This action retains the folder in the Recycle Bin for up to 30 days, allowing users to recover the folder. The folder does not permanently delete with this command.
PowerShell (New-Object -ComObject "Shell.Application").Namespace(0).ParseName("C:\Users\User\Downloads\MyFolder").InvokeVerb("delete")
Summary
- Deleting folders helps keep your computer clean and organized.
- Folders you delete usually go to the Recycle Bin, so you can recover them if needed.
- You can delete folders permanently by using the Shift key or command-line tools.
- There are many ways to delete folders—choose the one you feel most comfortable with!
Deleting folders in Windows 11 helps keep your computer clean and organized. Most deleted folders go to the Recycle Bin, allowing recovery. For permanent removal, you can use keyboard shortcuts like Shift+Delete or command-line tools such as PowerShell or Command Prompt.
Which 🪟 Windows 11 folders can be deleted?
Check the Location: Files in your Downloads, Videos, Desktop, or personal folders are generally safe to review and delete if unneeded. Be very cautious with files inside C:\Windows, C:\Program Files, or C:\Program Files (x86).
Was this guide helpful?

About the Author
Richard
Tech Writer, IT Professional
Richard, a writer for Geek Rewind, is a tech enthusiast who loves breaking down complex IT topics into simple, easy-to-understand ideas. With years of hands-on experience in system administration and enterprise IT operations, he’s developed a knack for offering practical tips and solutions. Richard aims to make technology more accessible and actionable. He's deeply committed to the Geek Rewind community, always ready to answer questions and engage in discussions.

No comments yet — be the first to share your thoughts!