How to Manage Your Addresses in Microsoft Edge Wallet


Microsoft Edge Wallet is a built-in browser tool that stores up to 10 shipping and billing addresses, so you can skip typing them at online checkout. Edge fills in these saved details on shopping sites, and on every device where you are signed in to Edge with sync turned on.
Keeping your addresses current stops orders from going to the wrong place. You can add, change, or delete saved addresses at any time in your browser settings. This guide covers that, and then a second method for turning address autofill off through the Registry Editor. The steps are written for the current Edge on Windows 11. Edge updates often, so a label may differ slightly on an older or newer build.
Open Microsoft Edge, click the three-dot menu and select Settings Profiles Wallet. Click Personal info to view your saved addresses, then click the three dots next to any address to edit or delete it. Click Add address to save a new one.
Add or delete saved address in Microsoft Edge Wallet
Managing your Edge Wallet addresses lets you update old shipping locations or remove places you no longer live. You do it from the browser settings. Open your profile settings, go to Wallet, and edit your shipping and billing information there. No admin rights are needed, and you do not need to restart anything.
To manage your saved addresses, follow these steps:
- Open the Microsoft Edge browser.
- Click the three horizontal dots in the top right corner and select Settings. The Settings page opens in a new tab.
- On the left menu, click Profiles. Your profile options appear on the right.
- Select Wallet. The Wallet dashboard opens.
Type edge://wallet into the address bar and press Enter. This skips the menu clicks and opens the same dashboard.
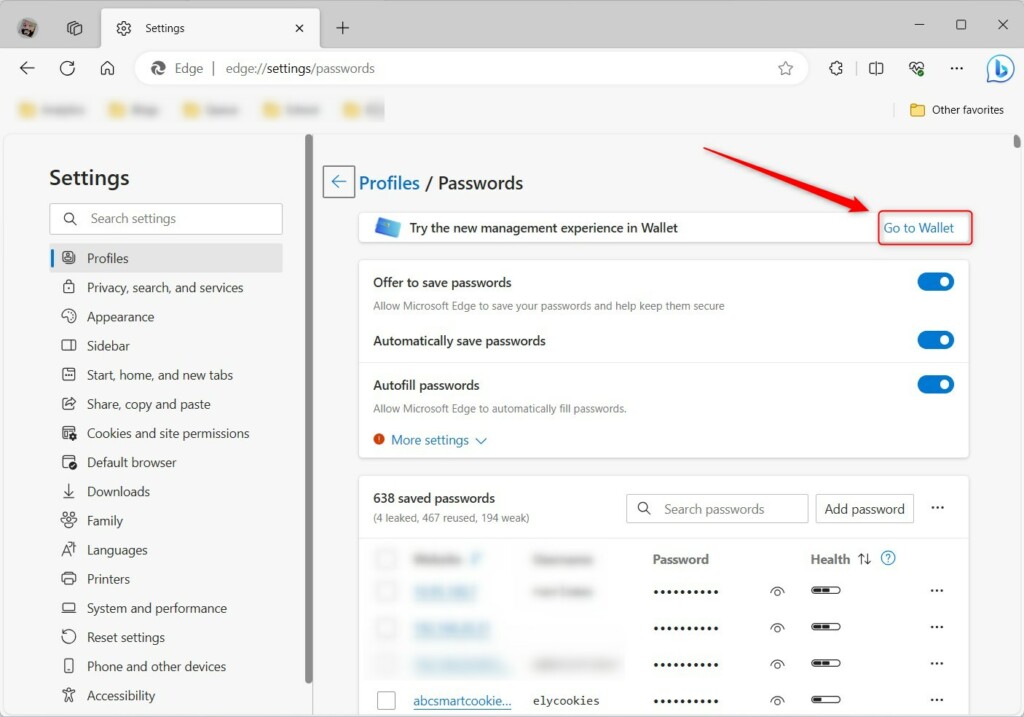
Once you are in the Wallet dashboard, you can add or remove addresses. If the address list is empty, you have not saved any yet, or you are signed in to a different Edge profile than the one you normally shop with. Check the profile icon in the top corner of the browser window.
- Click the Personal info tab. Your saved addresses are listed there.
- To remove an address, click the three dots next to it and select Delete. The entry disappears from the list.
- To add an address, click the Add address button in the top right corner and enter your details. Confirm the form to save it.
To change an existing address, open the same three-dot menu. It usually offers an edit option as well. If yours does not, delete the old entry and add the corrected one. Remember that the wallet holds a limited number of addresses, so you may need to delete one before you can add another.
Closing the settings tab finishes the process. Edge saves each address when you confirm the form, so there is nothing else to do. Changes reach your other devices through sync. If an old address still shows up elsewhere, check that sync is turned on for that profile and give it a few minutes.
Turn On or Off Autofill address in Microsoft Edge via the Registry Editor
If you need to control address autofill across a whole PC, use the Windows Registry Editor to set an Edge policy. You create a policy value that stops the browser from saving or suggesting your personal information on web forms. This is useful for shared computers or business setups where users should not store addresses.
It works on Windows 11 Home and Pro, because it edits the registry directly instead of using Group Policy. A wrong registry edit can cause problems, so back up the registry or create a restore point first.
Open the Windows Registry editor and go to this path. You can paste it into the address bar at the top of the Registry Editor window, or expand the folders in the left pane one by one:
HKEY_LOCAL_MACHINE\SOFTWARE\Policies\Microsoft\Edge
If the Edge folder does not exist, create it:
- Right-click the Microsoft folder.
- Select New, then Key.
- Name the new key Edge. It now appears under Microsoft in the left pane.

Next, create the setting that controls address autofill. Select the Edge key first, so the new value goes inside it.
- Right-click an empty space in the right pane.
- Select New, then DWORD (32-bit) Value. This is a 32-bit integer that Windows uses to store configuration settings.
- Name it AutofillAddressEnabled, with exactly this spelling and capitalization.
This value controls whether Microsoft Edge can automatically fill in your saved addresses.
Now double-click AutofillAddressEnabled to open its settings, and set the value as described below.
- To turn off autofill, set the value data to 0 and click OK.
- To turn autofill back on, delete the AutofillAddressEnabled item. Right-click it, select Delete, and confirm. This is also how you undo the change completely.
While this policy is active, Edge may show a message in its settings that some settings are managed by your organization. That is normal for registry policies, and the autofill option for addresses may appear locked.
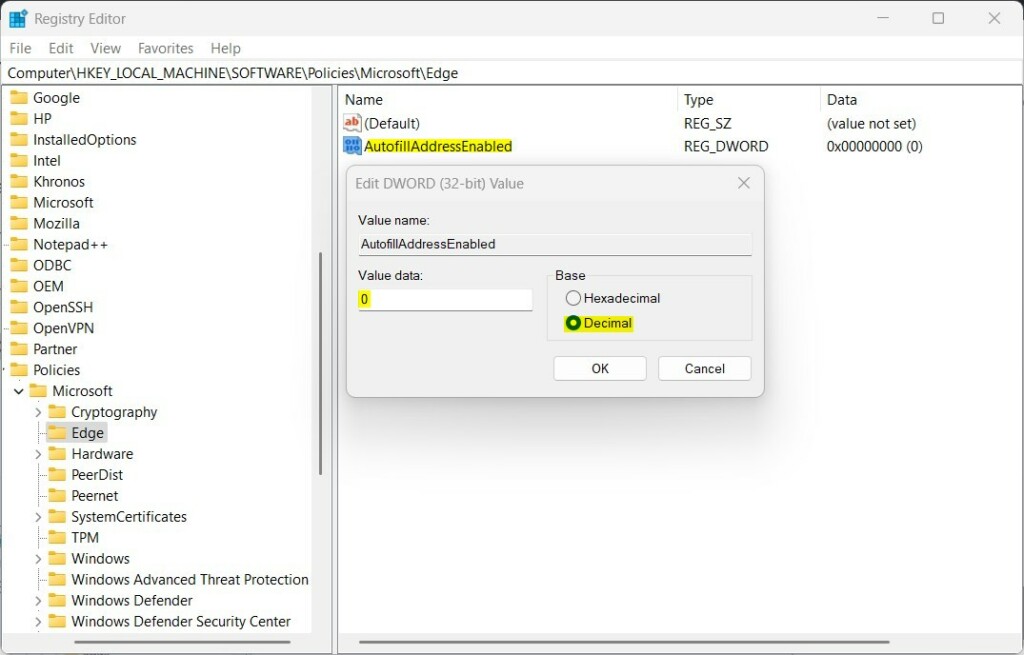
Restart your computer so the change takes effect. Close Edge first and save any open work. After you sign back in, open Edge and try a checkout or address form to confirm that autofill behaves the way you set it.
Conclusion
Managing your addresses in Edge Wallet keeps checkout quick and accurate. For everyday use, the Wallet settings are all you need, and syncing your account keeps the same data on all your devices. If you manage PCs in a business setting, you can restrict address autofill through the Registry Editor instead.
Have a question about this guide?
Answered by AI from this guide. Good questions may be added to this page — please don't include personal details.
Did this guide fix your problem?

About the Author
Richard
Tech Writer, IT Professional
Richard is a writer at Geek Rewind who turns complex IT tasks into clear, step-by-step guides. He draws on years of hands-on experience in system administration and enterprise IT operations, focusing on Windows, Linux and WordPress: the problems people actually run into, and the fixes that work. His server and WordPress guides come from systems he runs himself. Richard builds and maintains the platform behind Geek Rewind, from its Ubuntu servers and Nginx configuration to its custom WordPress plugins. Many new tutorials start with readers' questions, and he's always glad to answer them in the comments.
TOO DARNED COMPLICATED FOR A 78 YR OLD USER. THERE SHOULD BE A SIMPLER WAY TO GET WALLET EDITED OR ELIMINATED. THE THING HAS MY NEIGHBOR’S NAME ON IIT AND HER ADDRESS, TOO. I USE DASHLANE AND DO NOT WANT THIS APP INTEFERING W/ MY LIFE.