How to Enable/Disable Screenshots in Microsoft Edge


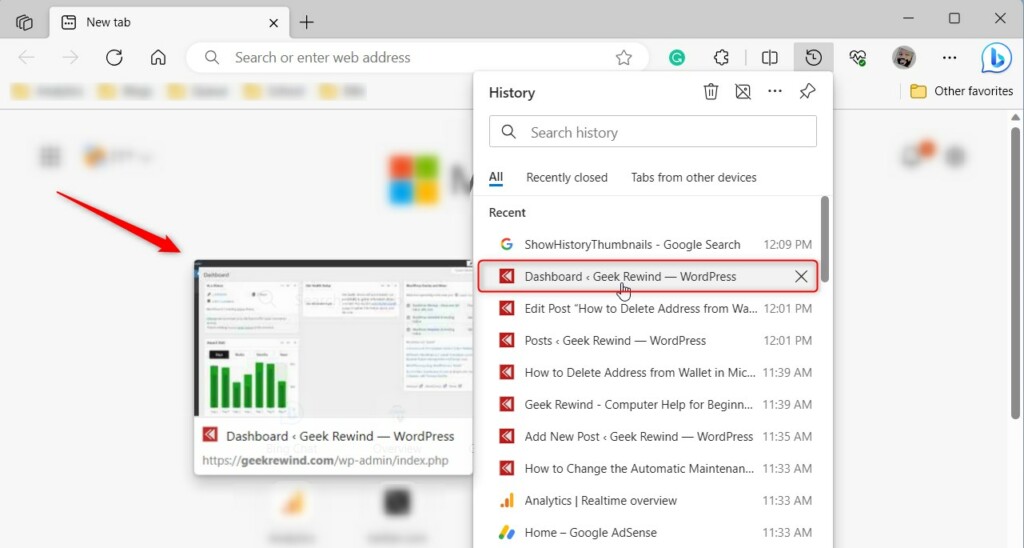
Screenshots in Microsoft Edge are visual thumbnail previews of websites you visit that appear in your browsing history. Version 88 and newer versions of Microsoft Edge automatically capture these page snapshots so you can spot sites faster when you press Ctrl+H.
Turning off this feature stops Microsoft Edge from saving these images to your device. Your history then goes back to showing simple text links for each site you open.
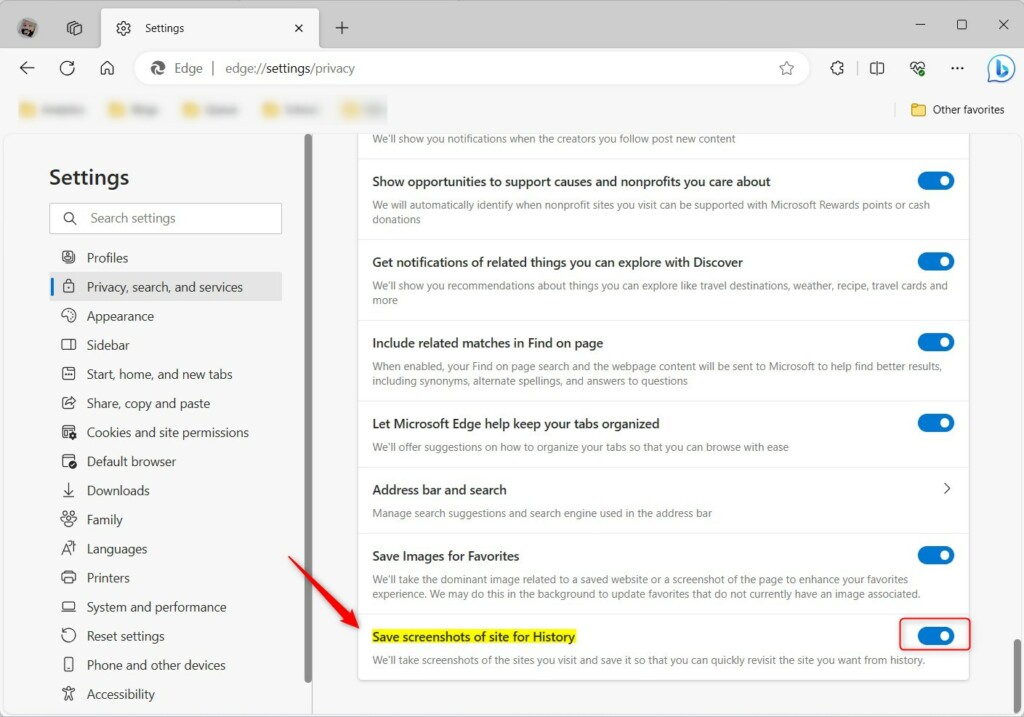
Go to Settings Privacy, search, and services. Under Services, find “Save screenshots of site for History” and toggle the switch to On to enable, or Off to disable.
Enable or disable Save screenshots for site History in Edge
Microsoft Edge screenshot settings let you control whether the browser saves thumbnail previews of the websites you visit for your browsing history. You can turn this feature on or off directly from the browser settings menu by opening Microsoft Edge, clicking the three-dot menu in the top-right corner, selecting Settings, and locating the privacy options for site history.
Here is how to turn it on or off.
Open Microsoft Edge.
Press Alt+F or click the three horizontal dots in the top-right corner, then select Settings.

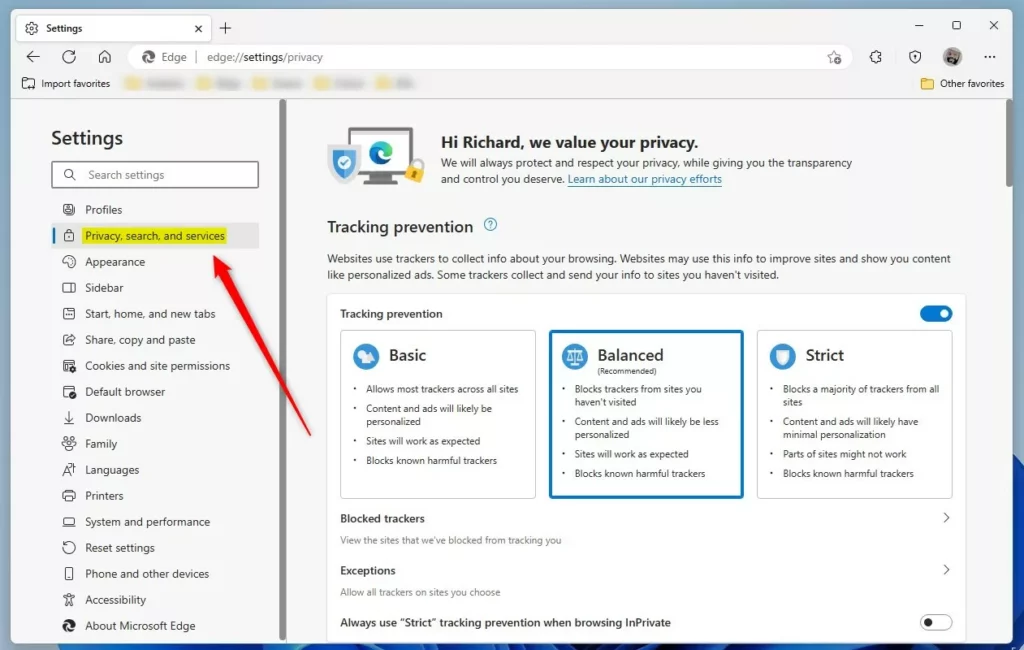
On the Settings page, click the Privacy, search, and services button in the left panel.
On the right side, under Services, find and select the "Save screenshots of site for History" tile. Toggle the switch to the On position to enable it.
To turn it off, toggle the button to the Off position.
Close the browser settings when finished.
Turn On or Off Save screenshots of site for History in Microsoft Edge via the Registry Editor
Microsoft Edge screenshot settings can be changed for your site history using Registry Editor (an advanced database that stores Windows and app settings) by modifying keys in the system registry. You can force this feature on or off across your computer by going to the HKEY_LOCAL_MACHINE\SOFTWARE\Policies\Microsoft\Edge folder key and adjusting the correct values.
To capture screenshots, open Registry Editor and navigate to the `HKEY_LOCAL_MACHINE\SOFTWARE\Policies\Microsoft\Edge` folder key. This action prepares your system for managing screenshot settings.
HKEY_LOCAL_MACHINE\SOFTWARE\Policies\Microsoft\Edge
If the 'Edge' folder key is absent, right-click the 'Microsoft' parent key and create a new subkey named 'Edge.'

In the right pane of the 'Edge' folder key, right-click and select 'New' > 'DWORD (32-bit) Value.' Name this new item 'ShowHistoryThumbnails.'
Double-click 'ShowHistoryThumbnails' to set its 'Value data':
- To always save screenshots of site for History in Microsoft Edge, type 1.
- To not save screenshots of site for History, type 0 or delete the ShowHistoryThumbnails to default to Edge.

If you encounter any discrepancies or have insights, feel free to utilize the comments section for further discussion and assistance.
Conclusion:
- In this article, you have learned how to enable or disable the "Save screenshots for site History" feature in Microsoft Edge, giving you greater control over your browsing experience.
- Following the step-by-step instructions, you can easily manage whether Microsoft Edge captures and saves thumbnails of the sites you visit for quick identification and revisiting your browsing history.
- If you encounter any discrepancies or have insights, feel free to utilize the comments section for further discussion and assistance.
Was this guide helpful?

About the Author
Richard
Tech Writer, IT Professional
Richard is a writer at Geek Rewind who turns complex IT tasks into clear, step-by-step guides. He draws on years of hands-on experience in system administration and enterprise IT operations, focusing on Windows, Linux and WordPress: the problems people actually run into, and the fixes that work. His server and WordPress guides come from systems he runs himself. Richard builds and maintains the platform behind Geek Rewind, from its Ubuntu servers and Nginx configuration to its custom WordPress plugins. Many new tutorials start with readers' questions, and he's always glad to answer them in the comments.



No comments yet — be the first to share your thoughts!