How to Setup Joomla on Ubuntu with Nginx & Cloudflare


Setting up Joomla on Ubuntu Server 22.04 LTS with Nginx and Cloudflare connects a popular website builder to a fast web server and a security shield. Joomla is a free system for building websites, Nginx is software that loads web pages quickly, and Cloudflare protects your site from attacks while speeding it up for visitors.
Pairing Nginx with Cloudflare gives your Joomla site strong security and quick load times. Follow the steps below to get everything working together properly.
- Sign up for a Cloudflare account and add your website.
- Update your domain’s nameservers at your registrar to Cloudflare’s.
- In Cloudflare, set SSL/TLS to “Full (Strict)” and create an Origin Certificate.
- Turn on “Always Use HTTPS” and “Automatic HTTPS Rewrites” in Cloudflare.
- Create a database and user for Joomla in MariaDB.
- Download and install Joomla into your web server’s directory.
- Configure Nginx to serve your Joomla site, including SSL settings.
- Visit your domain in a browser to complete the Joomla setup wizard.
- Remove the Joomla installation folder from your server.
To set up Joomla on Ubuntu with Nginx and Cloudflare, first configure Cloudflare DNS and SSL settings. Then, install Nginx, MariaDB, and PHP on your Ubuntu server. Finally, install Joomla and configure Nginx to serve your Joomla site.
Setting up Cloudflare
Setting up Cloudflare for your Joomla Nginx server protects your website from attacks and speeds up page loading times for visitors. You can configure this by creating an account at dash.cloudflare.com, adding your domain name, and updating your DNS settings to route your traffic through the Cloudflare network.
https://dash.cloudflare.com/sign-up
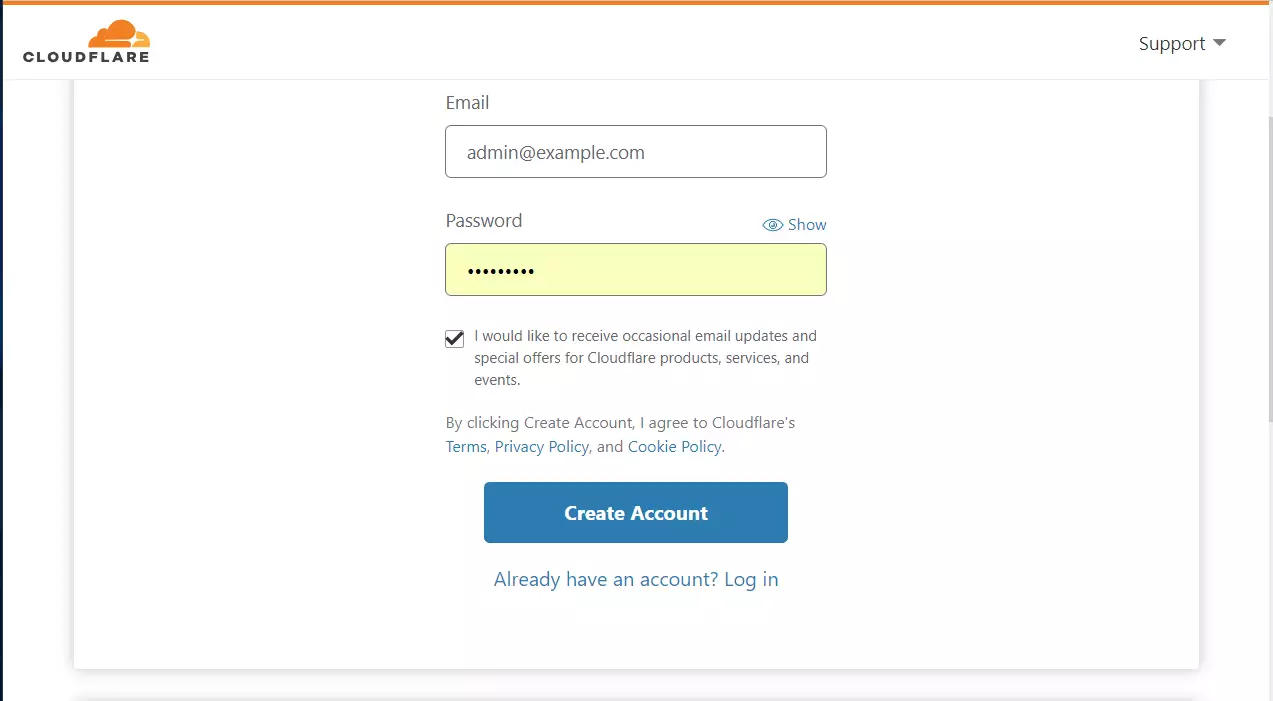
Enter your email and click Create Account.
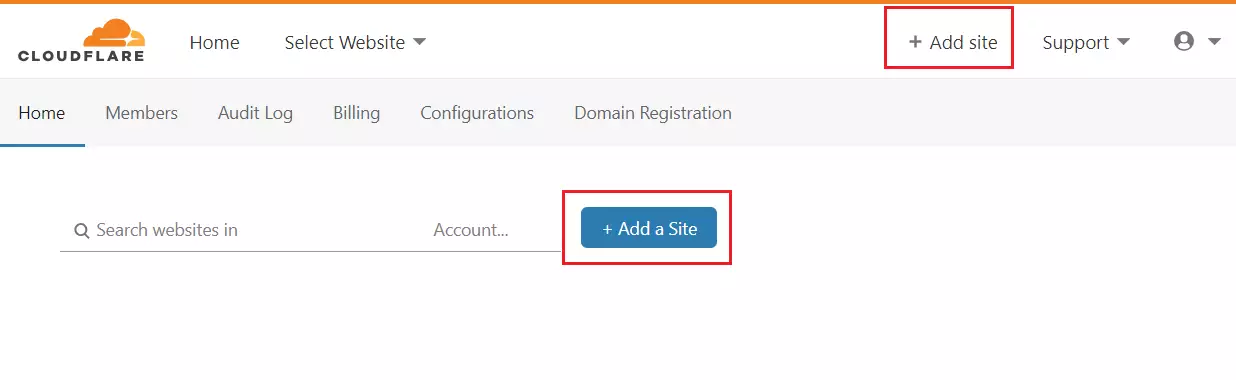
Once logged in, click the “Add a Site” button.
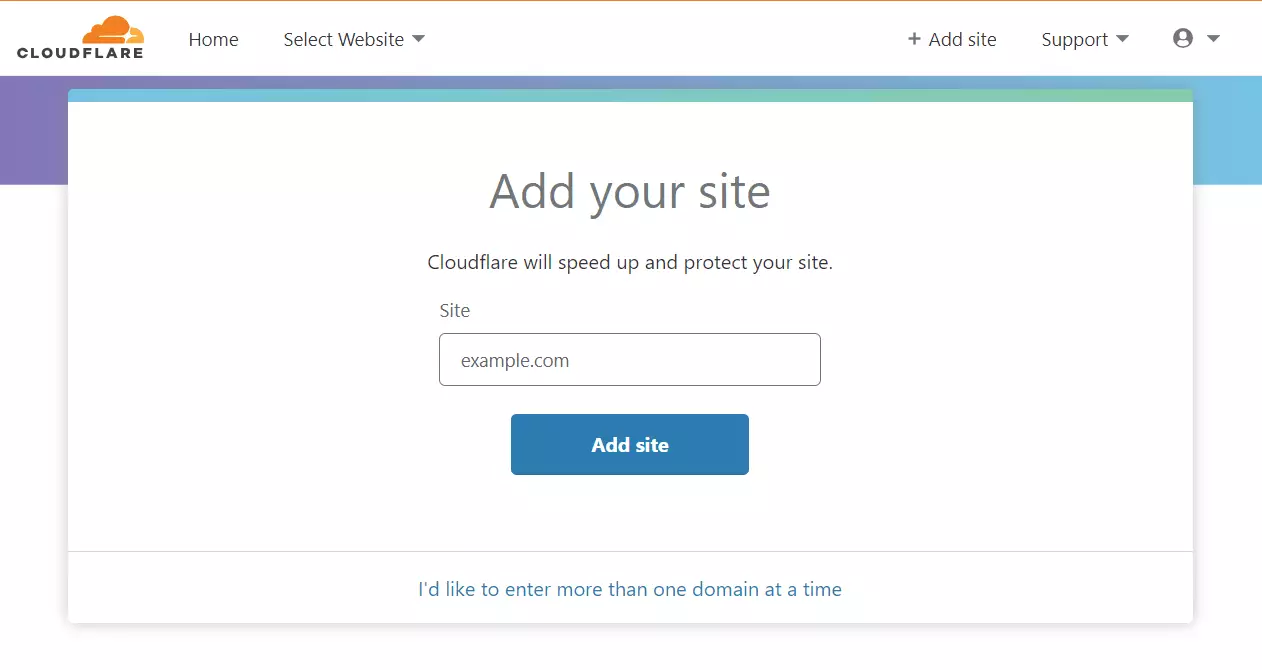
Type in your domain name. registered
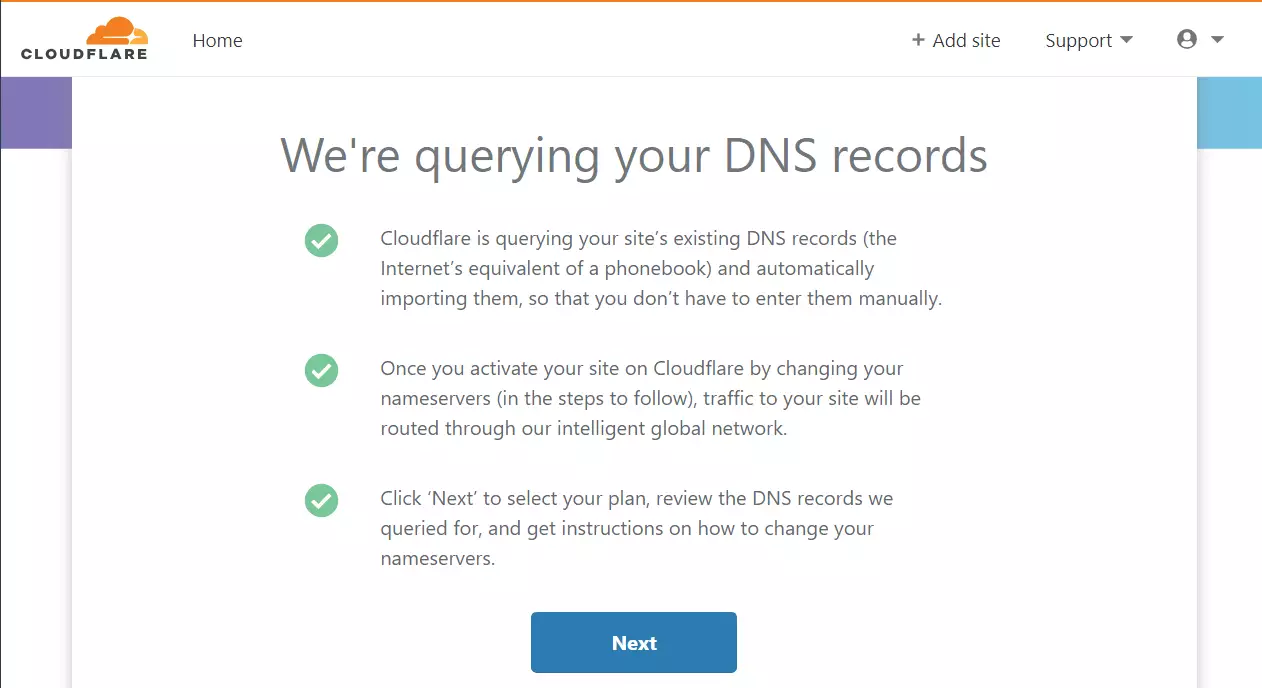
Cloudflare will scan your domain for existing records.
Select the free plan.

Log in to your domain registrar (where you bought your domain) and replace your current nameservers with these two.
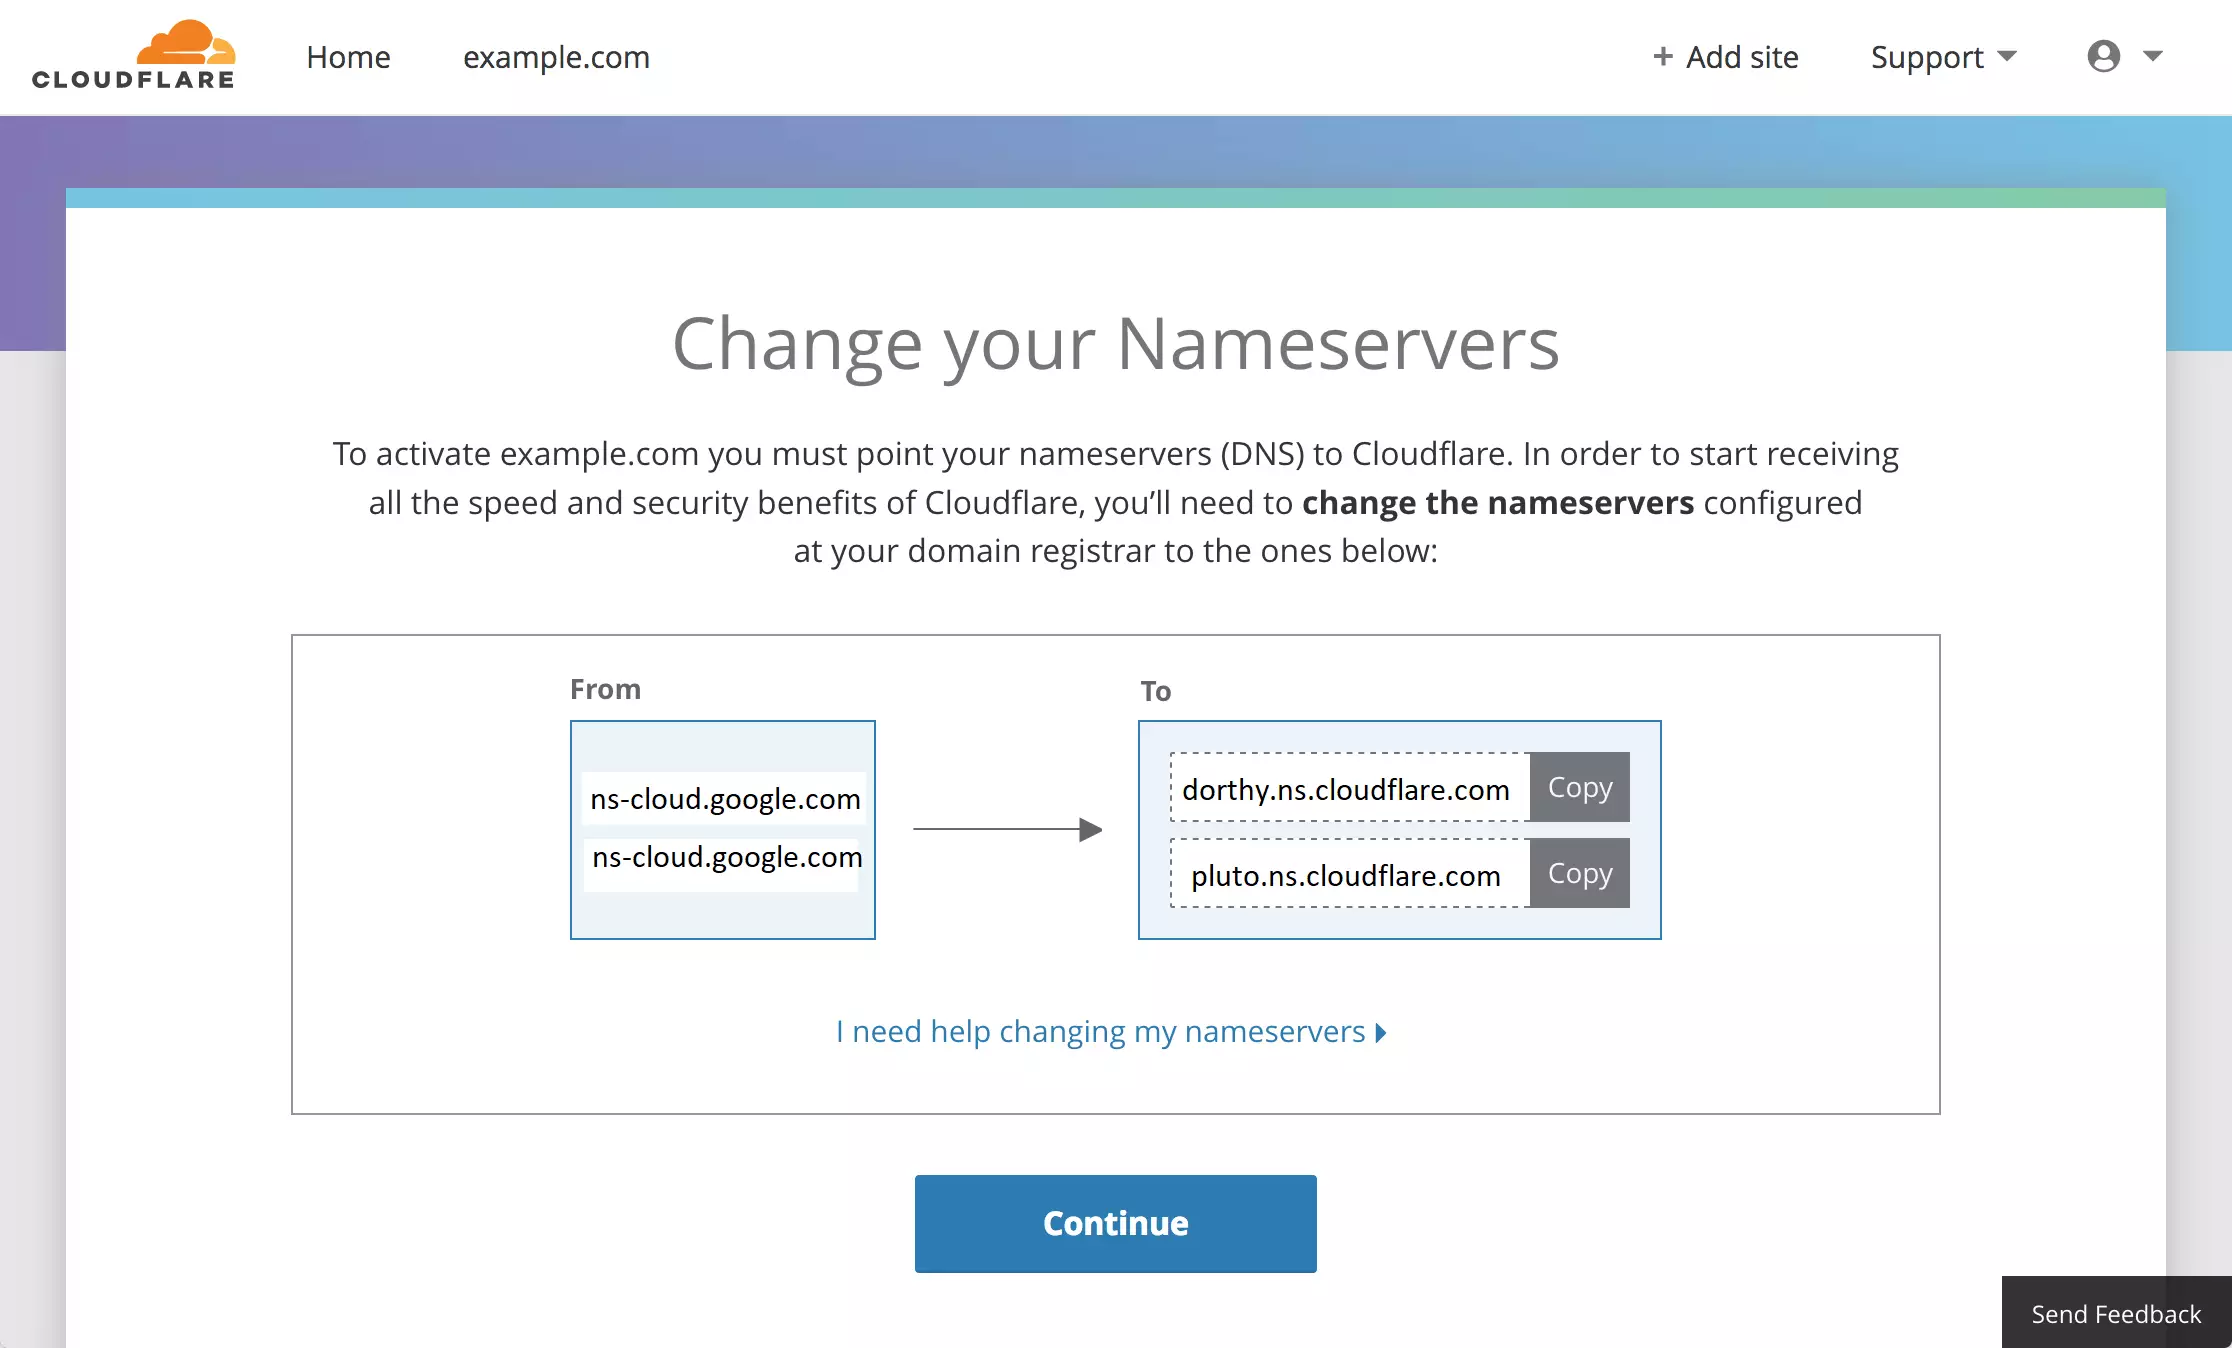
Example: If your domain is at Google Domains, select "use custom nameservers" and save the new addresses.
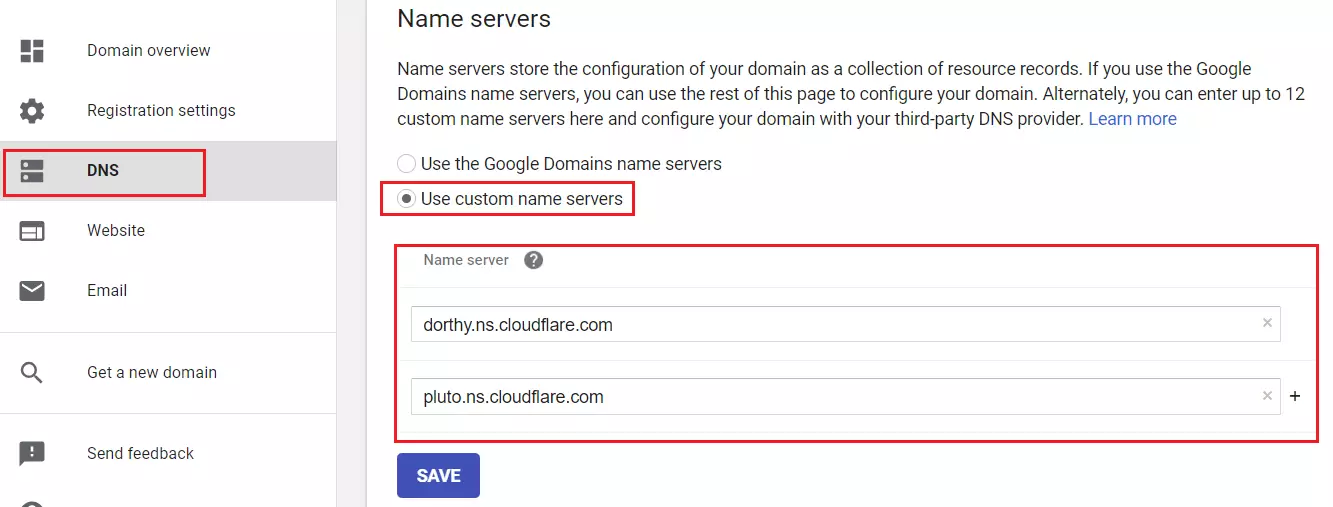
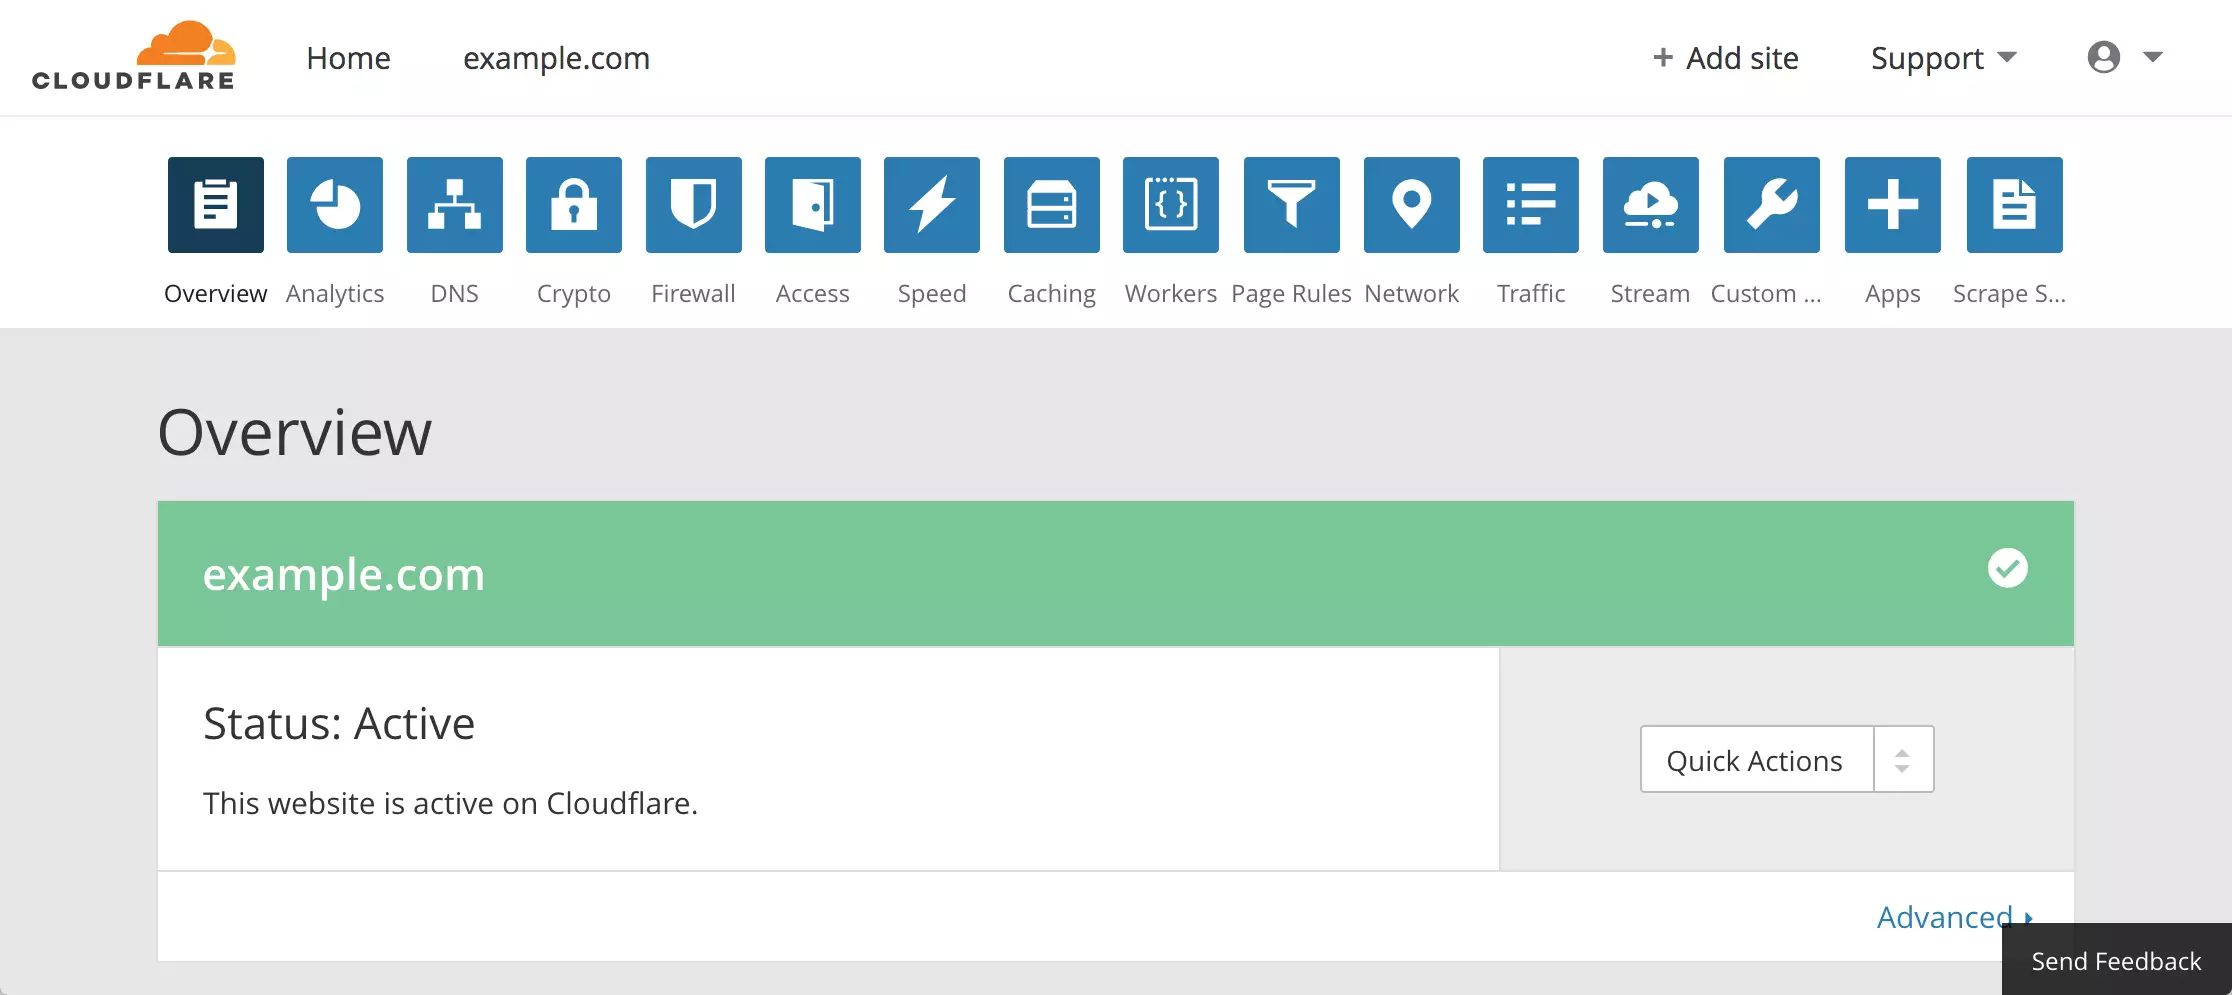
It can take up to an hour for these changes to take effect. Check your Cloudflare dashboard until the status says "Active."
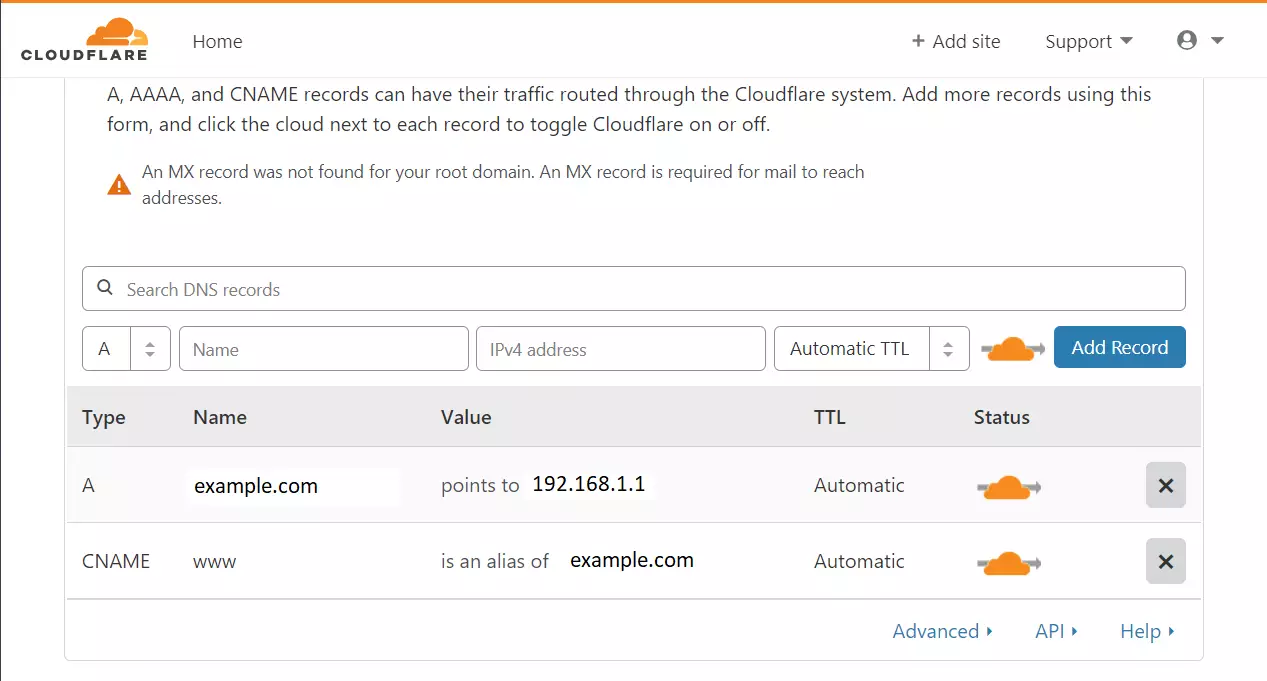
Your DNS entries should now appear in the Cloudflare dashboard.
Go to the SSL/TLS tab and set it to "Full (Strict)."
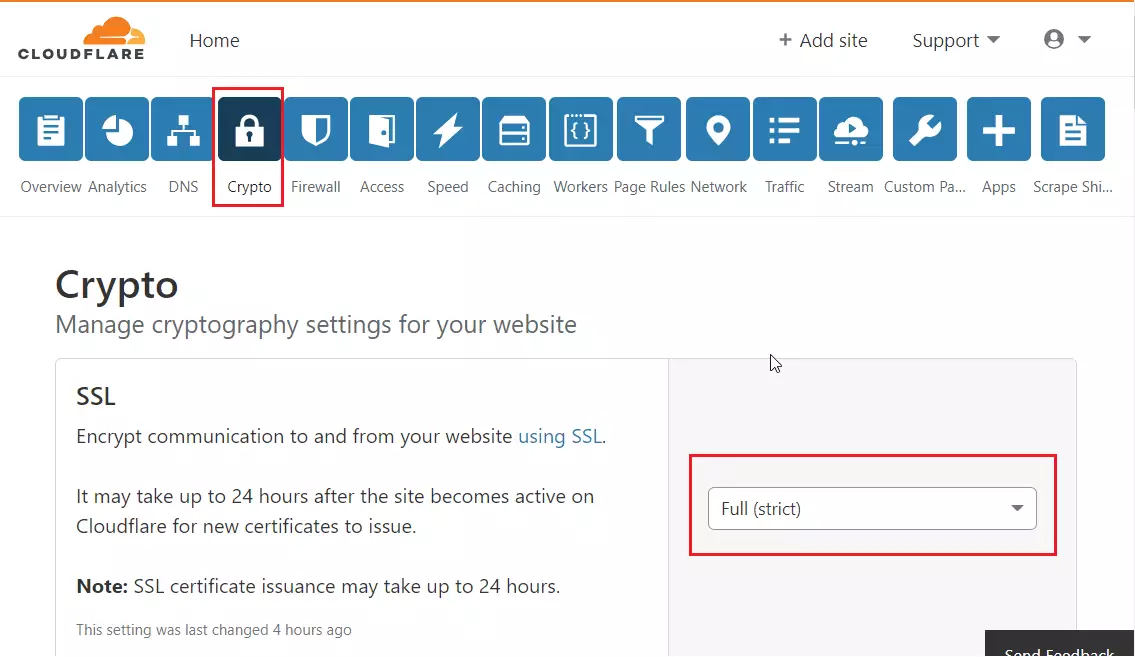
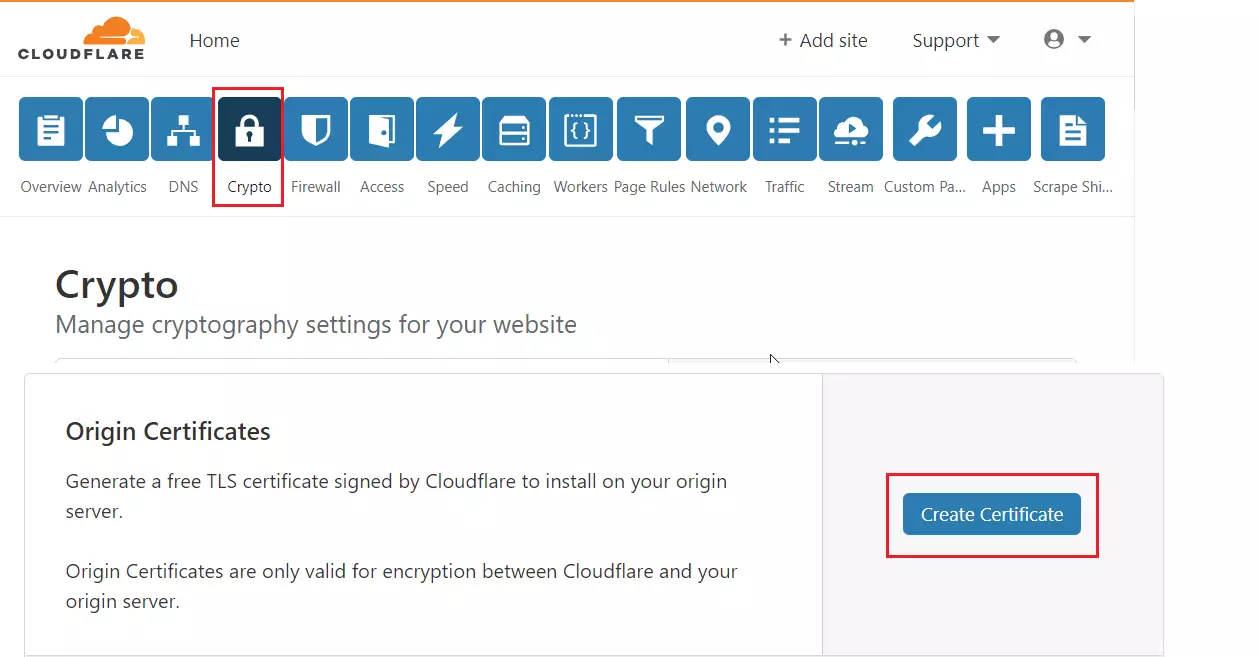
Scroll down to "Origin Certificates" and click "Create Certificate."
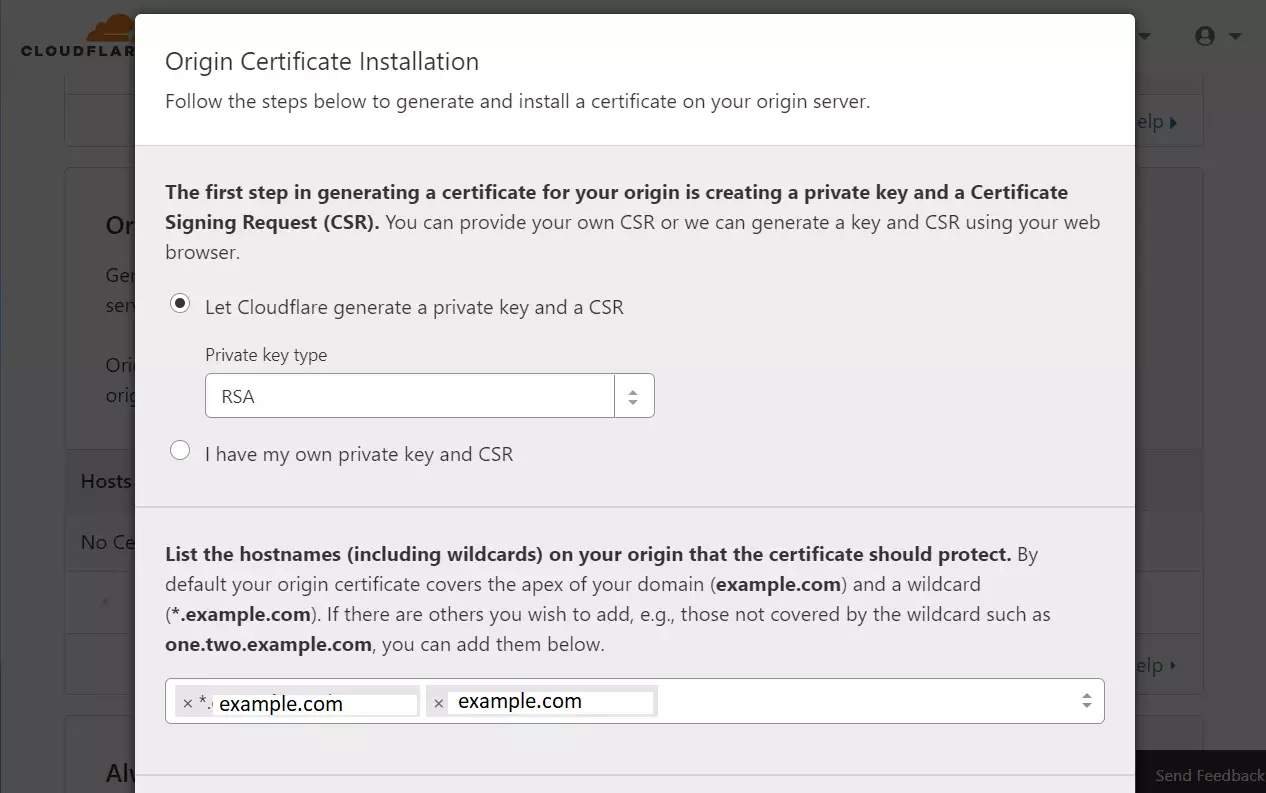
Let Cloudflare generate the key and click Next.
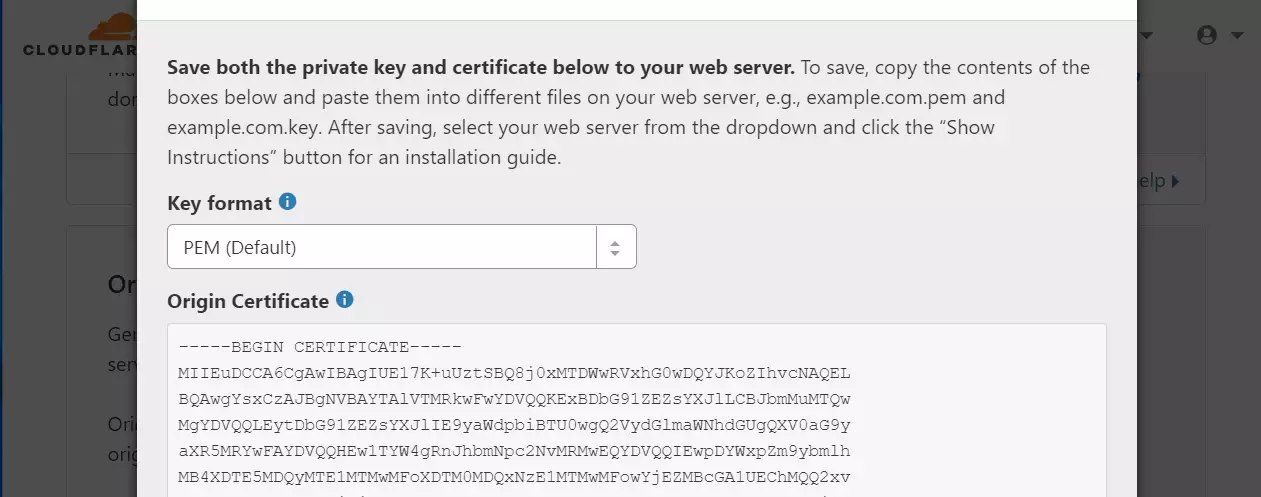
You will need to create three files on your server using these commands. (Requires admin privileges)
sudo nano /etc/ssl/private/cloudflare_key_example.com.pem
sudo nano /etc/ssl/certs/cloudflare_example.com.pem
Download the Cloudflare Origin Pull certificate here: Set up authenticated Origin pulls · Cloudflare SSL docs
sudo nano /etc/ssl/certs/origin-pull-ca.pem
You now have three files: cloudflare_key_example.com.pem, cloudflare_example.com.pem, and origin-pull-ca.pem.
In the Cloudflare dashboard, turn on "Always Use HTTPS."
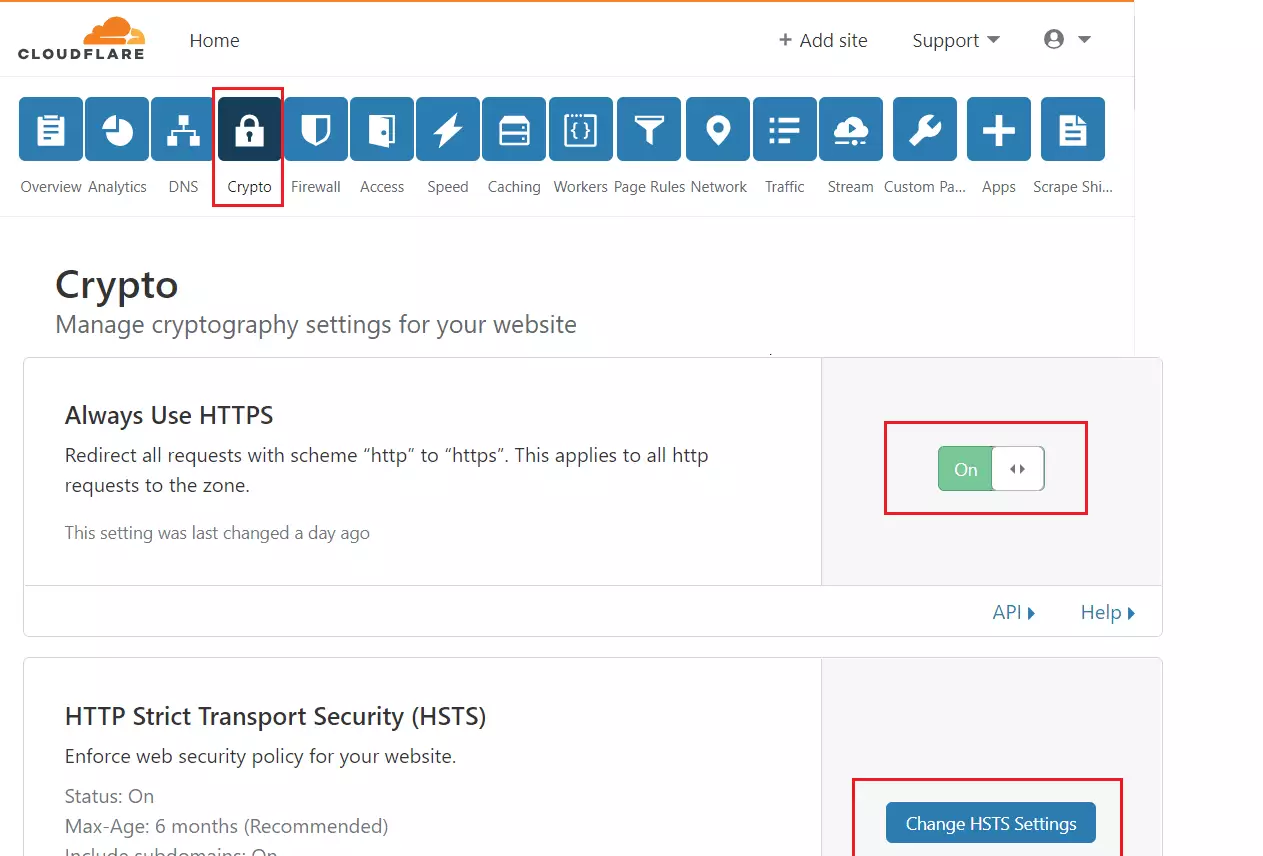
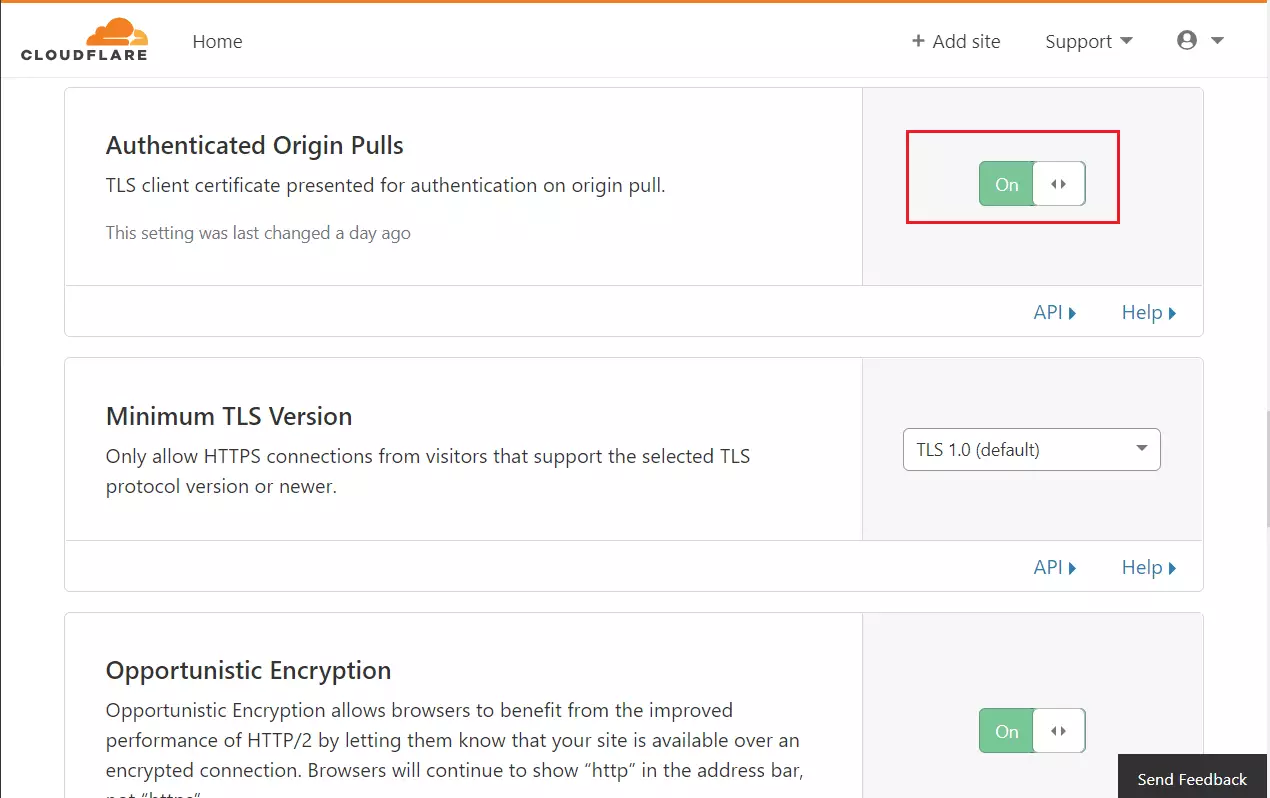
Turn on "Authenticated Origin Pulls" and "Opportunistic Encryption."
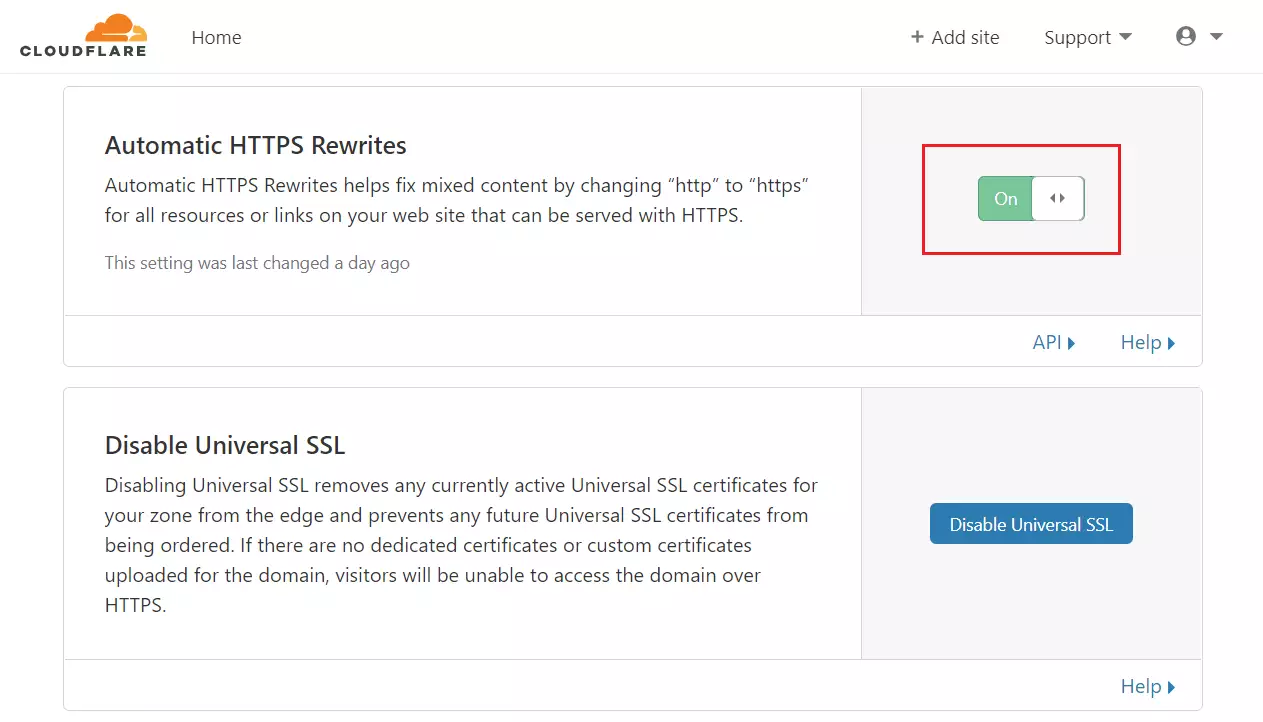
Turn on "Automatic HTTPS Rewrites."
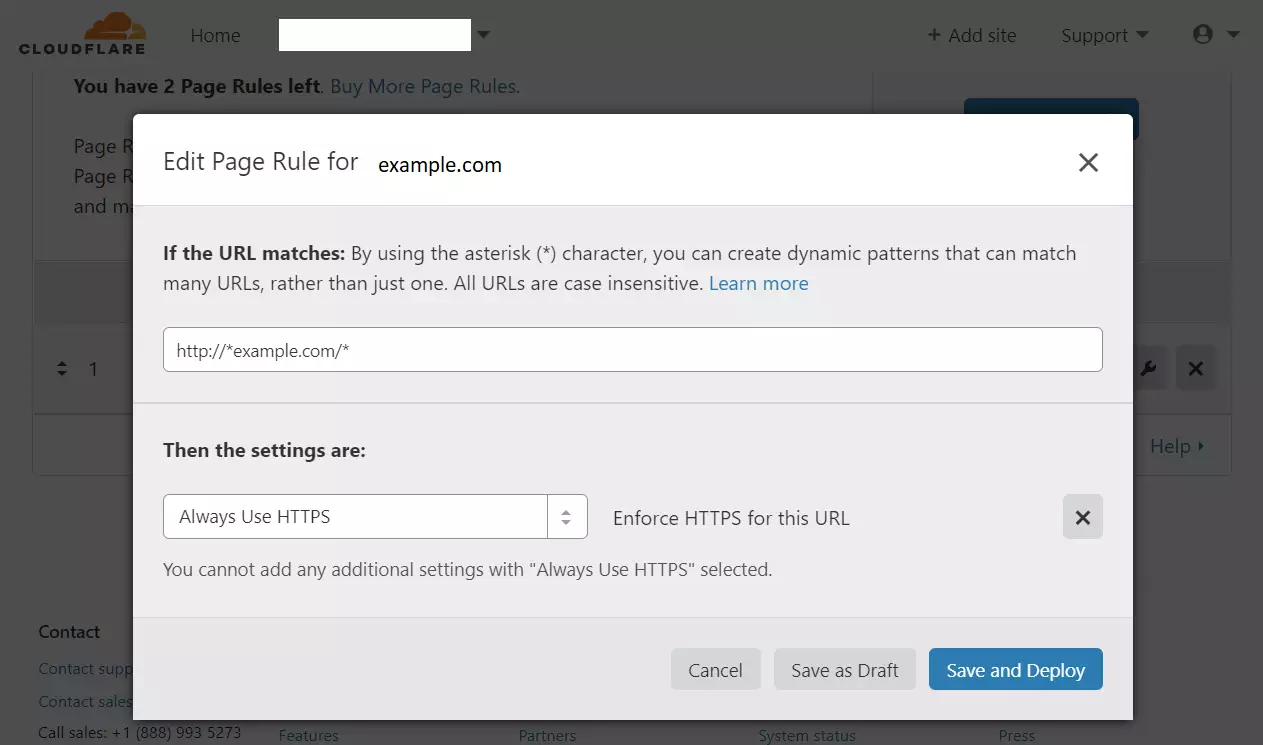
Go to "Page Rules" and create a rule to always use HTTPS for your domain.
Install and Configure Joomla
Log in to your server. (Requires admin privileges)
Install Nginx:
sudo apt update
sudo apt install nginx
Use these commands to manage the service:
sudo systemctl stop nginx.service
sudo systemctl start nginx.service
sudo systemctl enable nginx.service
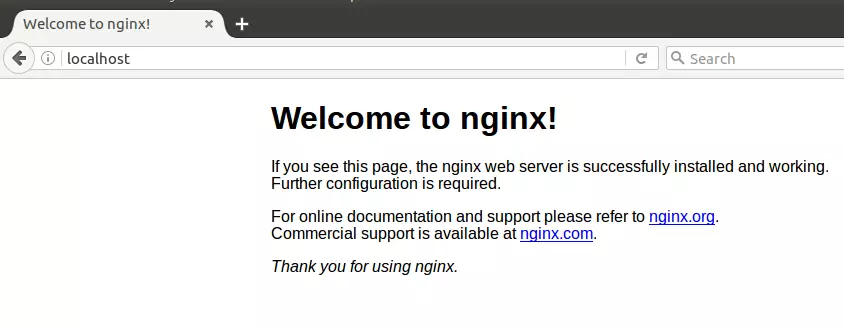
Test your server by visiting your site address in a browser.
Install MariaDB Database
Installing MariaDB on your Ubuntu server gives Joomla a reliable database system to store all your website data and user information. You can complete this setup by running the package installation command in your terminal and making sure the database service runs automatically when your server starts.
sudo apt-get install mariadb-server mariadb-client
Set the service to run on boot:
sudo systemctl stop mysql.service
sudo systemctl start mysql.service
sudo systemctl enable mysql.service
sudo systemctl stop mariadb.service
sudo systemctl start mariadb.service
sudo systemctl enable mariadb.service
Secure your database:
sudo mysql_secure_installation
Follow the on-screen prompts to set a password and remove test settings.
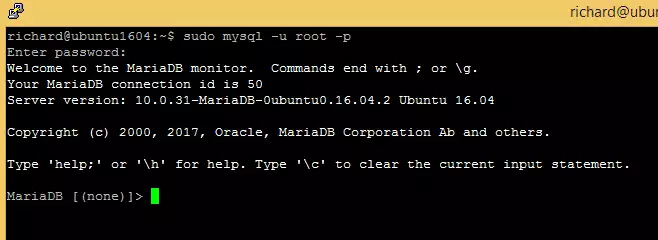
sudo mysql -u root -p
Install PHP
Installing PHP on your Ubuntu system allows your server to process the code that runs your Joomla website. You need to add the required software repository, update your package list, and install the specific PHP packages that work with your web server setup.
sudo apt-get install software-properties-common
sudo add-apt-repository ppa:ondrej/php
sudo apt update
sudo apt install php7.2-fpm php7.2-common php7.2-gmp php7.2-curl php7.2-intl php7.2-mbstring php7.2-xmlrpc php7.2-mysql php7.2-gd php7.2-xml php7.2-cli php7.2-zip
Edit the configuration file:
sudo nano /etc/php/7.2/fpm/php.ini
Update settings and save:
file_uploads = On
allow_url_fopen = On
short_open_tag = On
memory_limit = 256M
cgi.fix_pathinfo = 0
upload_max_filesize = 100M
max_execution_time = 360
date.timezone = America/Chicago
Restart Nginx:
sudo systemctl restart nginx.service
Create a test file to verify PHP:
sudo nano /var/www/html/phpinfo.php
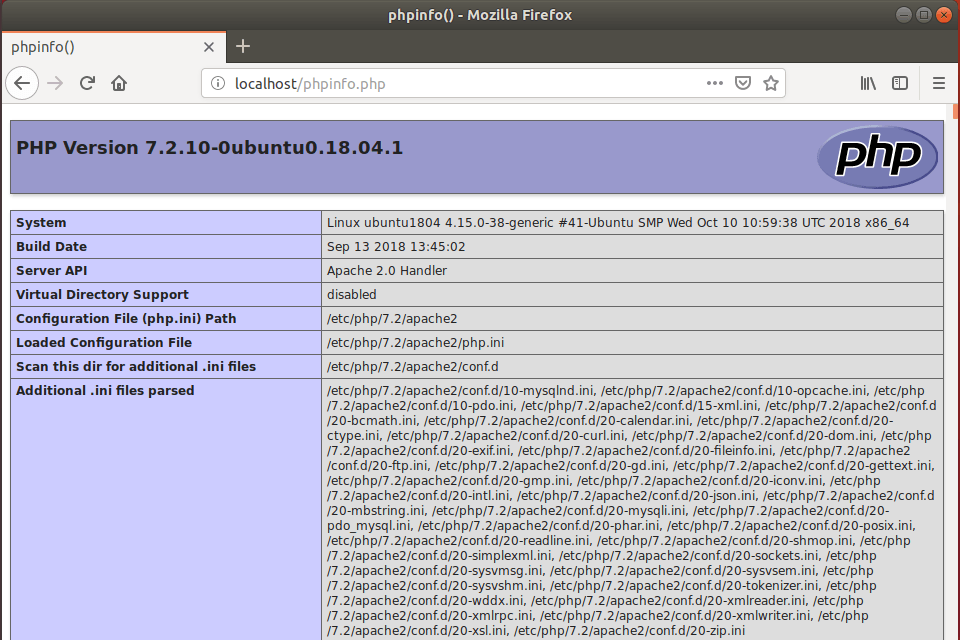
Visit your site address followed by /phpinfo.php to see the test page.
Create Joomla Database
Log in to the database:
sudo mysql -u root -p
Create the database and user:
CREATE DATABASE joomla;
CREATE USER 'joomlauser'@'localhost' IDENTIFIED BY 'new_password_here';
GRANT ALL ON joomla.* TO 'joomlauser'@'localhost' IDENTIFIED BY 'user_password_here' WITH GRANT OPTION;
FLUSH PRIVILEGES;
EXIT;
Install Joomla
Installing Joomla on your Ubuntu server lets you build and manage your website content using the popular content management system. You can set this up by downloading the official installation package from the Joomla website and extracting those files directly into your web server directory.
cd /tmp
wget https://downloads.joomla.org/cms/joomla3/3-9-5/joomla_3-9-5-stable-full_package-zip
sudo unzip -d /var/www/html/example.com /tmp/joomla_3-9-5-stable-full_package-zip
Set permissions:
sudo chown -R www-data:www-data /var/www/html/example.com/
sudo chmod -R 755 /var/www/html/example.com/
Configure Nginx for your site:
sudo nano /etc/nginx/sites-available/example.com
Add your domain settings and certificate references:
server {
    listen 80;
    listen [::]:80;
    listen 443 ssl http2;
    listen [::]:443 ssl http2;

    server_name  example.com www.example.com;
    root   /var/www/html/example.com;
    index  index.php;

    ssl_certificate /etc/ssl/certs/cloudflare_example.com.pem;
    ssl_certificate_key /etc/ssl/private/cloudflare_key_example.com.pem;
    ssl_client_certificate /etc/ssl/certs/origin-pull-ca.pem;
    ssl_verify_client on;

     client_max_body_size 100M;

     autoindex off;

     location / {
        try_files $uri $uri/ /index.php?$args;
      }

    location ~ .php$ {
         include snippets/fastcgi-php.conf;
         fastcgi_pass unix:/var/run/php/php7.2-fpm.sock;
         fastcgi_param SCRIPT_FILENAME $document_root$fastcgi_script_name;
         include fastcgi_params;
    }
}
Enable the site:
sudo ln -s /etc/nginx/sites-available/example.com /etc/nginx/sites-enabled/
sudo systemctl restart nginx.service
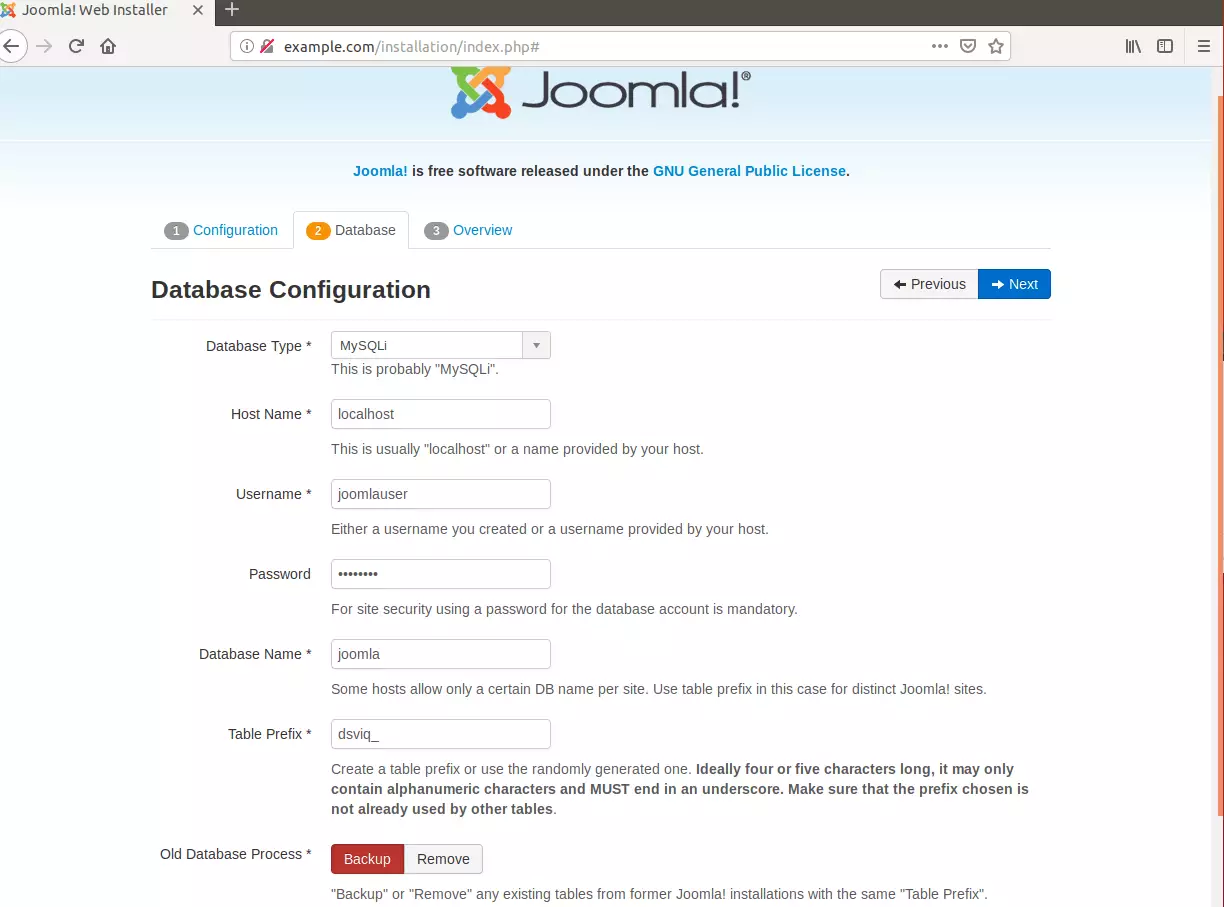
Visit your domain in a browser to finish the setup wizard.
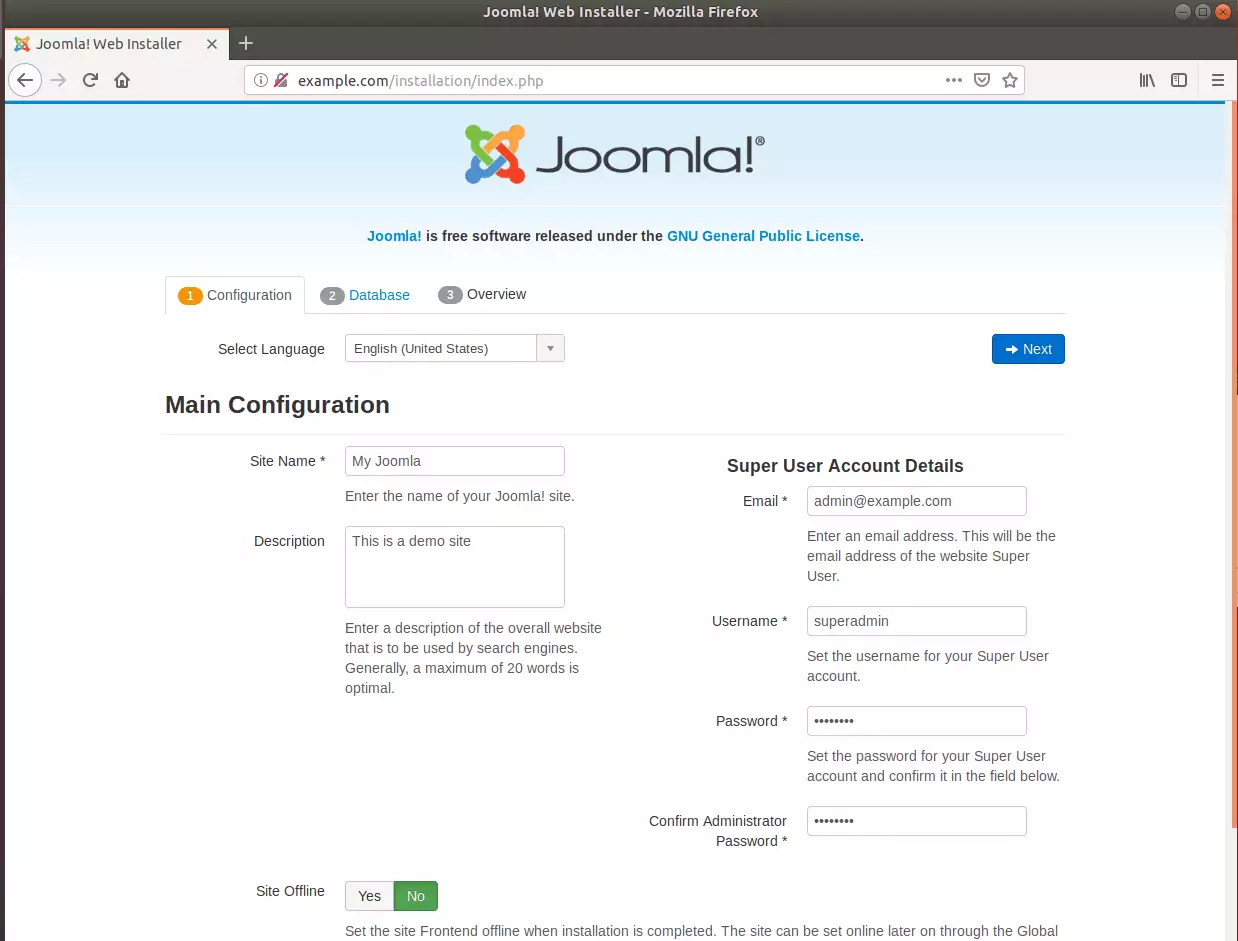
Enter your database info:
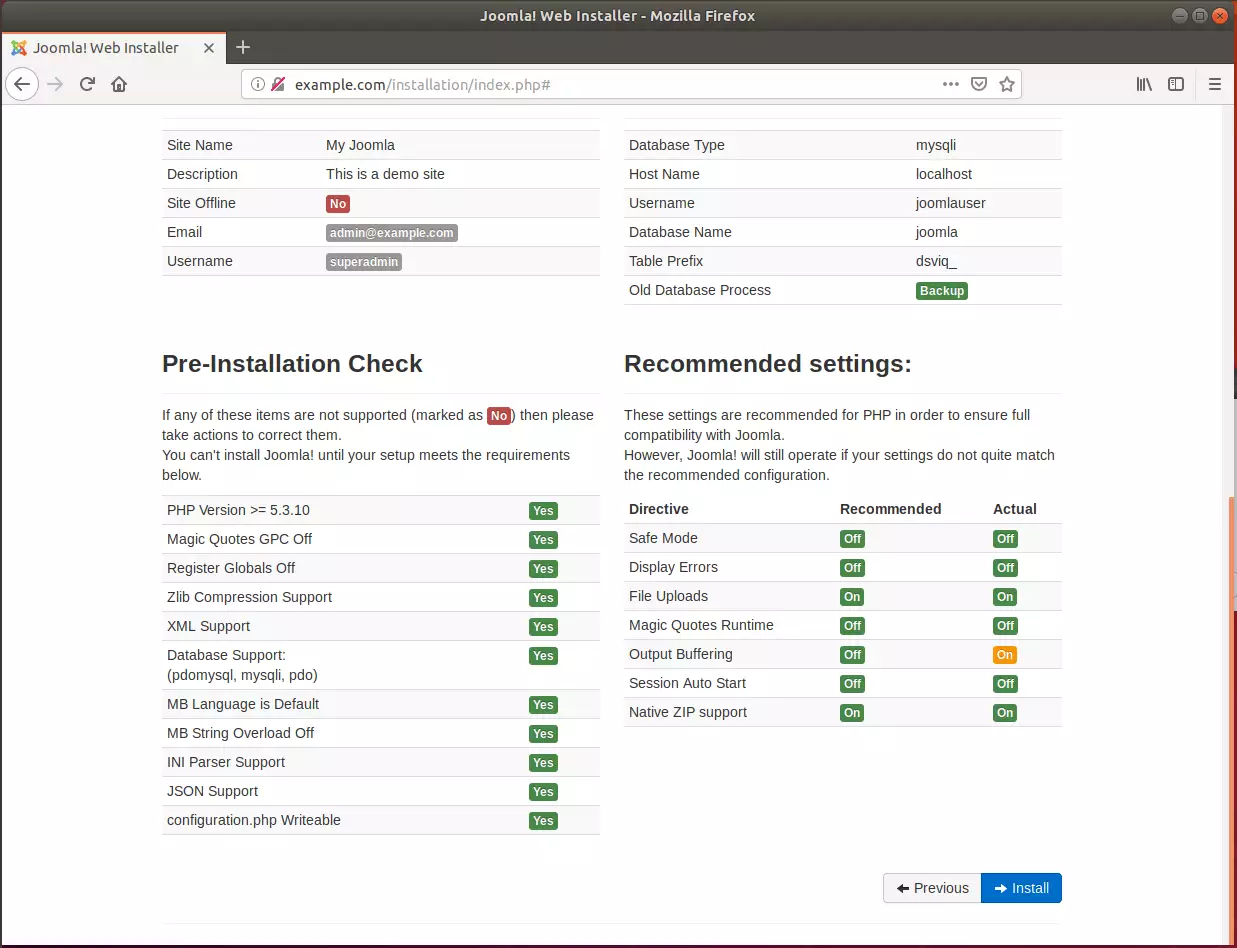
Confirm settings and install:
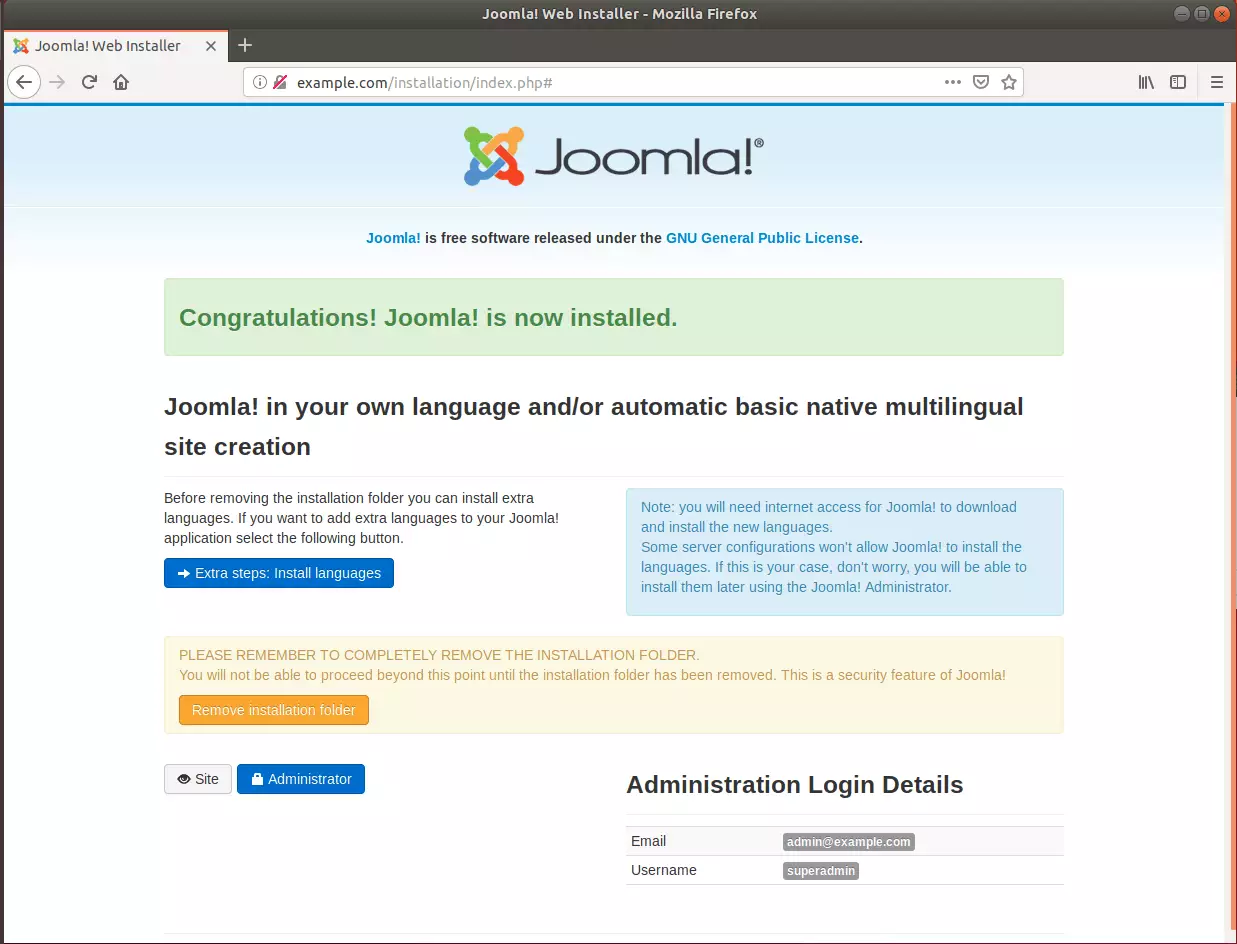
Remove the installation folder:
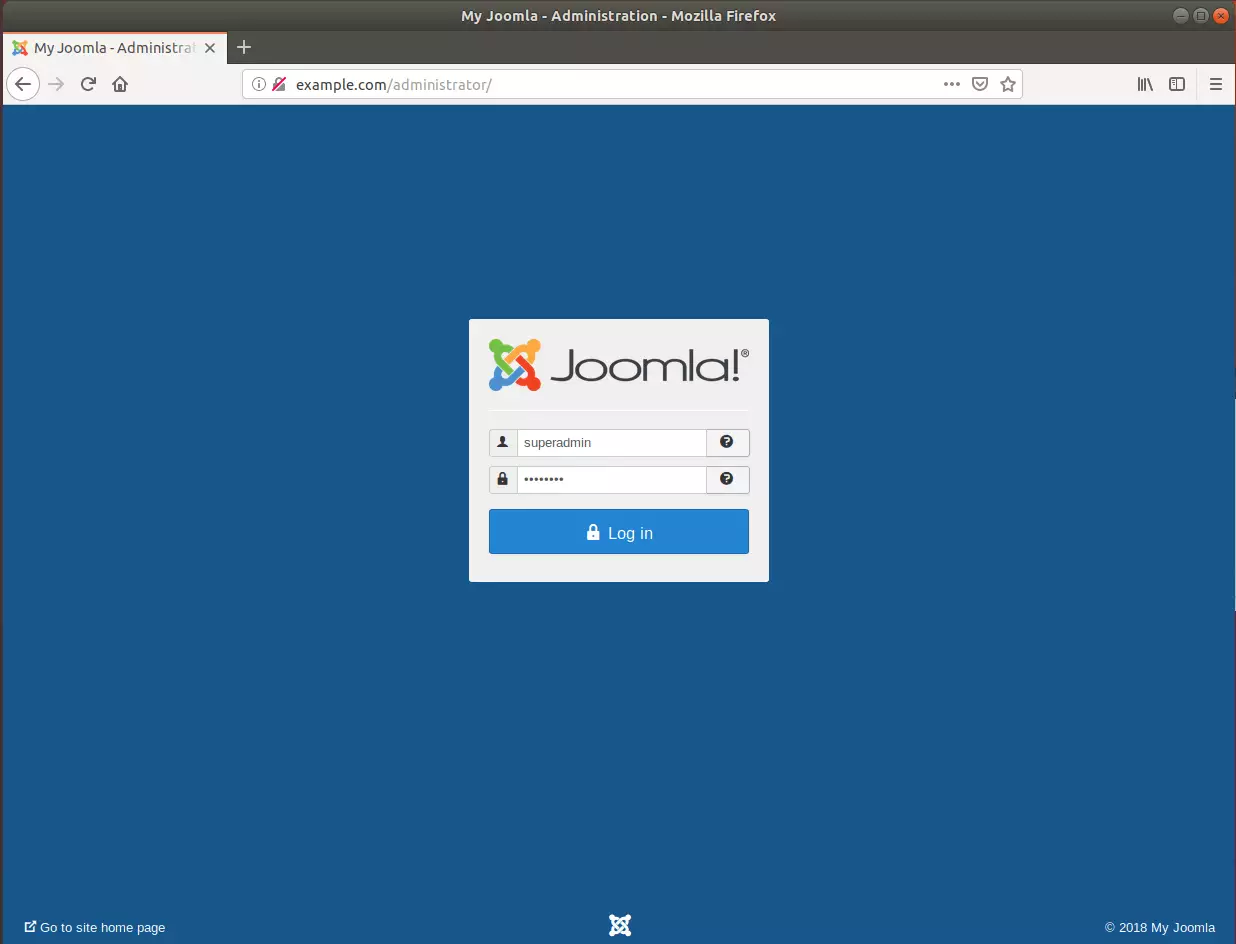
Log in to your dashboard:
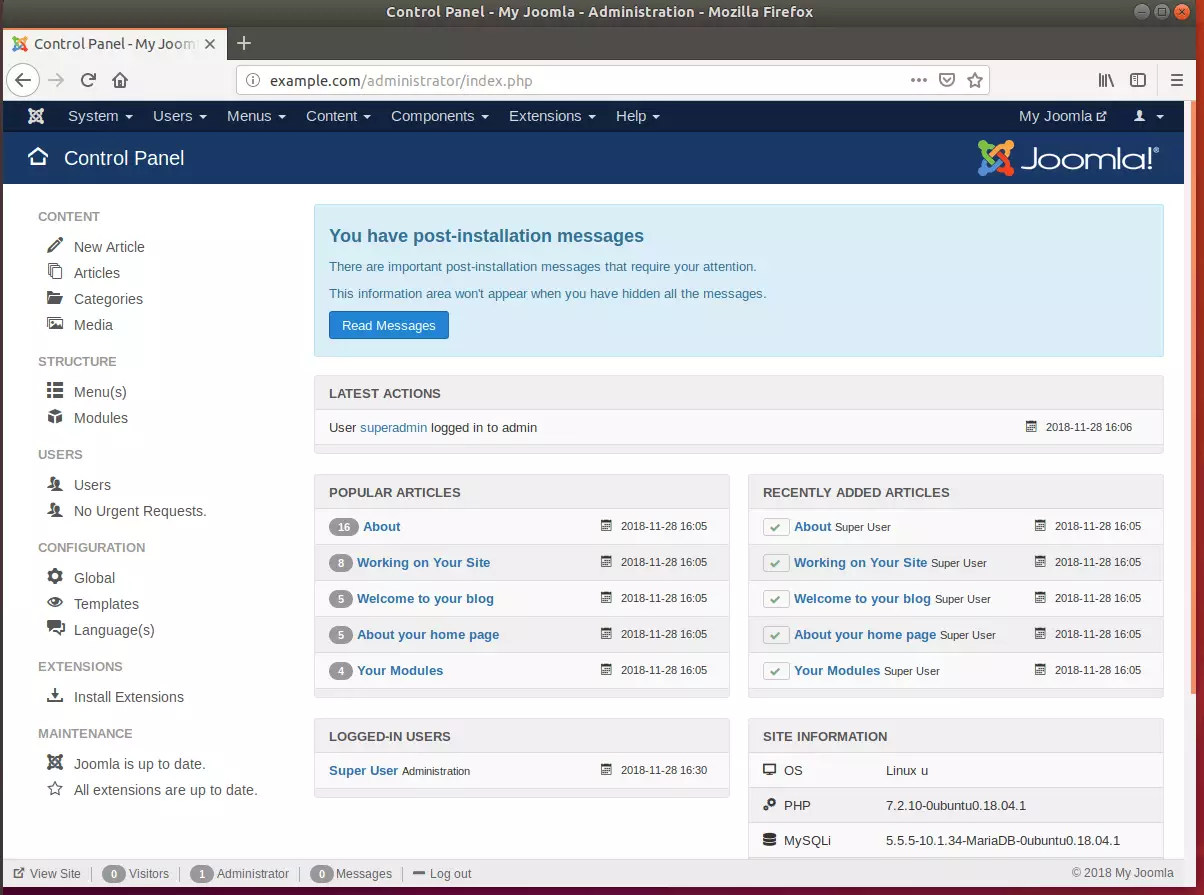
sudo rm -rf /var/www/html/joomla/installation
Summary
You have successfully installed Joomla on an Ubuntu server protected by Nginx and Cloudflare. You configured a database, added SSL encryption for security, and set up a custom domain. Your site is now ready for content.
[Y/n]
[Y/n]
[Y/n]
[Y/n]
[Y/n]
Was this guide helpful?




No comments yet — be the first to share your thoughts!