How to Configure AutoPlay Settings for Removable Drives in Windows 11

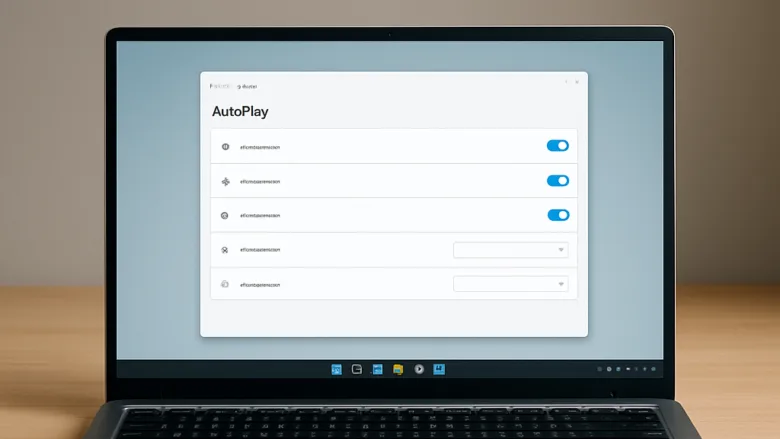
AutoPlay in Windows 11 lets you choose what happens when you plug in removable drives such as USB sticks, cameras or smartphones. Windows can open a specific app or folder based on the files it finds. AutoPlay is on by default. Windows blocks AutoRun on non-optical drives, which stops malware hidden on rogue hardware from launching itself.
You can change these behaviors so Windows prompts you for an action, opens File Explorer automatically, or ignores new hardware completely. This tutorial covers the Settings app, the legacy Control Panel , the Registry Editor and the Group Policy Editor, then per-drive choices and troubleshooting. For most people the Settings app is all you need. The Registry and Group Policy methods are for enforcing a rule or for cases where the normal options are locked.
Open Settings , select Bluetooth & devices, then click AutoPlay. Toggle Use AutoPlay for all media and devices on or off, then click the Removable drive dropdown and choose your preferred action: Configure this drive to perform actions, Open folder to view files, or Take no action.
How to Open AutoPlay Settings in 🪟 Windows 11
The AutoPlay options live in the main Settings app , a few clicks from the Start menu . Use this route first, because the other methods in this tutorial build on it.
- Open the Start menu and click Settings (the gear-shaped icon). You can also press the Win+I to open it directly. The Settings window opens with a list of categories on the left.
- Select Bluetooth & devices from the left-hand navigation menu. The device options appear on the right.
- Click AutoPlay. The configuration panel opens with the master switch and your removable drive options.
If you can’t find AutoPlay, scroll down the Bluetooth & devices page. It sits in the list below items like Printers & scanners and Phone Link. You can also type “AutoPlay” into the Settings search box .
Configuring Global AutoPlay Options
Global AutoPlay options let you turn the feature on or off for all media and devices at once. They also set a default action for each type of media, including removable drives and memory cards.
- Open the AutoPlay settings page in the Settings app, following the steps above.
- Find the master switch labeled Use AutoPlay for all media and devices. Set it to Off if you want to disable automatic actions across your system. Leave it On if you want to customize how individual drive types behave. With the switch off, the default drop-downs below it are hidden or unavailable.
- Under the Choose AutoPlay defaults section, click the drop-down menu next to Removable drive.
- Select your preferred action from the list:
- Configure this drive to perform actions (Control Panel ) makes Windows prompt you each time.
- Open folder to view files (File Explorer ) shows the drive’s contents immediately.
- Take no action ignores the connection.
- You can also pick a specific media application if one is listed.
- Click the drop-down menu next to Memory card and choose the default action for SD cards and similar storage media.
To undo any of this, return to the same page and pick a different action. If the options are greyed out or marked as managed by your organization, a policy is probably controlling them. See the Group Policy section below.
Managing AutoPlay via the Legacy Control Panel
The legacy Control Panel page gives you finer control than Settings. You can set actions for each media type and for specific device models that Windows has seen before.
- Open the Start menu, type
Control Panel, and press Enter. - Click Hardware and Sound. If Control Panel is in Category view, this appears as a heading. In Large or Small icons view, click AutoPlay directly.
- Click AutoPlay to open the legacy configuration window.
- Check the box next to Use AutoPlay for all media and devices to enable the feature, or uncheck it to disable it entirely.
- Review the list of media types: Audio CD, DVD movie, Software and games, Pictures, Video files and Audio files. Click the drop-down menu next to each category and select the action you want Windows to take.
- Scroll down to the Devices section. It lists previously connected removable drives, cameras and smartphones. Choose a specific action from the drop-down menu next to any listed device.
- Click the Save button at the bottom of the window to apply your changes. Unlike the Settings app, this window does not save changes until you click it.
Use it if you want to undo your changes.
Configuring AutoPlay Using the Windows Registry
Editing it lets you set AutoPlay behavior for the whole system. This works on Home as well as Pro. Mistakes in the Registry can cause problems, so follow the steps exactly.
Before you start, you can back up the Registry. In the Registry Editor, click File, then Export, and save a copy. To disable AutoPlay for all drives using the Registry Editor:
- Press the Windows Key + R to open the Run dialog box.
- Type
regeditand press Enter to open the Registry Editor. Click Yes if the User Account Control prompt appears asking for administrator privileges. - Navigate to the following key in the left-hand sidebar:
HKEY_CURRENT_USER\Software\Microsoft\Windows\CurrentVersion\Policies\Explorer. If the Explorer key does not exist under Policies, right-click Policies, select New Key, and name itExplorer. - Right-click an empty space in the right-hand pane, select New DWORD (32-bit) Value, and name it
NoDriveTypeAutoRun. The new value appears in the right-hand pane. - Double-click
NoDriveTypeAutoRun, select Hexadecimal under Base, and enter a hexadecimal value into the Value data field. Entering0xFFdisables AutoPlay for all drive types. Entering0x00enables AutoPlay for all drives. - Click OK and close the Registry Editor. Restart your computer for the changes to take effect.
To undo the change, set the value data to the enabling value from step 5, or delete the value you created and restart.
Setting AutoPlay Policies via Group Policy Editor
The Local Group Policy Editor lets you enforce AutoPlay rules on a single machine or across a network. It is included with Windows 11 Pro, Enterprise and Education. Windows 11 Home does not have it, so Home users should use the Registry method above.
- Press the Windows Key + R to open the Run dialog box.
- Type
gpedit.mscand press Enter to open the Local Group Policy Editor. This requires administrator privileges. - In the left-hand sidebar, navigate to
Computer Configuration\Administrative Templates\Windows Components\AutoPlay Policies. You can also look underUser Configuration\Administrative Templates\Windows Components\AutoPlay Policies. - Double-click the policy named Turn off AutoPlay in the right-hand pane. A settings window opens.
- Select Enabled to disable AutoPlay entirely across your system. Select Disabled or Not Configured to leave AutoPlay active.
- If you chose Enabled, use the drop-down menu under Options to turn off AutoPlay for All drives or for CD-ROM and removable media drives.
- Click Apply and then OK. Restart your computer to enforce the policy.
To reverse it, set the policy back to Not Configured and restart. While a policy is enforced, the matching options in Settings may be greyed out.
Advanced Drive-Specific AutoPlay Tuning
You can assign a persistent behavior to an individual USB flash drive or external hard drive. It is identified by its unique hardware details, and it overrides your global default for that drive only.
To customize a specific drive's behavior:
- Open Settings and go to Bluetooth & devices AutoPlay. Make sure Use AutoPlay for all media and devices is set to On.
- Connect the removable drive to your computer.
- If a notification banner appears in the bottom-right corner of your screen, click it to open the device-specific options.
- Select the action you want Windows to run every time you connect this particular drive. Windows stores this preference in the Registry under the device's hardware signature. It applies only to that drive, and other drives keep using your global preferences.
If no banner appears, it may have already gone to the notification area. You can also set an action for a known device in the Devices section of the legacy Control Panel page described earlier.
Troubleshooting AutoPlay Not Working in 🪟 Windows 11
When a drive is plugged in and nothing happens, check the hardware detection service and the AutoPlay defaults first. After that, look at third-party software that might be interfering.
- Verify that the Shell Hardware Detection service is running. It is a background service that provides notifications for hardware events. Press the Windows Key + R, type
services.msc, and press Enter. Scroll down to Shell Hardware Detection and check that its Status is Running and its Startup type is Automatic. If not, right-click the service, select Properties, change the startup type to Automatic, and click Start. This requires administrator privileges. - Reset AutoPlay defaults in the legacy Control Panel. Open Control Panel Hardware and Sound AutoPlay, check Use AutoPlay for all media and devices, click Reset all defaults at the bottom of the window, and click Save.
- Check for third-party shell extensions or security software that might intercept removable drive insertion events and suppress the AutoPlay prompt. Temporarily disable third-party antivirus utilities to test whether they block notifications, and turn them back on afterwards.
If none of this helps, check whether a Group Policy or Registry setting from earlier is still disabling AutoPlay. Those settings override what you choose in Settings.
Was this guide helpful?

About the Author
Richard
Tech Writer, IT Professional
Richard is a writer at Geek Rewind who turns complex IT tasks into clear, step-by-step guides. He draws on years of hands-on experience in system administration and enterprise IT operations, focusing on Windows, Linux and WordPress: the problems people actually run into, and the fixes that work. His server and WordPress guides come from systems he runs himself. Richard builds and maintains the platform behind Geek Rewind, from its Ubuntu servers and Nginx configuration to its custom WordPress plugins. Many new tutorials start with readers' questions, and he's always glad to answer them in the comments.

No comments yet — be the first to share your thoughts!