How to Choose Backup Folders in Dropbox on Windows 11

This article explains how to choose or change what folders to back up in Dropbox on Windows 11.
Configure your backup settings in the Dropbox desktop application to select which folders sync. Navigate to Preferences, then Backups, and choose the desired folders to automatically save to the cloud. This ensures your important files are protected while managing storage space.
Dropbox is a cloud storage service allowing users to store and share files and folders online. It offers features such as file syncing, file versioning, and collaboration tools, making it easier for teams to collaborate on projects.
One can configure many settings with the Dropbox app in Windows, including starting Dropbox on system startup, disabling Dropbox startup in the background, adding Microsoft Office add-in, turning notifications on or off, managing backups, turning automatic backups on or off, renaming backup device name, changing backup frequency, and more.
When you set up Dropbox Windows, you can later change or choose additional folders to backup in the Dropbox settings app. If some of the folders being backed up are no longer important, you can deselect or remove them from your backup. Or add new folders that are important to secure.
Choosing or changing which folders to back up in Dropbox is important because it allows you to back up the files and folders that are important to you. This can save you storage space and time, as you won’t back up unnecessary files.
Additionally, choosing specific folders to backup can help conserve your data usage if you have limited internet bandwidth. By selecting only the folders you need, you can better manage your storage and ensure that your important files are safely backed up.
Choose or change folders backing up
As mentioned above, users can choose or change folders to backup anytime in the Dropbox settings app. This allows you to only backup folders that are important and leave out those that are less important.
Here’s how to do it.
First, open the Dropbox flyout window from the notification area. You can do that by clicking the Taskbar overflow and selecting Dropbox to open its flyout window.

When the flyout opens, select the Settings (gear) at the top of the screen and click Preferences.

On the Preferences page, select the Backups tab. Under “This PC,” click the Manage backups button.

If you have already set up Dropbox, click My PC (DeviceName) under the Sync and backups tab on the flyout window.

This will open the Dropbox settings page.
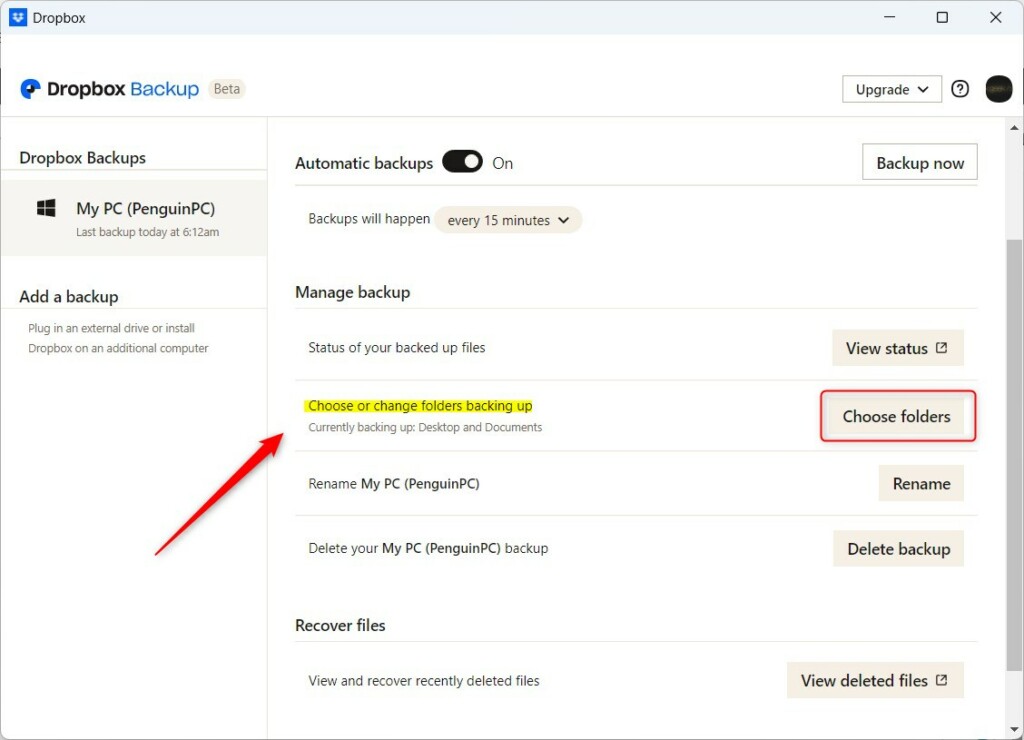
Under Manage backups, select the “Choose or change folder backing up” tile on the Dropbox Backup page.
Then click the Choose folder button.
On the folders and files selection window, check the box next to the folders you want to back up. Uncheck the folders and files you want to exclude from backing up.
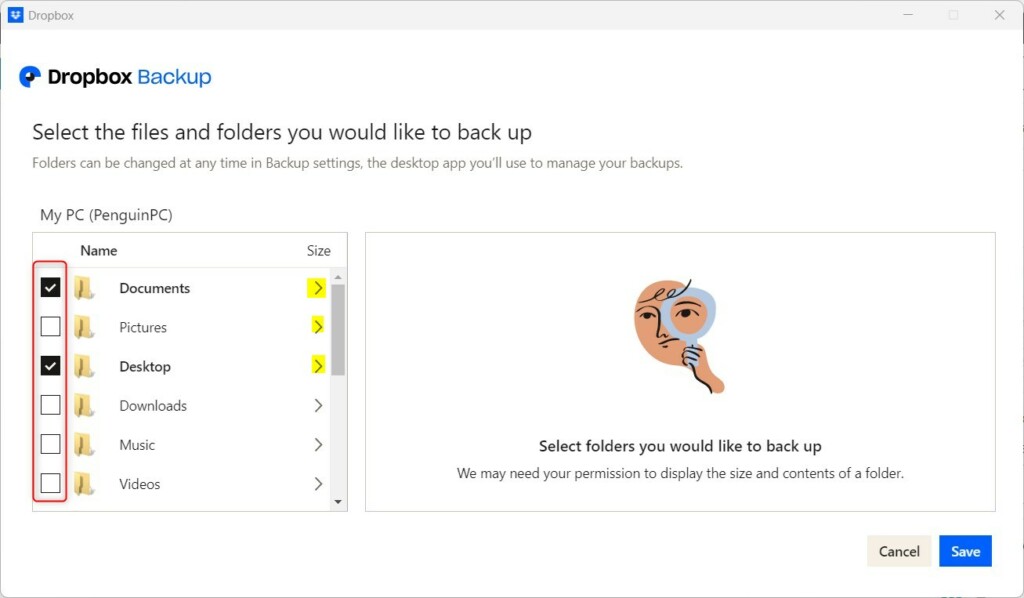
Click on the right-caret to expand to the folder to select subfolders.
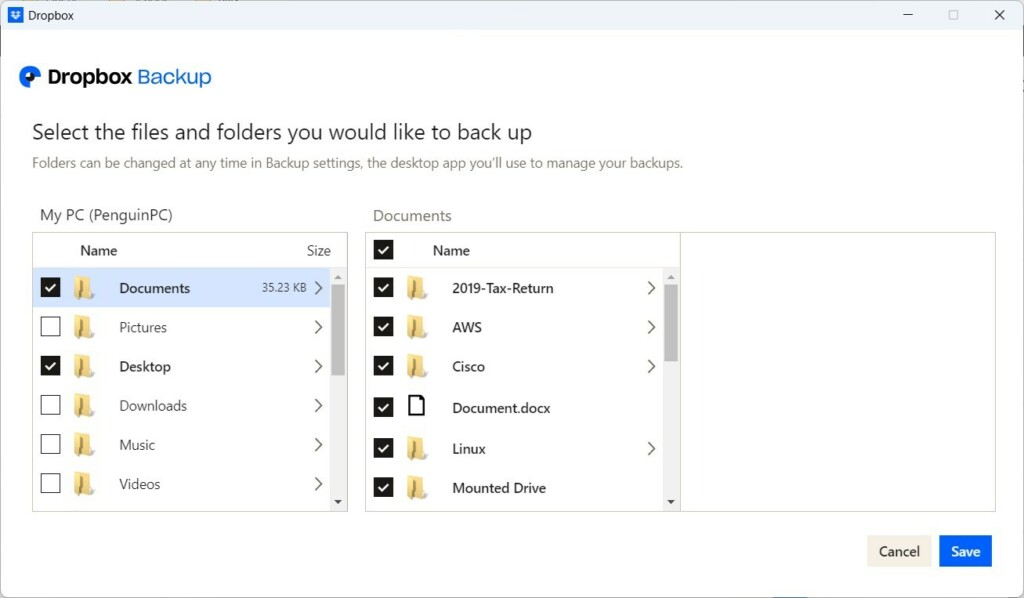
Select or unselect folders and files you want to include or exclude from backing up. Then click the Save button when you are done.
That should do it!
Conclusion:
- Choosing specific folders to back up in Dropbox allows you to prioritize important files and save storage space.
- Managing your backups can help conserve data usage, particularly if you have limited internet bandwidth.
- Following the steps outlined in this article, you can efficiently select or deselect folders to be included in your Dropbox backup, ensuring your important files are safely stored.
Was this guide helpful?

About the Author
Richard
Tech Writer, IT Professional
Richard, a writer for Geek Rewind, is a tech enthusiast who loves breaking down complex IT topics into simple, easy-to-understand ideas. With years of hands-on experience in system administration and enterprise IT operations, he’s developed a knack for offering practical tips and solutions. Richard aims to make technology more accessible and actionable. He's deeply committed to the Geek Rewind community, always ready to answer questions and engage in discussions.


[…] backups on or off, renaming backup device name, changing backup frequency, choosing back up folders, moving backup folder location, and […]